To install an old work electrical box, first cut a hole in the wall, then insert the box and secure it in place. In this guide, we will explain the step-by-step process for installing an old work electrical box in your home.
When making updates or renovations to your home, it is often necessary to install electrical boxes for switches, outlets, or other electrical devices. An old work electrical box is designed for situations where you cannot access the stud or joist behind the wall.
These boxes are commonly used for retrofitting projects or when adding new electrical outlets. Installing an old work electrical box may seem daunting, but with the right tools and techniques, it can be a relatively straightforward process. We will outline the steps you need to follow to safely and correctly install an old work electrical box in your home. By following these instructions, you can ensure a secure and professional installation that meets all electrical safety standards.
What Is An Old Work Electrical Box?
An old work electrical box, also known as a remodeling or retrofit box, is an essential component when adding or upgrading electrical outlets or switches in existing walls. Unlike new construction electrical boxes, old work boxes are designed to be installed in finished walls without the need for cutting or removing drywall.
Definition and Purpose
Old work electrical boxes are designed for retrofitting electrical components into existing walls. Their main purpose is to provide a safe and secure housing for electrical connections, allowing for the installation of switches, outlets, and other electrical devices.
Different types of old work electrical boxes
There are several types of old work electrical boxes available, each suitable for different purposes and applications. Here’s a breakdown of the most common types:
|
1. Plastic Sheathed Cable (Non-Metallic) Box (PVC)
A non-metallic old work box is typically made of PVC and is commonly used for residential applications. It is lightweight, easy to install, and non-conductive, making it safe for use in areas where electrical wires may come into contact with water. |
|
2. Metal Box with Clamps (Armored Cable Box)
An armored cable box is a metal box with built-in cable clamps. It is commonly used for commercial or industrial applications where armored or metal-clad cables are used to prevent damage to the electrical wiring. |
|
3. Metal Box with Ears (One-Gang or Two-Gang Metal Box)
A metal old work box with ears is a versatile option suitable for various applications. It has adjustable ears that can be folded out to secure the box against the backside of the wall, ensuring a tight and secure fit. |
|
4. Adjustable Depth Box (Telescoping Box)
An adjustable depth old work box is designed to accommodate walls of different thicknesses. It can be adjusted to extend beyond the wall surface, ensuring a snug fit regardless of the wall depth. |
When choosing an old work electrical box, it’s important to consider the specific wiring requirements, the type of wall material, and the intended use of the electrical device.
By understanding the definition and purpose of old work electrical boxes and being aware of the different types available, you’ll be equipped with the knowledge to tackle your next electrical retrofit project with confidence. Remember to always follow proper safety protocols and consult a professional electrician if needed.
Why Use An Old Work Electrical Box?
When it comes to electrical wiring in your home, it’s crucial to ensure that everything is installed correctly and safely. One essential component of electrical installations is an electrical box, which serves as a protective housing for electrical connections. While there are different types of electrical boxes available, using an old work electrical box can be a wise choice in certain situations.
Advantages of using an old work electrical box
- Ease of installation: One of the primary advantages of using an old work electrical box is its ease of installation. Unlike a new work electrical box that requires installation during initial construction or renovation, an old work electrical box can be installed in existing walls or ceilings without extensive modifications.
- Versatility: Another significant advantage of old work electrical boxes is their versatility. These boxes are designed to accommodate different types of electrical outlets, switches, and other devices, making them suitable for various electrical installations.
- Flexibility in positioning: Old work electrical boxes are adjustable and can be positioned precisely where needed. This flexibility allows for easy access to electrical connections and convenient installation in tight spaces or areas with obstructions.
- Cost-effective: Using an old work electrical box can also be cost-effective. Since these boxes can be installed without breaking walls or ceilings, you can avoid additional expenses of repairing or repainting surfaces after installation.
- Code-compliance: When it comes to electrical installations, following electrical codes and safety standards is crucial. Old work electrical boxes are designed and tested to comply with these codes, ensuring the safety and legality of your electrical connections.
Situations where an old work electrical box is necessary
An old work electrical box is necessary in specific situations where installing a new work electrical box would not be practical or feasible. Here are some scenarios where using an old work electrical box is beneficial:
- Remodeling projects: If you’re remodeling a room or area in your home and need to add electrical outlets or switches, using an old work electrical box allows for easy and convenient installation without extensive demolition.
- Renovations and updates: When updating your electrical system or making changes to the layout of your home, an old work electrical box allows for seamless integration of new electrical fixtures without major disruptions.
- Adding outlets or switches: Whether you need to add an outlet for a new appliance or a switch for lighting control, an old work electrical box simplifies the process, making it possible to add these electrical devices to existing walls or ceilings without tearing them apart.
- Installing light fixtures or ceiling fans: If you want to upgrade your lighting fixtures or install a ceiling fan, an old work electrical box provides a secure and stable mounting point for these fixtures.
In conclusion, using an old work electrical box offers several advantages such as ease of installation, versatility, flexibility in positioning, cost-effectiveness, and compliance with electrical codes. These boxes are necessary in situations where installing new work electrical boxes is not practical or feasible, such as remodeling projects, renovations, adding outlets or switches, and installing light fixtures or ceiling fans.

Step 1: Gathering The Necessary Tools And Materials
Before embarking on the installation of an old work electrical box, it is crucial to gather all the required tools and materials. This step is essential to ensure a smooth and hassle-free installation process. By having everything at hand, you’ll save time and minimize any potential disruptions. Let’s take a look at the list of tools and materials you’ll need:
List of Tools and Materials Needed
Here is a comprehensive list of tools and materials required for the installation of an old work electrical box:
| Tools | Materials |
|---|---|
|
|
Importance of Safety Precautions
Prioritizing safety is of utmost importance when it comes to any electrical project. The installation of an old work electrical box is no exception. Adhering to safety precautions not only protects you but also ensures an efficient and secure installation. Here are some crucial safety measures you should keep in mind:
- Always turn off the power supply from the breaker panel before starting any electrical work.
- Wear proper personal protective equipment (PPE) such as safety glasses and gloves to safeguard yourself from any potential hazards.
- Use a voltage tester to confirm that the power is indeed off before proceeding with the installation.
- Avoid working in wet or damp areas to prevent the risk of electric shock.
- Do not touch the bare wires with your bare hands to avoid electric shock or injury. Use insulated tools whenever necessary.
By following these safety precautions, you can ensure a secure and incident-free installation process. Now, with your tools and materials gathered and safety measures in place, you’re ready to move on to the next steps of installing an old work electrical box.
Step 2: Preparing The Work Area
Before installing an old work electrical box, it is crucial to properly prepare the work area. This involves determining the location for the electrical box and ensuring proper clearance and access to the box.
Determining the location for the electrical box
The first step in preparing the work area is to determine the location for the electrical box. This is determined based on the specific requirements of your electrical project. To determine the location, consider factors such as accessibility and functionality. For instance, in a room with multiple electrical outlets, it is important to position the box in a convenient location that allows for easy access to the electrical connections.
When determining the location, it is essential to follow the local building codes and regulations. These codes may mandate specific distances from nearby structures or specify the number of electrical outlets required in a certain area. By adhering to these regulations, you ensure the safety and compliance of your electrical installation.
Ensuring proper clearance and access to the box
Once you have determined the location for the electrical box, the next step is to ensure proper clearance and access to the box. This involves clearing any obstructions or obstacles that may hinder the installation or future maintenance of the electrical box.
Ensure that there is enough space around the box to accommodate the wiring connections and any devices that will be installed, such as switches or outlets. Additionally, make sure there are no pipes, studs, or other structural elements in the wall that may interfere with the installation or cause damage to the electrical wiring.
Furthermore, it is important to consider the depth of the wall and select an electrical box that fits properly. The box should be flush with the wall surface to ensure a secure installation and prevent any potential hazards or issues in the future.
By taking the time to properly prepare the work area, you ensure a smooth and successful installation of your old work electrical box. This attention to detail ensures the safety, functionality, and longevity of your electrical system.
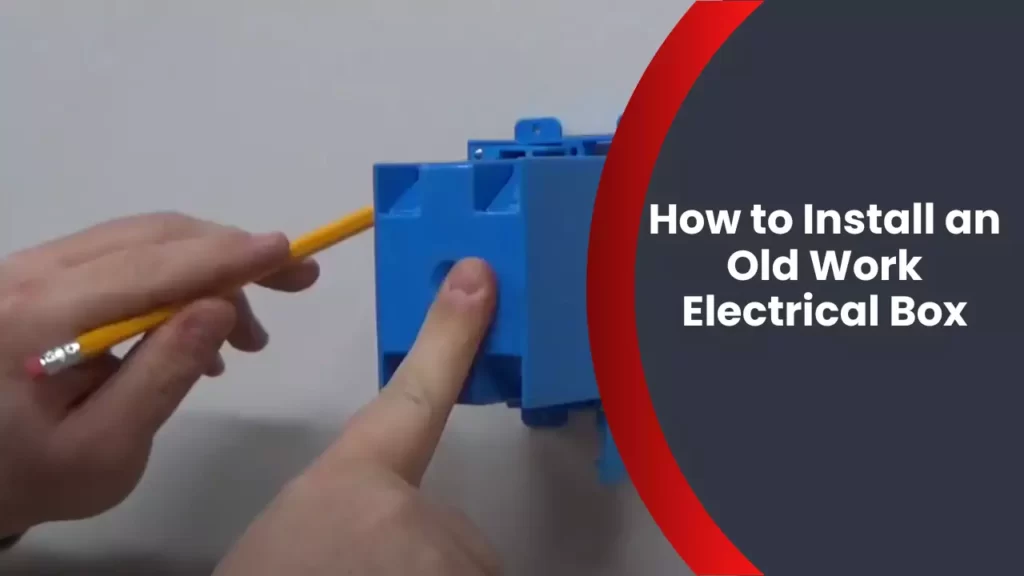
Step 3: Marking And Cutting The Opening
Now that you have determined the location of your old work electrical box, it’s time to mark and cut the opening. This step is crucial to ensure a proper fit and secure installation. In this section, we will discuss various techniques for marking the outline of the electrical box and different tools and methods you can use to cut the opening.
Techniques for marking the outline of the electrical box
Before you start cutting, it’s important to mark the outline of the electrical box on the wall. This will serve as a guide for making accurate cuts. Here are a few techniques you can use:
- Template method: One way to mark the outline is by creating a template out of a piece of cardboard or paper. Simply place the template over the box and trace around it with a pencil or marker.
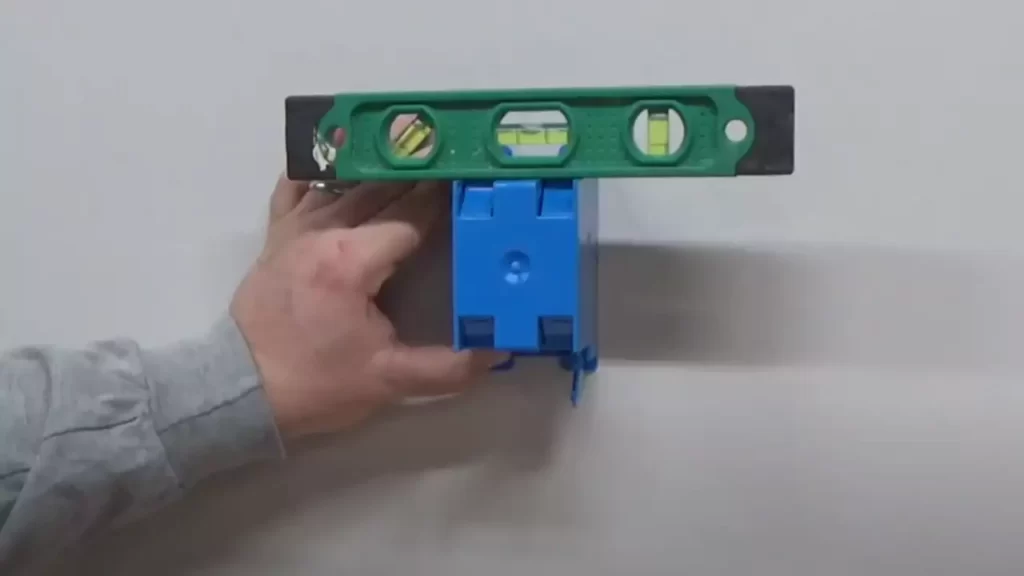
- Measurement method: Another option is to measure the dimensions of the box and use a tape measure or ruler to mark those measurements directly on the wall. Use a level to ensure the markings are straight.
- Manufacturer’s template: Some electrical boxes come with a template provided by the manufacturer. If yours does, follow the instructions provided to mark the outline accurately.
Choose the technique that works best for you and create a clear and visible outline for the electrical box. This will help you make precise cuts.
Tools and methods for cutting the opening
Once you have marked the outline, it’s time to cut the opening for the electrical box. There are several tools and methods you can use for this task:
| Tools | Methods |
|---|---|
| Keyhole saw: | The keyhole saw is a versatile tool that allows for precise cuts. Start by drilling a small hole within the marked outline and then insert the keyhole saw blade into the hole. Carefully cut along the outline, following the markings. |
| Rotary tool: | A rotary tool with a cutting attachment can also be used to make precise cuts. Use the appropriate cutting accessory and slowly cut along the marked outline, making sure to follow the markings accurately. |
| Reciprocating saw: | If you are working with a more substantial material, such as a plaster wall, a reciprocating saw can be an excellent choice. Use a fine-tooth blade and carefully cut along the outline, ensuring the blade stays within the markings. |
| Razor knife: | For smaller or shallow cuts, a razor knife can be an effective option. Score along the marked outline with the knife, gradually going deeper until you reach the desired depth. |
Remember to prioritize safety when using power tools and always wear appropriate protective gear, such as safety glasses and gloves.
By following these techniques for marking the outline of the electrical box and utilizing the right tools and methods for cutting the opening, you will achieve a clean and accurate installation for your old work electrical box.
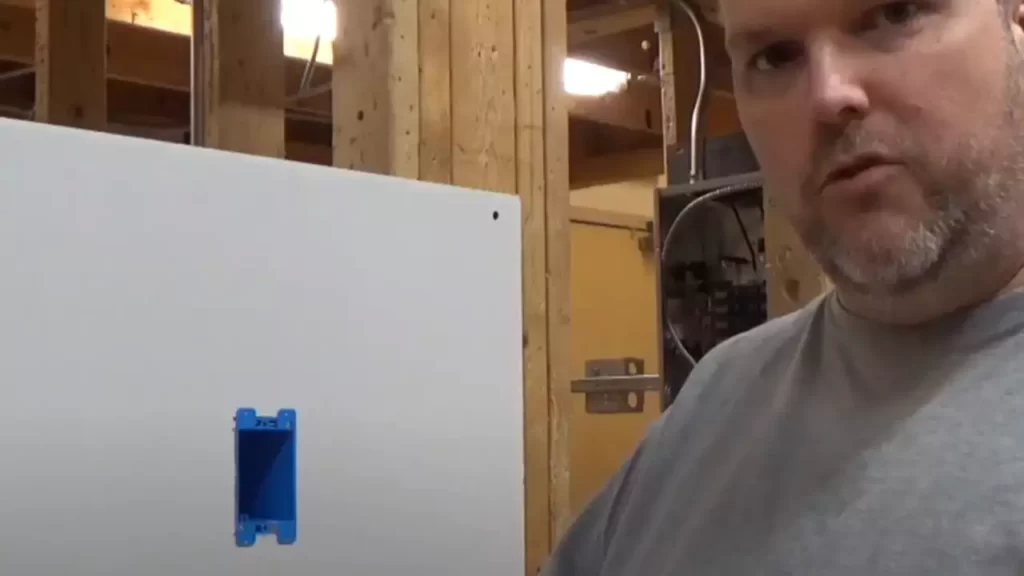
Step 4: Inserting The Electrical Box
Once you have prepared the wall and made the necessary measurements, it’s time to insert the old work electrical box. This step is crucial as it ensures the proper positioning and alignment of the box within the wall. Follow these steps to secure the electrical box in the wall.
Steps to secure the electrical box in the wall
- Hold the electrical box against the wall in the desired location, making sure it lines up with the measurements you previously marked. Ensure that there are no obstacles such as studs or pipes that may obstruct the installation.
- Push the electrical box into the wall cavity, applying gentle pressure until it fits snugly. It should be level with the surface of the wall.
- In some cases, you may need to rotate the box slightly to ensure the mounting wings align properly with the inner side of the wall. Adjust it as needed to achieve a secure fit.
- Once the box is in position, locate the screw holes on the mounting wings. These holes will be used to secure the box to the wall.
- Insert screws into the screw holes and tighten them until the box is firmly attached to the wall. Take care not to overtighten the screws, as this can damage the box or the wall surface.
Tips for proper alignment and positioning
To ensure a successful installation, here are some tips for achieving proper alignment and positioning of the old work electrical box:
- Double-check the measurements and markings before inserting the box into the wall. It’s better to be certain of the location beforehand to avoid any rework.
- Use a level to ensure the box is installed straight and aligned with the surface of the wall. This will prevent any issues when installing switches, outlets, or cover plates later on.
- When positioning the box, pay attention to the location of other electrical boxes or fixtures nearby. Maintain uniformity and symmetry for a professional and cohesive look.
- If the box doesn’t fit snugly into the wall cavity, check for any obstructions or adjustments needed. It’s crucial to have a secure and tight fit to prevent any movement or future electrical hazards.
- Take your time during the installation process. Rushing through this step can lead to improper alignment and potential issues down the line.
By following these steps and tips, you can confidently insert and secure an old work electrical box in your wall. Proceed to the next step, which involves wiring the box and connecting the electrical components.
Step 5: Wiring The Electrical Box
After securing the old work electrical box in place, it’s time to wire it up and connect the electrical wires. This step is crucial to ensure a safe and functional electrical system in your home. In this section, we will guide you through the process of connecting the electrical wires to the box and highlight the proper techniques for wire connections.
Connecting the electrical wires to the box
To start, you will need the following materials:
- Wire strippers
- Wire connectors (also known as wire nuts)
- Electrical tape
If you haven’t done so already, make sure the power is turned off to the circuit you’ll be working on. This is a critical safety measure to prevent electrical shock.
In order to connect the electrical wires to the old work electrical box, follow these steps:
- Begin by stripping approximately 1/2 inch of insulation from the ends of the wires.
- Locate the corresponding color-coded wires in the electrical box. For example, the black wire connects to the black wire, the white wire connects to the white wire, and the green or bare wire connects to the grounding screw or wire in the box.
- Twist the exposed wires together using your fingers or pliers, ensuring a tight and secure connection.
- Secure the connection by twisting a wire connector clockwise onto the twisted wires until it is snug. This will protect the connection and prevent the wires from coming apart.
- Once all the connections are made, wrap electrical tape around the wire nuts for added protection and insulation.
Remember, it is crucial to follow the proper techniques for wire connections to ensure a safe and reliable electrical system. Always double-check your work and never leave exposed wires or loose connections.
By following these steps, you will successfully wire the electrical box in your old work installation, bringing you one step closer to completing your electrical project.
Step 6: Securing The Electrical Box In Place
Ensuring the box is securely fastened to the wall
Step 6 of installing an old work electrical box involves securing the box in place to ensure a stable and safe installation. This step is crucial to prevent any movement or dislodgement of the electrical box, which can lead to loose connections, electrical hazards, and potential damage to the box and surrounding wall. Below are some tips to properly secure the electrical box to the wall.
Tips for proper installation and stability
1. Choose the right fasteners: Use the appropriate fasteners based on the wall material. For drywall, choose screws specially designed for this purpose, such as drywall screws. For other wall materials like plaster or masonry, select the suitable anchors or plugs. Using the correct fasteners will help ensure the electrical box stays securely attached to the wall.
2. Use a solid backing: If possible, identify and utilize a solid backing such as a stud behind the wall to secure the old work electrical box. Attaching the box to a stud provides maximum stability and strength to hold the weight of the electrical wiring and devices. Use a stud finder or other methods to locate the studs accurately.
3. Follow manufacturer’s instructions: Different old work electrical boxes may have specific instructions provided by the manufacturer regarding the installation process, including securing the box. Always refer to the instructions to ensure a proper and secure installation. Deviating from the manufacturer’s guidelines can result in an unstable electrical box.
4. Tighten the mounting screws: Make sure to tighten the mounting screws evenly to secure the electrical box to the wall. This ensures that the box remains flush against the wall and minimizes any potential movement or displacement. Avoid overtightening, as it may damage the box or the wall.
5. Double-check for stability: After securing the box, gently tug on it to check for any movement. A properly installed electrical box should not budge or feel loose. If you notice any instability, reevaluate the installation and make any necessary adjustments to ensure the box is solidly secured to the wall.
By following these tips, you can ensure a proper installation and stability of your old work electrical box. Taking the time to secure the box correctly not only promotes safety but also provides a professional and neat appearance to your electrical connections.
Tip 1: Checking For Proper Wiring
Ensuring the electrical wiring is in good condition is crucial before installing an old work electrical box. By doing so, you can prevent potential hazards and ensure a safe electrical setup for your project. In this section, we will discuss two important steps to check for proper wiring: ensuring the electrical wiring is in good condition and testing for electrical current before installation.
Ensuring the electrical wiring is in good condition
Before starting the installation process, it is essential to thoroughly examine the electrical wiring to ensure it is in good condition. Faulty or damaged wiring can lead to electrical shocks, short circuits, or even fires. To check the condition of your wiring, follow these steps:
- Inspect the insulation: Look for any signs of wear or damage on the wires’ insulation. Damaged insulation can expose the wire, creating a safety hazard. Replace any wire with damaged insulation.
- Check for frayed or loose wires: Examine the wiring for any frayed or loose connections. Tighten loose connections using appropriate tools, and replace any wires that are frayed.
- Observe for burn marks or discoloration: Look out for burn marks or discoloration on the wires or surrounding areas. This could indicate overheating or electrical issues. Consult a licensed electrician if you notice any signs of damage.
- Ensure the wires are properly labeled: Each wire should be clearly marked to indicate its purpose (e.g., hot, neutral, or ground). This will help you make the correct connections during installation.
Testing for electrical current before installation
Before proceeding with the installation, it is vital to test for electrical current to ensure there is no active power flowing through the wires. Follow these steps to perform the test:
- Turn off the power: Locate the circuit breaker or fuse box and switch off the power to the specific circuit you will be working on. Take extra precautions to avoid accidental contact with live wires.
- Use an electrical tester: Use a non-contact voltage tester to check if there is any electrical current present in the wires. Hold the tester near the wires; if it detects a current, it will emit a visual or audible signal.
- Double-check with a multimeter: For an accurate reading, use a multimeter to measure the voltage in the wires. Follow the manufacturer’s instructions to ensure proper usage of the multimeter.
- Confirm no current is detected: If both the non-contact voltage tester and multimeter indicate no electrical current, you can proceed with the installation safely. However, if there is any indication of current, do not proceed and consult a professional electrician.
Remember, checking for proper wiring and testing for electrical current are essential steps to ensure a safe and efficient installation of an old work electrical box. By following these steps, you can minimize the risk of electrical hazards and ensure a successful project.
Tip 2: Properly Grounding The Electrical Box
When installing an old work electrical box, ensuring proper grounding is crucial to maintain a safe and reliable electrical system. Grounding helps protect you and your home from electrical hazards and reduces the risk of electrical shock or fire. In this section, we will discuss the importance of grounding for safety and provide step-by-step instructions on how to properly ground an electrical box.
Importance of Grounding for Safety
Grounding is a fundamental aspect of electrical systems as it provides a path for electrical current to safely flow to the earth. Without proper grounding, electrical faults or abnormalities could lead to dangerous situations. By grounding the electrical box, you create a direct path for any electrical faults to be safely directed away from you and your home, preventing potential harm.
Steps to Properly Ground the Electrical Box
Follow these steps to ensure that your electrical box is properly grounded:
- Turn off the power: Before starting any electrical work, always turn off the power to the area where you will be installing the electrical box. This step ensures your safety and prevents accidental electrical shocks.
- Locate the grounding screw: Inside the electrical box, there should be a grounding screw or grounding clip. This screw or clip is specifically designed for connecting the grounding wire.
- Strip the grounding wire: Strip approximately 1-inch of insulation from the end of the grounding wire using wire strippers. This exposes the bare copper wire, which is essential for creating a solid connection.
- Connect the wire to the grounding screw: Insert the stripped end of the grounding wire into the grounding screw or clip inside the electrical box. Use a screwdriver or pliers to tighten the screw securely, ensuring a solid connection.
- Test the ground connection: Once the wire is securely connected, use a multimeter or a circuit tester to verify that the grounding is working correctly. This step helps ensure that the electrical box is effectively grounded.
By following these easy steps, you can properly ground your electrical box, enhancing the safety of your electrical system and reducing the risk of electrical hazards. Ensuring a secure and reliable ground connection is essential for maintaining a safe home environment.
Tip 3: Utilizing Box Extensions If Needed
When installing an old work electrical box, sometimes the existing wall depth may not be sufficient to accommodate the box and the wiring. In such cases, using box extensions can be a lifesaver. Box extensions allow you to increase the depth of the electrical box, providing extra space for your wiring. In this section, we will discuss when and how to use box extensions, along with the various types available in the market.
When and How to Use Box Extensions
Box extensions are typically used when the electrical box needs to be recessed further into the wall to align with the finished surface. This situation often arises when remodeling or installing in-wall fixtures such as outlets, switches, or light fixtures.
To use a box extension, follow these steps:
- Start by removing the wall plate or fixture that you need to install the electrical box for.
- Ensure the existing box is securely mounted in the wall.
- Select the appropriate box extension based on the required depth.
- Attach the box extension to the existing electrical box using the provided screws or clips.
- Make sure the extension is aligned flush with the existing box.
- Securely tighten the screws or clips to ensure a stable connection.
- You can then proceed with installing the wall plate or fixture onto the extended box.
Types of Box Extensions Available
There are several types of box extensions available in the market. The choice of extension depends on the specific requirements of your electrical box and the depth you need to achieve. Some common types of box extensions include:
| Type | Description |
|---|---|
| Plastic Box Extensions | Affordable and easy to install, these extensions are made of sturdy plastic and can be directly attached to the existing box. They come in various depths to suit different requirements. |
| Metal Box Extensions | These extensions are made of metal and provide additional durability and stability. They are ideal for heavy-duty applications and offer a secure mounting for the electrical box. |
| Retrofit Box Extensions | These extensions are specifically designed for retrofit applications and are compatible with different types of electrical boxes. They allow easy installation without the need for major modifications. |
| Adjustable Box Extensions | As the name suggests, these extensions can be adjusted to achieve the desired depth. They offer flexibility and versatility, making them suitable for various installation scenarios. |
By choosing the right type of box extension, you can ensure a secure and professional installation of your electrical box, even in situations where the wall depth is insufficient.
Remember, always select box extensions that meet the necessary safety standards and are compatible with your specific electrical box. Additionally, it’s crucial to follow the manufacturer’s instructions for proper installation.
Issue 1: Box Doesn’T Fit Properly
One of the most common issues that DIYers face when installing an old work electrical box is that it doesn’t fit properly. This can be frustrating and may require some troubleshooting to find the right solution. In this section, we will explore the reasons why the box may not fit and provide alternative options to overcome this issue.
Reasons why the box may not fit
- Box size: The size of the old work electrical box you are using might not be appropriate for the wall depth or the wiring setup. It is crucial to ensure that you choose the correct box size for your specific installation.
- Obstructed wall: If there are obstacles like studs, pipes, or other electrical wires behind the wall, they can hinder the proper installation of the box. You need to identify and work around these obstacles to create enough space for the box.
- Uneven or damaged wall surface: If the wall surface is uneven or damaged, it may prevent the old work electrical box from fitting properly. In such cases, you may need to repair or smoothen the wall surface before attempting the installation.
- Incorrect cutout: If the cutout in the wall for the old work electrical box is not accurate, it can lead to a poor fit. Double-check your measurements and make sure that the cutout is precise to accommodate the box properly.
Solutions and alternative options
Fortunately, there are several solutions and alternative options available to address the issue of an improperly fitting old work electrical box. Here are a few:
- Use an adjustable box: Consider opting for an adjustable old work electrical box that allows you to customize the depth to fit your specific requirements. These boxes are designed to accommodate various wall depths, providing more flexibility during installation.
- Install an extension ring: If the box you have doesn’t provide enough space, you can attach an extension ring to increase its depth. Extension rings are available in various sizes and can be easily attached to the existing box to create the necessary clearance.
- Repair the wall surface: If the issue is with the uneven or damaged wall surface, you can repair it using plaster or drywall compound. Fill in any holes, cracks, or uneven areas, then sand it down to create a smooth surface for installing the electrical box.
- Adjust the cutout: In case the cutout for the old work electrical box is incorrect, you may need to make adjustments. Carefully measure and mark the correct dimensions, then use a saw or a suitable cutting tool to modify the cutout, ensuring a precise fit.
By understanding the reasons why an old work electrical box may not fit properly and knowing the possible solutions and alternative options, you can overcome this issue confidently. Remember, proper installation is essential to ensure the safety and functionality of your electrical system.
Issue 2: Wiring Difficulties
When installing an old work electrical box, one of the common challenges you might encounter is dealing with wiring difficulties. From tangled or short wires to the frustration of making secure connections, it’s important to have the right techniques in your toolkit to overcome these hurdles.
Dealing with tangled or short wires
Tangled or short wires can make the installation process more time-consuming and frustrating. However, with a few simple steps, you can untangle those wires and ensure they are the correct length for a successful installation.
Here are some tips:
- Step 1: Start by carefully untangling any knots or twists in the wires. This can be done by gently pulling and separating each wire.
- Step 2: If you encounter any wires that are too short, you may need to extend them. Strip the insulation off another piece of wire, match the gauge of the existing wire, and use wire connectors or wire nuts to securely join the two pieces.
- Step 3: Once all the wires are untangled and at the correct length, use wire ties or electrical tape to keep them organized and prevent future tangles.
Techniques for easier wire connections
Making secure wire connections is essential for the safety and functionality of your electrical box installation. Here are some techniques to make this process easier:
- Twist and tuck: Strip about 3/4 inch of insulation off the ends of the wires. After twisting the exposed strands together, tuck them neatly into the old work electrical box.
- Wire connectors: If you have multiple wires to connect, consider using wire connectors. These connectors, also known as wire nuts or twist-on connectors, provide a secure and insulated connection. Gently twist the wires together clockwise, and then twist the wire connector onto the twisted wires until it is tight and secure.
- Crimp connectors: Crimp connectors are another option for secure wire connections. Strip the insulation off the ends of the wires, insert them into the appropriate crimp connector, and use a crimping tool to compress the connector onto the wires.
Remember to always follow electrical safety guidelines, ensuring that the power is turned off before working with any wires. Additionally, it’s highly recommended to consult a licensed electrician for any complex wiring tasks or if you’re unsure about your abilities.
By employing these techniques, you can overcome wiring difficulties and successfully install an old work electrical box, creating a safe and functional electrical system in your home.
Issue 3: Inadequate Support For Heavy Fixtures
When it comes to installing an old work electrical box, one of the concerns many homeowners face is the adequate support for heavy fixtures such as light fixtures or ceiling fans. Without proper stability and support, these fixtures can pose a safety hazard and damage the electrical box or the ceiling itself. Thankfully, there are methods that can be implemented to ensure the stability and safety of these heavy fixtures.
Addressing concerns with heavy light fixtures or ceiling fans
Installing heavy light fixtures or ceiling fans in an old work electrical box requires careful consideration and proper reinforcement. Here are some methods that can be used to address any concerns:
Methods to ensure stability and safety
To ensure that heavy fixtures are properly supported and to avoid any mishaps, it is important to employ the following methods:
- Use an appropriate electrical box: The first step is to select an old work electrical box that is specifically designed to support heavy fixtures. These boxes are usually made from sturdy materials like metal or high-impact plastic, ensuring adequate support.
- Check the mounting bracket: Before installation, carefully inspect the mounting bracket of the fixture. Ensure that it is in good condition and compatible with the electrical box. If needed, replace the bracket with a heavy-duty one to provide additional support.
- Secure the box to a stud: Whenever possible, secure the electrical box to a stud for added stability. This will provide a strong anchor point for the heavy fixture, reducing the risk of it falling or becoming loose over time.
- Utilize support braces: If there are no studs available or if additional support is required, support braces can be used. These braces are typically adjustable and can be attached between the electrical box and the nearest structural support, ensuring the weight of the fixture is evenly distributed.
- Consider using a ceiling fan mount: For ceiling fans, it is highly recommended to use a ceiling fan mount. These mounts are specifically designed to provide maximum stability and support for the weight and movement of the fan.
- Consult a professional: If you are unsure about the proper installation of heavy fixtures or if you have any concerns regarding the electrical box’s support, it is always best to consult a professional electrician. They have the expertise and knowledge to ensure a safe and secure installation.
By following these methods, you can ensure that heavy fixtures are properly supported and minimize the risk of accidents or damage. Remember, safety should always be the top priority when installing electrical equipment in your home.
Frequently Asked Questions
What Is An Old Work Electrical Box?
An old work electrical box is a device used to house electrical outlets or switches in existing walls without the need for additional framing or cutting. It’s designed for retrofits where cutting into the wall is not an option.
How Do You Install An Old Work Electrical Box?
To install an old work electrical box, start by marking the location on the wall where you want the box to be. Then, cut a hole into the wall using a drywall saw. Next, insert the old work electrical box into the hole and secure it in place using the integrated clamps.
Finally, connect the wiring to the box according to the manufacturer’s instructions.
Can An Old Work Electrical Box Support Heavy Fixtures?
Old work electrical boxes are not designed to support heavy fixtures such as ceiling fans or heavy light fixtures. If you need to install a heavy fixture, it is recommended to use a new work electrical box that provides proper support and is secured to the framing of the wall or ceiling.
What Tools Are Needed To Install An Old Work Electrical Box?
To install an old work electrical box, you will need a few basic tools including a drywall saw to cut the hole in the wall, a screwdriver to secure the box, wire strippers to strip the insulation off the wires, and a voltage tester to ensure the power is off before working on the electrical connections.
Conclusion
To wrap things up, installing an old work electrical box might seem daunting at first, but with the right instructions, tools, and a little patience, it’s a manageable task for any DIY enthusiast. By following the step-by-step process outlined in this guide, you can ensure a safe and secure installation that meets the necessary electrical codes.
Remember, safety should always be your top priority when working with electricity. Don’t hesitate to seek professional assistance if you are unsure or uncomfortable with any part of the process. Happy installing!