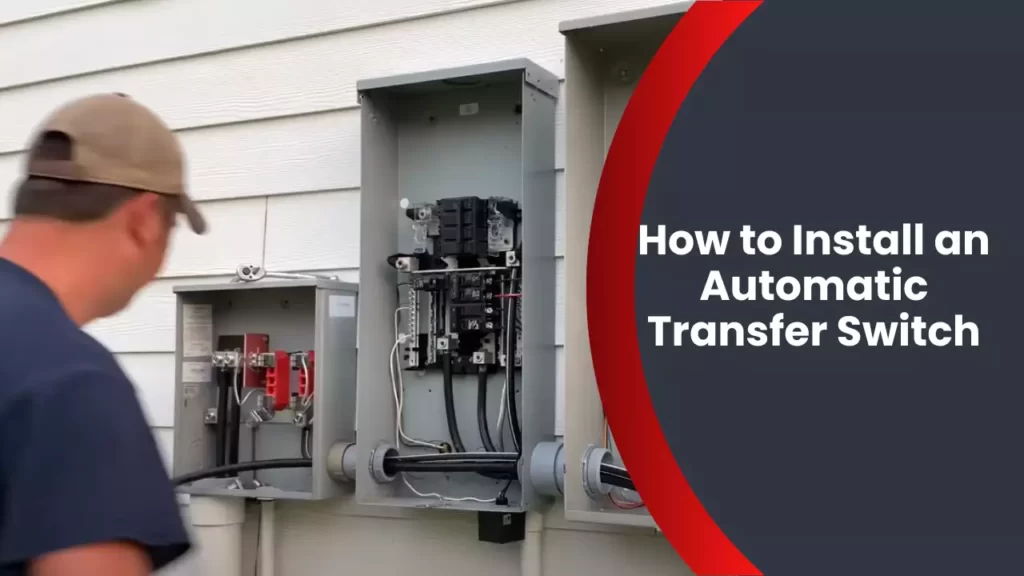
To install an automatic transfer switch, follow these steps: find a suitable location, shut off power, connect the switch to the electrical panel, and test the system. When installing an automatic transfer switch (ATS) in your home or office, it is essential to carefully follow the necessary steps to ensure a safe and proper installation.
An ATS allows you to seamlessly transition from grid power to a backup generator during power outages, ensuring uninterrupted power supply. This comprehensive guide will highlight the key steps involved in installing an ATS, from selecting an appropriate location to testing the system’s functionality.
By the end of this guide, you will have the knowledge and confidence to successfully install an automatic transfer switch and enjoy the convenience of a reliable backup power solution.
Understanding Automatic Transfer Switches
What is an Automatic Transfer Switch?
An automatic transfer switch (ATS) is an essential device that plays a vital role in backup power systems. It serves as a connection point between the utility grid and a backup generator, ensuring seamless power supply during emergencies, power outages, or scheduled maintenance. With an ATS, you can rest assured knowing that your critical appliances and systems will continue to function uninterrupted, keeping you connected, comfortable, and safe.
How does an Automatic Transfer Switch work?
An automatic transfer switch works by monitoring the electrical supply from the utility grid. It constantly evaluates the voltage and frequency of the grid power. When it detects any interruption, below or over-voltage, or frequency deviation, the ATS instantly triggers a transfer to the backup generator. This automatic switchover ensures that your essential circuits receive power from the generator, providing a seamless transition without any manual intervention or disruption to your daily life.
The ATS is equipped with internal mechanisms such as relays, sensors, and control circuits that facilitate the automatic switching process. These components work together to sense any changes in the grid power and activate the generator to supply power to your home or business within seconds.
Why do you need an Automatic Transfer Switch?
An automatic transfer switch is a crucial component of any backup power system, and here’s why:
- Reliability: With an ATS, you can rely on your backup generator to kick in automatically during power outages, thereby ensuring a continuous power supply to your essential appliances or critical systems.
- Convenience: Unlike manual transfer switches that require physical intervention to switch between utility power and generator power, an ATS eliminates the need for manual operation. It saves you time and effort by automatically transferring the power source.
- Safety: Automatic transfer switches provide a safe and secure transition between the utility and backup power sources. They prevent the risk of back-feed, which occurs when power flows back to the utility lines, posing a danger to utility workers.
- Seamless Operation: With an ATS in place, you won’t experience power interruptions or downtime during blackouts. Your critical systems, such as security systems, medical equipment, or data servers, will remain operational without any disruption.
- Peace of Mind: Having an automatic transfer switch gives you peace of mind, knowing that your backup power system is reliable and capable of seamlessly taking over during emergencies. You can focus on your priorities without worrying about power disruptions.
Preparing For Installation
Before you can embark on installing an Automatic Transfer Switch (ATS), proper preparation is key. In this section, we will guide you through the necessary steps to ensure a smooth installation process. From conducting a load assessment to selecting the right ATS for your needs, and gathering the necessary tools and materials, we’ve got you covered.
Conducting a Load Assessment
Conducting a load assessment is the first step in preparing for an ATS installation. This assessment involves carefully examining and documenting the electrical loads that your generator will need to support. By understanding the power requirements of your appliances, machinery, and equipment, you can determine the appropriate capacity for your ATS.
To conduct a load assessment, follow these steps:
- Make a list of all the appliances, machinery, and equipment that will be connected to the ATS.
- Identify the power ratings or wattage for each item on your list. This information can typically be found on the manufacturer’s label or in the user manual.
- Add up the wattage for all the items to calculate the total load.
Remember to account for any potential future additions or upgrades to your electrical system. It’s crucial to select an ATS with a capacity that can accommodate your current and future power needs.
Selecting the right Automatic Transfer Switch for your needs
Once you have completed the load assessment, you can move on to selecting the most suitable ATS for your requirements. Consider the following factors when choosing an ATS:
- Capacity: Ensure that the ATS you select has a capacity that matches or exceeds your total load.
- Type: There are various types of ATS available, including Standard Transfer Switches (STS) and Switchgear Transfer Switches (SGTS). Determine which type best suits your specific needs.
- Features: Different ATS models offer a range of features, such as remote monitoring, programmable settings, and surge protection. Prioritize the features that are essential for your setup.
- Brand and reliability: Research reputable brands known for manufacturing high-quality ATSs. Read reviews and consider the reliability of the product.
Remember, selecting the right ATS is crucial to ensure a reliable and efficient transfer of power during a utility outage.
Gathering the necessary tools and materials
Before you can proceed with the installation, gather the necessary tools and materials to ensure a smooth workflow. Here’s a list of the essential items you will need:
| Tools | Materials |
|---|---|
|
|
Having all the necessary tools and materials within reach will save you time and help ensure a successful installation.
Now that you are well-prepared and armed with the right information, it’s time to move on to the next step: Installing the Automatic Transfer Switch.
Installing The Automatic Transfer Switch
Installing an automatic transfer switch is an important step in ensuring uninterrupted power supply during a power outage. A transfer switch allows you to seamlessly switch between utility power and generator power, keeping essential appliances and systems running smoothly. In this section, we will walk you through the process of installing an automatic transfer switch, step by step.
Safety precautions to follow
Before you begin, it’s crucial to prioritize safety. Working with electricity can be dangerous, so it’s important to take the necessary precautions. Here are some safety tips to keep in mind:
1. Ensure that all power sources are turned off before starting any work.
2. Wear protective gear, such as safety glasses, gloves, and non-conductive footwear.
3. Keep a fire extinguisher nearby in case of emergencies.
4. Familiarize yourself with the manuals and instructions provided by the manufacturer.
5. If you’re not confident in your electrical skills, consult a professional electrician.
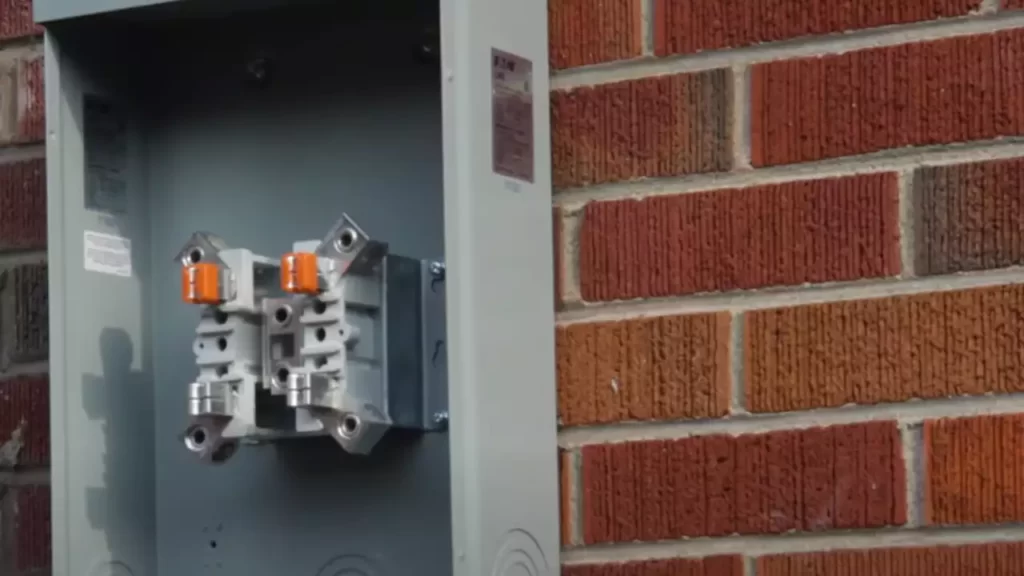
Locating the main electrical panel
To install the automatic transfer switch, you’ll need to locate your main electrical panel. This panel is usually found in the basement, garage, or utility room of your home. It contains the main circuit breakers and distributes power to different areas of your house. Once you locate the panel, make sure you have enough space around it to work comfortably.
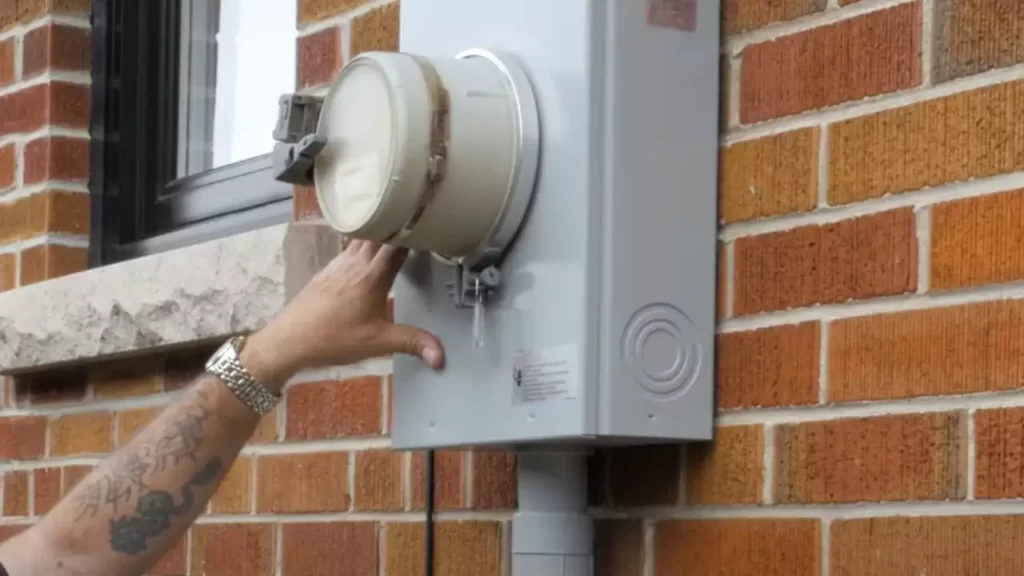
Shutting off power to the main panel
Before you start connecting the transfer switch, you must shut off power to the main panel. This step is vital to prevent any electrical accidents. Locate the main breaker inside the panel and switch it off. To be extra cautious, lock the panel or place a warning sign to ensure no one accidentally turns the power back on.
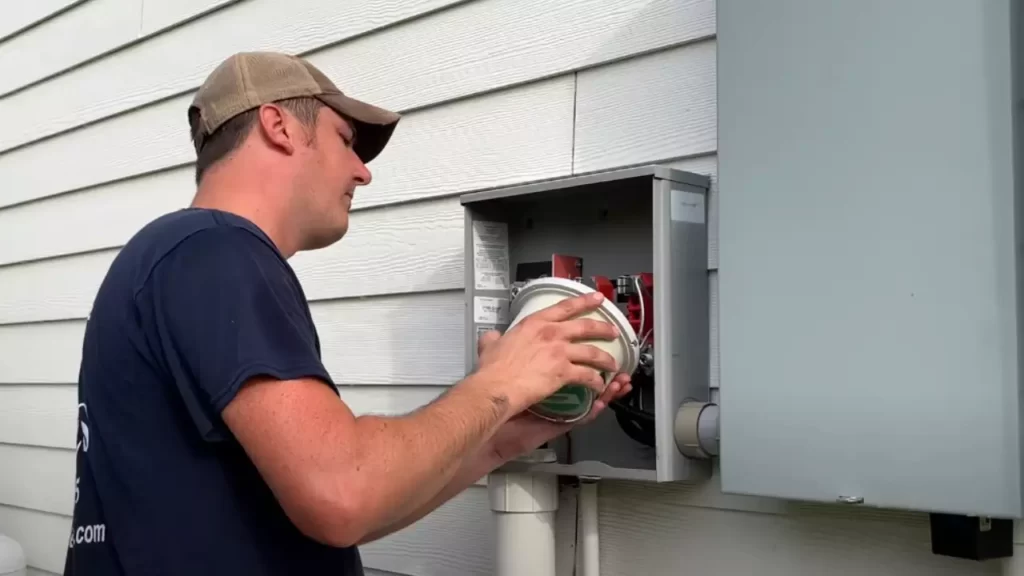
Connecting the Automatic Transfer Switch to the main panel
Once the power is shut off, it’s time to connect the automatic transfer switch to the main panel. This process may vary depending on the specific switch model you have, so it’s essential to follow the manufacturer’s instructions. Generally, you’ll need to connect the switch’s main wires to the lugs in the main panel. Ensure each wire is securely fastened and tightened properly.
Connecting the generator to the Automatic Transfer Switch
After connecting the transfer switch to the main panel, you’ll need to connect your generator to the switch. Locate the designated connection points on the transfer switch and generator. Depending on the switch and generator models, you may need to use special cables or plugs provided by the manufacturer. Follow the instructions carefully, making sure to connect the generator in the correct sequence.
Testing the connections and functionality of the Automatic Transfer Switch
Once all the connections are made, it’s crucial to test the functionality of the automatic transfer switch. Start by restoring power to the main panel and turning on the generator. As the generator begins to supply power, the automatic transfer switch should detect the change and seamlessly transfer the load to generator power. Test different circuits and appliances to ensure they are receiving power from the generator. If any issues arise, consult the manufacturer’s troubleshooting guide or contact a professional electrician.
By following these steps and taking the necessary safety precautions, you can successfully install an automatic transfer switch and be prepared for any future power outages. Ensure to consult manufacturer-provided guidelines and consult a professional if needed to ensure a seamless installation process.
Wiring And Electrical Connections
When it comes to the installation of an automatic transfer switch (ATS), one crucial aspect is ensuring proper wiring and electrical connections. This is the stage that establishes the connection between the ATS and the electrical circuits in your home. In this section, we will guide you through the process of wiring the automatic transfer switch to the electrical circuits, ensuring proper grounding and bonding, installing surge protection devices, and labeling the circuits for easy identification.
Wiring the Automatic Transfer Switch to the Electrical Circuits
Wiring the automatic transfer switch to your electrical circuits is a task that requires careful attention to detail. It is essential to follow the wiring diagram provided by the manufacturer to ensure a correct and safe installation. Here are the steps to wire the ATS:
- Turn off the power: Before you begin any wiring work, make sure to turn off the main power supply to prevent any accidents or electrical shocks.
- Locate the circuits: Identify the circuits that you want to connect to the ATS. These circuits may include essential appliances and areas of your house that you want to keep powered during a power outage.
- Run the wires: Run appropriate-sized wires from the ATS to the electrical panel for each circuit. Make sure to use the correct gauge wire and follow the specific requirements mentioned in the manufacturer’s instructions.
- Make the connections: At the electrical panel, make the necessary connections between the ATS and the circuits. This typically involves connecting the hot wires, neutral wires, and ground wires to their respective terminals.
- Secure the connections: After making the connections, ensure they are properly tightened and secured using appropriate connectors or screw terminals.
Ensuring Proper Grounding and Bonding
Proper grounding and bonding are crucial for the safety and proper functioning of your electrical system. Here are a few key steps to ensure proper grounding and bonding of the automatic transfer switch:
- Connect the grounding wire: Connect the grounding wire from the ATS to the grounding system of your home. This is typically done through a grounding electrode conductor (GEC) or a grounding bus bar.
- Bond the neutral and ground: In your electrical panel, bond the neutral and ground wires by connecting them to the neutral bar. It is important to follow local electrical codes and guidelines when performing this step.
- Perform ground fault testing: After completing the grounding and bonding connections, perform ground fault testing to ensure that the system is properly grounded and there are no electrical faults.
Installing Surge Protection Devices
Power surges can cause significant damage to your electrical equipment during a power outage. Installing surge protection devices (SPDs) adds an extra layer of protection by diverting excessive voltage away from your sensitive electronics. Here are a few considerations for installing surge protection devices:
- Choose the right SPD: Select a surge protection device that is suitable for your specific electrical panel and meets the voltage rating and protection level requirements.
- Follow manufacturer instructions: carefully follow the manufacturer’s instructions for installation, which may involve connecting the SPD directly to the ATS or at the electrical panel.
- Ensure proper grounding: To maximize the effectiveness of the surge protection device, ensure it is properly grounded as per the manufacturer’s guidelines.
Labeling the Circuits for Easy Identification
Properly labeling the circuits connected to your automatic transfer switch is essential for easy identification during an outage or maintenance. This enables you to quickly locate and manage specific circuits. Here are a few tips for labeling:
- Label each circuit: Use labels or tags to clearly mark each circuit at both the ATS and the electrical panel. Include descriptive information such as room or device names.
- Use color-coded labels: Utilize color-coded labels or tags to visually distinguish different circuits. This can help to quickly identify critical circuits.
- Document your labeling: Keep a detailed record or diagram of the labeled circuits for future reference or in case of any changes or upgrades to the system.
By adequately wiring the automatic transfer switch to the electrical circuits, ensuring proper grounding and bonding, installing surge protection devices, and labeling the circuits for easy identification, you can ensure a safe and efficient operation of your backup power system. Following these steps will give you peace of mind knowing that your essential appliances and devices will remain powered during unexpected power outages.
Commissioning And Testing
Once you have successfully installed an automatic transfer switch (ATS), the next crucial step is commissioning and testing. This process ensures that the ATS functions properly, seamlessly transfers power between the utility and generator, and guarantees reliable backup power in case of an outage.
Verifying the proper working of the Automatic Transfer Switch
To begin the commissioning process, it’s essential to thoroughly verify the proper working of the ATS. This involves checking the various components, connections, and settings to ensure everything is in order. Here are the key steps to follow:
- Inspect the physical condition of the ATS enclosure, checking for any damages, loose connections, or signs of wear and tear.
- Double-check the electrical connections, ensuring that all wires are securely fastened, and there are no loose or exposed wires that could pose a safety hazard.
- Review the manufacturer’s instructions and reference any necessary diagrams or documentation to ensure accurate wiring connections.
- Check the ATS control panel to verify that it is properly configured and programmed according to the specific requirements of your system.
- Test the ATS manually by toggling the transfer switch and monitoring the transfer of power between the utility and the generator. Observe the status of the LEDs or indicators and ensure they reflect the correct power source.
Conducting a full system test with the generator
After confirming the proper working of the ATS, it’s time to conduct a comprehensive system test with the generator. This is a critical step that helps identify any potential issues and ensures a seamless transfer of power in real-world scenarios. Follow these steps to conduct a full system test:
- Start by notifying any relevant parties, such as building occupants or facility managers, about the upcoming test to avoid any inconvenience.
- Inspect the generator itself, ensuring it is in good condition, adequately fueled or connected to a fuel source, and ready for operation.
- Begin the test by simulating a power outage. This can be done by disconnecting the utility power supply or manually triggering the ATS to transfer power to the generator.
- Monitor the generator’s performance, including its ability to start up promptly, handle the load, and maintain a stable power supply without any interruptions or fluctuations.
- Observe the transfer switch during the test, ensuring it operates smoothly and swiftly transfers power from the utility to the generator, and vice versa, once the utility power is restored.
- Document any observations or issues encountered during the test to address them promptly and make any necessary adjustments or repairs.
Troubleshooting common issues
Despite careful installation and testing, it’s possible to encounter some common issues with an automatic transfer switch. These problems can range from minor electrical glitches to mechanical failures. To troubleshoot and resolve these issues effectively, follow the steps below:
- Start by carefully reviewing the manufacturer’s troubleshooting guide or manual to identify potential solutions for the specific issue at hand.
- Inspect the electrical connections once again, looking for loose wires, damaged cables, or any signs of a short circuit that may be causing the problem.
- Check the functionality of the ATS control panel and ensure that all the settings are correctly configured. Make any necessary adjustments or recalibrations as recommended by the manufacturer.
- If the issue persists, consider consulting a qualified electrician or contacting the manufacturer’s technical support for further assistance.
- Keep detailed records of any troubleshooting steps taken, including the date, time, and specific actions. This documentation can be valuable in case the problem persists or additional support is required.
By following these commissioning, testing, and troubleshooting procedures, you can ensure the reliable performance of your automatic transfer switch. Properly verifying the working of the ATS, conducting thorough system tests, and addressing common issues will provide you with peace of mind knowing that your backup power system is ready to seamlessly take over in the event of an electrical outage.
Maintenance And Safety Tips
Regular maintenance and following safety procedures are essential when working with an Automatic Transfer Switch (ATS). By keeping up with regular maintenance tasks and adhering to safety precautions, you can ensure the smooth and reliable functioning of your ATS. Additionally, learning to recognize signs of potential problems and knowing when to seek professional help is crucial in maintaining the longevity of your ATS.
Regular maintenance tasks for the Automatic Transfer Switch
Maintaining your Automatic Transfer Switch is integral to its performance and durability. Here are some regular maintenance tasks that you should prioritize:
- Inspect and clean the ATS regularly to remove any dust, debris, or potential obstructions that could hinder proper functioning. Make sure to turn off power and follow safety precautions when working with electrical components.
- Check all the connections and wiring for any signs of wear, corrosion, or loose connections. Tighten or replace any components as necessary, ensuring secure connections.
- Regularly test the ATS by simulating power outages to ensure it seamlessly transfers power between the utility and generator sources. Follow the manufacturer’s instructions for testing and document the results for future reference.
- Keep the ATS surroundings clean and well-ventilated to prevent overheating and reduce the risk of fire hazards.
- Refer to the manufacturer’s manual for any specific maintenance guidelines and recommendations for your particular model of ATS.
Safety precautions when working with the Automatic Transfer Switch
Working with an Automatic Transfer Switch involves electrical components and potential hazards. It’s vital to prioritize safety to prevent accidents or damage. When handling the ATS, make sure to adhere to the following safety precautions:
- Always disconnect the power source before performing any maintenance tasks or modifications.
- Wear appropriate personal protective equipment (PPE) such as insulated gloves, safety goggles, and protective clothing to minimize the risk of electrical shocks or injuries.
- Avoid working alone and ensure someone is aware of your activity or, ideally, seek assistance from a qualified professional.
- Use insulated tools specifically designed for electrical work to minimize the risk of electrical shocks.
- Ensure proper grounding and bonding of the ATS to prevent electrical malfunctions and electrocution hazards.
- Follow all local electrical codes and regulations when installing or maintaining the ATS.
Signs of potential problems and when to seek professional help
While regular maintenance can significantly reduce the likelihood of issues, it’s crucial to recognize signs of potential problems with your Automatic Transfer Switch. If you notice any of the following signs, consider seeking professional assistance:
- Strange noises or excessive vibrations coming from the ATS during operation.
- Frequent tripping of breakers or fuses associated with the ATS.
- Inconsistent power transfer between the utility and generator sources.
- Failure of the ATS to start or transfer power during simulated testing or actual power outages.
- Noticeable damage or deterioration of the ATS components.
- Any unusual odors, smoke, or sparks coming from the ATS.
Your Automatic Transfer Switch is a critical component of your power system, ensuring seamless transitions between power sources. By following regular maintenance tasks, safety precautions, and promptly addressing potential problems, you can enjoy a reliable power transfer system for years to come.
Frequently Asked Questions
Can I Install A Transfer Switch Myself?
Yes, you can install a transfer switch yourself. However, it is important to follow the necessary guidelines and safety precautions. It’s recommended to consult with a licensed electrician to ensure proper installation and to comply with local regulations.
Where Is The Best Place To Put The Automatic Transfer Switch?
The best place to put the automatic transfer switch is near the main electrical panel. It should be easily accessible for maintenance purposes but protected from potential damage. This location ensures efficient and reliable transfer of power between the utility grid and backup power source during outages.
How Much Does It Cost To Install An Automatic Transfer Switch?
Installing an automatic transfer switch typically costs between $500 and $2,000.
What Is Needed To Install A Transfer Switch?
To install a transfer switch, you’ll need a few essentials. Firstly, a transfer switch device itself is required. Additionally, you’ll need a suitable generator compatible with the transfer switch. Proper electrical wiring and connections are crucial, so be sure to have the necessary tools, such as wire cutters and screwdrivers.
Lastly, it’s essential to follow local electrical codes and regulations to ensure safe installation.
Conclusion
To ensure a seamless power transition during outages, installing an automatic transfer switch is essential. This blog post has provided step-by-step instructions on how to successfully install one. By following these guidelines and consulting a professional, you can safeguard your electrical system and protect your appliances from potential damage.
So go ahead and take control of your power supply with an automatic transfer switch installation. Stay powered up, no matter what!