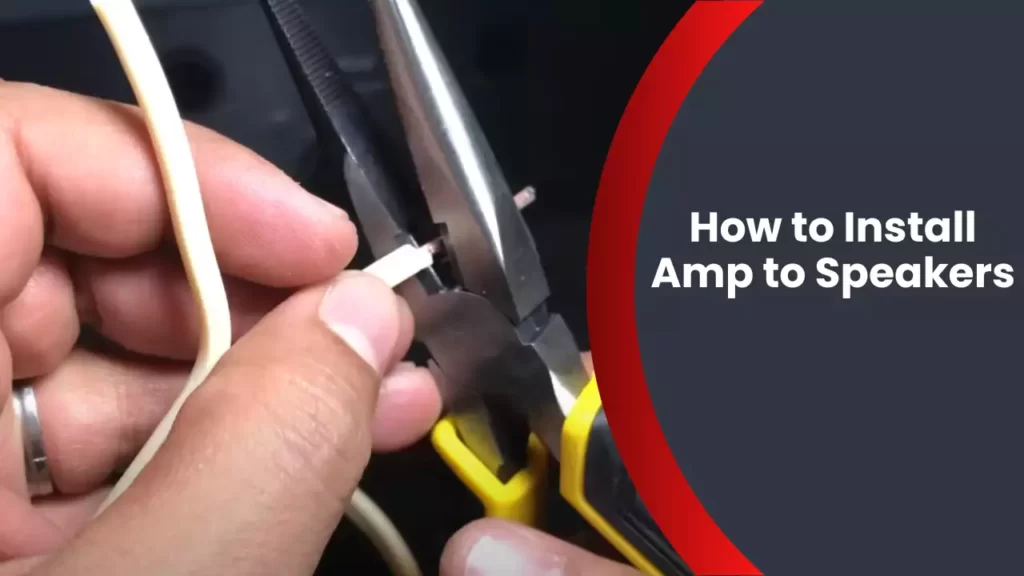
To install an amp to speakers, connect the amp to the power source and then use speaker wire to connect the amp to the speakers. When setting up a sound system, it is essential to ensure that all components are properly connected for optimal performance.
One crucial step in this process is installing an amplifier (amp) to speakers. By doing so, you can enhance the audio quality and power output of your speakers. We will guide you through the simple steps to install an amp to speakers without any hassle.
Whether you are a beginner or an experienced audio enthusiast, this step-by-step guide will help you in achieving the desired results. So, let’s get started and transform your audio experience with an upgraded sound system.
Understanding Amplifiers And Speakers
What is an amplifier and how does it work?
An amplifier is an essential component in any audio system that is responsible for increasing the power of the audio signal before it is sent to the speakers. It takes the low-level signals from the sound source and boosts them to a level that is suitable for the speakers to reproduce sound effectively.
Amplifiers work by receiving the audio signals and then using a combination of voltage amplification and current amplification to increase their amplitude. The input signal is first passed through a preamplifier, which enhances the weak signal from the source and prepares it for further amplification in the main amplifier stage. The main amplifier stage, also known as the power amplifier, amplifies the preamplified signal to a level that can drive the speakers.
Different types of amplifiers and their applications.
There are several types of amplifiers available, each with its own characteristics and applications:
- Class A Amplifiers: These amplifiers provide the highest audio quality but are less efficient and generate more heat. They are commonly used in high-end audio systems where sound quality is paramount.
- Class B Amplifiers: Class B amplifiers are more efficient than Class A amplifiers but introduce some distortion due to the switching between the positive and negative halves of the audio waveform. They are commonly used in car audio systems.
- Class D Amplifiers: These amplifiers are highly efficient and generate less heat. They use pulse-width modulation to replicate the audio signal and are commonly used in portable speakers and subwoofers.
Understanding the anatomy of speakers and their components.
Speakers play a crucial role in delivering audio output from the amplifier. They convert the electrical signals received from the amplifier into sound waves that can be heard. Understanding the anatomy of speakers can help in choosing the right ones for your system:
| Component | Description |
|---|---|
| Cone/Diaphragm | The cone or diaphragm is the main vibrating component of the speaker. It moves back and forth to produce sound waves. |
| Voice Coil | The voice coil is a wire wound around a cylindrical former. When an electrical signal passes through it, it generates a magnetic field that interacts with the permanent magnet, causing the cone to vibrate. |
| Magnet | The magnet provides a permanent magnetic field against which the voice coil interacts, resulting in the vibration of the cone. |
| Spider | The spider is a flexible ring that suspends the diaphragm and allows it to move freely while maintaining its position. |
| Surround | The surround is a flexible ring that connects the diaphragm to the speaker frame. It allows the diaphragm to move while ensuring it stays centered. |
By understanding the functioning of amplifiers and the components of speakers, you can make informed decisions when installing an amplifier to your speakers. It is crucial to ensure compatibility and optimize your audio system for an enhanced listening experience.
Selecting The Right Amplifier For Your Speakers
Selecting the right amplifier for your speakers is crucial to ensure optimum performance and sound quality. To achieve the best audio experience, you need to consider various factors such as the power requirements of your speakers, impedance matching, and additional features and compatibility options. In this section, we will guide you through these essential steps to help you make an informed decision when installing an amp to your speakers.
Determining the power requirements of your speakers
Before you start searching for an amplifier, it’s important to first determine the power specifications of your speakers. Every speaker has a specified power rating, measured in watts (W). You need an amplifier that can provide enough power to drive your speakers without causing distortion or overheating. Exceeding the power capabilities of your speakers may result in damaged sound quality or even physical damage to the speakers themselves.
To determine the power requirements of your speakers, you can refer to the user manual or check the label on the back of the speakers. Look for the “RMS” or “continuous power handling” rating, which indicates the amount of power the speakers can handle consistently. Once you have this information, you can search for an amplifier with a power output that matches or slightly exceeds the power rating of your speakers.
Matching the impedance of your speakers with the amplifier
Impedance matching is another crucial aspect when selecting an amplifier for your speakers. Impedance is measured in ohms (Ω) and represents the resistance to electrical current flow in a speaker. The amplifier and speakers must have compatible impedance ratings to ensure proper functioning.
When selecting an amplifier, check its specifications to find the recommended speaker impedance range. For example, an amplifier might specify a recommended impedance range of 4-8 ohms. This means your speakers should have an impedance within this range for optimal performance. Using speakers with an impedance outside the recommended range can result in inefficient power transfer, reduced sound quality, or damage to the amplifier.
Considering additional features and compatibility options
Aside from power requirements and impedance matching, you may also consider additional features and compatibility options when choosing an amplifier for your speakers. Manufacturers offer a variety of features, such as built-in equalizers, tone controls, multiple input options, and even wireless connectivity. Think about your specific needs and preferences to determine which features are essential for your audio setup.
In addition, ensure that the amplifier you choose is compatible with your speakers in terms of connections and wiring. Check if the amplifier has the correct input and output options that match the connectors on your speakers. This will ensure a proper and secure connection, avoiding any potential audio quality issues or compatibility challenges.
Preparing For The Installation Process
Before you begin installing an amp to your speakers, it’s important to prepare yourself and your workspace. Taking the time to gather the necessary tools and equipment, organizing your workspace, and taking safety precautions will ensure a seamless installation process. In this section, we will guide you through each step, ensuring you have everything you need and are ready to get started.
Gathering the necessary tools and equipment
To effectively install an amp to your speakers, you will need a few essential tools and equipment. Below is a list of items you should have on hand:
| Tools | Equipment |
|---|---|
|
|
Make sure you have these tools and equipment readily available before starting the installation process. This way, you won’t have to pause mid-way to search for missing items, ensuring a smoother and more efficient installation.
Organizing your workspace for a seamless installation
Creating an organized workspace will help you avoid any confusion or delays during the installation process. Follow these tips to ensure a seamless installation:
- Clear your workspace of any unnecessary clutter or objects that may hinder your movement or accessibility to the speakers and amp.
- Arrange your tools and equipment in a logical order, making it easy to locate and reach them when needed.
- Consider laying out a protective covering, such as a thick fabric or plastic sheet, to safeguard your workspace from any accidental spills or scratches.
By organizing your workspace in advance, you can focus on the installation itself without any distractions or interruptions.
Taking safety precautions before starting the installation
Prioritizing safety is crucial when working with electrical components. Before you begin installing the amp to your speakers, take the following precautions:
- Ensure the power is completely turned off and disconnected to prevent any electrical shocks or accidents.
- Wear appropriate safety gear, such as gloves and safety glasses, to protect yourself from any potential hazards.
- Avoid working alone if possible. Having a second person present can provide both assistance and an extra level of safety.
- Read and understand the user manuals and instructions for both the amp and speakers before initiating any installation steps.
By taking these safety precautions, you can reduce the risk of any mishaps and complete the installation process safely.
Connecting The Amplifier To The Speakers
Once you have chosen the right amplifier for your speaker setup, the next step is to connect the amplifier to the speakers. This step is crucial in ensuring that you get the best performance from your audio system. By properly connecting the speakers to the amplifier, you can enjoy immersive and high-quality sound in your desired location. In this section, we will guide you through the process of connecting the amplifier to the speakers.
Identifying the input and output ports on the amplifier
Before you start connecting the speakers to the amplifier, it is important to identify the input and output ports on the amplifier. These ports may vary depending on the make and model of your amplifier, but generally, you will find RCA or XLR inputs for connecting audio sources and speaker outputs for connecting the speakers. Look for labels or markings near these ports to help you identify them.
If you are unsure about which ports to use, refer to the amplifier’s user manual. The manual will provide specific instructions and diagrams for connecting the speakers to the amplifier. Remember, it is important to use the correct ports to ensure optimal sound quality.
Setting up the amplifier in the desired location
Once you have identified the input and output ports on the amplifier, the next step is to set up the amplifier in the desired location. Choose a location that is well-ventilated and offers easy access to the necessary cables. It is also important to consider any space restrictions or aesthetic preferences you may have.
Place the amplifier on a stable surface, such as a shelf or a rack, to prevent it from vibrating or falling. Ensure that the amplifier is placed away from any potential sources of interference, such as other electronic devices or power cables.
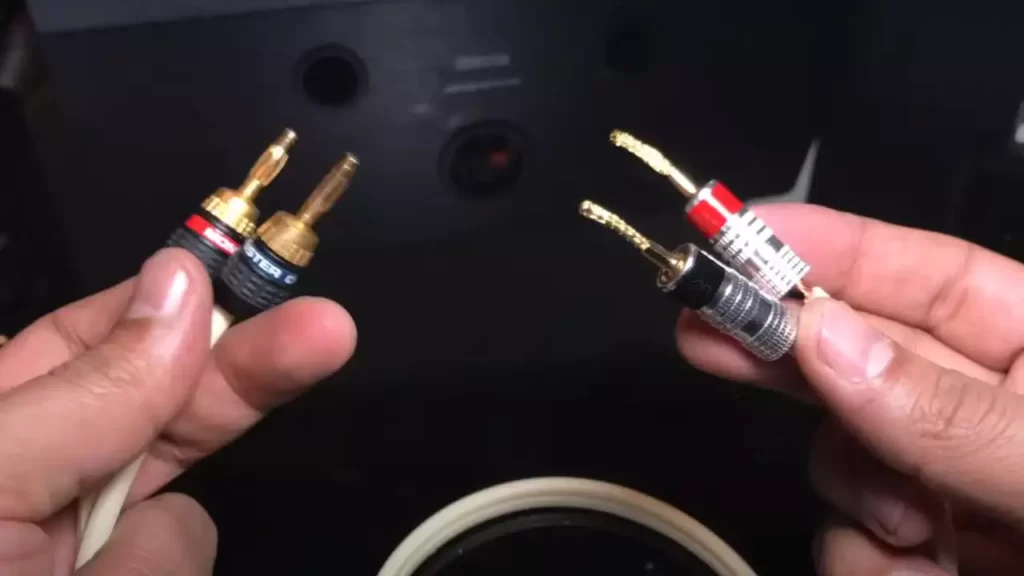
Properly connecting the speakers to the amplifier using appropriate cables
Now that the amplifier is set up in the desired location, it’s time to connect the speakers. To do this, you will need appropriate cables that match the input and output ports on the amplifier and the speakers. For example, if your amplifier has RCA outputs and your speakers have RCA inputs, you will need RCA cables to connect them.
Take care to match the positive (+) and negative (-) terminals on both the amplifier and the speakers. This ensures that the speakers are properly wired and will produce the correct sound. Incorrect wiring can result in phase cancellation or distorted audio.
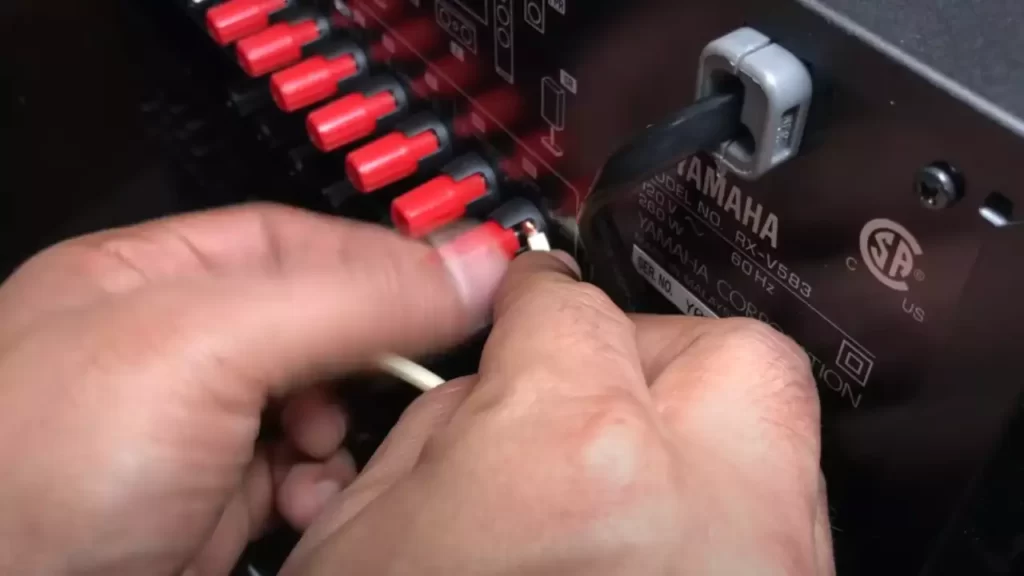
1. Start by connecting one end of the cable to the speaker output ports on the amplifier. Ensure that the connections are secure and tight to avoid any audio interruptions.
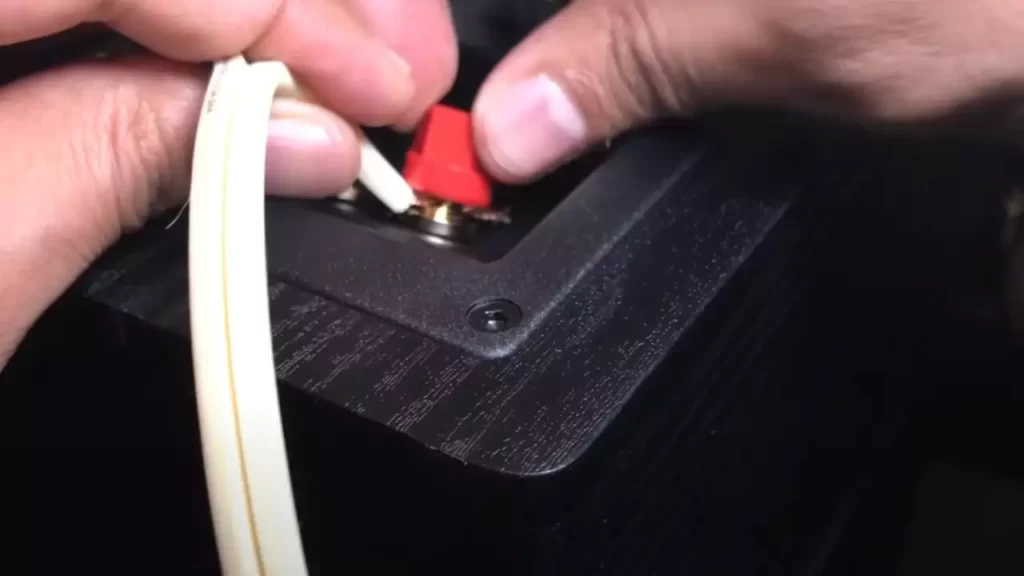
2. Next, connect the other end of the cable to the corresponding input ports on the speakers. Again, ensure that the connections are secure and tight.
By following these steps, you have successfully connected the amplifier to the speakers. Now you can power on the amplifier and start enjoying your favorite audio content with enhanced sound quality.
Adjusting The Amplifier Settings
Understanding the different controls and knobs on the amplifier
When it comes to adjusting the amplifier settings, it’s essential to understand the different controls and knobs that are featured on your amplifier. These controls allow you to fine-tune your audio experience and optimize the performance of your speakers. Let’s take a closer look at some of the most common controls you’ll find on an amplifier.
- Volume Control: The volume control adjusts the overall loudness of your speakers. It allows you to increase or decrease the volume output according to your personal preference.
- Tone Control: The tone control knobs usually include bass, midrange, and treble controls. These controls enable you to adjust the different frequencies of the audio to achieve the desired sound balance.
- Balance Control: The balance control enables you to control the distribution of sound between the left and right speakers. By adjusting this control, you can achieve a balanced stereo sound.
Setting the volume levels and gain to optimize audio performance
To optimize the audio performance of your speakers, it’s crucial to set the volume levels and gain correctly. Here’s a step-by-step guide on how to do it:
- Start at a low volume: Begin by setting the volume control to its lowest level to avoid any sudden loud noises or potential damage to your speakers.
- Gradually increase the volume: Slowly increase the volume to a comfortable level, listening carefully for any distortions or clipping sounds.
- Adjust the gain control: The gain control determines the input sensitivity of the amplifier. Set it to a level that allows the audio signal to be amplified without distortion.
Exploring additional settings for equalization and sound customization
In addition to the basic controls, many amplifiers offer additional settings for equalization and sound customization. These settings provide you with more control over the audio output and allow you to tailor the sound to your preferences. Here are some of the common additional settings you might find:
- Equalizer: An equalizer allows you to adjust the audio frequencies in more detail. It typically consists of sliders that control different frequency bands, allowing you to boost or cut specific frequencies.
- Sound effects: Some amplifiers offer built-in sound effects, such as reverb or echo. These effects can enhance your audio experience by adding depth or dimension to the sound.
- Surround sound: If you have a surround sound system, your amplifier may have settings to optimize the surround sound experience. These settings help you to achieve the ideal balance between different channels.
By exploring these additional settings, you can further customize your audio output and create a sound that suits your preferences and the specific characteristics of your speakers.
Troubleshooting Common Installation Issues
Installing an amp to speakers can greatly enhance the audio experience, but sometimes things don’t go as smoothly as planned. In this section, we will look at some common problems that may arise during the installation process and provide troubleshooting tips to help you get your amp up and running.
Identifying potential problems during the installation process
Installing an amp to your speakers requires careful attention to detail. Here are some potential issues you may encounter:
- The amp not turning on: If your amp is not powering up, check the power connection and ensure it is securely plugged into a working power outlet.
- Incorrect wiring: Double-check your wiring connections to ensure they are correct. Ensure that the positive (+) and negative (-) terminals are correctly aligned.
- Grounding issues: Improper grounding can lead to unwanted noise or hum. Make sure the amp is properly grounded by connecting the ground wire to a metal part of your vehicle or audio system.
Troubleshooting issues with sound quality and connectivity
Even after successfully installing the amp, you may encounter issues with sound quality or connectivity. Below are some troubleshooting steps to address these problems:
- Distorted sound: If you experience distorted sound, check your amplifier’s gain settings. Adjust the gain levels to the appropriate level, ensuring they are not set too high.
- No sound at all: Double-check all the connections between the amp, speakers, and audio source. Ensure that all cables are securely plugged in.
- Poor connectivity: If you are experiencing intermittent connectivity issues, inspect the cables for any damage or loose connections. Consider replacing or tightening the cables to improve signal transmission.
Seeking professional assistance for complex problems
In some cases, troubleshooting common installation issues may require professional expertise. If you have followed all the troubleshooting steps and are still unable to resolve the problem, it is advisable to seek assistance from a professional audio technician or installer.
They possess the knowledge and experience to identify and fix complex problems that may be beyond the scope of a DIY installation. They can provide you with expert advice, ensuring your amp and speakers work together seamlessly.
By following these troubleshooting tips and seeking professional assistance when needed, you can overcome common installation problems and enjoy the optimal performance of your amp and speakers.
Tips For Maintaining Your Amplifier And Speakers
Proper maintenance of your amplifier and speakers is crucial for ensuring optimal performance and longevity. By following a few simple tips, you can keep your audio equipment in excellent condition and enjoy great sound quality for years to come.
Regular cleaning and dusting of the amplifier and speakers
Regular cleaning and dusting are essential to prevent the buildup of dirt, dust, and other particles that can affect the performance of your amplifier and speakers. Remove the dust by gently wiping the surfaces with a soft, lint-free cloth. Pay close attention to the speaker grills and any vents on the amplifier to ensure proper airflow.
Preventing overheating and managing power requirements
Overheating can damage your amplifier and speakers, so it’s crucial to take steps to prevent this. Ensure that your amplifier has proper ventilation and is not placed in an enclosed space. It is also important to manage the power requirements by using an amplifier that matches the impedance and power handling capabilities of your speakers.
Here are a few tips to prevent overheating and manage power requirements:
- Ensure proper airflow around the amplifier and speakers by keeping them away from walls and not stacking other objects on top of them.
- Consider using a cooling fan or placing the amplifier in a well-ventilated rack system.
- Monitor the volume levels and avoid prolonged use at high volumes, as it can generate excess heat.
- Use an appropriate power conditioner or surge protector to protect your audio equipment from electrical fluctuations.
Proper storage and transportation of your audio equipment
Proper storage and transportation are crucial to prevent any damage to your amplifier and speakers. When not in use, store your audio equipment in a clean and dry environment, away from extreme temperatures and humidity. If you need to transport your amplifier and speakers, consider investing in a padded carrying case or using foam inserts to provide cushioning and protection.
Follow these tips to ensure proper storage and transportation:
- Disconnect all cables and cover the amplifier and speakers with protective covers or fabric before storing them.
- Store the equipment in a secure location, away from potential hazards and excessive vibrations.
- When transporting, secure the amplifier and speakers properly in a sturdy case or using seatbelts to prevent any movement during transit.
By practicing regular cleaning, preventing overheating, and taking proper storage and transportation measures, you can maintain the performance and longevity of your amplifier and speakers. These simple tips will help you enjoy top-quality audio for years to come.
Frequently Asked Questions
How Do I Connect Amp To Speakers?
To connect an amp to speakers, follow these steps: 1. Locate the speaker output on your amplifier. 2. Using speaker wire, connect the positive terminal of the left speaker to the positive output of the amplifier. 3. Connect the negative terminal of the left speaker to the negative output of the amplifier.
4. Repeat the process for the right speaker. 5. Ensure all connections are secure and test the sound to ensure proper functionality.
How Do I Add An Amp To My Car Speakers?
To add an amp to your car speakers, you’ll need to follow these steps: 1. Start by disconnecting the car battery to ensure safety. 2. Use a wiring kit to connect the amp to your car’s stereo system. 3. Install the amp and make sure it’s securely mounted.
4. Connect the amp to your speakers using speaker wire. 5. Finally, reconnect the car battery and test your new setup.
Can You Connect Any Speakers To An Amp?
Yes, you can connect any type of speakers to an amplifier.
How Do I Connect My Amp To My Stereo?
To connect your amp to your stereo, first, locate the audio output on your stereo and insert one end of an RCA cable. Then, find the audio input on your amp and connect the other end of the cable. Make sure both devices are turned off before connecting.
Finally, power on both the stereo and the amp to complete the connection.
Conclusion
Installing an amp to speakers can greatly enhance your audio experience. With the right equipment and careful attention to detail, you can enjoy better sound quality and increased volume. By following the step-by-step guide provided in this blog post, you can successfully set up your amp and make the most out of your speakers.
So why wait? Upgrade your audio system today and immerse yourself in a whole new level of audio bliss.