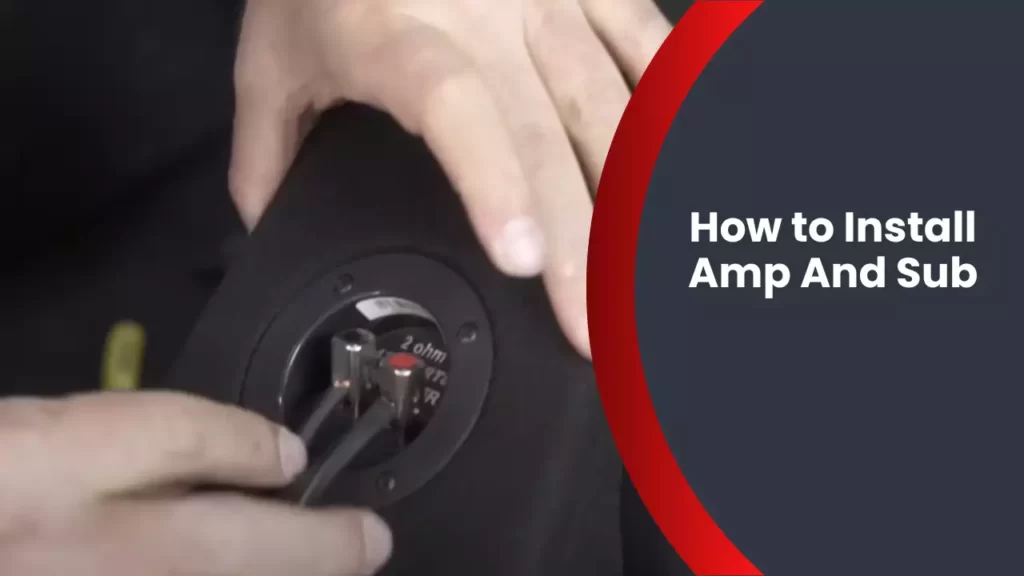
To install an amp and sub, you need to connect the power wire, ground wire, remote wire, RCA cables, and speaker wires properly. When it comes to enhancing your car’s audio system, installing an amp and sub can make a significant difference.
By adding an amplifier and subwoofer, you can experience deep bass and improved sound quality. However, installing these components requires careful attention to detail. We will guide you through the installation process, ensuring that you have all the necessary tools and knowledge to complete the job successfully.
By following these steps, you’ll be on your way to enjoying powerful and immersive audio in your vehicle.
Getting Started With Amp And Sub Installation
Are you ready to take your car’s audio system to the next level? Installing an amp and sub can greatly enhance your listening experience, providing deep bass and clearer sound. Whether you’re a car audio enthusiast or just looking to upgrade your vehicle’s entertainment system, this step-by-step guide will help you get started with the amp and sub installation process. From preparing the necessary equipment to choosing the right amp and sub for your vehicle, we’ve got you covered.
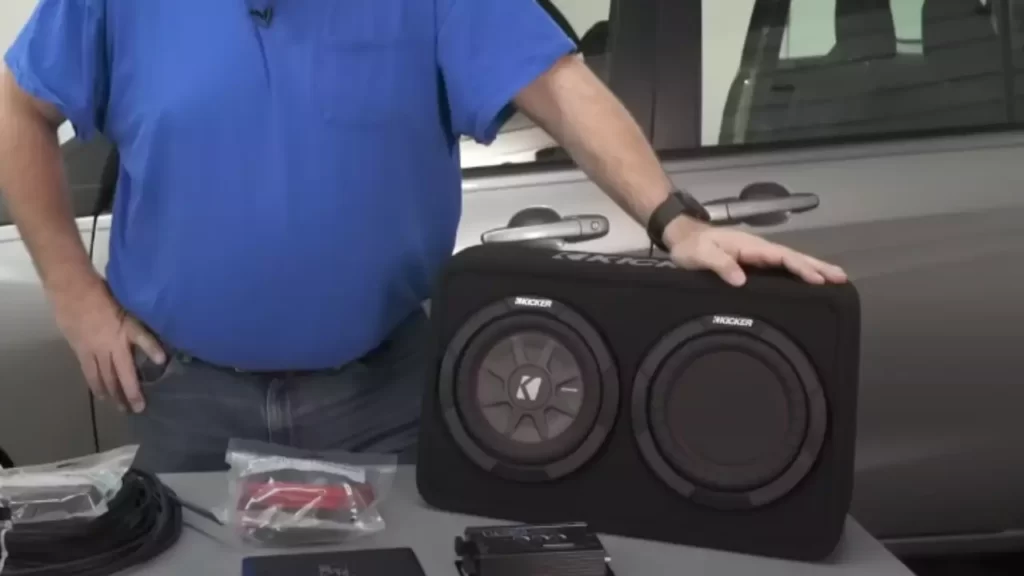
Prepare the Necessary Equipment
Before diving into the installation, it’s important to ensure you have all the necessary equipment at your disposal. Here’s a list of items you’ll need:
| Tools | Materials |
|---|---|
|
|
Choosing the Right Amp and Sub for Your Vehicle
Now that you have your equipment ready, it’s time to choose the right amp and sub for your vehicle. Here are a few factors to consider:
- Power requirements: Check your car’s electrical system to determine the power capabilities. Make sure the amp and sub you choose are compatible with your vehicle’s electrical capacity.
- Size and fit: Consider the available space in your car. Measure the dimensions and ensure that the amp and sub can fit without any issues.
- Sound preferences: Determine the level of bass you desire. Some subs are designed to deliver deep and thunderous bass, while others offer a more balanced sound.
By carefully considering these factors, you’ll be able to select an amp and sub that perfectly matches your car’s audio needs.
Now that you’re equipped with the necessary tools and materials, as well as the knowledge to choose the right amp and sub, you’re well-prepared to begin the installation process. In the next section, we’ll dive into the step-by-step instructions for installing your new amp and sub in your vehicle.
Preparing Your Vehicle For Amp And Sub Installation
Before diving into the exciting world of installing an amp and sub in your vehicle, there are a few crucial steps you need to take to ensure a successful and hassle-free installation. This section will guide you through the process of preparing your vehicle for amp and sub installation, helping you make informed decisions about the ideal location, available space, and potential wiring challenges.
Determining the Ideal Location for the Amp and Sub
One of the first considerations when installing an amp and sub in your vehicle is finding the perfect location for them. This decision can significantly impact the overall audio quality and integration with your car’s interior. Here are a few factors to keep in mind:
- Accessibility: Ensure that the chosen location allows for easy access to the amp and subwoofer for any future maintenance or adjustments.
- Air Flow: Proper air circulation around the amp is crucial to prevent overheating. Choose a location that allows for sufficient ventilation.
- Vibration and Rattles: Avoid installing the amp and sub in areas that can cause rattling or unwanted vibrations. Look for sturdy mounting points that minimize vibration transfer.
Evaluating Space and Mounting Options
Once you have determined the best location for your amp and sub, evaluate the available space and consider the mounting options:
- Space Constraints: Measure the dimensions of the chosen location to ensure that the amp and sub will fit comfortably without interfering with other car components.
- Mounting Techniques: Depending on the space available, you can opt for different mounting techniques such as surface mounting or custom-built enclosures. Choose the method that suits your vehicle and audio preferences.
- Weight Distribution: Consider the weight of the amp and sub and distribute it evenly across the mounting points to maintain balance and avoid potential damage to your vehicle.
Considering Wiring Lengths and Potential Interference
Wiring is a critical aspect of amp and sub installation that requires careful planning to ensure optimal performance. Consider the following points during the preparation stage:
- Wiring Lengths: Measure the distances between the amp, subwoofer, and other components. Choose wiring of appropriate lengths to ensure a clean and organized installation.
- Potential Interference: Take note of any potential interference from existing wires, electrical systems, or moving parts. Avoid routing the amp and sub wiring too close to these sources to minimize unwanted noise or signal disruption.
- Grounding: Identify suitable grounding points in your vehicle’s chassis to establish a solid electrical connection and minimize the risk of ground loop issues.
By considering the ideal location, evaluating available space and mounting options, and planning for wiring lengths and potential interference, you can lay the foundation for a successful amp and sub installation. Taking the time to prepare your vehicle adequately will ensure a seamless integration of the audio system, providing you with a premium sound experience on the road.
Wiring Setup For Amp And Sub Installation
Installing an amplifier and subwoofer in your car can take your audio experience to a whole new level. However, getting the wiring setup right is crucial to ensure optimal performance and safety. In this section, we will guide you through the process of wiring setup for amp and sub installation step by step. Following these instructions will help you achieve the best sound quality while maintaining a clean and professional-looking installation.
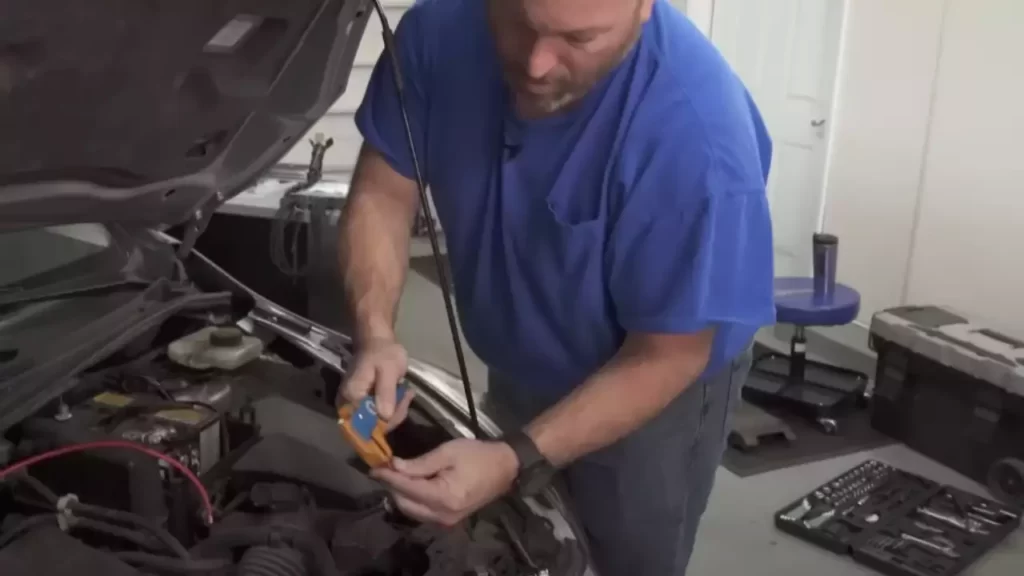
Connecting the Amp to the Car Battery
The first step in the wiring setup is to connect the amp to the car battery. This step ensures that your amplifier receives a steady and sufficient power supply. To do this:
- Locate the positive terminal of your car battery and connect the positive power wire of the amp to it.
- Connect the negative power wire of the amp to a suitable grounding point in your vehicle, such as a metal chassis bolt.
Choosing the Right Gauge of Power Wire
Selecting the appropriate gauge of power wire is essential for the efficient functioning of your amplifier. The gauge of the wire determines the amount of current that can flow to your amp. To choose the right gauge:
- Refer to the manufacturer’s recommendations or consult a professional to determine the appropriate gauge for your amplifier’s power requirements.
- Purchase a power wire of the recommended gauge and ensure it is long enough to reach from the battery to your amp location.
Installing the Fuse and Grounding the Amp
Installing a fuse and properly grounding the amp are crucial for protecting your amplifier and vehicle’s electrical system. Follow these steps:
- Install a fuse holder on the positive power wire near the battery.
- Insert the appropriate fuse into the fuse holder to protect your amp from electrical surges.
- Choose a suitable grounding point near your amplifier and use a grounding wire to connect it to the metal chassis of your vehicle.
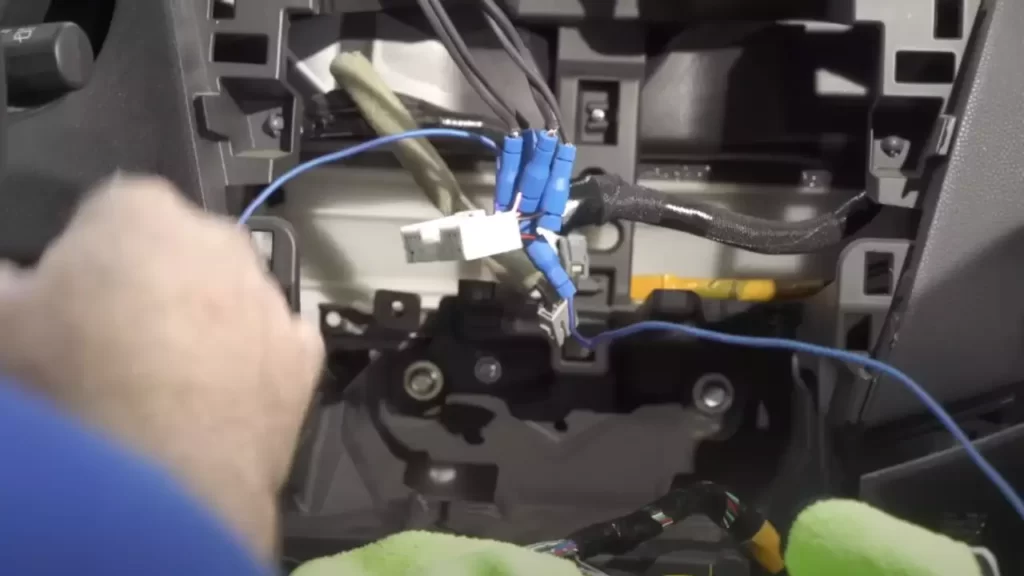
Running the RCA Signal Cables and Remote Wire
Properly connecting the RCA signal cables and remote wire ensures that your amplifier receives the necessary audio signals and power activation. Here’s what you need to do:
- Run the RCA signal cables from your head unit or signal processor to the amp location. Keep them away from power cables to avoid any interference.
- Connect the RCA cables to the appropriate inputs on the amplifier.
- Route the remote wire from the head unit to the amp location, ensuring it is connected to the remote terminal on the amp.
Routing the RCA Cables for Optimal Sound Quality
Routing the RCA cables properly helps minimize noise interference and ensures optimal sound quality. Follow these guidelines:
- Avoid running the RCA cables alongside power wires to prevent any interference or signal degradation.
- Keep the RCA cables away from sources of electrical noise, such as power lines or ignition components.
Connecting the Remote Wire for Power Activation
The remote wire is responsible for activating your amplifier when you turn on your car’s audio system. Follow these steps for a proper connection:
- Connect the remote wire to the remote terminal on the head unit.
- Ensure the remote wire is securely connected to the remote terminal on the amplifier.
- Test the connection by turning on your car’s audio system and verifying that the amplifier powers on.
Following these wiring setup instructions will help you install your amp and sub correctly, allowing you to enjoy enhanced audio performance while driving. Always consult your amplifier and vehicle manuals for specific instructions and safety guidelines.
Installing The Subwoofer In Your Vehicle
When it comes to enhancing your car’s audio system and achieving that deep, powerful bass, installing a subwoofer is a must. A subwoofer adds a whole new dimension to your listening experience, bringing out the low frequencies and giving your music that extra punch. In this section, we will guide you through the process of installing a subwoofer in your vehicle, covering everything from preparing the enclosure to wiring it to the amp. Let’s get started!
Preparing the Enclosure for the Subwoofer
The first step in installing a subwoofer is preparing the enclosure that will house it. The type of enclosure you choose can greatly impact the sound quality and performance of your subwoofer. There are several types of enclosures, including ported, sealed, bandpass, and infinite baffle. Each type has its own advantages and considerations, and it’s important to choose the one that best suits your needs and vehicle. Let’s take a closer look at each type:
Types of Subwoofer Enclosures
• Ported Enclosure: This type of enclosure features a vent or port that allows the air to escape from the enclosure, helping to enhance the bass response. Ported enclosures are known for producing louder bass and are generally recommended for larger vehicles.
• Sealed Enclosure: Sealed enclosures are airtight and provide a more accurate and tight bass response. They are ideal for smaller vehicles or those looking for a more precise bass performance.
• Bandpass Enclosure: Bandpass enclosures are a combination of sealed and ported enclosures, offering the best of both worlds. They provide deep bass and can be quite efficient, but they require careful tuning to achieve optimal performance.
• Infinite Baffle Enclosure: This type of enclosure utilizes the space behind the rear seat of the vehicle as the enclosure itself. It requires a large amount of space and careful planning, but it can provide excellent bass response and sound quality.
Securing the Enclosure in a Suitable Location
Once you have selected the appropriate enclosure for your subwoofer, the next step is to secure it in a suitable location within your vehicle. You want to choose a spot that is sturdy and won’t interfere with other components or passengers. Some common locations include the trunk, under the seats, or in custom-built enclosures. Make sure to secure the enclosure properly to prevent any movement or vibrations that could affect the sound quality.
Wiring the Subwoofer to the Amp
Now that you have the subwoofer and enclosure in place, it’s time to wire it to the amplifier. The amplifier is responsible for powering the subwoofer and driving the bass. Start by connecting the positive and negative speaker wires from the subwoofer to the corresponding terminals on the amplifier. Ensure that the wires are securely connected and make good contact.
Matching Speaker Wire Gauge to the Subwoofer’s Power Handling
When selecting the speaker wire gauge for your subwoofer installation, it’s important to match it to the power handling capabilities of your subwoofer. Using wire that is too thin can result in power loss and reduced performance, while wire that is too thick is unnecessary and can be difficult to work with. Consult the manufacturer’s specifications for your subwoofer to determine the appropriate gauge.
Properly Connecting the Speaker Wires and Terminal
Lastly, it is crucial to properly connect the speaker wires and terminal to ensure a solid and secure connection. Strip the wire ends, insert them into the terminal, and tighten them securely. Avoid leaving any exposed wire or loose connections as they can cause distortion or damage to your equipment.
In conclusion, installing a subwoofer in your vehicle can greatly enhance your audio experience, bringing depth and power to your favorite music. By following these steps and considering the type of enclosure, securing the location, wiring to the amp, matching the speaker wire gauge, and properly connecting the wires and terminal, you’ll be well on your way to enjoying immersive bass in your car.
Connecting The Amp And Sub To The Car Stereo
When it comes to enhancing your car audio system with an amplifier (amp) and subwoofer (sub), one crucial step is correctly connecting them to your car stereo. This is necessary to ensure optimal performance and a rich audio experience. In this guide, we will discuss the various steps involved in connecting the amp and sub to your car stereo, including identifying the appropriate inputs, utilizing preamp outputs or speaker-level inputs, ensuring compatibility, adjusting settings and levels, and fine-tuning sound balance.
Identifying the Appropriate Input on the Car Stereo
The first step in connecting your amp and sub to the car stereo is identifying the appropriate input on your car stereo. Most car stereos usually offer RCA input jacks, also known as preamp outputs, which are the common and recommended method for connecting an amp and sub. These RCA jacks can be labeled as “Subwoofer output” or “Subout” on your car stereo. Additionally, some car stereos may provide speaker-level inputs, which allow you to connect the amp and sub directly to the speaker wires of your car stereo.
Utilizing Preamp Outputs or Speaker-Level Inputs
If your car stereo has RCA input jacks, consider utilizing these preamp outputs for a cleaner and higher-quality audio signal. Simply connect the RCA cables from the preamp outputs on the car stereo to the corresponding inputs on the amp. On the other hand, if your car stereo only offers speaker-level inputs, connect the speaker wires from the car stereo to the speaker-level inputs on the amp. Ensure that the polarity of the connections is correct to prevent any phase cancellation or audio distortion.
Ensuring Compatibility Between the Amp and Car Stereo
Before connecting the amp and sub to your car stereo, it’s important to ensure compatibility between the devices. The power output of the amp should match the power handling capabilities of the sub. Additionally, check if the impedance (measured in ohms) of the amp and sub are compatible. Connecting incompatible devices can result in poor audio quality or potentially damage your equipment.
Adjusting Settings and Levels for Optimal Performance
Once the amp and sub are connected to the car stereo, it’s time to fine-tune the settings and levels for optimal performance. Begin by adjusting the gain, which controls the input sensitivity of the amp. Setting the gain correctly helps prevent distortion and maximize sound quality. Additionally, adjust the crossover settings to ensure that only the desired frequency range is sent to the subwoofer. Fine-tuning these settings can make a significant difference in the audio output.
Adjusting Gain, Crossover Settings, and Bass Boost
When adjusting the gain, start with a low setting and gradually increase it until you achieve the desired level of bass. Next, adjust the crossover settings to determine which frequencies the subwoofer will reproduce. Lower crossover frequencies typically result in deeper bass, while higher crossover frequencies provide a more balanced sound. If your amp has a bass boost feature, you can experiment with it to further enhance the low-frequency response. However, be cautious not to overpower the subwoofer or damage it by excessively boosting the bass.
Fine-tuning Sound Balance and Subwoofer Level Control
After adjusting the gain, crossover settings, and bass boost, it’s essential to fine-tune the sound balance to your preferences. This can involve adjusting the equalizer settings on your car stereo to enhance specific audio frequencies. Additionally, many amps come with a subwoofer level control, allowing you to adjust the volume of the subwoofer independently. Experiment with different settings until you achieve the perfect balance between the subwoofer’s bass output and the rest of the audio system.
By following these steps and paying attention to details, you can successfully connect your amp and sub to your car stereo, creating an immersive audio experience that will enhance your drives for years to come.
Testing And Troubleshooting Amp And Sub Installation
Once you have successfully installed your new amplifier (amp) and subwoofer (sub), the next step is to ensure everything is functioning optimally. In this section, we will discuss various tests and troubleshooting techniques to help you gauge the performance of your amp and sub installation.
Checking for Proper Power and Ground Connections
One of the first things to verify is the power and ground connections. Improper connections can lead to a host of issues, including weak or distorted sound. To ensure everything is properly connected, follow these steps:
- Inspect the power cable and confirm it is securely connected to the positive terminal of the vehicle’s battery.
- Check the ground connection by ensuring the amp’s ground wire is securely attached to a clean metal surface on the vehicle’s chassis.
- Make sure the fuse on the power cable is intact and has the correct rating for your setup.
Verifying the Amp’s Power Indicator Lights
Many amplifiers come equipped with power indicator lights to signify whether the amp is receiving proper power. These lights can provide valuable information regarding the health of your installation. Here’s how you can verify the amp’s power indicator lights:
- Turn on your vehicle’s ignition and observe the power indicator lights on the amplifier.
- Check if the lights illuminate as expected. If they don’t, it may indicate an issue with the power or remote wire connection.
- Refer to your amp’s manual to understand the specific meaning of each indicator light and troubleshoot accordingly.
Troubleshooting Ground Issues and Solutions
Ground issues can negatively impact the performance of your amp and sub. If you experience problems such as excessive noise, weak bass, or intermittent sound, addressing the ground connection could be the solution. Follow these steps to troubleshoot and resolve ground issues:
- Double-check the ground connection and ensure it is properly secured to a clean and unpainted metal surface.
- Clean the ground contact point to eliminate any potential corrosion or debris that might hinder the connection.
- Consider relocating the ground connection to a different spot on the vehicle’s chassis if the previous steps don’t resolve the issue.
Testing the Sound Quality and Performance
Now that you have confirmed that the power, ground, and indicator lights are functioning correctly, it’s time to evaluate the sound quality and performance of your amp and sub. Follow these steps:
- Play a variety of audio tracks to assess the overall sound quality and clarity.
- Ensure the sound is balanced across all frequencies and that there are no distortions or clipping noises.
- Listen for any unwanted rattling or buzzing sounds, which may indicate poor installation or inadequate soundproofing.
Assessing Bass Response and Audio Clarity
Bass response and audio clarity are crucial aspects of any amp and sub installation. To assess these factors, apply the following evaluation techniques:
- Listen for smooth, deep bass tones without any muddiness or distortion.
- Ensure the bass complements the other audio frequencies without overpowering them.
- Pay attention to the clarity of vocals and instruments, ensuring they are crisp and well-defined.
Identifying and Addressing Potential Issues
Even with proper installation, issues may still arise. It is essential to identify and address them promptly to maintain optimal performance. Here are some common potential issues to be aware of:
| Potential Issues | Solutions |
|---|---|
| Overheating amp | Check for proper ventilation and consider installing a cooling fan if necessary. |
| Excessive distortion | Double-check the gain settings and adjust them as needed to prevent clipping. |
| Intermittent or no sound | Inspect all connections and wires for loose or damaged components. Replace or fix as necessary. |
By following these testing and troubleshooting techniques, you can ensure your amp and sub installation is optimized for the best sound quality and performance. Don’t hesitate to consult professional help if you encounter persistent issues that you cannot resolve on your own.
Maintaining And Upgrading Your Amp And Sub System
Once you have successfully installed your amp and subwoofer, it’s important to prioritize regular maintenance and consider upgrading your car audio system over time. By doing so, you can ensure the longevity and optimal performance of your amp and sub system.
1. Regular Maintenance Tips for Longevity and Performance
To keep your amp and subwoofer in great shape, follow these maintenance tips:
- Check the wiring connections regularly to ensure they are secure and free from any damage.
- Inspect the power and ground cables for any signs of wear or corrosion. Replace them if necessary.
- Clean the speaker cones and grilles to prevent dust and debris buildup, which can affect sound quality.
- Keep the amplifier and subwoofer away from extreme temperatures and humidity, as they can damage the components.
2. Cleaning and Protecting the Amp and Subwoofer
To maintain the appearance and performance of your amp and subwoofer, it’s essential to clean and protect them properly. Follow these steps:
- Disconnect the power source before cleaning.
- Use a soft cloth or brush to gently remove dust and dirt from the surface of the amplifier and subwoofer.
- Avoid using harsh chemicals or abrasive cleaners, as they may damage the finish.
- Apply a suitable protectant product, such as a vinyl conditioner or UV protectant, to prevent fading and cracking.
3. Monitoring and Adjusting Settings Over Time
Regularly monitor the settings of your amp and sub system to ensure optimal performance. Here are some steps to follow:
- Pay attention to the gain and crossover settings and adjust them as needed to achieve the desired sound balance.
- Periodically test your system with different audio sources and genres to ensure it is producing accurate and well-balanced sound.
- Monitor the performance of your speakers and subwoofer for any signs of distortion or vibration.
- Consider investing in a sound level meter to precisely measure and adjust the output levels of your audio system.
4. Upgrading and Expanding your Car Audio System
If you feel the need for an audio upgrade or want to expand your car audio system further, consider the following:
- Add additional amplifiers and subwoofers to enhance the power and bass response of your audio system.
- Upgrade your speakers to higher quality components for improved sound clarity and fidelity.
- Invest in a digital signal processor (DSP) to fine-tune the audio signals and optimize the soundstage.
5. Exploring Advanced Audio Processing Technologies
To take your car audio experience to the next level, explore advanced audio processing technologies:
- Consider incorporating digital sound processors (DSPs) that offer features like time alignment, equalization, and crossover adjustments.
- Explore technologies like active noise control and active sound enhancement to further enhance the overall audio quality inside your vehicle.
By following these maintenance and upgrading tips, you can ensure the longevity and optimal performance of your amp and sub system. Regular care, cleaning, and adjustments will help you enjoy a powerful and immersive audio experience on the road.
Frequently Asked Questions
How Do I Connect My Subwoofer To My Amp?
To connect your subwoofer to your amp, follow these steps: 1. Locate the subwoofer output on your amp. 2. Connect an RCA cable from the amp’s subwoofer output to the subwoofer’s input. 3. Ensure the subwoofer is powered on. 4.
Adjust the volume and crossover settings on both the amp and subwoofer to your preference. 5. Test the connection by playing music or a movie with deep bass.
Is It Ok To Put Amp On Sub Box?
Yes, it is okay to place an amplifier (amp) on a sub box. This setup can enhance the bass output and overall sound quality of your subwoofer system. However, it is essential to ensure that the amp is correctly mounted and securely attached to the sub box to avoid any damage or complications.
Do I Need An Amp If I Install A Subwoofer?
Yes, you need an amp to install a subwoofer as it requires additional power to deliver deep bass frequencies. An amplifier amplifies the audio signal and provides the necessary power for the subwoofer to produce low-frequency sounds with clarity.
Can You Hook Up A Subwoofer And Amp To A Stock Radio?
Yes, you can connect a subwoofer and amp to a stock radio. Simply use a line output converter to connect the amp and subwoofer to the stock radio’s speaker wire. This allows you to enhance the bass and overall audio quality of your car’s sound system.
Conclusion
Installing an amp and subwoofer doesn’t have to be daunting. By following these simple steps, you can enhance your car audio experience. Remember to gather all the necessary tools, choose the right location for installation, and connect the wires correctly.
This way, you can enjoy the deep, rich bass that an amp and sub combo can provide while driving. Happy installing!