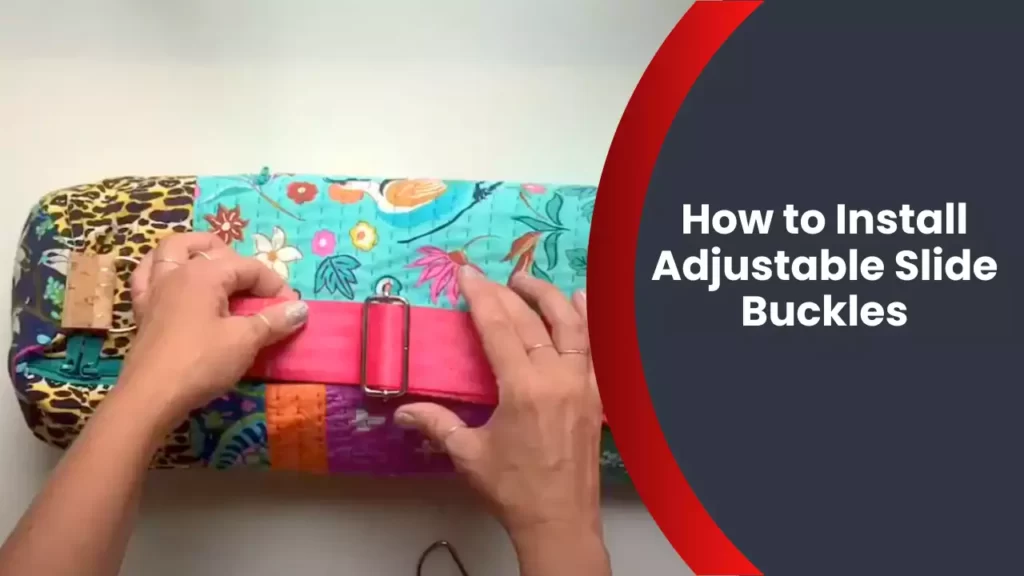
To install adjustable slide buckles, thread the strap through the buckle and secure it with stitching or a metal fastener. This ensures a secure and adjustable fit for various applications.
Find out how to properly attach adjustable slide buckles and achieve the desired functionality by following these simple steps: Adjustable slide buckles are versatile hardware components used in various applications such as belts, bags, and straps. With their ability to provide quick and easy adjustment, they offer convenience and functionality.
Whether you are a DIY enthusiast or a professional, learning how to install adjustable slide buckles is essential. In this guide, we will take you through the step-by-step process of attaching these buckles to your straps, ensuring a secure and adjustable fit. So let’s dive in and learn how to install adjustable slide buckles without any hassle.
Understanding Adjustable Slide Buckles
In the world of crafting and DIY projects, adjustable slide buckles play an important role. These small but mighty accessories are versatile and can be used in various applications. Whether you are making a belt, a purse strap, or even a dog leash, adjustable slide buckles provide a convenient solution for adjusting and securing the length of a strap.
What are adjustable slide buckles?
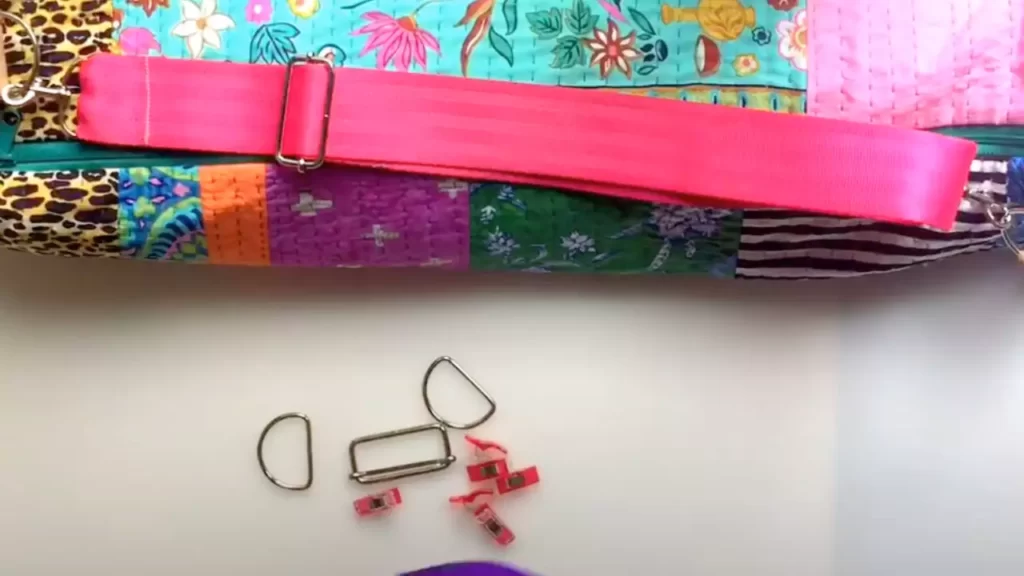
Adjustable slide buckles, also known as strap adjusters, are hardware components used to secure and adjust the length of straps. They consist of a rectangular frame with one or two slots and a central bar. The slots on the frame allow the strap to pass through, while the bar can be moved to tighten or loosen the strap as needed. These buckles are typically made of metal or plastic, depending on the intended application.
Types of adjustable slide buckles
There are different types of adjustable slide buckles available, each designed for specific purposes. The two main types are single-bar slide buckles and double-bar slide buckles.
Single-bar slide buckles: These buckles have a single slot and a bar that is moved back and forth to adjust the strap’s length. They are commonly used in applications where only one adjustment point is needed.
Double-bar slide buckles: As the name suggests, these buckles have two slots and two bars. They provide the flexibility of adjusting the strap from both ends simultaneously. This type of buckle is often used in applications where symmetrical adjustments are required.
Benefits of using adjustable slide buckles
Using adjustable slide buckles offers several benefits that make them a popular choice for various DIY projects.
- Versatility: Adjustable slide buckles can be used with a wide range of strap widths, making them highly versatile. Whether you have narrow straps or wide ones, these buckles can accommodate various sizes with ease.
- Adjustability: The primary purpose of these buckles is to easily adjust the length of a strap. This adjustability allows for a comfortable fit and ensures the strap stays securely in place.
- Durability: Adjustable slide buckles are typically made of sturdy materials such as metal or strong plastic. This durability ensures that the buckles can withstand regular use without breaking or deforming.
- Enhanced aesthetics: These buckles are available in a variety of styles and finishes, including metallic and colorful options. This variety allows you to choose a buckle that complements your project and enhances its overall aesthetic appeal.
- Easy to use: Installing adjustable slide buckles is a straightforward process that requires minimal effort. With just a few simple steps, you can securely attach the buckle to your strap and enjoy the convenience of adjustable length.
Whether you are a seasoned crafter or a beginner, understanding the functionality and benefits of adjustable slide buckles can open up a world of possibilities for your DIY projects. From achieving the perfect fit to adding a touch of style, these buckles are a valuable tool in your creative arsenal.
Tools And Materials Required
Installing adjustable slide buckles may seem like a challenging task, but with the right tools and materials, it becomes a breeze. In this section, we will walk you through the essential tools you need and the recommended materials for a secure installation. So, let’s dive right in!
Essential tools for installation
Before you start installing adjustable slide buckles, make sure you have these essential tools at your disposal. Having them on hand will make the installation process smoother and more efficient:
- Tape Measure: A reliable tape measure will help you accurately measure the length and width required for your buckles.
- Pliers: Pliers are necessary for gripping and adjusting the buckles. Make sure to choose pliers with a comfortable grip to avoid any hand fatigue.
- Screwdriver: Depending on the type of buckles you are installing, a screwdriver may be needed to fasten them securely in place.
- Scissors or Craft Knife: These tools come in handy when trimming excess straps or cutting through materials during the installation process.
Recommended materials for a secure installation
To ensure a secure installation that withstands regular usage, it’s important to use high-quality materials. Here are the recommended materials for a reliable installation of adjustable slide buckles:
| Material | Why it’s recommended |
|---|---|
| Durable Straps: | Choose straps made of strong and sturdy materials like nylon or polyester. These materials offer excellent durability and resistance to wear and tear. |
| Matching Thread: | Using matching thread ensures a seamless and visually appealing installation. The thread should be strong enough to withstand tension and regular usage. |
| Double-Sided Adhesive Tape: | This adhesive tape is ideal for securing the straps temporarily before applying more permanent fastening methods, such as stitching or riveting. |
| Heavy-Duty Rivets: | If you’re looking for an extra layer of security, consider using heavy-duty rivets to fasten the buckles. They provide a strong and permanent connection. |
By having these tools and materials ready, you’re well-prepared to take on the installation of adjustable slide buckles. In the next section, we will guide you through the step-by-step installation process, ensuring your buckles are securely in place.
Preparing For Installation
Before you can install an adjustable slide buckle, it’s important to properly prepare for the installation process. This involves choosing the right location for the buckle, checking its compatibility with the strap material, and cleaning and prepping the strap surface. By following these steps, you can ensure a successful and secure installation of your adjustable slide buckle.
Choosing the Right Location for the Buckle
When selecting the location for your adjustable slide buckle, consider factors such as functionality and accessibility. The buckle should be positioned in a place that allows for easy adjustment of the strap length while also ensuring that it remains securely in place during use.
Here are a few key points to keep in mind:
- Choose a location where the buckle won’t cause discomfort or irritation when worn.
- Ensure the buckle doesn’t interfere with any other parts of the item or garment.
- Consider the weight and pull of the strap when determining the position of the buckle.
Checking Compatibility with the Strap Material
It’s essential to make sure that the adjustable slide buckle you are installing is compatible with the strap material. Different materials may have different requirements for installation, so it’s important to check the manufacturer’s recommendations.
Here are a few steps to help you determine compatibility:
- Refer to the manufacturer’s instructions or documentation for the recommended strap materials.
- If there are no specific recommendations, consider the weight, thickness, and flexibility of the strap material.
- Ensure the buckle is designed to accommodate the width and thickness of your strap.
Cleaning and Prepping the Strap Surface
Before installing the adjustable slide buckle, it’s crucial to clean and prep the surface of the strap to ensure proper adhesion. This helps create a strong bond between the strap material and the buckle.
Follow these steps to clean and prep the strap surface:
- Remove any dirt, dust, or debris from the strap using a soft brush or cloth.
- If the strap material is porous, consider using a mild detergent and water to clean it.
- Ensure the strap surface is completely dry before applying any adhesive or installing the buckle.
By taking the time to prepare for the installation of your adjustable slide buckle, you can ensure that it is positioned correctly, compatible with the strap material, and secure for use. Following these steps will help you achieve a professional and long-lasting installation.
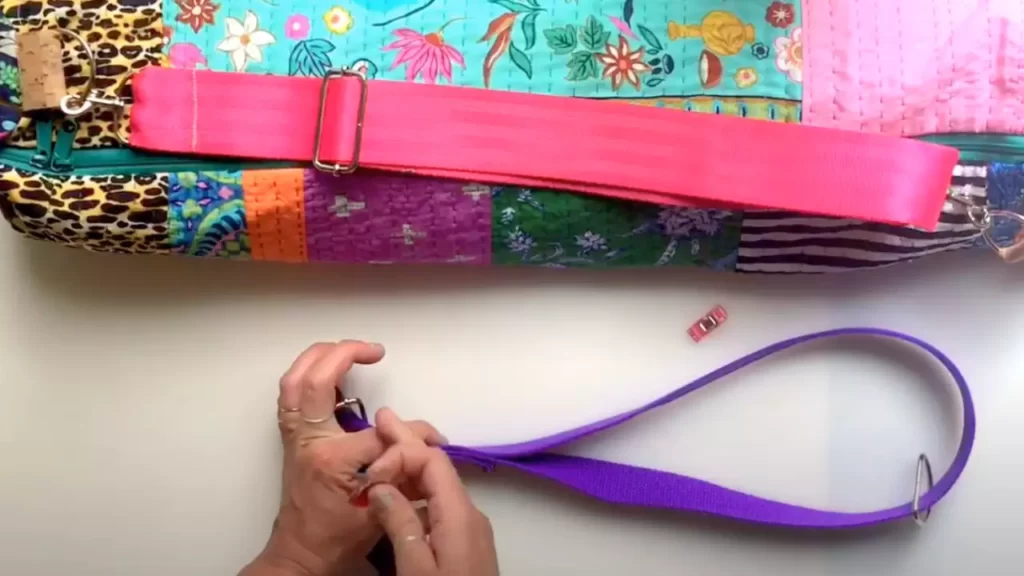
Step 1: Preparing The Strap
Before you can install adjustable slide buckles, it’s important to prepare the strap properly. This step is crucial to ensure a secure and professional-looking result. In this section, we will cover two key aspects of preparing the strap: measuring and cutting it to the desired length, and sealing the cut end to prevent fraying. Let’s get started!
Measuring and Cutting the Strap to the Desired Length
To begin, you’ll need to determine the length of the strap that best suits your needs. This will depend on the purpose of your project and the specific requirements of the adjustable slide buckle you are using.
Here’s a simple guide to help you measure and cut the strap accurately:
- Start by determining the desired length of the strap. If you are replacing an old strap, you can use it as a reference. Otherwise, consider the functionality and fit of your project.
- After measuring the desired length, mark it on the strap using a fabric marker or a small piece of tape. Double-check your measurement to ensure accuracy.
- Use sharp scissors or a utility knife to cut the strap along the marked line. Be sure to cut in a straight line to achieve neat and clean edges.
By following these steps, you can obtain a strap that is the perfect length for your project. Now that you have cut the strap, it’s time to prevent fraying by sealing the cut end.
Sealing the Cut End of the Strap to Prevent Fraying
Preventing the strap from fraying is essential for both the durability and aesthetics of your adjustable slide buckle installation. By sealing the cut end, you can avoid unraveling threads and maintain the integrity of the strap for long-lasting use.
Here’s a quick and effective method to seal the cut end of the strap:
- Apply a small amount of fabric glue or fray check solution to the cut end of the strap.
- Gently press the cut end together to ensure the glue or fray check is evenly distributed and absorbed by the threads.
- Let the sealant dry completely according to the manufacturer’s instructions. This will usually take a few minutes.
Once the sealant is dry, you can proceed with installing the adjustable slide buckles without worrying about fraying or compromising the quality of your strap.
Remember, properly preparing the strap is a crucial first step in installing adjustable slide buckles. By measuring and cutting the strap to the desired length and sealing the cut end, you can ensure a professional and secure result for your project.

Step 2: Inserting The Buckle
Once you have identified the correct orientation of the buckle, you can proceed to insert it into the strap. This step is crucial as it ensures the buckle functions properly and provides the desired fit. Follow these simple instructions to expertly insert the adjustable slide buckle:
Identifying the correct orientation of the buckle
- First, locate the adjustable slide buckle and examine its design. Depending on the style of the buckle, you may find a directional arrow or other markings that indicate the correct orientation.
- It is essential to ensure the buckle is facing the right way to achieve the desired functionality. Placing it incorrectly may result in an uncomfortable or ineffective fit.
Sliding the strap through the buckle’s slots
Once you have identified the correct orientation of the buckle, it’s time to slide the strap through the slots. Follow these steps:
- Take one end of the strap and thread it through the bottom slot of the buckle, from the underside to the top.
- Ensure the strap is centered and does not twist as you thread it through.
- Then, take the other end of the strap and pass it through the top slot of the buckle, from the top side to the underside.
- Again, ensure the strap remains centered and does not twist.
By properly sliding the strap through the buckle’s slots, you are securing the strap in place and preparing it for adjustment.
Adjusting the strap length for a desired fit
Now that the strap is threaded through the buckle, you can adjust its length to achieve the desired fit. Follow these steps:
- Hold the buckled strap and pull the loose end to tighten it. This will reduce the length of the strap.
- Continue adjusting the strap length until you reach the desired fit. Check the tightness and comfort as you make the adjustments.
Remember to ensure both sides of the strap are adjusted evenly to maintain balance and symmetry.
Successfully installing adjustable slide buckles is key to achieving a comfortable and customized fit for your straps. By following these simple steps, you can confidently insert the buckle, slide the strap through, and adjust it to your preferred length for a secure and personalized fit.
Step 3: Securing The Buckle
Once you have properly adjusted the slide buckle to your desired position, the next step is to secure it firmly in place. This will prevent the buckle from shifting or slipping during use, ensuring the stability and functionality of your strap. In this section, we will discuss two effective methods for securing the buckle: folding and stitching the strap to prevent slippage, and using rivets or screws for a more secure attachment.
Folding and Stitching the Strap to Prevent Slippage
To ensure the buckle stays in place, you can fold and stitch the strap at the end where the buckle will be attached. This method provides an additional layer of security and prevents any slippage or movement of the buckle. Here’s a step-by-step guide on how to fold and stitch the strap:
- Begin by folding the end of the strap over itself, creating a loop that is slightly larger than the buckle.
- Place the folded end of the strap through the buckle, making sure it is centered and aligned.
- With the strap folded and aligned, use a durable and strong thread (such as nylon or polyester) to stitch through both layers of the strap. Start stitching from one side and go all the way around the folded end, ensuring the thread passes through both layers securely.
- Once you have completed stitching around the folded end, tie a secure knot to finish off the stitching. Trim any excess thread if necessary.
By folding and stitching the strap, you create a reinforced section that prevents slippage and provides a secure hold for the buckle. This method is particularly useful for straps that will undergo frequent movement or heavy use.
Using Rivets or Screws for a More Secure Attachment
Another effective method for securing the buckle is by using rivets or screws. This method provides a more permanent and robust attachment, making it ideal for heavy-duty applications. Follow these steps to ensure a secure attachment using rivets or screws:
- After adjusting the buckle to your desired position, place it on the strap in the designated area.
- Using a marker or pen, mark the positions where the holes for the rivets or screws will be made.
- Using a leather punch or a suitable tool for the type of material you are working with, create holes at the marked positions.
- Apply a small amount of glue (specifically designed for the material) around the holes to reinforce the attachment.
- Insert the rivets or screws through the holes, from the front side of the strap to the back side.
- If using rivets, secure them by setting the rivet cap in place and using a rivet setter tool to compress and secure the rivet. If using screws, tighten them securely using a suitable screwdriver or tool.
- Ensure that the buckle is securely fastened and has no movement or play in the attachment.
By using rivets or screws, you create a strong and durable attachment that will withstand the rigors of regular use. This method is especially recommended for heavy-duty straps or applications that require a higher level of security and stability.
In conclusion, securing adjustable slide buckles is crucial for ensuring the stability and functionality of your strap. Whether you choose to fold and stitch the strap or use rivets and screws, these methods will provide a secure attachment, preventing slippage and ensuring the buckle stays in place. Choose the method that best suits your needs and enjoy the reliability and convenience of your newly secured adjustable slide buckles.
Code Example:
- Begin by folding the end of the strap over itself, creating a loop that is slightly larger than the buckle.
- Place the folded end of the strap through the buckle, making sure it is centered and aligned.
- With the strap folded and aligned, use a durable and strong thread (such as nylon or polyester) to stitch through both layers of the strap. Start stitching from one side and go all the way around the folded end, ensuring the thread passes through both layers securely.
- Once you have completed stitching around the folded end, tie a secure knot to finish off the stitching. Trim any excess thread if necessary.
“`
Step 4: Testing And Adjusting The Buckle
Now that you have successfully installed the adjustable slide buckle, it’s time to test its functionality and make any necessary adjustments to ensure a snug fit. This step is crucial as it guarantees the buckle will serve its purpose effectively and securely. Here’s what you need to do:
Checking the buckle’s functionality and movement
The first thing you must do is to check whether the buckle moves smoothly and functions properly. To do this:
- Hold the strap ends firmly.
- Attempt to slide the buckle up and down the strap.
- Observe if the buckle moves easily without any resistance.
If you encounter any difficulty while sliding the buckle, it may indicate a problem. In such cases, try applying a small amount of lubricant to the moving parts of the buckle. This should help improve its functionality.
Making any necessary adjustments for a snug fit
Next, it’s time to ensure that your adjustable slide buckle provides a snug fit. Follow these steps:
- Place the strap over the item you are securing.
- Thread one end of the strap through the adjustable slide buckle.
- Position the buckle at the desired tightness.
- Pass the strap through the buckle again, creating a loop.
- Ensure the fit is secure but not too tight, allowing for adjustments if needed.
After securing the strap and adjusting the buckle, check if the item remains securely in place. If it does, congratulations! You have successfully installed and adjusted the adjustable slide buckle.
Remember, testing and adjusting the buckle is crucial for ensuring its functionality and providing a secure fit for your items. By following these simple steps, you can enjoy the benefits of an adjustable slide buckle, knowing that your belongings are secure and well-protected.
Troubleshooting Common Installation Issues
While installing adjustable slide buckles for your straps, you may encounter a few common issues that can hinder the functionality and overall success of the installation process. This section will provide you with valuable insights on how to troubleshoot and overcome these problems, ensuring a smooth and hassle-free installation experience.
Strap slippage and how to prevent it
Strap slippage can be a frustrating problem that compromises the durability and security of your adjustable slide buckles. Here are a few tips to help you prevent strap slippage:
- Ensure that the strap material is compatible with the buckle, considering factors such as thickness and texture.
- Tighten the buckle adequately to provide optimal grip and prevent any unwanted movement.
- If your straps tend to slip, you can use a non-slip material, such as rubber or silicone, between the strap and the buckle to enhance friction and stability.
- Regularly inspect your straps and buckles to identify any signs of wear and tear. Replace damaged components promptly to avoid potential slippage issues.
Buckle misalignment and how to fix it
If you notice that your adjustable slide buckle is misaligned, it’s important to address the issue to ensure proper functioning. Follow these steps to fix buckle misalignment:
- Loosen the strap tension to allow easier adjustment of the buckle position.
- Ensure that the strap is threaded correctly through the buckle slots, aligning it as straight as possible.
- Gently manipulate the buckle, moving it in the desired direction to achieve proper alignment.
- Once aligned, tighten the strap tension again to secure the buckle in place.
Possible reasons for buckle malfunction and troubleshooting tips
If you come across a malfunctioning adjustable slide buckle, here are some possible reasons and troubleshooting tips:
| Possible Reason | Troubleshooting Tip |
|---|---|
| The buckle is jammed or stuck | Apply some lubrication, such as silicone spray, to loosen the mechanism. If the problem persists, inspect the buckle for any obstructions or damage that may require repair or replacement. |
| The buckle is not engaging properly | Check if the straps are correctly threaded and tensioned. Adjust as needed to ensure proper engagement. Additionally, inspect the buckle for any signs of wear or damage that might affect its functionality. |
| Strap release mechanism is not working | Examine the release mechanism for any debris or dirt accumulation that may hinder its operation. Clean the mechanism thoroughly and ensure smooth movement. If the problem persists, consider replacing the buckle. |
By addressing these common issues and applying the troubleshooting tips provided, you will be able to overcome installation problems and ensure the optimal performance of your adjustable slide buckles.
Maintenance And Care Tips
Cleaning and maintaining adjustable slide buckles
Proper maintenance and cleaning is crucial to ensure the longevity of your adjustable slide buckles. Regular care will help keep them functioning smoothly and looking their best. Here are some tips to keep in mind:
- Remove dirt and debris: Start by removing any dirt, sand, or debris that may have accumulated on your buckles. Use a soft brush or cloth to gently scrub away the particles. Avoid using sharp or abrasive tools as they may damage the buckle’s surface.
- Wash with mild soap: For a deeper clean, you can wash your adjustable slide buckles with mild soap and water. Fill a bowl or sink with warm water and add a small amount of gentle soap. Submerge the buckles and use a soft cloth or sponge to clean them. Rinse thoroughly with clean water and pat dry with a towel.
- Avoid harsh chemicals: It’s important to note that harsh chemicals, such as bleach or strong cleaners, should never be used on your buckles. These can cause discoloration or corrosion, compromising their function and appearance.
- Dry thoroughly: After cleaning, make sure to dry your adjustable slide buckles completely before reattaching them. Moisture can lead to rust or other damage. Air-drying is recommended, but if you’re in a hurry, you can use a clean towel to gently remove excess water.
- Store properly: When not in use, store your adjustable slide buckles in a dry and clean place. Avoid exposing them to extreme temperatures or direct sunlight, as this can cause fading or warping over time.
Repairing or replacing damaged buckles
Even with proper care, adjustable slide buckles may occasionally suffer damage. In such cases, it’s essential to address the issue promptly to prevent further deterioration. Follow these guidelines for repairing or replacing damaged buckles:
- Assess the damage: Carefully examine the buckle to determine the extent of the damage. Look for cracks, breaks, or any other visible signs of wear or tear.
- Repair options: If the damage is minor, you may be able to fix it yourself. Small cracks or loose parts can often be glued or reattached using a suitable adhesive. However, for more significant damage, it’s recommended to seek professional help or consider replacing the buckle entirely.
- Replace if necessary: In some cases, the damage may be beyond repair, or you may prefer to replace the buckle for aesthetic reasons. Look for a replacement buckle that matches the size, style, and functionality of the original one. You can find adjustable slide buckles at local craft stores or online retailers specializing in sewing or hardware supplies.
Extending the lifespan of your buckles
By following these tips, you can maximize the lifespan of your adjustable slide buckles, ensuring continued functionality and appearance:
- Avoid excessive force: When using adjustable slide buckles, avoid applying excessive force or straining them beyond their intended capacity. Doing so may lead to damage or deformation.
- Check for loose components: Regularly inspect your buckles for loose parts or screws. Tighten them gently if needed. Loose components can affect the buckle’s performance and stability.
- Keep away from sharp objects: To prevent scratches or abrasions, store your adjustable slide buckles away from sharp objects or rough surfaces.
- Replace worn-out straps: If the straps attached to your adjustable slide buckles become worn or damaged, replacing them promptly can help avoid additional stress on the buckles themselves.
- Periodic lubrication: Apply a small amount of silicone or other suitable lubricant to the moving parts of your buckles on occasion. This will help maintain their smooth operation.
- Regular inspections: Make it a habit to inspect your adjustable slide buckles periodically for signs of wear, rust, or any other issues. Addressing potential problems early can prevent further damage and extend their lifespan.
Frequently Asked Questions
How Do You Set Up An Adjustable Buckle?
To set up an adjustable buckle, follow these steps: 1. Thread the strap through the buckle. 2. Determine the desired length and pull the strap accordingly. 3. Lock the buckle by securing it in place. 4. Adjust as needed for a comfortable fit.
How Do You Put A Slide Adjuster On A Strap?
To put a slide adjuster on a strap, first thread the strap through the adjuster slot. Then, slide the adjuster along the strap until it reaches the desired length. Pull the loose end of the strap to tighten, and adjust as needed.
How Do You Use An Adjustable Slide Buckle Belt?
To use an adjustable slide buckle belt, simply thread the belt through the buckle and pull tight to adjust the fit. The slide buckle allows for easy tightening or loosening, making it simple to find the perfect fit for your waist.
Enjoy the convenience and versatility of this type of belt!
How Do You Put A Slide Buckle On A Belt?
To put a slide buckle on a belt, first, thread the loose end of the belt through the buckle’s center bar. Then, slide the buckle towards the belt’s other end, adjusting the fit as desired. Finally, pull the belt tight and secure it by sliding the buckle’s prong into one of the pre-punched holes.
Conclusion
To wrap up, installing adjustable slide buckles can greatly enhance the functionality and versatility of your projects. With simple steps and basic tools, you can easily secure straps and adjust tension as needed. By following the tips and techniques mentioned in this blog post, you’ll be well-equipped to tackle any project requiring adjustable slide buckles.
So go ahead, get creative and enjoy the added convenience these buckles bring to your designs. Start exploring the endless possibilities today!