To install adhesive wallpaper, first prepare the surface by cleaning it thoroughly. Then, peel off the backing and carefully stick the wallpaper onto the wall, smoothing out any bubbles or wrinkles as you go.
Installing adhesive wallpaper is a simple and cost-effective way to transform the look of a space. Whether you’re looking to add a pop of color or create a statement wall, adhesive wallpaper offers a convenient solution. We’ll explain how to properly install adhesive wallpaper in just a few easy steps.
By following these guidelines, you’ll be able to achieve a professional-looking result that will instantly update your room’s aesthetic. So, let’s dive in and discover the straightforward process of installing adhesive wallpaper.
Understanding Adhesive Wallpaper
What is adhesive wallpaper?
Adhesive wallpaper, also known as self-adhesive wallpaper or peel-and-stick wallpaper, is an innovative and versatile alternative to traditional wallpaper. Unlike traditional wallpaper that requires glue or paste for installation, adhesive wallpaper comes with a pre-applied adhesive backing. This allows for hassle-free and mess-free installation, making it a popular choice among homeowners and renters alike.
Benefits of using adhesive wallpaper
Using adhesive wallpaper offers several advantages over traditional wallpaper. Here are some key benefits:
1. Easy installation: With adhesive wallpaper, you can say goodbye to the tedious and messy process of applying glue or paste. Simply peel off the backing and stick the wallpaper onto a clean and dry surface. It’s a DIY-friendly option that doesn’t require any special tools or skills.
2. Removable and repositionable: One of the major advantages of adhesive wallpaper is its ability to be easily removed without causing damage to the wall. Whether you want to change the look of your space or you’re renting and need a temporary design solution, adhesive wallpaper can be peeled off without leaving behind any residue or marks. It can also be repositioned during installation if you need to make adjustments.
3. Versatile designs: Adhesive wallpaper comes in a wide variety of colors, patterns, and textures, allowing you to find the perfect design to suit your unique style and the aesthetic of your space. Whether you prefer bold and vibrant patterns or subtle and understated textures, there is adhesive wallpaper available to meet your needs.
4. Cost-effective: Adhesive wallpaper is often more budget-friendly than traditional wallpaper. It eliminates the need for additional supplies such as glue or paste, saving you money on the overall installation process. Additionally, its easy removal and reusability mean that you can use the same adhesive wallpaper for multiple projects or spaces, further maximizing its value.
Different types of adhesive wallpaper available in the market
There are various types of adhesive wallpaper available in the market to cater to different preferences and functional requirements. Here are a few popular options:
– Peel-and-stick vinyl wallpaper: This type of adhesive wallpaper is made from vinyl and offers a durable and water-resistant option. It is ideal for high-moisture areas such as kitchens and bathrooms.
– Fabric-based adhesive wallpaper: Fabric-based adhesive wallpaper provides a softer and more textured look. It is often made from materials like cotton, linen, or silk, offering a luxurious finish to your walls.
– Mural adhesive wallpaper: Mural adhesive wallpaper is designed to create a statement wall with large-scale prints or custom designs. It allows you to transform an entire wall into a captivating focal point.
– Chalkboard or whiteboard adhesive wallpaper: For those who love creativity and functionality, chalkboard or whiteboard adhesive wallpaper is a fantastic choice. It turns any smooth surface into a fully functional chalkboard or whiteboard, perfect for jotting down ideas or leaving messages.
Each type of adhesive wallpaper has its own unique features and benefits, so consider your needs and preferences before selecting the right one for your project. Whatever type you choose, adhesive wallpaper is an excellent option for adding style, personality, and a touch of creativity to your space.
Preparing The Surface
Before you start installing adhesive wallpaper, it’s important to properly prepare the surface you’ll be working on. This step is crucial in ensuring a smooth and long-lasting application. Follow these steps to assess, clean, and patch the wall to create the ideal foundation for your wallpaper.
Assessing the condition of the wall
The first step in preparing the surface is to assess the condition of the wall you’ll be applying the adhesive wallpaper to. Take a close look at the wall and check for any cracks, rough patches, or loose paint. These issues can prevent the wallpaper from adhering properly and cause it to bubble or peel over time.
If you come across any cracks, it’s essential to address them before proceeding. Use a putty knife to carefully fill in the cracks with spackling compound or patching plaster. Allow the compound to dry completely and then sand it smooth. This will ensure a seamless finish and prevent any imperfections from showing through the wallpaper.
Cleaning the wall surface
Once you’ve assessed the condition of the wall, it’s time to clean the surface thoroughly. Cleaning the wall is essential to remove any dirt, dust, or grease that could hinder the adhesive’s effectiveness. Follow these steps to clean the wall:
- Start by removing any furniture or decorations near the wall to give yourself space to work.
- Dust the wall using a soft cloth or duster to remove loose particles.
- Fill a bucket with warm water and a mild detergent. Dip a sponge or cloth into the soapy water and wring it out to remove excess moisture.
- Gently scrub the wall in a circular motion, paying close attention to any particularly dirty areas. Be sure to clean the entire surface of the wall, including corners and edges.
- Once you’ve cleaned the wall, rinse the sponge or cloth and go over the wall again to remove any soap residue.
- After rinsing, use a clean, dry cloth to wipe away any excess moisture and allow the wall to air dry completely.
Patching any holes or imperfections
After assessing the condition of the wall and cleaning the surface, it’s time to patch any holes or imperfections you may have identified. Use these steps to patch and smooth the wall:
- If you find any small nail holes or dents, simply use a lightweight spackle compound to fill them in. Apply the spackle with a putty knife, ensuring it’s smooth and level with the surrounding wall.
- For larger holes or areas with crumbling plaster, use a patching plaster or joint compound. Apply the compound with a putty knife, following the manufacturer’s instructions for drying time.
- Once the compound is dry, sand the patched areas lightly with fine-grit sandpaper to create a smooth and even surface. This will help the adhesive wallpaper adhere properly and result in a professional-looking finish.
By properly preparing the surface of your wall, you’ll create an ideal foundation for installing adhesive wallpaper. Assessing the condition of the wall, cleaning the surface thoroughly, and patching any holes or imperfections will ensure a seamless and long-lasting application.
Measuring And Cutting The Wallpaper
Measuring the Wall Dimensions Accurately
To ensure a precise and professional-looking installation, it’s essential to start by measuring the wall dimensions accurately. Incorrect measurements can lead to unnecessary waste of adhesive wallpaper or, even worse, a misaligned and unsightly final result. Follow these simple steps to get the measurements spot on.
First, grab a tape measure, a pencil, and a notepad. Begin by measuring the height of your wall from floor to ceiling. Note down the exact measurement. Next, measure the width of your wall from one end to the other. Again, jot down the measurement. Repeat this process for any other walls you plan to cover with adhesive wallpaper.
If your wall has any obstacles such as windows, doors, or electrical outlets, measure the distance from the floor to the obstacle’s bottom, and note it down. Measure the width of the obstacle too. Repeat this for each obstacle you encounter.
Calculating the Amount of Wallpaper Needed
Now that you have the accurate wall measurements, it’s time to calculate how much adhesive wallpaper you’ll need. This step is crucial to avoid purchasing too little or too much wallpaper.
To determine the amount of wallpaper needed, follow these simple calculations. Multiply the width of your wall by the height. This will give you the total square footage of the wall. However, if your wall has obstacles, subtract their square footage from the total. Make sure to account for any repeat pattern in the wallpaper design.
Once you’ve calculated the square footage for one wall, repeat the process for all the walls you plan to cover. Add up the square footage of each wall to get the total amount of wallpaper needed for the entire room.
Cutting the Wallpaper Panels to Size
Now that you have your adhesive wallpaper ready, it’s time to cut the panels to the exact size of your wall. This step ensures a seamless and polished appearance once the wallpaper is applied.
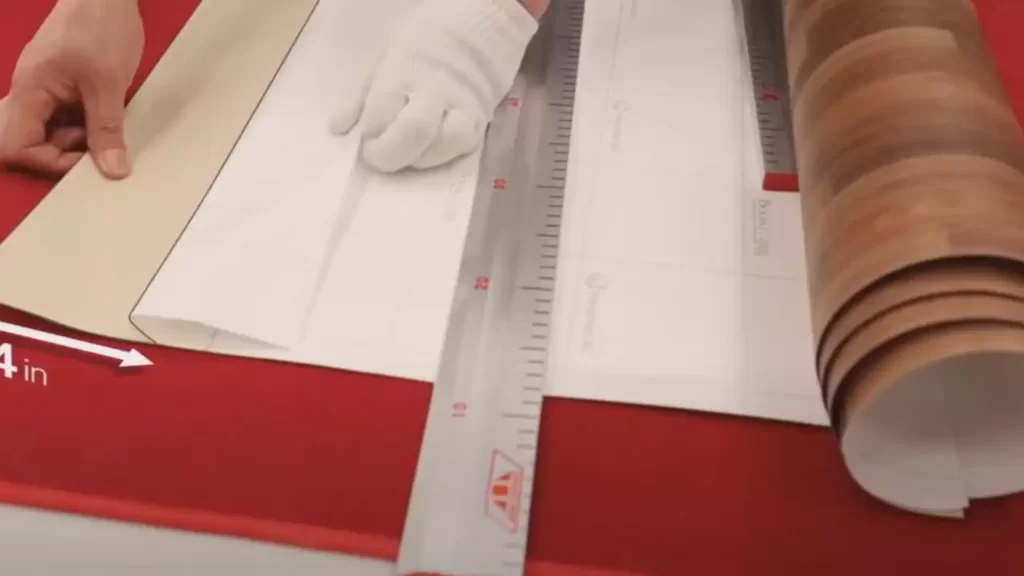
Start by unrolling the wallpaper and placing it on a clean and flat surface. Carefully measure the height of your wall and mark the measurement on the back of the wallpaper using a pencil. Use a straight edge to draw a straight line across the width of the wallpaper to create a cutting guide.
Once you have the desired height marked, use a sharp utility knife or scissors to cut along the line. Tip: Utilize a metal straight edge to ensure straight and precise cuts. Repeat this process for each panel needed to cover your walls, taking care to align any pattern or design elements.
Remember, accuracy is key when cutting the wallpaper panels. Measure twice, cut once! Keeping each panel the correct size will result in a clean and professional installation.
In summary, measuring and cutting adhesive wallpaper for installation requires accuracy and attention to detail. By measuring the wall dimensions accurately, calculating the amount of wallpaper needed, and cutting the panels to size, you can achieve a seamless and beautifully finished look for your walls.
Applying The Adhesive Wallpaper
Installing adhesive wallpaper can be a fun and rewarding DIY project that can instantly transform the look of any room. Whether you’re looking to add a pop of color or create a statement wall, adhesive wallpaper offers an easy and cost-effective solution. In this section, we’ll walk you through the step-by-step process of applying adhesive wallpaper, from preparing the adhesive to ensuring a seamless finish.
Preparing the adhesive
Before you begin applying the adhesive wallpaper, you’ll need to prepare the adhesive. Follow the manufacturer’s instructions on the packaging to ensure you mix the adhesive correctly. Typically, you’ll need to mix the adhesive with water and let it sit for a few minutes to activate. Make sure to stir the mixture thoroughly to eliminate any lumps or clumps.
Starting from a corner or focal point
Once your adhesive is ready, it’s time to start applying the wallpaper. Begin by choosing a corner or focal point where you want to start. This can be the top corner of the wall or the center of the wall, depending on your preference and the design of the wallpaper. Starting from a corner or focal point will make it easier to align patterns and ensure a seamless finish.
Removing the backing and applying the first panel
Now, it’s time to peel off the backing of the adhesive wallpaper. Take the first panel and carefully peel away a few inches of the backing, making sure not to touch the adhesive side. Align the exposed edge of the wallpaper with the corner or focal point you chose earlier. Slowly and gradually peel away the backing while smoothing the wallpaper onto the wall, using a wallpaper brush or soft cloth to eliminate any air bubbles.
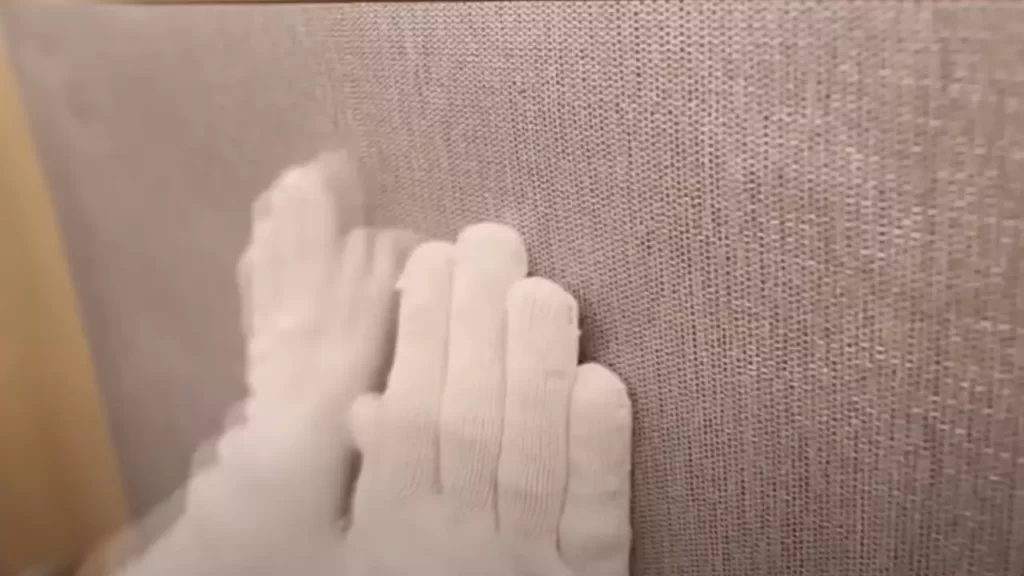
Smoothly pressing the wallpaper onto the wall
As you continue applying each panel of the adhesive wallpaper, make sure to smooth it onto the wall as you go. Use your hands or a wallpaper brush to gently press the wallpaper onto the wall, starting from the center and moving outwards. This will help to ensure a smooth and secure bond between the wallpaper and the wall, preventing any peeling or lifting.
Aligning patterns and ensuring a seamless finish
If your adhesive wallpaper has a pattern or design, it’s crucial to align the panels correctly to ensure a seamless finish. Take your time to carefully match up the patterns and edges of each panel as you apply them. Use a ruler or straight edge to guide your cuts and make precise adjustments, ensuring a seamless transition from one panel to the next.
By following these steps and taking your time, you can achieve a professional-looking result when installing adhesive wallpaper. Remember to read and follow the manufacturer’s instructions for the best results, and enjoy the process of transforming your space with beautiful and easy-to-use adhesive wallpaper!
Dealing With Corners And Obstacles
Installing adhesive wallpaper can instantly transform the look of any space. However, when it comes to dealing with corners and obstacles, it can sometimes be a bit tricky. But worry not! With the right techniques and a little patience, you can achieve a seamless and professional-looking result. In this section, we will explore the techniques for wallpapering corners and trimming excess wallpaper around outlets and switches.
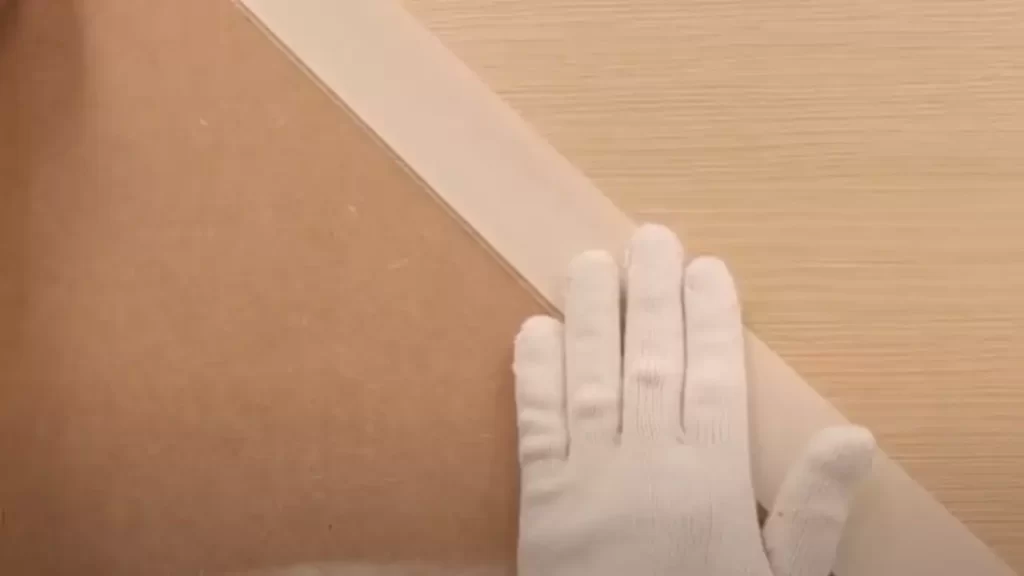
Techniques for Wallpapering Corners
Wallpapering corners requires precision and careful attention to detail. Here are a few techniques to help you achieve a seamless finish:
- Measure and cut accurately: Before starting, measure the height of the wall and cut a strip of wallpaper accordingly. Make sure to leave an extra few inches at the top and bottom to account for adjustments.
- Start from the corner: Begin by applying the first strip of wallpaper from the corner. Smooth out any air bubbles or wrinkles using a wallpaper smoothing tool or a credit card.
- Overlap the next strip: When placing the next strip of wallpaper, make sure to overlap it slightly with the first strip. This will help create a seamless transition between the two strips.
- Use a sharp utility knife: To achieve clean and precise corners, use a sharp utility knife to trim off the excess wallpaper. Carefully follow the corner angle and avoid cutting too much.
By following these techniques, you can ensure that the wallpaper seamlessly wraps around corners, creating a polished and attractive look.
Trimming Excess Wallpaper Around Outlets and Switches
Trimming excess wallpaper around outlets and switches is essential for a professional-looking installation. Here’s how you can do it:
- Turn off the power: Before working around outlets and switches, always turn off the power to ensure safety.
- Measure and mark: Measure the dimensions of the outlet or switch plate and mark those measurements on the wallpaper. Be sure to add a small allowance to ensure accuracy.
- Cut with precision: Using a sharp utility knife, carefully cut along the marked lines. Take your time to achieve clean and precise cuts.
- Smooth and secure: After trimming, reapply the wallpaper to the wall. Use a smoothing tool or a credit card to remove any air bubbles and ensure a secure adhesion.
By following these steps, you can ensure that outlets and switches seamlessly blend with the wallpaper, creating a polished and cohesive look in your space.
Sealing And Finishing The Edges
Sealing and finishing the edges of adhesive wallpaper is a crucial step to ensure a professional and long-lasting result. By properly sealing the edges, you not only enhance the overall appearance of the wallpaper but also prevent the risk of peeling and curling over time. This section will guide you through two essential techniques: applying wallpaper seam adhesive and trimming excess wallpaper to create clean edges.
Applying Wallpaper Seam Adhesive
Applying wallpaper seam adhesive is an effective way to reinforce the edges of adhesive wallpaper, providing extra adhesion and protection against moisture and humidity. Here’s a simple step-by-step guide:
- Clean the area around the edges of the wallpaper using a mild detergent and a soft cloth. Ensure that the surface is dry before proceeding.
- Prepare the wallpaper seam adhesive according to the manufacturer’s instructions. Typically, you will need to mix the adhesive with water and let it rest for a few minutes.
- Using a paintbrush or a small roller, apply a thin layer of adhesive along the edges of the wallpaper. Be sure to cover the entire edge evenly, without leaving any gaps.
- Smooth out any excess adhesive using a clean, damp cloth to achieve a neat and seamless finish.
- Allow the adhesive to dry completely before moving on to the next step.
Trimming Excess Wallpaper and Creating Clean Edges
Trimming excess wallpaper and creating clean edges is essential to achieve a polished and professional look. Follow these steps to ensure precise cutting and perfect edges:
- Use a sharp utility knife or a wallpaper cutting tool to carefully trim off any excess wallpaper that extends beyond the desired edge.
- Hold the knife at a slight angle and press gently to avoid tearing or damaging the wallpaper.
- For straight edges, use a ruler or a straightedge as a guide to ensure clean and straight cuts.
- For curved edges or corners, make small, controlled cuts using the tip of the knife, following the edge of the surface.
- After trimming, run a wallpaper smoothing tool or a credit card along the edges to press down and secure the wallpaper firmly.
- Inspect the edges carefully and fix any uneven cuts or imperfections by carefully trimming or smoothing as needed.
Remember, taking your time and ensuring precise cuts and smooth edges will contribute to a flawless and professional finish. With these techniques, you can transform any space with adhesive wallpaper and enjoy the beauty and convenience it brings.
Care And Maintenance Of Adhesive Wallpaper
Tips for Cleaning Adhesive Wallpaper
Cleaning adhesive wallpaper is a crucial step in maintaining its longevity and appearance. By following these simple tips, you can keep your wallpaper looking fresh and clean.
- Dust Regularly: Dust particles can accumulate on the surface of adhesive wallpaper, causing it to look dull and dirty. To prevent this, use a soft, dry cloth or a duster to gently remove any dust accumulation at least once a week.
- Avoid Harsh Chemicals: When cleaning adhesive wallpaper, it’s essential to use mild, non-abrasive cleaning solutions. Abrasive cleaners and harsh chemicals can damage the wallpaper’s adhesive properties and potentially cause peeling or discoloration. Instead, opt for gentle dish soap mixed with water as an effective cleaning solution.
- Test Before Applying: Before using any cleaning solution on your adhesive wallpaper, it’s crucial to test it on a small, inconspicuous area. This ensures that the solution doesn’t have any adverse effects on the wallpaper’s surface or color.
- Gently Blot Stains: In case of accidental spills or stains on the wallpaper, it’s important to act quickly. Use a clean, damp cloth to gently blot the stain, avoiding rubbing or scrubbing, which might worsen the situation. Blotting helps to lift the stain without spreading it further.
- Wipe in a Vertical Motion: When cleaning adhesive wallpaper, wipe the surface in a vertical motion. This technique helps to avoid any streaks on the wallpaper, ensuring a clean and polished finish.
Preventing Damage and Peeling
To maintain the integrity of your adhesive wallpaper and prevent damage or peeling, make note of the following tips:
- Avoid Excessive Moisture: Excessive moisture can weaken the adhesive properties of the wallpaper, leading to peeling or detachment from the wall. Avoid placing the wallpaper in areas prone to high humidity, such as bathrooms or kitchens.
- Protect from Direct Sunlight: Prolonged exposure to direct sunlight can cause the colors of adhesive wallpaper to fade over time. Consider using window treatments or UV-blocking films to protect the wallpaper from harmful UV rays.
- Be Cautious with Sharp Objects: Avoid using sharp objects, such as knives or scissors, near the wallpaper. Accidental punctures or cuts can create weak spots and make the wallpaper more susceptible to peeling or tearing.
- Avoid Placing Heavy Objects: Heavy objects can exert pressure on the adhesive wallpaper, leading to damage or peeling. Be mindful of placing heavy furniture or decorations against the wallpaper, and use felt pads or protective barriers to prevent any direct contact.
- Inspect Regularly: It’s essential to regularly inspect your adhesive wallpaper for any signs of damage, peeling, or discoloration. Addressing these issues promptly can prevent further damage and allow for timely repairs or replacements if necessary.
Troubleshooting Common Issues
Troubleshooting Common Issues
Installing adhesive wallpaper may seem like a straightforward process, but occasionally, you may encounter some common issues along the way. Don’t worry, though – we’ve got you covered! In this section, we’ll explore how to deal with air bubbles and wrinkles, as well as provide guidance on removing adhesive wallpaper if needed. So, let’s dive right in and troubleshoot these problems together.
Dealing with Air Bubbles and Wrinkles:
1. Smooth it out with a squeegee:
If you notice air bubbles or wrinkles forming under your adhesive wallpaper, fret not. The solution is quite simple. Begin by using a squeegee or a firm flat object, like a credit card, to press out the air bubbles. Starting from the center, work your way outwards, applying even pressure. Use long, smooth strokes to ensure a smooth, bubble-free finish.
2. Use a hairdryer:
In some cases, stubborn wrinkles may appear, even after using a squeegee. To tackle this issue, grab a hairdryer and set it on low heat. Hold the hairdryer 6-8 inches away from the wallpaper and gently warm the surface. As the heat softens the adhesive, smooth out the wrinkles by applying pressure with your hands or the squeegee. The heat helps the adhesive bond more effectively, giving you a flawless installation.
Removing Adhesive Wallpaper if Needed:
Despite your best efforts, you may find yourself needing to remove adhesive wallpaper. Whether it’s due to a change in design preferences or a desire to update your space, the removal process can be a breeze when done correctly. Follow these steps to ensure a smooth removal:
1. Start with a corner:
Begin by finding a corner or edge, ideally near a seam, where you can easily lift the wallpaper. Use your fingers or a putty knife to carefully loosen it. Be gentle to avoid damaging the underlying surface.
2. Peel slowly:
Once you’ve lifted a corner, slowly peel the wallpaper away from the wall, keeping it at a low angle. Take care not to rip or tear the wallpaper. If it is not coming off easily, you can use a hairdryer on low heat to warm the adhesive and make it more pliable. This will help in removing it smoothly.
3. Clean the residue:
After removing the adhesive wallpaper, you may find some sticky residue lingering on the wall. To get rid of it, mix warm water with dish soap to create a mild solution. Using a sponge or cloth, gently scrub the residue until it is completely gone. Avoid using abrasive materials that could damage the wall’s surface.
Now that you know how to troubleshoot these common adhesive wallpaper issues, you can confidently tackle any challenges that may arise. Remember, with a little patience and care, you’ll achieve the stunning results you desire. Happy decorating!
Enhancing The Look With Accents And Patterns
Adding borders or patterned strips
One of the easiest ways to enhance the look of your adhesive wallpaper is by adding borders or patterned strips. This simple technique allows you to introduce pops of color and different designs to your space, creating a unique and personalized touch.
When choosing borders or patterned strips, consider the overall aesthetic you want to achieve. Do you prefer a subtle contrast or a bold statement? Think about the existing colors and patterns in your room and select border or strip designs that complement or add an interesting twist to your overall decor.
To install borders or patterned strips, you can either purchase pre-made ones or create your own using the same adhesive wallpaper material. If you’re feeling creative, you can even mix and match different designs and colors to create a custom border or strip that perfectly suits your style.
Creating a focal point with wallpaper
Another way to elevate the look of your space with adhesive wallpaper is by creating a focal point using a bold wallpaper design. A focal point adds visual interest and draws attention to a specific area, such as a feature wall or an alcove.
When selecting a wallpaper design for your focal point, consider the purpose of the space and the atmosphere you want to create. For a cozy and intimate room, opt for warm and rich colors. If you want to make a statement and create a dramatic effect, choose a wallpaper with a bold pattern or vivid hues.
When installing wallpaper for a focal point, make sure to measure and plan the layout beforehand. Take note of any furniture or fixtures in the area to ensure a seamless installation. Additionally, consider the lighting in the space as it can greatly impact the way the wallpaper design appears.
Remember, the key to creating a cohesive look is to balance the focal point with the rest of the room. Allow the wallpaper to take center stage while coordinating the surrounding elements, such as furniture, accessories, and wall colors, to enhance the overall aesthetic.
Adhesive Wallpaper For Different Surfaces
Are you looking to give your walls or furniture a fresh new look? Adhesive wallpaper is a great solution that allows you to transform your space quickly and easily. Whether you have different types of walls or furniture surfaces, adhesive wallpaper can adhere to them all, giving you endless possibilities for customization. In this blog post, we will cover everything you need to know about using adhesive wallpaper on different surfaces, from walls to furniture, so you can achieve the perfect look for your space.
Using Adhesive Wallpaper on Different Types of Walls
One of the great things about adhesive wallpaper is its versatility. It can be applied to a variety of wall surfaces, including plaster, drywall, concrete, and even brick. However, the process may vary slightly depending on the type of wall you are working with. Here’s a breakdown of how to apply adhesive wallpaper to different types of walls:
| Wall Type | Installation Steps |
|---|---|
| Plaster walls |
|
| Drywall |
|
| Concrete or brick walls |
|
Applying Adhesive Wallpaper to Furniture or Other Surfaces
Adhesive wallpaper is not limited to walls. It can also be used to revamp furniture pieces or other surfaces, such as cabinets, shelves, or even doors. The process for applying adhesive wallpaper to furniture or other surfaces is similar to that of walls. Here are some tips to help you achieve a seamless application:
- Ensure the surface is clean and free of any dust or grease.
- Measure and cut the adhesive wallpaper to fit the surface, leaving a little extra for trimming.
- Peel off a small section of the backing and start applying the wallpaper, smoothing out any air bubbles as you go.
- Continue peeling off the backing and pressing the wallpaper onto the surface, working in small sections until the entire surface is covered.
- Trim any excess wallpaper using a utility knife or scissors.
With these simple steps, you can transform not only your walls but also your furniture and other surfaces with adhesive wallpaper. The possibilities are endless, and the results are sure to impress. So get creative and start giving your space a fresh new look!
Adhesive Wallpaper As A Temporary Solution
Adhesive Wallpaper as a Temporary Solution
Adhesive wallpaper is a versatile and cost-effective solution for transforming any space, whether you own or rent. One of the biggest advantages of adhesive wallpaper is its ability to act as a temporary decor solution. Whether you’re in a rental home or apartment, using adhesive wallpaper allows you to add personality and style to your space without causing any damage to the walls.
Using Adhesive Wallpaper for Rented Spaces
Living in a rented space shouldn’t limit your creativity or style. Adhesive wallpaper offers a convenient way to personalize your home without leaving any marks or residue behind. Here are a few tips to make the most of adhesive wallpaper in your rented space:
- Choose Removable Wallpaper: Look for adhesive wallpaper specifically designed for easy removal. This type of wallpaper is generally made from a material that won’t leave any residue or damage the walls when it’s time to take it down.
- Be Mindful of the Surface: Before applying the adhesive wallpaper, ensure that the surface is clean and smooth. Remove any dust or dirt to ensure optimal adhesion for the wallpaper. If there are any existing damages on the walls, it’s best to address them beforehand.
- Experiment with Patterns and Colors: Adhesive wallpaper comes in a wide range of patterns, colors, and textures. Take advantage of this wide variety to find a design that matches your personal style and complements your existing decor.
- Apply with Precision: Measure and cut the adhesive wallpaper carefully to fit the desired area. Take your time during the application process to avoid air bubbles or wrinkles. Smooth out the wallpaper gently using a squeegee or a soft cloth to ensure a seamless finish.
Tips for Removing Adhesive Wallpaper without Damage
At the end of your rental period, it’s time to remove the adhesive wallpaper without causing any damage to the walls. Here are a few tips to make the removal process hassle-free:
- Locate an Edge: Find a corner or an edge of the wallpaper and slowly peel it back. If needed, use a hairdryer on low heat to warm up the adhesive, making it easier to remove.
- Peel Carefully: Take your time as you peel away the adhesive wallpaper, applying gentle pressure. Apply heat as necessary and continue peeling until the entire piece is removed.
- Remove any Residue: Use a mild soap and warm water solution to remove any remaining adhesive or residue. Gently scrub the wall in a circular motion until it’s clean.
- Test for Damages: Once the adhesive wallpaper is fully removed, inspect the wall for any damages. If you notice any, you can touch them up with a matching paint color.
Adhesive wallpaper provides the perfect solution for those who want to personalize their living space without any long-term commitments or potential damage to the rental property. By following these tips, you can effortlessly install and remove adhesive wallpaper, transforming your rented space into a stylish and comfortable home.
Frequently Asked Questions
What Is The Best Way To Apply Peel And Stick Wallpaper?
To apply peel and stick wallpaper, follow these steps: 1. Clean the surface thoroughly. 2. Measure and cut the wallpaper to fit the area. 3. Slowly peel off the backing, starting from one corner. 4. Apply the wallpaper to the wall, smoothing out any bubbles or wrinkles.
5. Use a smoothing tool to ensure proper adhesion.
Is Self-Adhesive Wallpaper Easy To Install?
Yes, self-adhesive wallpaper is easy to install. It doesn’t require any additional adhesive and can be easily applied to walls. Just peel off the backing and stick it on the desired surface. It’s a hassle-free way to update your decor.
How Do You Prepare A Wall For Self-Adhesive Wallpaper?
To prepare a wall for self-adhesive wallpaper, clean the surface thoroughly with soap and water. Remove any loose paint or wallpaper and patch any holes or cracks. Smooth out the wall with sandpaper and apply a primer for better adhesion.
Finally, measure and cut the wallpaper to fit the wall and carefully apply it, smoothing out any air bubbles.
Do You Need Paste For Self-Adhesive Wallpaper?
No, self-adhesive wallpaper does not require paste. It sticks directly to the wall without the need for additional adhesive.
Conclusion
Installing adhesive wallpaper can be a straightforward and cost-effective way to transform your space. By following the steps outlined in this guide, you’ll be able to achieve a professional-looking result without the need for expert help. Remember to thoroughly prepare your walls, carefully align the wallpaper, and smooth out any bubbles or creases.
With a little patience and attention to detail, you can create a stunning and personalized space that reflects your unique style. Happy decorating!