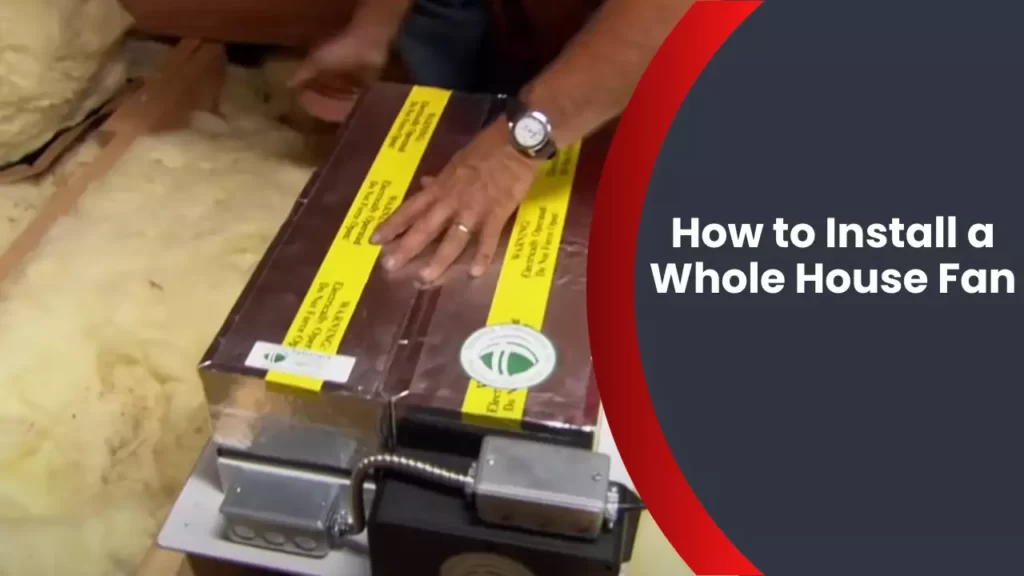
To install a whole house fan, start by finding a suitable location on the ceiling. Then, use a stud finder to locate the joists, cut a hole, and secure the fan using the provided mounting hardware and screws.
Understanding The Benefits
Understanding the Benefits:
Installing a whole-house fan can be a game-changer when it comes to keeping your home cool and comfortable during the hot summer months. Not only does it provide energy-efficient cooling, but it also improves indoor air quality and helps save on electricity bills.
Energy-efficient cooling:
A whole-house fan is an excellent alternative to traditional air conditioning systems, as it uses significantly less energy. This fan works by pulling in cool air from outside and expelling hot air through the attic. By circulating the fresh outdoor air throughout your home, it creates a refreshing and comfortable environment without the need for air conditioning. The energy savings from using a whole-house fan can be substantial, especially during peak summer months.
Improved indoor air quality:
Indoor air quality is a significant concern for many homeowners. A whole-house fan plays a crucial role in improving air quality by increasing ventilation and reducing pollutants, odors, and excess moisture. When the fan is turned on, it quickly expels stale indoor air and replaces it with fresh outdoor air. This constant flow of fresh air helps remove allergens, pet dander, and other irritants that can trigger respiratory problems, making it a great choice for those with allergies or asthma.
Cost savings on electricity bills:
One of the most appealing benefits of installing a whole-house fan is the substantial cost savings on electricity bills. Air conditioning can account for a significant portion of your monthly energy expenses. By utilizing a whole-house fan during cooler evenings and mornings, you can reduce your reliance on air conditioning, thereby lowering your electricity consumption. The energy-efficient design of the fan allows you to enjoy a cooler home without the high costs typically associated with running air conditioning units.
In conclusion, installing a whole-house fan provides several key benefits. It offers energy-efficient cooling, improves indoor air quality, and helps lower electricity bills. By taking advantage of these benefits, you can create a comfortable living environment while saving money and reducing your carbon footprint. So why wait? Install a whole-house fan today and experience the difference it can make in your home.
Assessing Your Home’S Suitability
Installing a whole house fan is a great way to cool your home efficiently and save on energy costs. However, before diving into the installation process, it’s important to assess your home’s suitability for this type of system. Here are some key factors to consider when evaluating if a whole house fan is right for your home:
Evaluating Attic Access and Space
One of the first things to consider is the accessibility of your attic. A whole house fan is typically installed in the attic, so you’ll need a safe and convenient way to access this space. Look for a dedicated attic staircase or pull-down ladder that allows easy entry. Additionally, ensure that there is enough space in your attic to accommodate the fan. Measure the square footage and height of your attic to determine if it meets the requirements for installation.
Determining the Correct Fan Size
Choosing the right size of a whole house fan is crucial for optimal performance. To determine the appropriate fan size for your home, you need to consider the square footage of the living space. As a general rule of thumb, you’ll want a fan that can move about 2 to 3 cubic feet of air per minute (CFM) for every square foot of living space. Calculate the total square footage of your home and multiply it by the recommended CFM value to find the appropriate fan size.
Considering Local Climate Conditions
The climate in which you live plays a significant role in determining the effectiveness of a whole house fan. In regions with hot and dry climates, like arid deserts, this type of cooling system can work exceptionally well. However, if you reside in an area with high humidity or have mild summers, a whole house fan might not be as effective. Take into account the local climate conditions and consult with a professional to determine if a whole house fan is suitable for your specific geographic location.
Assessing your home’s suitability for a whole house fan installation is an important step before embarking on this project. By evaluating the accessibility of your attic space, determining the correct fan size for your home, and considering the local climate conditions, you can ensure that a whole house fan will effectively cool your home and provide energy-efficient comfort.
Gathering The Required Tools And Materials
Before you jump into installing a whole house fan, it’s important to gather all the necessary tools and materials. Having everything ready will make the installation process smooth and efficient. Below are the key items you’ll need:
Whole house fan unit
The whole house fan unit is the centerpiece of your installation. It’s important to choose a fan that is adequately sized for your home and meets your specific needs. Consider factors such as the square footage of your house and the amount of ventilation you desire. Research different models and select one that suits your requirements.
Installation brackets and hardware
To properly secure your whole house fan, you’ll need installation brackets and hardware. These components ensure that the fan is securely mounted, preventing any movement or vibrations during operation. Check the fan manufacturer’s instructions for specific bracket and hardware requirements, as they may vary depending on the unit you have chosen.
Measuring tape and pencil
Precision is key when installing a whole house fan. A measuring tape and pencil will help you accurately mark the locations for the fan unit, brackets, and any additional openings that may be required. Measure twice to ensure you have the correct dimensions before making any cuts or installations.
Screwdriver and adjustable wrench
When it comes to securing components and making adjustments, a screwdriver and adjustable wrench are essential tools to have on hand. These tools enable you to tighten bolts and screws securely, ensuring the fan unit remains in place and functions optimally. Use them with care and caution to avoid any injuries.
Safety goggles and gloves
Prioritize your safety and protect yourself from any potential hazards by wearing safety goggles and gloves. Construction debris, dust, and metal edges can pose risks during the installation process. Safety goggles shield your eyes from particles, while gloves provide hand protection. Remember, safety should always be the number one priority.
Before you start installing your whole house fan, double-check that you have all the necessary tools and materials readily available. This will save you time and frustration during the installation process. Now that you are fully equipped, it’s time to proceed with the next steps to installing your whole house fan.
Planning The Installation Process
Before you dive into the installation process of your whole house fan, it’s crucial to plan it out meticulously. Careful planning helps ensure a smooth and efficient installation, saving you time and frustration down the line. In this section, we’ll cover the essential aspects of planning your installation, from choosing the best location for the fan to considering vibration and noise reduction strategies. Let’s get started!
Choosing the Best Location for the Fan
When it comes to installing a whole house fan, selecting the ideal location is paramount. You want to ensure that the fan can efficiently cool your entire home while avoiding any obstructions or disturbances. Here are a few factors to keep in mind:
- Identify a central area in your home that allows for efficient airflow to every room.
- Consider the proximity to the attic and roof vents, as this will impact the fan’s effectiveness.
- Ensure there is enough space for the fan’s size and clearances as specified in the manufacturer’s instructions.
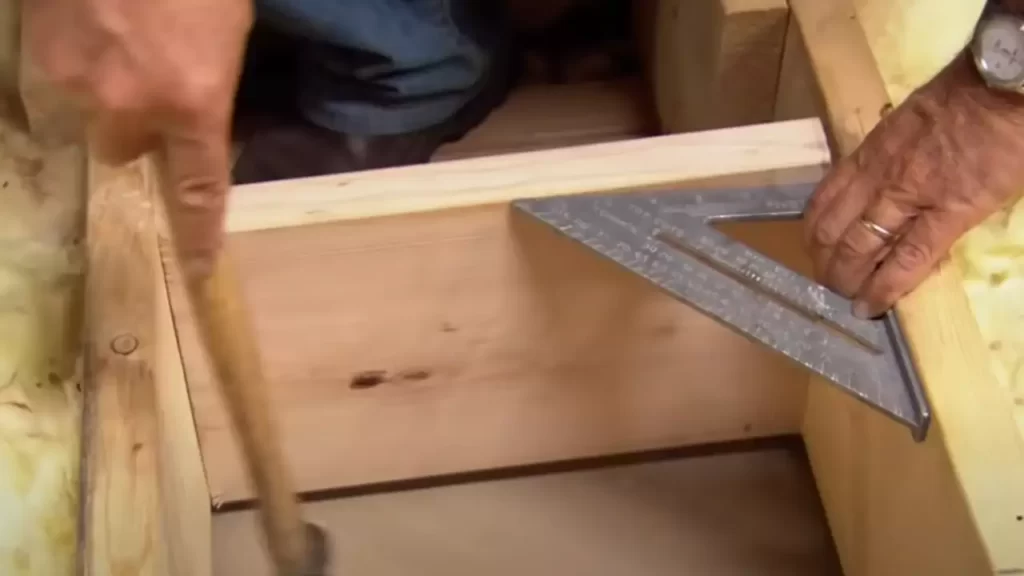
Measuring and Marking the Installation Area
Once you’ve determined the best location for your whole house fan, it’s time to measure and mark the installation area. Follow these steps for accuracy:
- Measure the dimensions of your fan to determine the space it requires for installation.
- Using a tape measure, mark the dimensions on the ceiling or wall where you plan to install the fan.
- Double-check your measurements to ensure they are accurate.
Considering Vibration and Noise Reduction Strategies
Installing a whole house fan can introduce vibrations and noise into your home, which can be disruptive and bothersome. To minimize these issues, consider the following strategies:
- Choose a location that is away from bedrooms or areas where noise sensitivity is high.
- Install rubber or foam vibration isolators between the fan and the mounting surface to reduce vibrations.
- Consider adding soundproofing materials, such as acoustic insulation, around the fan’s housing to dampen noise.
Ensuring Proper Electrical Connections
Proper electrical connections are vital for the safe and effective operation of your whole house fan. Follow these guidelines:
- Create a dedicated electrical circuit for the fan to prevent overloading existing circuits.
- Ensure you have the necessary wiring and switches to support the fan’s power requirements.
- If you’re unsure about electrical work, consult a licensed electrician for assistance.
By planning the installation process thoroughly, you can avoid common pitfalls and set yourself up for success. Remember to choose the best location for the fan, measure and mark the installation area accurately, consider vibration and noise reduction strategies, and ensure proper electrical connections. With this solid foundation, you’ll be well on your way to enjoying the benefits of a whole house fan in no time!
Preparing The Attic Space
Before you begin the installation of a whole house fan, it’s crucial to properly prepare the attic space. Taking the time to complete these necessary steps will ensure a successful and efficient installation process.
Clearing obstructions and debris
The first step in preparing your attic space is to clear away any obstructions and debris that may be present. This includes removing any boxes, furniture, or other items that may be in the way of the fan installation. Additionally, it’s important to sweep or vacuum the attic floor to rid the area of any dust or dirt that could hinder the installation process.
Checking for proper attic ventilation
Proper attic ventilation is crucial for the operation of a whole house fan. Before installing the fan, it’s essential to check for adequate ventilation in your attic. Ensure that vents are clear of any blockages and that they are properly sized and positioned for optimal airflow. If necessary, consult a professional to assess your attic’s ventilation needs.
Sealing air leaks and insulating ductwork
One of the main benefits of a whole house fan is its ability to provide efficient cooling while minimizing energy loss. To maximize the fan’s effectiveness, it’s important to seal any air leaks in your attic and insulate the ductwork. Use weatherstripping and caulk to seal any gaps or cracks around windows, doors, and other potential leakage points. Additionally, insulate the ductwork to prevent the loss of cool air.
Installing attic baffles and firestops (if required)
Attic baffles and firestops are essential for maintaining proper air circulation and preventing the spread of fire in your home. Install attic baffles to ensure that insulation does not block the airflow from the whole house fan. These baffles should be placed between the roof trusses, allowing for proper ventilation. If required by local building codes, install firestops to create a barrier that prevents the spread of fire from your attic to the rest of your home.
By carefully preparing your attic space before installing a whole house fan, you can ensure a smoother installation process and optimize the efficiency of your cooling system.
Installing The Whole House Fan
Installing a whole house fan can help you save energy and keep your home cool and comfortable during the hot summer months. This ventilation system is easy to install and can provide excellent airflow throughout your entire home. In this guide, we will walk you through the step-by-step process of installing a whole house fan. Let’s get started!
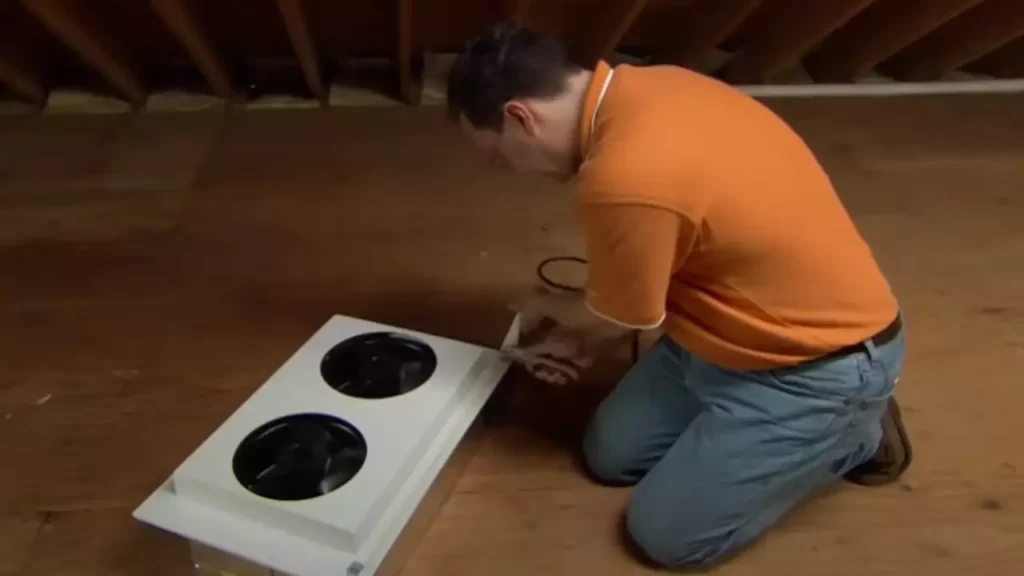
Mounting the fan on installation brackets
To begin the installation process, you will first need to mount the whole house fan on installation brackets. These brackets will provide support and ensure the fan is correctly positioned in your attic. Follow these steps:
- Locate a suitable spot in your attic where the fan will be installed.
- Place the installation brackets in the chosen spot, ensuring they are level and secure.
- Attach the fan to the installation brackets using the provided screws or bolts. Make sure the fan is tightly secured and stable.
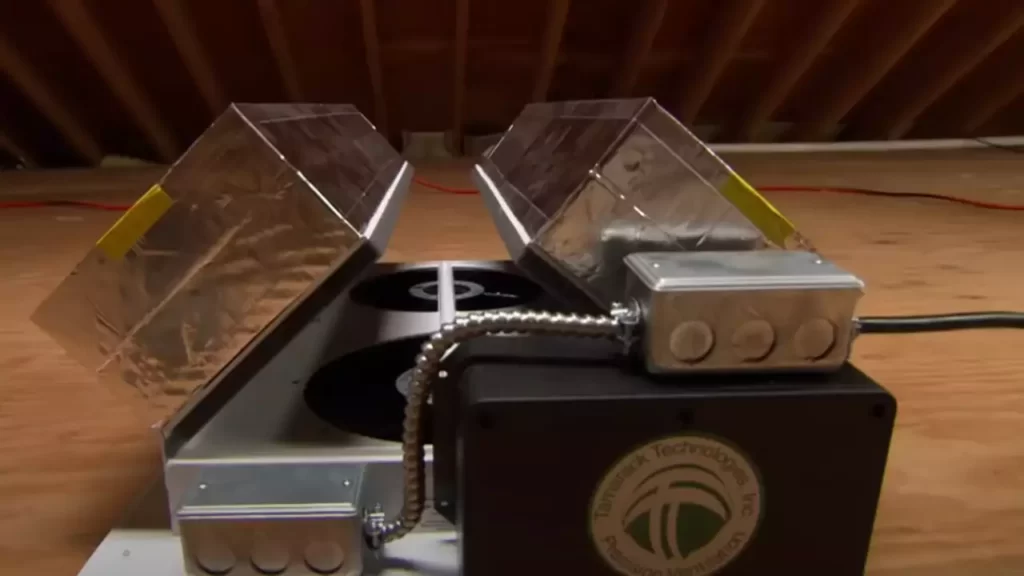
Securing the fan to the attic floor or rafters
Once the fan is mounted on the installation brackets, the next step is to secure it to the attic floor or rafters. This will ensure that the fan remains in place during operation. Follow these instructions:
- Identify the location where the fan will be secured to the attic floor or rafters.
- Use screws or nails to attach the fan securely to the floor or rafters. Make sure to select appropriate fasteners for the type of material you are securing the fan to.
- Double-check the stability of the fan by giving it a gentle push or shake. It should be firmly secured and not wobble or move excessively.
Connecting the fan to the electrical supply
Now that the fan is securely mounted, it’s time to connect it to the electrical supply. Follow these steps to ensure a safe and proper connection:
- Locate the nearest electrical outlet or junction box in your attic.
- Turn off the power to the circuit that will be used for the fan installation.
- Connect the wiring from the fan to the electrical supply, following the manufacturer’s instructions. Make sure to use appropriate wire connectors and secure all connections tightly.
- Turn the power back on and test the fan to ensure it is functioning properly.
Testing the fan for proper operation
Before considering the installation complete, it is essential to test the fan for proper operation. Follow these guidelines to ensure everything is working correctly:
- Turn on the fan and let it run for a few minutes to ensure it is generating the desired airflow.
- Listen for any unusual noises or vibrations that may indicate a problem.
- Check the fan’s speed settings, if applicable, to ensure they are functioning as intended.
- Verify that the fan is effectively ventilating your home by feeling the airflow in different areas.
By following these installation steps and properly testing your whole house fan, you can enjoy a more comfortable and energy-efficient home. Remember to refer to the manufacturer’s instructions and consult a professional if needed. Now, sit back, relax, and let your new whole house fan keep you cool all summer long!
Finishing Touches And Safety Measures
Insulating the Fan Cover and Sealing Gaps
Before completing the installation of your whole house fan, it is important to insulate the fan cover and seal any gaps to maximize energy efficiency and prevent unwanted air leaks. This step ensures that your cooling system operates at its optimum level, saving you money on your energy bills and keeping your home comfortable throughout the seasons.
To insulate the fan cover, consider using foam or weatherstripping tape. Measure the dimensions of the cover and cut the insulation material accordingly. Attach the insulation around the perimeter of the cover, making sure it is snug and completely covers the edges. This will effectively seal any gaps, preventing air from escaping or entering your home.
Securing the Access Panel with Hinges or Latches
Securing the access panel is another crucial step in the installation process. This ensures that the panel remains securely closed during operation, preventing any accidents or mishaps. Two common methods of securing the access panel are using hinges or latches.
If you choose to use hinges, attach them to one side of the panel and the corresponding side of the opening. Ensure that the hinges are properly aligned and that the panel opens and closes smoothly. This method allows for easy access when maintenance or cleaning is required.
Alternatively, you can opt for latches to secure the access panel. Install the latches on opposite sides of the panel and the corresponding sides of the opening. Make sure the latches are firmly in place and that the panel is tightly sealed when closed. This method provides additional security, particularly if you have young children.
Installing Protective Screens or Grilles
Protective screens or grilles are an essential safety feature when installing a whole house fan. They prevent any objects or debris from entering the fan blades while allowing air to flow freely throughout your home. Installing these screens or grilles is a straightforward process that adds an extra layer of protection to your cooling system.
Measure the dimensions of your fan opening and choose a screen or grille that fits properly. Attach it securely over the opening, ensuring that it covers the entire area and leaves no gaps. This safeguards against any accidental contact with the fan blades and keeps you and your family safe.
Educating Household Members on Safe Operation
Finally, it is important to educate all household members on the safe operation of your whole house fan. This ensures that everyone understands the potential hazards associated with the system and knows how to use it correctly.
Explain the basics of turning the fan on and off, demonstrating the controls and emphasizing the importance of proper ventilation. Advise all family members to stay clear of the fan when it is in operation and never attempt to touch the blades. Additionally, it is crucial to review the manufacturer’s instructions and any safety guidelines specific to your whole house fan model.
By completing these finishing touches and safety measures, you can confidently enjoy the benefits of your newly installed whole house fan while ensuring the well-being of your household.
Frequently Asked Questions
Can I Install A Whole House Fan Myself?
Yes, you can install a whole house fan yourself. It is a relatively simple process that can be done with some basic tools and knowledge. However, it is important to follow the manufacturer’s instructions and safety guidelines to ensure proper installation.
How Much Does It Cost To Add A Whole House Fan?
The cost of adding a whole house fan varies, but on average, it can range from $1,000 to $2,500. Factors such as the fan size, brand, and installation complexity can affect the final price. It’s best to get quotes from professionals for an accurate estimate.
Where Should A Whole House Fan Be Installed?
A whole house fan should be installed in the attic or a central location on the ceiling, away from any obstructions. It should be strategically placed to draw air from open windows and exhaust it outside, creating a cooling breeze throughout the house.
What Are The Disadvantages Of A Whole House Fan?
Whole house fans can have some drawbacks. They are noisy and may disturb your sleep or peace. They also require large openings in ceilings and can let in outdoor pollutants. Additionally, they may not be suitable for areas with high humidity or extreme temperatures.
Conclusion
Installing a whole house fan is a practical and cost-effective way to keep your home cool and comfortable. By following the step-by-step instructions outlined in this guide, you can easily complete the installation process on your own. Remember to choose the right size fan for your home, ensure proper ventilation, and follow all safety precautions.
With a whole house fan in place, you can enjoy improved air circulation and reduced energy costs. So why wait? Start enjoying the benefits of a whole house fan today! (49 words)