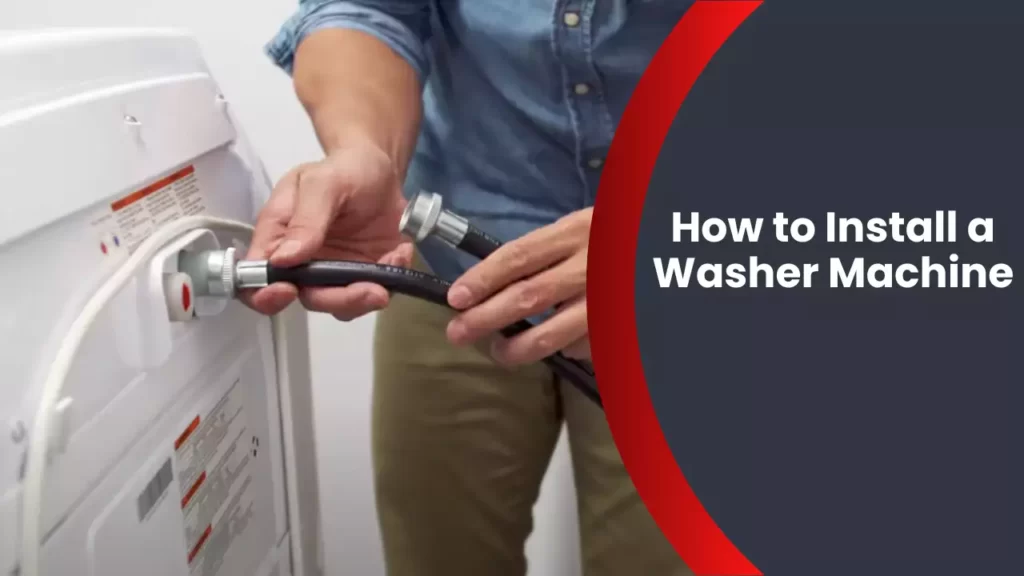
To install a washer machine, first ensure you have the necessary tools and equipment. Then, connect the water supply hoses, plug in the machine, and level it using the adjustable feet.
Introduction (120 words): Installing a washer machine can be a straightforward process if you have the right tools and know-how. Whether you’re replacing an old machine or installing a brand new one, it’s important to follow the proper steps to ensure everything runs smoothly.
In this guide, we’ll outline the key steps you need to take to install your washer machine correctly. By carefully following these instructions, you can save time and avoid any potential issues down the line. From connecting the water supply hoses to leveling the machine, we’ll cover everything you need to know to get your washer up and running in no time. So, let’s jump right in and get started!
Determining The Right Location
Considerations for choosing the location
Choosing the right location for your washer machine is crucial for its efficient functioning and your convenience. There are several factors to consider when determining the right location. These include water supply and drainage accessibility, space requirements and clearance, a smooth and level surface, proximity to water and power sources, ventilation, room for movement, and assessing floor stability. Let’s delve into each of these considerations.
Water supply and drainage accessibility
One of the first things to consider when determining the location for your washer machine is the accessibility of the water supply and drainage. Ideally, you want to place your washer machine near existing water supply lines and a suitable drainage area. This will ensure that your washer can easily fill with water and drain effectively without any issues.
Space requirements and clearance
Another important consideration is the space requirements and clearance for your washer machine. Measure the dimensions of the washer and ensure that you have enough space for it to fit comfortably. Additionally, you should leave ample clearance around the washer to allow for easy access during installation, maintenance, and repair work if needed. It’s also important to consider any nearby walls or obstacles that may obstruct the opening of the washer lid or the proper functioning of the machine.
Smooth and level surface
To ensure the proper operation and longevity of your washer machine, it is essential to have a smooth and level surface for installation. Uneven surfaces can cause the machine to vibrate excessively, potentially leading to damage or poor performance. Use a level to check the surface and make any necessary adjustments before installing the washer.
Finding the best spot for your washer machine
When determining the exact location for your washer machine, you should consider its proximity to water and power sources. Placing the machine close to these sources will minimize the length of hoses and power cords required, reducing the risk of tripping hazards and potential damage. It’s also important to ensure adequate ventilation in the area to prevent moisture buildup and allow for proper drying of clothes.
Assessing floor stability
Lastly, you need to assess the stability of the floor where you plan to install your washer machine. Ensure that the floor is structurally sound and capable of supporting the weight of the machine, especially when it is fully loaded with water and clothes. If the floor appears unstable or weak, consider reinforcing it before proceeding with the installation.
In conclusion, determining the right location for your washer machine involves considering various factors such as water supply and drainage accessibility, space requirements and clearance, a smooth and level surface, proximity to water and power sources, ventilation, room for movement, and floor stability. By carefully evaluating these considerations, you can ensure a proper installation and optimize the performance of your washer machine.
Preparing The Space For Installation
The first step in installing a washer machine is to adequately prepare the space where it will be placed. By ensuring a clean and organized environment, you can avoid complications and ensure a smooth installation process. This section will guide you through the necessary steps to take before installing your washer machine.
Gathering necessary tools and materials
Before beginning the installation process, it is important to gather all the required tools and materials. This will save you time and frustration later on. Here are the essential items you will need:
Tools required for installation
- Adjustable wrench
- Screwdriver (both flathead and Phillips)
- Measuring tape
- Level
- Pliers
- Pipe wrench
- Bucket
Safety equipment
- Safety goggles
- Gloves
Additional materials for plumbing and electrical connections
To ensure proper plumbing and electrical connections, make sure you have the following materials on hand:
- Water hose
- Hot and cold water supply lines
- Electrical cord
- Plumber’s tape
- Electrical tape
Clearing and cleaning the area
To make room for your washer machine, you will need to clear the area of any obstacles or debris. This will ensure adequate space for installation and prevent any potential hazards. Follow these steps to clear and clean the area:
- Remove any items that may be blocking the installation area, such as furniture or appliances.
- Sweep or vacuum the floor to remove any dirt or dust.
- Wipe down the walls and adjacent surfaces to remove any grime or stains.
Ensuring a clean working environment
It is crucial to have a clean and organized working environment to ensure a smooth installation process. Follow these steps to create a clean and efficient workspace:
- Prepare a sturdy and level surface for the washer machine to sit on.
- Place a protective mat or tarp underneath the washer machine to prevent any potential damage to the floor.
- Arrange your tools and materials in an organized manner for easy access.
Addressing any existing plumbing or electrical issues
Before proceeding with the installation, it is important to address any existing plumbing or electrical issues. This will prevent any complications or safety hazards in the future. Follow these guidelines to ensure a smooth installation process:
- Inspect the plumbing connections to ensure they are in good condition and do not leak.
- Check the electrical outlet to ensure it is grounded and can support the washer machine’s power requirements.
- If you encounter any issues, such as leaks or faulty wiring, it is recommended to consult a professional plumber or electrician to resolve the problem.
By following these steps, you can effectively prepare the space for the installation of your washer machine. Taking the time to gather the necessary tools and materials, clear and clean the area, and address any existing plumbing or electrical issues will ensure a successful and hassle-free installation process.
Connecting The Washer Machine
Connecting your washer machine properly is crucial for its efficient operation and to prevent any potential leaks or mishaps. In this section, we will guide you through the steps of connecting the water supply hoses, attaching the drainage hose, and connecting the power supply. Follow these instructions carefully to ensure a safe and hassle-free installation process.
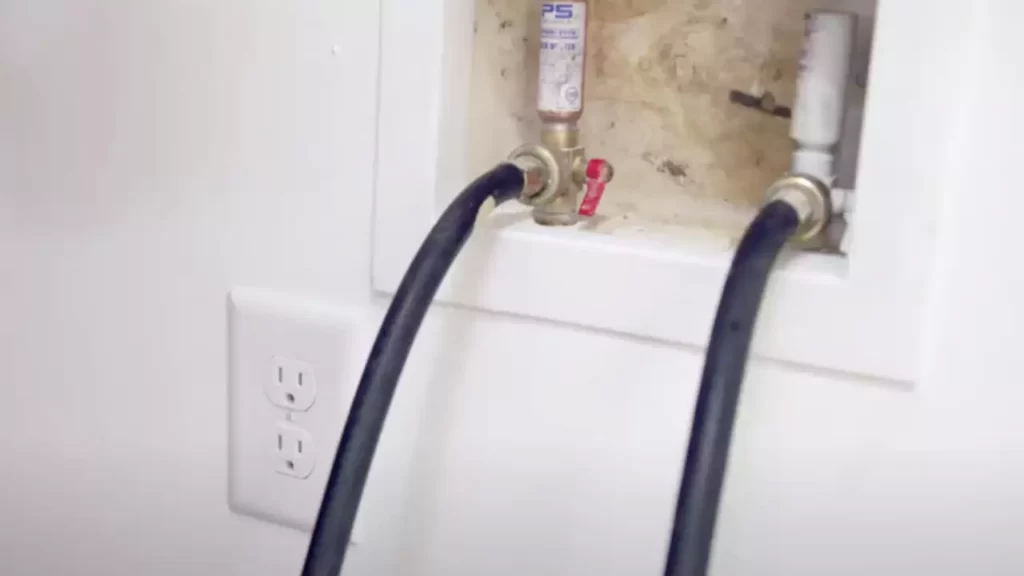
Installing the Water Supply Hoses
Before you begin connecting the water supply hoses, make sure you have the required materials handy, including adjustable pliers and washer hoses. Follow these steps to install the water supply hoses:
- Locate the water supply valves behind your washer machine. These valves should be labeled for easy identification.
- Using your adjustable pliers, carefully tighten the valve connections by turning them clockwise.
- Attach one end of the hot water hose to the hot water valve and the other end to the hot water inlet on the back of the washer machine.
- Similarly, attach one end of the cold water hose to the cold water valve and the other end to the cold water inlet on the washer machine.
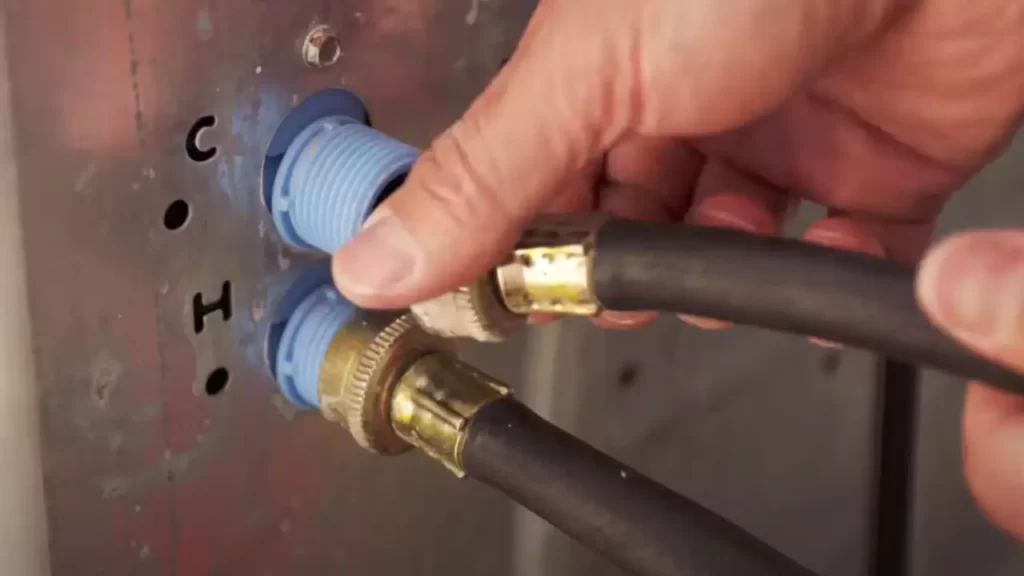
Identifying Hot and Cold Water Connections
Ensuring proper identification of hot and cold water connections is essential to maintain a smooth flow of water while operating the washer machine. Follow these steps to correctly identify the hot and cold water connections:
- Check the labeling on your water supply valves to identify which valve is for hot water and which is for cold water.
- Match the hot water hose and cold water hose accordingly, connecting them to the respective valves and inlets on the washer machine.
Connecting the Hoses Securely
To prevent any leaks or water damage during operation, it is imperative to connect the hoses securely. Follow these steps to ensure a tight and secure connection:
- Tighten the hose connections by hand first, ensuring they are snug.
- Using your adjustable pliers, give the connections an extra quarter turn to ensure a tight fit.
- Do not overtighten, as it may damage the hose or the washer machine.
Checking for Leaks or Drips
Once you have connected the hoses securely, it is vital to check for any leaks or drips. Follow these steps to ensure there are no water leaks:
- Turn on both the hot and cold water supply valves.
- Observe the hose connections for any signs of leaks or drips.
- If you notice any leaks, make sure the connections are tightened properly.
Attaching the Drainage Hose
Proper attachment of the drainage hose is necessary to ensure the effective removal of wastewater from your washer machine. Follow these steps to attach the drainage hose:
- Locate the drainage outlet on the back of the washer machine. It is usually labeled.
- Attach one end of the drainage hose securely to the drainage outlet.
- Place the other end of the drainage hose into a dedicated drainpipe or utility sink.
Ensuring Proper Placement and Position
Positioning the washer machine correctly is essential for its stable operation and efficient performance. Follow these steps to ensure proper placement and position:
- Place your washer machine on a level and sturdy surface.
- Ensure there is enough space around the washer machine for proper ventilation and easy access.
- Avoid overcrowding the area with other objects that may obstruct the washer machine’s functionality.
Securing the Hose to Prevent Leaks
To prevent any leaks or water backups, it is important to secure the drainage hose properly. Follow these steps to secure the hose:
- Affix the drainage hose to the dedicated drainpipe or utility sink using hose clamps or zip ties.
- Ensure the hose is tightly secured to prevent any loosening or disconnection during operation.
Testing the Drainage System
Before using your washer machine, it is recommended to test the drainage system to ensure proper functionality. Follow these steps to test the drainage:
- Fill the washer machine with a small amount of water.
- Start a short washing cycle and observe whether the water drains properly without any backups or blockages.
- If you notice any issues, check the drainage hose and connections to ensure they are secure and free from obstructions.
Connecting the Power Supply
Connecting the washer machine to a safe and appropriate power supply is essential for its performance and safety. Follow these steps for a proper power supply connection:
- Ensure that you understand the electrical requirements of your washer machine by referring to the manufacturer’s instructions or specifications.
- Locate the grounded outlet near your washer machine.
- Plug the washer machine’s power cord securely into the grounded outlet.
Understanding Electrical Requirements
Understanding the electrical requirements of your washer machine is crucial to avoid any electrical hazards or damage. Refer to the manufacturer’s instructions or specifications for specific electrical details, such as voltage, amperage, and circuit breaker requirements.
Using a Grounded Outlet
A grounded outlet ensures a safe and reliable power supply for your washer machine. It helps protect against electrical faults and reduces the risk of electrical shock. Avoid using adapters or extension cords and always connect your washer machine to a properly grounded outlet.
Ensuring Safety with Proper Wiring
Proper wiring is vital for the safe operation of your washer machine. Make sure the power cord is intact and undamaged. If you notice any frayed wires or exposed conductors, contact a professional electrician to address the issue.
Testing And Troubleshooting
Performing initial tests
Once you have successfully installed your washer machine, it is essential to perform a series of initial tests to ensure that everything is functioning properly. These tests will help you identify any potential issues before they become major problems. Here are a few important initial tests to perform:
- Check if the machine is level and stable on the ground to prevent excessive vibrations.
- Ensure that all the hoses and connections are securely attached, and there are no leaks.
- Inspect the inlet hoses for any blockages or damages that could restrict water flow.
- Check the electrical connections and ensure that the power cord is properly plugged in.
- Verify that the washer machine is properly grounded for safety reasons.
- Ensure that the control knobs and buttons are functioning correctly.
Checking water flow and drainage
Proper water flow and drainage are essential for the efficient operation of your washer machine. Here are some steps to check the water flow and drainage:
- Turn on the water supply valve and check if water is flowing freely into the machine.
- Inspect the drain hose to ensure it is properly connected and free from any kinks or blockages.
- Run a test cycle and observe if the water is draining properly without any signs of backup or overflow.
- If you encounter any issues with water flow or drainage, refer to the manufacturer’s instructions or troubleshooting guide for solutions.
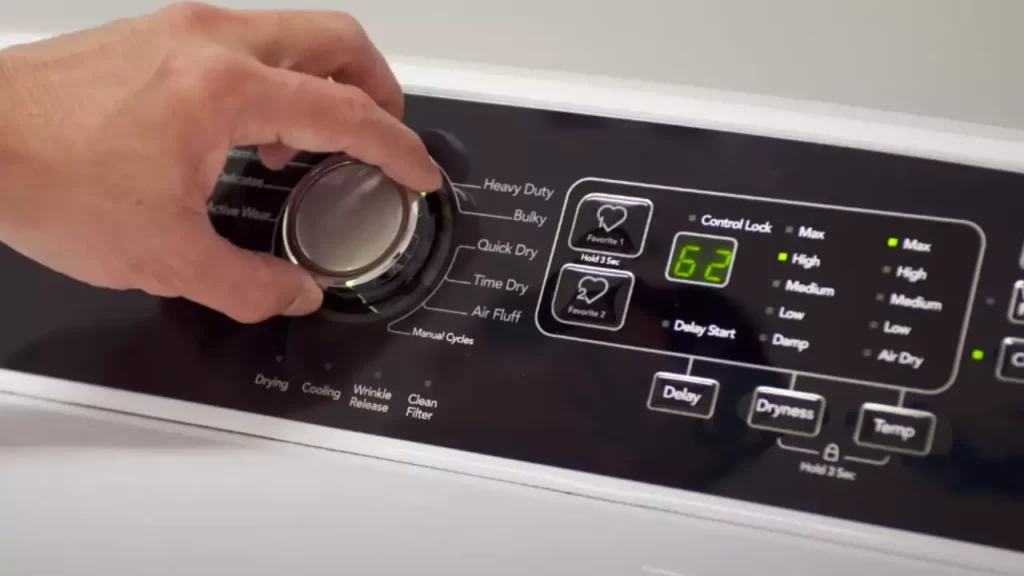
Verifying power supply and controls
Before running a test cycle, it is essential to verify the power supply and controls of your washer machine. Here’s how:
- Ensure that the power supply to the machine is stable and within the specified voltage range.
- Check the control panel and make sure that all the buttons and settings are functional.
- If the machine has any additional features or settings, familiarize yourself with them to ensure proper operation.
Running a test cycle
Running a test cycle is a crucial step to ensure that your washer machine is working as intended. Here’s how to run a test cycle:
- Load the machine with a small load of laundry, following the manufacturer’s guidelines.
- Select the appropriate water temperature, wash cycle, and any desired options.
- Start the test cycle and monitor the machine closely for any abnormal noises, leaks, or error codes.
- Observe the water level, agitation, and spin cycles to ensure they are functioning correctly.
- If any issues arise during the test cycle, consult the troubleshooting section of the user manual or contact customer support for assistance.
Troubleshooting common installation issues
Even with careful installation, you may encounter some common issues that can be easily resolved. Here are a few troubleshooting tips:
- Identifying potential problems and solutions
- Addressing water leaks or drain blockages
- Resolving electrical or power-related issues
By following these troubleshooting steps, you can quickly address and resolve common installation issues, ensuring optimal performance of your washer machine.
Maintenance And Care Tips
Proper maintenance and care are essential to ensure your washer machine performs efficiently and lasts a long time. By following these maintenance and care tips, you can keep your washer machine in excellent condition. From regular cleaning and inspection to using the right detergent and settings, let’s explore how to take care of your washer machine.
Regular cleaning and maintenance
Regular cleaning and maintenance help maintain the performance and longevity of your washer machine. Here are some steps to follow:
- Periodically inspect the hoses and fittings for wear or leaks.
- Check the drum and ensure there are no foreign objects or items left behind.
- Wipe the exterior of the machine with a mild detergent and a damp cloth.
- Keep the machine in a well-ventilated area to prevent mold growth.
Cleaning the machine and detergent dispenser
To ensure a clean and fresh wash every time, it is important to clean the machine and detergent dispenser regularly. Here’s how:
- Empty the detergent dispenser and remove any residue or buildup.
- Use a mixture of equal parts water and vinegar to clean the dispenser.
- Wipe down the interior and exterior of the machine with a damp cloth.
- Consider using a washing machine cleaner or descaler for an occasional deep clean.
Removing lint and debris from filters
Filters in your washer machine can accumulate lint and debris, affecting its performance. Follow these steps to remove lint and debris:
- Locate and remove the lint filter from your machine.
- Rinse the filter under running water to remove any lint or debris.
- Inspect the filter for signs of damage and replace if necessary.
- Clean the filter housing to ensure proper installation.
Preventing mold and odors
Mold and odors can develop in your washer machine if not properly maintained. Take these steps to keep your machine fresh and mold-free:
- Leave the door or lid of the machine open after each use to let it air dry.
- Wipe down the rubber gasket and door seal to remove any moisture or residue.
- Avoid using excess detergent, as it can contribute to mold growth.
- Run a hot water wash cycle with vinegar or bleach every few months to remove any lingering smells.
Proper loading and usage guidelines
Proper loading and usage of your washer machine can prevent unnecessary strain and damage. Follow these guidelines:
- Sort your laundry by color and fabric type before loading.
- Avoid overloading the machine, as it can affect the quality of the wash.
- Distribute the load evenly to maintain balance during the wash cycle.
- Follow the manufacturer’s instructions for water temperature and cycle selection.
Using the right detergent and settings
Using the right detergent and settings plays a crucial role in achieving optimal wash results. Consider these tips:
- Choose a detergent specifically formulated for your type of machine and clothing.
- Follow the recommended dosage on the detergent packaging.
- Adjust the settings according to the type of load and desired outcome.
- Opt for eco-friendly detergents and energy-saving settings when possible.
Maximizing efficiency and energy savings
Maximizing efficiency and energy savings not only benefits the environment but also helps reduce utility costs. Here are some tips:
- Wash full loads whenever possible to maximize water and energy usage.
- Choose shorter wash cycles for lightly soiled clothes.
- Consider using cold water for certain fabrics and loads.
- Regularly clean and maintain your machine to ensure optimal performance.
By following these maintenance and care tips, you can keep your washer machine running smoothly and effectively for years to come.
Frequently Asked Questions
Can I Install Washing Machine Myself?
Yes, you can install a washing machine yourself. Follow the manufacturer’s instructions, ensure proper connections, and make sure the machine is level. If unsure, consult a professional. Enjoy the convenience of doing it yourself!
How Do You Install A Washing Machine Step By Step?
To install a washing machine, follow these steps: 1. Choose a suitable location. 2. Connect the water hoses to the machine and the water supply. 3. Plug in the power cord. 4. Level the machine by adjusting its feet. 5.
Test the machine by running a cycle. That’s it!
What Do You Need To Install A Washing Machine?
To install a washing machine, you will need a few things: a suitable space with access to water and drainage, electrical connection, a water supply hose, a drain hose, and a leveling tool. Make sure to follow the manufacturer’s instructions for proper installation.
How Do You Hook Up A Water Line To A Washing Machine?
To hook up a water line to a washing machine, first, turn off the main water supply. Connect one end of the water hose to the machine’s water inlet valve and the other end to a suitable water source, like a faucet or a dedicated water outlet.
Slowly turn on the water supply and check for any leaks.
Conclusion
Installing a washer machine doesn’t have to be a daunting task. By following the step-by-step guide outlined in this blog post, you can successfully set up your washer machine and ensure its optimal performance. From choosing the right location to connecting the necessary hoses, this process can be completed with ease.
So, get ready to enjoy the convenience and efficiency that a properly installed washer machine can bring to your laundry routine.