To install a wall anchor in plaster, start by drilling a small hole using a drill bit slightly smaller than the anchor’s size. Then, gently tap the anchor into the hole until it is flush with the wall surface.
Plaster walls can present a challenge when it comes to hanging objects securely. Without the proper support, items may come loose and damage the wall. One effective solution is to use wall anchors. These small devices provide stability and strength to hold objects in place.
However, installing a wall anchor in plaster requires careful precision to avoid damaging the wall. We will walk you through the step-by-step process of how to install a wall anchor in plaster. By following these instructions, you can ensure that your anchor is installed securely and your desired objects are safely hung on your plaster wall.
Tools And Materials Needed
Before you start installing a wall anchor in plaster, make sure you have the following tools and materials ready:
Wall anchor kit
A reliable and sturdy wall anchor kit is essential for this project. Choose a kit that includes anchors, screws, and any other necessary components. This will ensure you have everything you need to complete the installation successfully.
Drill
A power drill is crucial for making holes in the plaster. Look for a drill with adjustable speed settings to provide precise control while drilling. Make sure your drill is fully charged or has a power source nearby for uninterrupted work.
Drill bit
Equally important is the right drill bit. A high-quality masonry or carbide drill bit will be effective in creating clean and precise holes in the plaster. Ensure that the drill bit is the appropriate size for the wall anchor screws you’ll be using.
Screwdriver
A screwdriver will be necessary for inserting the wall anchor screws into the holes. Make sure you have the right type and size of screwdriver that matches the screws in your wall anchor kit. This will ensure a secure and stable installation.
Pencil
A simple pencil will come in handy for marking the exact spot where you’ll be drilling the holes. It’s important to have a clear guide to prevent any mistakes or inaccuracies during the installation process.
Tape measure
Precision is key when it comes to installing wall anchors in plaster. A tape measure will help you accurately measure the distances between the anchor points. This is particularly important if you’re planning to install multiple wall anchors in a specific pattern or arrangement.
Level
To ensure your wall anchor is perfectly vertical or horizontal, a level is essential. Place the level on the wall surface after drilling the holes to guarantee an even and level installation. This step is crucial for both the aesthetics and functionality of the wall anchor.
Hammer
A hammer is necessary for driving in certain wall anchor types, such as expansion anchors or toggle bolts. Make sure you select a hammer that is suitable for the specific wall anchor you’ll be using. This will help you achieve a secure and tight fit.
Vacuum cleaner or brush
Cleaning up the debris after drilling is essential for maintaining a clean and tidy workspace. Use a vacuum cleaner or a brush to remove any dust or loose particles from the drilled holes and surrounding area. This will ensure a clean and solid anchor installation.
Safety goggles
Your safety is paramount while working with power tools. Protect your eyes from any flying debris or dust particles by wearing safety goggles throughout the installation process.
Dust mask
Additionally, to guard against inhaling dust or particles, use a dust mask. This will help protect your respiratory system as you work with the plaster.
Now that you have a comprehensive list of the tools and materials you’ll need, you’re ready to tackle the installation process. Ensure all the items are readily available and in good condition, so you can successfully complete the wall anchor installation in your plaster wall.
Assessing The Wall
Before you can install a wall anchor in plaster, it’s crucial to assess the wall and ensure you have all the necessary information to proceed safely and securely. This involves locating the stud, determining the wall thickness, and checking for electrical wires. Let’s go through each step to help you get started on your wall anchor installation project.
Locating the Stud
The first step in assessing the wall is to locate the stud. The stud is a vertical framing member that provides structural support to the wall and holds it together. By finding the studs, you’ll know where you can securely anchor your wall-mounted items.
To locate the stud, you can use various methods:
- Using an electronic stud finder: This handy tool detects changes in the density of the wall, indicating the presence of a stud. Simply move the stud finder along the wall until it beeps or lights up, indicating the stud’s location.
- Knocking on the wall: By lightly tapping the wall with your knuckles, you can listen for solid, consistent sounds. The hollow spots between the studs will produce a dull sound, while the studs themselves will create a more solid and resonant noise.
- Using a magnet: If there are nails or screws in the studs, a small magnet can help you detect their presence. By sliding the magnet along the wall, it will be attracted to the metal fasteners, indicating the location of the stud.
Determining the Wall Thickness
After locating the stud, the next step is to determine the wall thickness. This information is essential to ensure you choose the appropriate length of wall anchor for a secure installation.
Measuring the wall thickness is a straightforward process. Use a tape measure or ruler to determine the distance between the outer surface of the wall and the stud. Be sure to take multiple measurements along the same vertical line to account for any irregularities or variations in the wall construction.
Checking for Electrical Wires
Prior to installing a wall anchor, it’s crucial to check for electrical wires behind the plaster. Drilling or inserting a wall anchor into a wall with live wires can lead to electrical hazards and damage. Take the necessary precautions and follow these steps to ensure safety:
- Shut off the power to the area where you’ll be working. Locate the electrical panel in your home and switch off the circuit breaker that corresponds to the room or area.
- Use a non-contact voltage tester to double-check for the presence of electrical currents. Hold the tester close to the wall surface and move it along the intended anchor installation area. If the tester beeps or lights up, there might be wiring present.
- If you detect electrical activity, it’s best to consult a professional electrician to safely assess the situation and make any necessary adjustments before proceeding with your wall anchor installation.
By following these steps to assess the wall, you’ll have a solid foundation of knowledge to proceed with installing your wall anchor in plaster. This careful preparation will ensure a safe and secure anchoring solution that will withstand the test of time.

Choosing The Right Wall Anchor
When it comes to hanging heavy items on a plaster wall, choosing the right wall anchor is crucial. Not only does it ensure the stability and security of your installation, but it also prevents any damage to the wall surface. In this section, we will guide you through the process of selecting the most appropriate wall anchor based on factors such as wall thickness, weight capacity, and surface material.
Understanding different types of wall anchors
Before diving into the selection process, it’s essential to have a basic understanding of the different types of wall anchors available. Let’s take a look at some popular options:
| Anchor Type | Best Use |
|---|---|
| Plastic Expansion Anchor | Lightweight items |
| Metal Toggle Bolt | Medium to heavy items |
| Metal Molly Bolt | Heavy items |
| Plastic Plug Anchor | Light to medium items |
Selecting the appropriate anchor based on wall thickness and weight capacity
When it comes to selecting the right anchor, two essential factors to consider are wall thickness and weight capacity. Here’s an easy-to-follow guide:
- Measure the thickness of your wall using a tape measure or ruler.
- Refer to the weight capacity specifications provided by the anchor manufacturer.
- Choose an anchor that can support the weight of your item without exceeding the wall thickness capacity.
- For example, if you have a thick plaster wall and need to hang a heavy mirror, a metal Molly Bolt would be a suitable choice.
Considering the surface material and desired end result
In addition to wall thickness and weight capacity, it’s important to consider the surface material of your plaster wall and the desired end result. Depending on the texture, hardness, and condition of the plaster, certain anchors may be more suitable than others. Take the following factors into account:
- If your plaster wall has a rough texture, using an anchor with a flange or collar will provide a more secure hold.
- For delicate or older plaster, opt for plastic anchors to minimize the risk of cracking or damaging the wall.
- If you aim for a flush and seamless installation, choose anchors that can be easily concealed.
By considering the surface material and desired end result, you can ensure that your wall anchor installation blends seamlessly with the aesthetics of your room.
With these guidelines in mind, you are now equipped to choose the right wall anchor for your plaster wall. Remember to always follow the manufacturer’s instructions for proper installation, and enjoy the peace of mind that comes with a securely hung item.
Preparing The Wall
Before you can install a wall anchor in plaster, you need to properly prepare the wall. This involves marking the location for the wall anchor, determining the depth for drilling, and preparing the drill bit. Follow these steps to ensure a successful installation.
Marking the Location for the Wall Anchor
The first step in preparing the wall is marking the location for the wall anchor. This will ensure that the anchor is installed in the correct spot and provides maximum support. Here’s how to do it:
- Carefully examine the area where you want to install the wall anchor.
- Make sure there are no pipes, electrical wires, or other obstacles behind the plaster.
- Once you’ve determined that it is safe to proceed, use a pencil to mark the exact spot where the wall anchor will go.
- For additional precision, you can use a level to ensure that the mark is perfectly straight.
Determining the Depth for Drilling
After you’ve marked the location for the wall anchor, the next step is to determine the depth for drilling. This will depend on the size and type of wall anchor you are using. Follow these guidelines:
- Refer to the instructions provided with the wall anchor to determine the recommended depth for drilling.
- Measure the length of the wall anchor using a ruler or tape measure.
- Using a piece of masking tape, mark the depth on your drill bit to ensure you don’t drill too deep.
- Alternatively, you can use a piece of electrical tape wrapped around the drill bit to mark the desired depth.
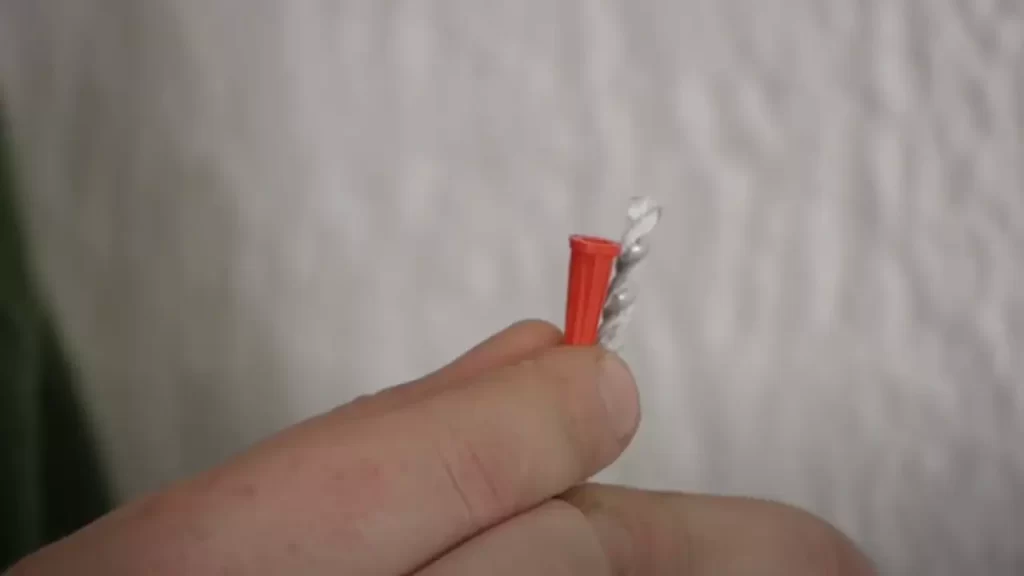
Preparing the Drill Bit
Before you start drilling, it’s important to properly prepare the drill bit for a clean and efficient installation. Here’s what you need to do:
- Select a drill bit that matches the size of the wall anchor.
- If the drill bit is dull or damaged, replace it with a new one to ensure smooth drilling.
- Hold the drill bit firmly and clean off any debris or dust to prevent it from getting stuck in the hole.
- If necessary, apply a lubricant to the drill bit to reduce friction and make drilling easier.
By following these steps to prepare the wall, mark the location for the wall anchor, determine the depth for drilling, and prepare the drill bit, you’ll be well on your way to successfully installing a wall anchor in plaster.
Drilling The Hole
Using the drill to create the hole
Drilling the hole is a crucial step in installing a wall anchor in plaster. To ensure a sturdy and secure anchor, it’s important to follow the proper drilling technique. Start by inserting the appropriate drill bit into the drill. For plaster walls, it’s recommended to use a masonry drill bit, typically made of carbide. This type of bit is specifically designed to penetrate through the hard surface of plaster with ease.
Once the drill bit is securely attached, position it on the wall where you want the anchor to be installed. Press the trigger gently to start the drilling process. Begin drilling at a slow speed to ensure accuracy and control. Gradually increase the speed as you progress, being careful not to apply too much pressure. Let the drill do the work, allowing the bit to penetrate smoothly through the plaster.
Cleaning the hole from dust and debris
After drilling the hole, it’s essential to clean it thoroughly from any dust or debris that may have accumulated. This step is crucial to ensure a proper fit for the wall anchor. Using a small brush or a compressed air canister, carefully remove all the loose particles from the hole. Pay close attention to the bottom of the hole to ensure it’s completely clear.
Checking the hole’s depth and width
Checking the depth and width of the hole is an important part of the wall anchor installation process. It ensures that the anchor will fit securely and provide the necessary support. To measure the depth, place a drill bit next to the hole and mark the desired depth using tape. Gently insert the marked drill bit into the hole to determine its depth. Adjust if needed to meet the recommended depth for your specific wall anchor.
Next, check the width of the hole. Measure the diameter of the wall anchor and compare it to the actual hole. The hole should be slightly smaller than the diameter of the anchor to create a snug fit. If the hole is too wide, it may compromise the stability of the anchor. In such cases, consider using a larger anchor or filling the hole and re-drilling to the appropriate width.
Inserting The Wall Anchor
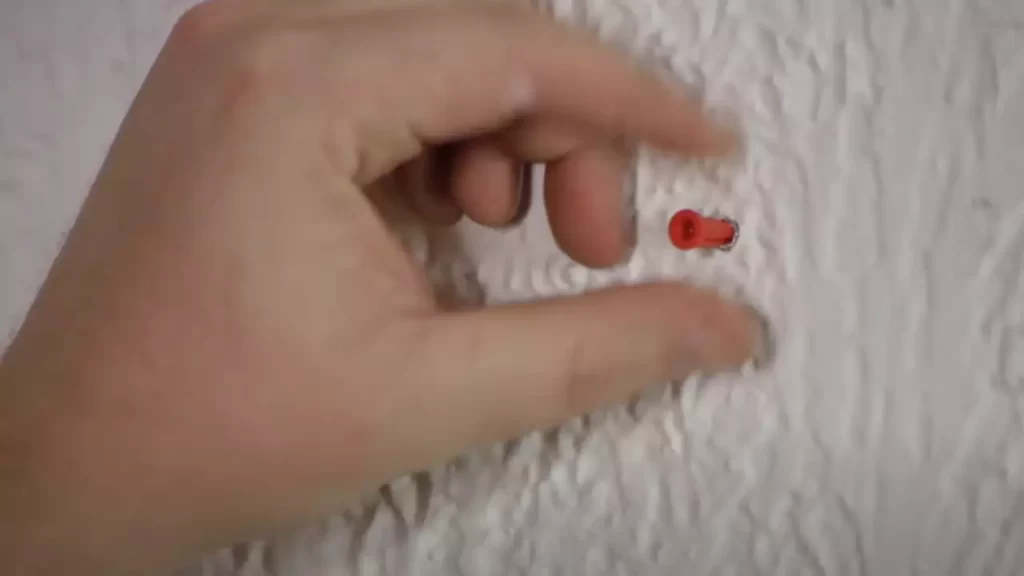
Inserting a wall anchor in plaster may seem like a daunting task, but with the right technique, it can be a breeze. This crucial step ensures that your wall anchor is securely held in place, allowing you to hang objects on your plastered wall with confidence. In this section, we will walk you through the steps of aligning the wall anchor with the hole, gently tapping it in with a hammer, and ensuring that the anchor is flush with the wall surface.
Aligning the wall anchor with the hole
Before inserting the wall anchor, it’s important to align it properly with the hole you have drilled in the plaster. This ensures a snug fit and prevents the anchor from becoming loose over time. Hold the wall anchor parallel to the hole, making sure that it lines up perfectly. You can use your fingers to secure the anchor in place as you prepare for the next step.
Gentle tapping with a hammer
With the wall anchor aligned, it’s time to gently tap it into the hole using a hammer. This step requires finesse to avoid damaging the plaster. Place the tip of the hammer against the head of the wall anchor and apply light pressure. Gradually tap the anchor into the hole, using small, controlled movements. Be careful not to hit the anchor too hard, as this can cause the plaster to crack or break. Repeat this process until the anchor is securely inserted into the wall.
Ensuring the anchor is flush with the wall surface
After you have inserted the wall anchor, it’s essential to check that it sits flush with the wall surface. This helps create a stable base for attaching any hanging hardware. Run your fingers along the anchor, feeling for any gaps or protrusions. If you detect any unevenness, gently tap the anchor further into the hole until it sits flush with the wall. This step guarantees that the anchor is securely in place and ready to support the weight of your desired hanging object.
By following these steps for inserting a wall anchor, you can confidently hang objects on your plastered walls without worrying about them falling or causing damage. Taking the time to align the anchor, tap it in gently with a hammer, and ensure it is flush with the wall surface will result in a secure and reliable hold. Now that you have mastered this technique, you can enjoy the benefits of a well-decorated and organized living space.
Installing The Screw
Screw selection based on the wall anchor type
When it comes to installing a wall anchor in plaster, selecting the right screw based on the wall anchor type is crucial. Using the correct screw ensures a secure and long-lasting installation. There are different types of wall anchors available in the market, including plastic anchors, toggle bolts, and molly bolts. Each type requires a specific type of screw for optimal performance.
Here is a table summarizing the screw selection for different wall anchor types:
| Wall Anchor Type | Recommended Screw |
|---|---|
| Plastic Anchors | Phillips or slotted screws |
| Toggle Bolts | Machine screws with corresponding thread size |
| Molly Bolts | Screws with matching diameter and length |
Inserting the screw into the wall anchor
Once you have selected the right screw for your wall anchor, it’s time to insert it into the anchor. Make sure the anchor is securely fastened to the wall before inserting the screw. Apply gentle pressure and turn the screw clockwise until it catches the threads of the anchor. This step may vary depending on the type of wall anchor you are using.
Tightening the screw until secure
Once the screw is inserted into the wall anchor, it’s important to tighten it until it is fully secure. This ensures that the anchor and the screw are tightly held in place, providing maximum stability for the object you will be hanging on the wall. Use a screwdriver or a drill with the appropriate bit size to tighten the screw. Avoid over-tightening, as it may damage the anchor or the plaster.
Remember to repeat the process for each screw and anchor combination to achieve a secure and robust installation.
By following these steps, you can confidently install a wall anchor in plaster, ensuring a strong and reliable mounting for your objects.
Testing And Adjusting
Testing and Adjusting:
Once you have successfully installed a wall anchor in plaster, it is important to test its stability and make any necessary adjustments. This step is crucial to ensure that your anchor can effectively support the weight of the object you plan to hang on the wall. Follow these easy steps to test and adjust your wall anchor.
Checking the anchor’s stability
Start by gently giving the anchor a slight tug. If it feels loose or moves easily, you will need to adjust it for a more secure fit. Use a screwdriver to tighten the anchor by turning it clockwise. This will expand the anchor, providing a tighter grip on the plaster. Take care not to overtighten, as this may cause damage to the wall.
Adjusting the anchor if needed
If tightening the anchor does not provide the stability you desire, you may need to adjust the anchor’s position. Gently pull the anchor out of the wall, using a screwdriver if necessary. Now, take a closer look at the hole and ensure it is clean and free of debris. Any dirt or dust can compromise the anchor’s grip. Clean the hole, if needed, and examine the anchor for any signs of damage.
| Signs of Anchor Damage | Action |
|---|---|
| Cracked or broken plastic | Replace the anchor with a new one. |
| Deformed or bent anchor | Replace the anchor with a new one. |
| Loose screws or hardware | Tighten the screws or replace them if necessary. |
Once you have inspected the anchor and made any necessary replacements or adjustments, carefully reinsert it into the hole. Gently push it in until it sits snugly against the wall.
Testing the weight capacity
To ensure that your wall anchor can handle the weight of the object you plan to hang, it is essential to conduct a weight capacity test. Attach a known weight to the hook or screw, gradually increasing the load until the anchor’s stability is tested.
Using a scale or weight measuring tool, start with a weight that is significantly lighter than what you plan to hang. Slowly add more weight, carefully observing the anchor’s performance. If the anchor starts to loosen or the weight causes any damage to the wall, stop immediately. It is crucial not to exceed the weight capacity specified by the manufacturer.
By following these simple steps to test and adjust your wall anchor, you can ensure its stability and maximize its weight-bearing capacity. Taking the time to properly test and adjust your anchor will give you peace of mind knowing that your valuable items are securely and safely attached to the wall.
Filling And Finishing
Patching the hole with spackling paste or filler
Once you have successfully drilled the hole for your wall anchor in plaster, it’s time to move on to the next step: filling and finishing. Patching the hole is essential to ensure a smooth and seamless appearance on your wall. With the help of spackling paste or filler, you can easily cover up the hole and prepare it for the finishing touches. Here’s how to patch the hole using spackling paste or filler:
1. Clean the area: Start by cleaning the hole and the surrounding area with a damp cloth. Remove any loose plaster or debris to ensure a clean and smooth surface for patching.
2. Apply the spackling paste or filler: Take a putty knife and scoop out a small amount of spackling paste or filler. Apply it to the hole, filling it completely. Make sure to apply the paste or filler evenly for a seamless finish.
3. Smooth and level the surface: Use the flat edge of the putty knife to smooth and level the surface of the patch. Gently scrape off any excess paste or filler until it is flush with the surrounding wall.
4. Let it dry: Allow the spackling paste or filler to dry completely according to the manufacturer’s instructions. This may take a few hours or overnight, depending on the product used.
5. Sand the patched area: Once the patch is dry, use a fine-grit sandpaper to gently sand the surface. This will ensure that the patched area is smooth and blends seamlessly with the rest of the wall. Be careful not to apply too much pressure or sand too aggressively, as this can damage the surrounding plaster.
Sanding the patched area
After patching the hole with spackling paste or filler, sanding is the next important step to achieve a flawless finish. Sanding not only smoothens the patched area but also helps in blending it with the rest of the wall. To sand the patched area effectively, follow these steps:
1. Select the right sandpaper: Choose a fine-grit sandpaper, such as 220 grit, for sanding the patched area. This will ensure a smooth finish without causing damage to the plaster.
2. Sand gently and evenly: Hold the sandpaper firmly and sand the patched area in a circular motion. Apply light pressure and sand evenly across the surface. Be sure to feather the edges of the patched area to blend it seamlessly with the surrounding wall.
3. Check your progress: Periodically stop sanding to check your progress. Run your hand over the patched area to feel for any bumps or inconsistencies. If necessary, continue sanding until the patched area is smooth and flush with the rest of the wall.
4. Remove dust: After sanding, use a clean, dry cloth to wipe away the dust created. Make sure the surface is clean and free of any debris before moving on to the next step.
Painting or covering the patched area to match the wall
Once you have patched and sanded the hole in your plaster wall, the final step is to paint or cover the patched area to blend with the rest of the wall. This will ensure a seamless and professional-looking finish. Here’s how to go about it:
1. Choose the right paint or cover: Select a paint color that matches the existing wall or choose a patching cover material that closely resembles the texture and color of the plaster.
2. Apply the paint or cover: Using a small paintbrush or roller, carefully apply the paint to the patched area. If you opt for a cover material, follow the manufacturer’s instructions for application. Make sure to cover the entire patched area evenly.
3. Blend the edges: To create a seamless transition between the patched area and the rest of the wall, feather the edges of the paint or cover material. This will help it blend in with the surrounding plaster and create a cohesive look.
4. Let it dry: Allow the paint or cover material to dry completely according to the manufacturer’s instructions. This may take a few hours or more, depending on the product used.
5. Inspect the result: Once dry, closely inspect the patched and painted area to ensure a smooth finish and a seamless blend with the rest of the wall. Make any necessary touch-ups or adjustments if needed.
By following these steps for filling and finishing when installing a wall anchor in plaster, you can achieve a professional-looking result that seamlessly blends with your wall. Take your time and pay attention to detail, and your wall anchor installation will be practically invisible to the naked eye.
Frequently Asked Questions
Can You Use Anchors In Plaster Walls?
Yes, anchors can be used in plaster walls for hanging objects. They provide support and help prevent damage to the wall. Make sure to choose the correct anchor type and install it properly to ensure a secure and sturdy hold.
How Do You Put An Anchor In A Plaster Wall Without A Drill?
To put an anchor in a plaster wall without a drill, use a hammer and a nail. Gently tap the nail into the wall until it feels secure, then remove the nail and insert the anchor into the hole. Finally, screw in your desired fixture.
What Is The Best Anchor For A Plaster Wall?
The best anchor for a plaster wall is a toggle bolt. It provides strong support and can handle heavier items.
How Do You Install Plastic Anchors In Plaster?
To install plastic anchors in plaster, follow these steps: 1. Choose an appropriate plastic anchor size for your project. 2. Use a power drill to create a hole in the plaster at the desired location. 3. Insert the plastic anchor into the hole until it is flush with the surface.
4. Gently tap the anchor with a hammer to secure it in place. 5. Finally, insert the screw into the anchor and tighten until secure.
Conclusion
Installing a wall anchor in plaster can be a straightforward process if you have the right tools and follow the proper steps. By carefully drilling a hole, inserting the anchor, and securing it tightly, you can ensure your wall will support heavy objects securely.
Remember to choose the appropriate anchor based on the weight of the item you’re hanging. With these tips, you’ll be ready to tackle any wall anchor installation project with confidence. Happy hanging!