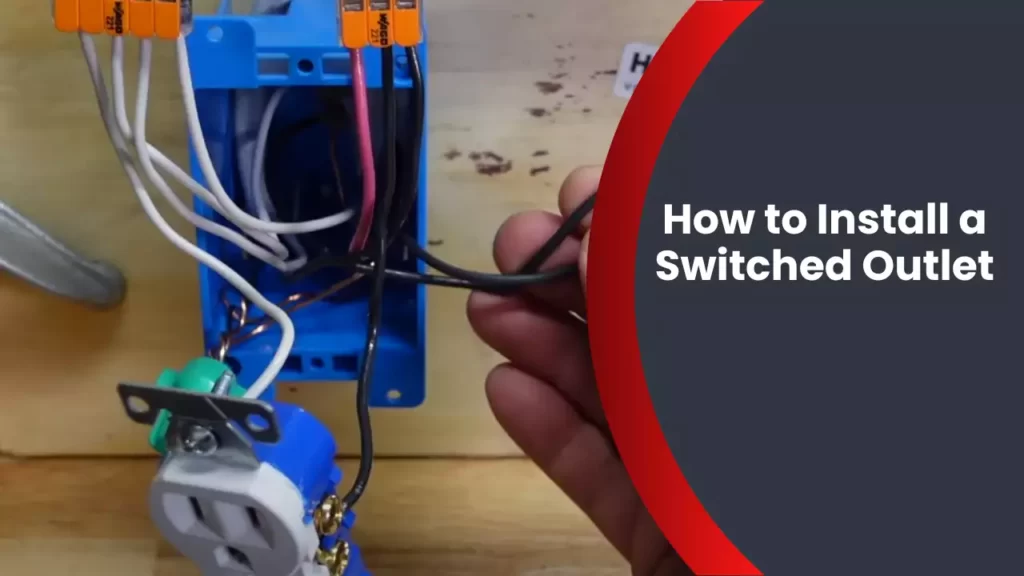
To install a switched outlet, turn off the power, remove the existing outlet, connect the switch to the power source and the outlet, and install the new outlet. Installing a switched outlet allows you to control a plugged-in device using a switch.
Whether you want to turn off a lamp without unplugging it or control a power-consuming device more conveniently, installing a switched outlet is a simple and efficient solution. In this guide, we will walk you through the step-by-step process of installing a switched outlet to enhance your home’s electrical functionality.
By following these instructions, you can enjoy the convenience of controlling your devices with ease. So, let’s get started with this straightforward procedure.
Understanding The Basics
Differentiating between a regular outlet and a switched outlet
If you are new to the world of electrical installations or are considering making changes to your home’s electrical setup, it’s essential to understand the basics. One key aspect is knowing the difference between a regular outlet and a switched outlet. While standard outlets are always powered, switched outlets provide you with greater control over the flow of electricity.
To differentiate between the two, it’s important to know that a regular outlet functions by constantly providing power to a connected device. This means that once an appliance or electronic is plugged in, it continues to draw electricity, even when not in use. On the other hand, a switched outlet offers the convenience of being able to turn the power on and off as needed.
Why you might need a switched outlet in your home
There are several practical reasons why you might consider installing a switched outlet in your home. Having a switch allows you to turn off power to specific devices or appliances without having to unplug them completely. This is particularly useful when you have devices with built-in clocks or settings that need to be preserved, such as microwaves or DVRs.
Switched outlets are also commonly used for lighting fixtures. They give you the flexibility to control the lighting levels in a room, providing ambience and energy savings. With a switched outlet, you can switch off the power to a lamp or other light source without having to reach for the socket or cord.
Safety considerations before proceeding with the installation
Before diving into any electrical installation, it’s crucial to prioritize safety. Electrical work can be hazardous if not approached with caution, and it’s important to take the necessary precautions. Here are a few safety considerations to keep in mind before proceeding with the installation of a switched outlet:
- Ensure that the power is turned off at the main circuit breaker before starting any electrical work. This will protect you from the risk of electric shock.
- Double-check that the outlet box you plan to use is suitable for the installation. Make sure it is properly grounded and has enough space to accommodate the new switch.
- Use the correct tools and equipment when working with electricity. Insulated screwdrivers and gloves are essential for added protection.
- If you are unsure about any aspect of the installation process, consult a licensed electrician to ensure the job is done safely and up to code.
By understanding the basics of a switched outlet, recognizing its benefits, and placing a strong emphasis on safety considerations, you can confidently proceed with the installation. Remember, electricity can be dangerous, so it’s always wise to exercise caution and seek professional assistance when needed.
Gathering The Tools And Materials
Before diving into the installation process, it is crucial to gather all the necessary tools and materials. Having everything you need on hand will make the installation smoother and more efficient. In this section, we will discuss the essential tools, necessary materials and supplies, as well as provide tips for selecting the right switch and outlet for your specific needs.
Essential tools you’ll need for the installation
When it comes to installing a switched outlet, having the right tools is essential. Here are the tools you’ll need to ensure a successful installation:
- Screwdriver: A set of flathead and Phillips head screwdrivers is necessary for removing outlet covers and securing wires.
- Wire Stripper: A wire stripper is indispensable for removing the insulation from the electrical wires.
- Pliers: Needle-nose pliers are useful for bending and twisting wires, while lineman pliers allow you to cut and strip wires with ease.
- Voltage Tester: Before working on any electrical connections, always double-check the power is off using a voltage tester.
- Wire Connectors: Wire connectors, or wire nuts, are used to secure and connect wires together.
- Tape Measure: A tape measure is handy when positioning the outlet and switch in the desired locations.
Necessary materials and supplies for a successful installation
Now that you have the essential tools, it’s time to gather the necessary materials and supplies for a successful installation. Here’s what you’ll need:
- Switch: Choose a switch that suits your needs and complements your home decor. There are various types, including toggle switches, rocker switches, and dimmer switches.
- Socket Outlet: Consider the type of socket outlet you require – it could be a standard duplex outlet or a USB-enabled outlet for charging devices.
- Electrical Box: Depending on the existing electrical setup, you may need to install an electrical box to house the switch and outlet.
- Wire: Ensure you have the appropriate gauge and color of wire for the installation. A typical switched outlet requires a black (hot) wire, a white (neutral) wire, and a bare copper (ground) wire.
- Faceplate Cover: Once the installation is complete, a faceplate cover provides a finishing touch and protects the switch and outlet.
Tips for choosing the right switch and outlet for your needs
Choosing the right switch and outlet is crucial for your specific requirements. Here are some tips to help you make the perfect selection:
- Consider the functionality: Determine what features are essential for your switch and outlet. Would you like a dimmer switch for adjustable lighting or USB ports for convenient device charging?
- Check compatibility: Ensure the switch and outlet you choose are compatible with your home’s electrical system and the wiring configuration.
- Consider aesthetics: Take into account the design and style of your home when selecting the switch and outlet, ensuring they blend seamlessly with your existing decor.
- Read reviews: Before making a final decision, read reviews from reputable sources to ensure the chosen switch and outlet have a positive track record in terms of quality and performance.
By gathering the right tools and materials and carefully selecting the switch and outlet, you are ready to move on to the next step – preparing for the installation process.
Step 1: Turning Off The Power
Locating and shutting off the correct circuit breaker
Before you start installing a switched outlet, it is crucial to turn off the power to the circuit you will be working on. This will help prevent any accidental electrical shocks or injuries. Locating and shutting off the correct circuit breaker is the first step in ensuring your safety and the proper installation of the switched outlet.
Using a voltage tester to ensure the power is off
Even after turning off the circuit breaker, it is always wise to double-check and confirm that the power is indeed turned off. This is where a voltage tester comes in handy. Using a voltage tester will give you peace of mind by verifying that there is no electricity running through the wires you will be working with.
To use a voltage tester, follow these basic steps:
- Make sure that the voltage tester is functioning properly.
- Insert the tester’s probes into the outlet and observe the indicator lights or digital display.
- If there is no indication of voltage, such as lights or a reading on the display, then you can proceed with confidence knowing that the power is effectively turned off.
The importance of wearing protective gear during this step
During the process of turning off the power, it is essential to prioritize your safety by wearing the proper protective gear. This includes:
- Safety goggles: Protect your eyes from any potential debris or sparks.
- Gloves: Keep your hands safe from electrical shocks or injuries.
Additionally, make sure you are wearing appropriate clothing and have a non-conductive mat or surface to stand on. These precautions may seem small but can make a significant difference in preventing accidents and injuries during the installation process.
Step 2: Removing The Existing Outlet
Now that we have covered the necessary safety precautions in Step 1, it is time to move on to Step 2: Removing the Existing Outlet. This step is crucial in order to prepare the wall for the installation of the new switched outlet. In this section, we will guide you through the process of safely removing the faceplate and outlet from the wall, disconnecting the wires, and properly disposing of the old outlet and its components.
How to Safely Remove the Faceplate and Outlet from the Wall
The first step in removing the existing outlet is to safely remove the faceplate from the wall. Follow these steps:
- Start by turning off the power to the outlet from the circuit breaker panel.
- Using a flathead screwdriver, gently pry the faceplate away from the wall. Be careful not to damage the surrounding area.
- Once the faceplate is removed, you will see the outlet itself. Again, use a screwdriver to loosen the screws that secure the outlet to the electrical box.
- Gently pull the outlet out of the box, being careful not to disconnect any wires just yet.
Disconnecting the Wires from the Existing Outlet
Now that you have the outlet removed from the wall, it’s time to disconnect the wires. Here’s how:
- Locate the screws that hold the wires in place on the sides of the outlet.
- Using a screwdriver, loosen the screws to release the wires. Make sure to keep the wires separated and avoid letting them touch each other or any metal surfaces.
- Once the wires are disconnected, carefully remove the old outlet from the wires.
Proper Disposal of the Old Outlet and Its Components
When it comes to getting rid of the old outlet, it is important to properly dispose of it and its components. Follow these guidelines:
- Check with your local waste management regulations to determine the proper method of disposal for electrical components in your area.
- Wrap the old outlet and its components in a plastic bag to prevent any loose wires from being exposed.
- Place the wrapped outlet in a designated container for electronic waste or bring it to a proper disposal facility.
By following these steps, you can safely remove the existing outlet from the wall, disconnect the wires, and dispose of the old outlet and its components responsibly. With the old outlet out of the way, we can now move on to Step 3: Preparing the New Switched Outlet for Installation.
Step 3: Wiring The Switched Outlet
Now that you have a clear understanding of the different components involved in installing a switched outlet, it’s time to move on to the wiring process. This step is crucial for ensuring that your outlet functions properly and safely. In this section, we will discuss two important aspects of wiring the switched outlet: understanding the different terminal screws on the outlet and switch, and identifying the load and line wires for proper connection. We will also cover the importance of properly grounding the outlet to ensure safety.
Understanding the different terminal screws on the outlet and switch
When it comes to wiring a switched outlet, it’s essential to understand the different terminal screws on both the outlet and switch. These terminal screws are labeled and color-coded for easy identification. On the switched outlet, you will typically find three screws: brass, silver, and green.
| Terminal Screw | Description |
|---|---|
| Brass | The brass screw is used for connecting the hot wire, also known as the line wire. This wire carries the electrical current from the circuit breaker to the outlet. |
| Silver | The silver screw is used for connecting the neutral wire, which completes the electrical circuit. This wire carries the return current back to the electrical panel. |
| Green | The green screw is designated for grounding the outlet. It connects the ground wire, providing a safe path for electrical currents in case of a fault. |
Identifying the load and line wires for proper connection
To ensure the proper functioning of a switched outlet, it’s crucial to identify and connect the load and line wires correctly. The load wire is the wire that carries the electrical current from the outlet to the connected device. The line wire, on the other hand, carries the electrical current from the circuit breaker to the outlet.
When wiring a switched outlet, the line wire connects to the brass screw on the outlet, while the load wire connects to the brass screw on the switch. This setup allows you to control the flow of electricity to the connected device using the switch.
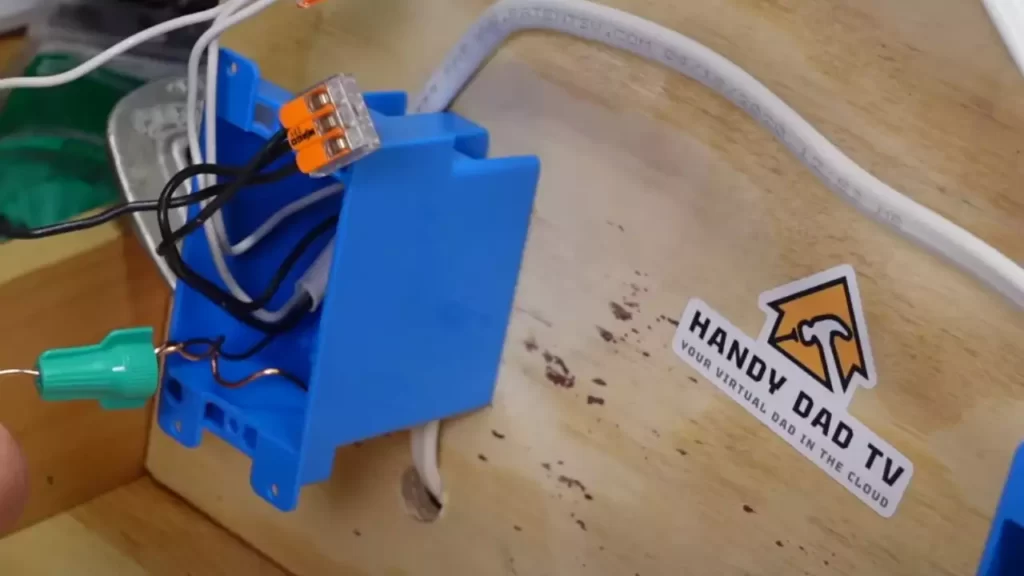
Properly grounding the outlet to ensure safety
The grounding of an outlet is of utmost importance to ensure safety. It protects against electrical shocks and prevents potential hazards. Grounding involves connecting the green screw on the outlet to the ground wire in the electrical box.
To properly ground the outlet, make sure the ground wire is securely attached to the green screw. If the outlet box is made of metal, it should also be grounded using a grounding screw or wire. This grounding connection provides a safe path for electrical currents to follow in case of a fault or electrical surge.
By understanding the different terminal screws, identifying the load and line wires, and properly grounding the outlet, you can ensure the safe and efficient operation of your switched outlet. Make sure to follow these steps carefully to avoid any electrical hazards and enjoy the convenience of a switched outlet.
Step 4: Installing The Switch
Once you have correctly mounted the electrical box, installed the outlet, and connected the wires, it’s time to complete the installation process by installing the switch. This step is crucial as it allows you to control the power flow to the outlet. Follow the steps below to properly install the switch onto the electrical box.
Mounting the switch onto the electrical box
To begin, ensure the power to the electrical box is turned off before proceeding with this step. This will help prevent any electrical accidents or injuries during the installation process.
Next, carefully remove the switch from its packaging, taking note of the screws provided. Typically, there will be two screws that will be used to attach the switch to the electrical box.
Align the switch over the electrical box, making sure the switch’s toggle aligns with the desired up and down positions. Gently push the switch towards the electrical box until it firmly sits against it.
Using a screwdriver or a suitable tool, tighten the mounting screws provided with the switch. Make sure the switch is secured tightly to the electrical box to prevent any movement or instability.
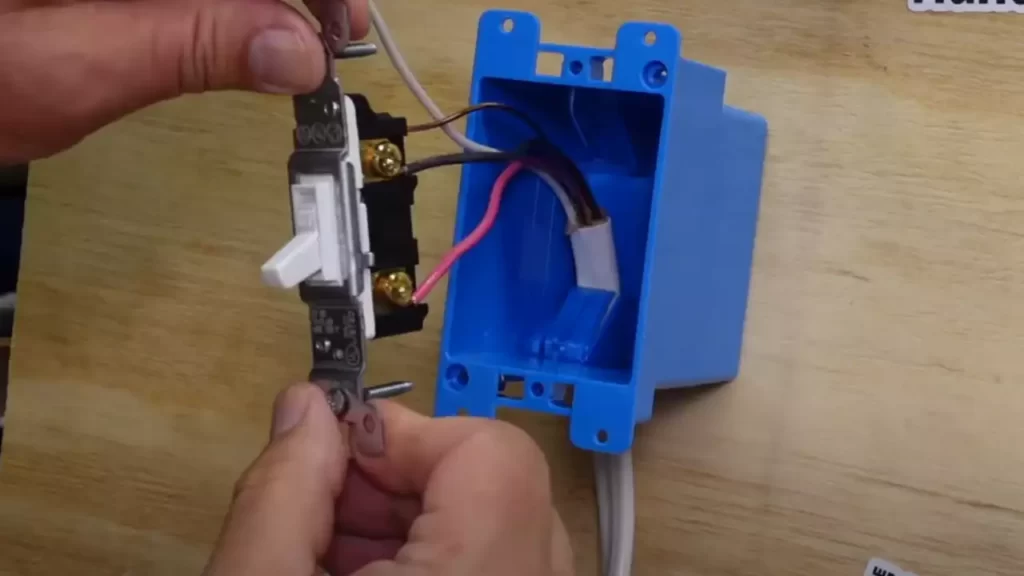
Connecting the wires to the switch terminals
Now that the switch is securely mounted onto the electrical box, it’s time to connect the wires. Start by identifying the two wires coming from the outlet, as well as the two wires within the electrical box that are connected to the switch.
Strip off approximately half an inch of insulation from the end of each wire, revealing the bare copper or colored conductor. Match the corresponding hot wires, commonly black or red, to the brass or dark-colored terminals on the switch.
Using a screwdriver or a tool suitable for securing wires, connect each wire to its respective terminal by tightening the screw until the wire is firmly held in place. Ensure there is no exposed copper or loose strands of wire that could cause a short circuit or poor connection.
Securing the switch into place and testing its functionality
After connecting the wires, double-check the connections to ensure they are secure and properly tightened. Any loose or poorly connected wires can lead to electrical hazards or improper functionality of the switch.
With the switch securely attached and the wires properly connected, it’s time to test the functionality of the newly installed switched outlet. Turn on the power and carefully flip the switch to the desired up or down position and check if the outlet is receiving power or not.
Using an electrical tester or plugging a device into the outlet, verify that the power supply is correctly controlled by the switch. If everything works as expected, congratulations! You have successfully installed a switched outlet. If any issues arise, it’s recommended to consult a professional electrician for further assistance.
Now that you have completed the installation process, you can enjoy the convenience and control provided by your newly installed switched outlet.
Step 5: Installing The New Outlet
Now that you have successfully prepared the wires for connection, it’s time to install the new outlet. This step involves properly connecting the wires to the outlet terminals and securing the outlet into the electrical box. Let’s get started!
Preparing the wires for connection to the new outlet
Before connecting the wires to the new outlet, it is essential to prepare them properly. Here’s how you can do it:
1. Begin by stripping the insulation off the wires. Use wire strippers to carefully remove about 3/4 inch of insulation from the ends of the wires. Make sure to remove only the necessary insulation to expose the bare wire.
2. Once the wires are stripped, inspect the exposed ends for any fraying or damage. Trim off any frayed strands to ensure a clean and secure connection.
3. Next, you’ll want to identify the hot (black), neutral (white), and ground (green or bare copper) wires. Take a moment to double-check the wire colors and confirm their functionality using a voltage tester. Safety should always be a priority when working with electricity!
Properly connecting the wires to the outlet terminals
Now that the wires are prepared, it’s time to connect them to the outlet terminals. Follow these steps to ensure a proper and secure connection:
1. Locate the terminal screws on the new outlet. Typically, there will be a set of screws on each side of the outlet, labeled as “hot,” “neutral,” and “ground.”
2. Start by connecting the hot (black) wire. Loosen the terminal screw labeled “hot” and insert the exposed end of the black wire into the opening. Tighten the screw firmly to secure the connection. Ensure that no bare wire is exposed beyond the terminal.
3. Next, connect the neutral (white) wire. Loosen the terminal screw labeled “neutral” and insert the exposed end of the white wire into the opening. Tighten the screw securely.
4. Finally, connect the ground (green or bare copper) wire. Loosen the terminal screw labeled “ground” and insert the exposed end of the ground wire into the opening. Tighten the screw firmly to complete the connection.
Securing the outlet into the electrical box
After connecting the wires, it’s time to secure the outlet into the electrical box. Follow these steps to ensure a safe and secure installation:
1. Carefully tuck the connected wires back into the electrical box, ensuring they are not cramped or pinched. Avoid overfilling the box with wires, as this can lead to potential hazards.
2. Align the outlet with the screw holes on the electrical box. Double-check that the outlet is level and straight before proceeding.
3. Insert the screws provided with the outlet into the screw holes on the top and bottom of the outlet. Use a screwdriver to tighten the screws until the outlet is securely fastened to the electrical box.
4. Give the outlet a gentle tug to ensure it is firmly attached to the box. If it feels loose, tighten the screws further until secure.
Congratulations! You have successfully installed the new switched outlet. Take a moment to double-check your work and ensure all connections are secure before restoring power to the circuit.
Step 6: Testing And Finalizing
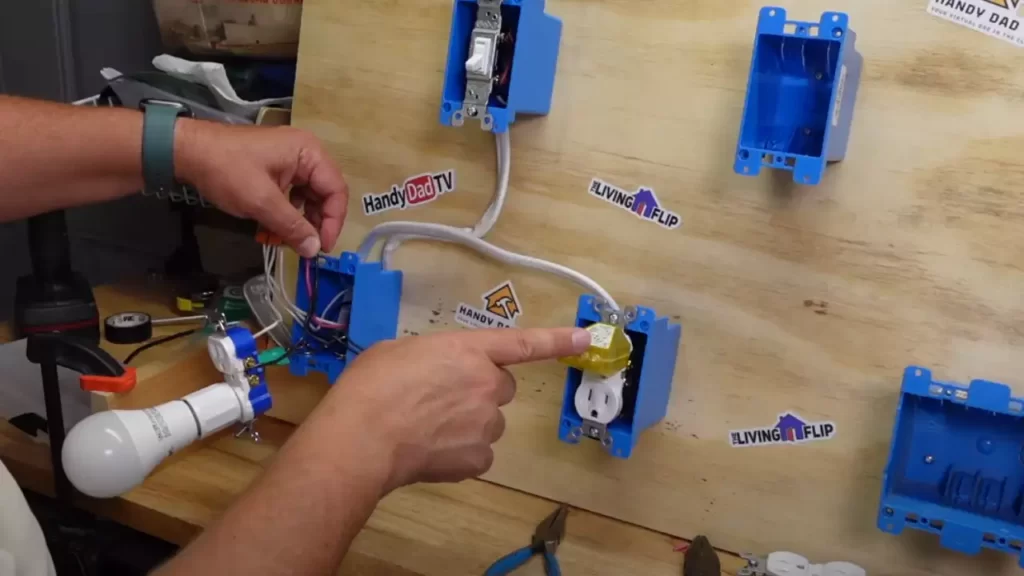
Turning the power back on and testing the switched outlet
Now that you have successfully completed the installation process, it’s time to turn the power back on and test your newly installed switched outlet. This step is crucial to ensure that everything is functioning properly and that you can enjoy the convenience and functionality of your new setup.
- Firstly, locate the main electrical panel in your home. It is usually found in a basement, utility room, or garage.
- Open the panel door and locate the circuit breaker that you turned off earlier during the installation.
- Flip the circuit breaker back into the “on” position. You should hear a clicking sound when it properly engages.
- Once the power is restored, head over to the switched outlet you just installed.
- Plug in a lamp or any other electrical device into the outlet.
- With caution, turn on the switch attached to the outlet. If everything is wired correctly, the device should power on.
- If the device doesn’t turn on, double-check your wiring connections and ensure they are securely fastened.
- If the device still doesn’t work, It’s necessary to troubleshoot the issue further.
Troubleshooting common issues and solutions
While it’s uncommon, there might be certain issues that arise during the testing phase. Here are a few common problems and their possible solutions to help you troubleshoot:
| Issue | Solution |
|---|---|
| No power to the outlet | Double-check the connections, ensuring they are properly secured. Also, verify that the circuit breaker is in the “on” position and hasn’t tripped. |
| Outlet works but doesn’t switch on/off | Check the wiring connections between the switch and the outlet. Make sure the black “hot” wire is connected to the brass screw on the switch and the black wire of the cable running to the outlet. |
| Switched outlet only works intermittently | This issue may suggest loose or faulty wiring connections. Inspect all connections and tighten them if needed. |
Final tips and precautions to ensure a successful installation
- Ensure that the power is completely turned off during the installation process to avoid any electrical shock. Safety should always be your top priority.
- Double-check all connections, ensuring they are tight and properly secured.
- Use wire nuts or electrical tape to cover exposed wire ends to prevent any accidental contact.
- If you encounter any issues or are unsure about the installation process, it’s always best to consult a professional electrician.
- Remember to turn off the circuit breaker before making any adjustments or modifications to the switched outlet in the future.
By following these steps and adhering to the provided tips and precautions, you can confidently test and finalize your switched outlet installation. Enjoy the added convenience and enhanced functionality in your home!
Frequently Asked Questions
What Is The Point Of A Switched Outlet?
A switched outlet allows you to control the power to a device using a switch on the wall. This can be useful to turn off appliances or lights without having to unplug them.
How Is A Switched Outlet Wired?
A switched outlet is wired by connecting a switch to control the power to the outlet. The hot wire is connected to the switch terminal, while the neutral wire is connected directly to the outlet. When the switch is turned on, it completes the circuit, allowing electricity to flow to the outlet, and when it’s turned off, the circuit is broken, cutting the power supply.
How Do I Change An Outlet To A Switch?
To change an outlet to a switch, first turn off the power. Then, remove the outlet and disconnect the wires. Connect the wires to the switch, ensuring the hot wire is connected to the black screw. Attach the switch to the electrical box and secure it.
Turn the power back on to test the switch.
How Do You Flip An Electrical Outlet?
To flip an electrical outlet, first, turn off the power. Then, unscrew the faceplate and remove the screws holding the outlet in place. Carefully disconnect the wires from the old outlet and reattach them to the new outlet in the desired orientation.
Finally, secure the new outlet and replace the faceplate.
Conclusion
Installing a switched outlet can be a straightforward DIY project, saving you time and money in the long run. By following the step-by-step guide provided in this blog post, you can easily accomplish a safe and efficient installation. Remember to turn off the power before starting and consult an electrician if you encounter any difficulties.
With a switched outlet, you can enhance lighting control and conveniently power specific devices. So why wait? Start installing your switched outlets today and enjoy the added flexibility they bring to your home!