To install a surface mount electrical outlet, first, turn off the power supply. Then, remove the faceplate and attach the outlet box to the wall.
Next, connect the wires to the outlet and secure it in the box. Finally, attach the faceplate and restore the power supply. Installing a surface mount electrical outlet can be a straightforward and efficient way to add convenience and functionality to your living space.
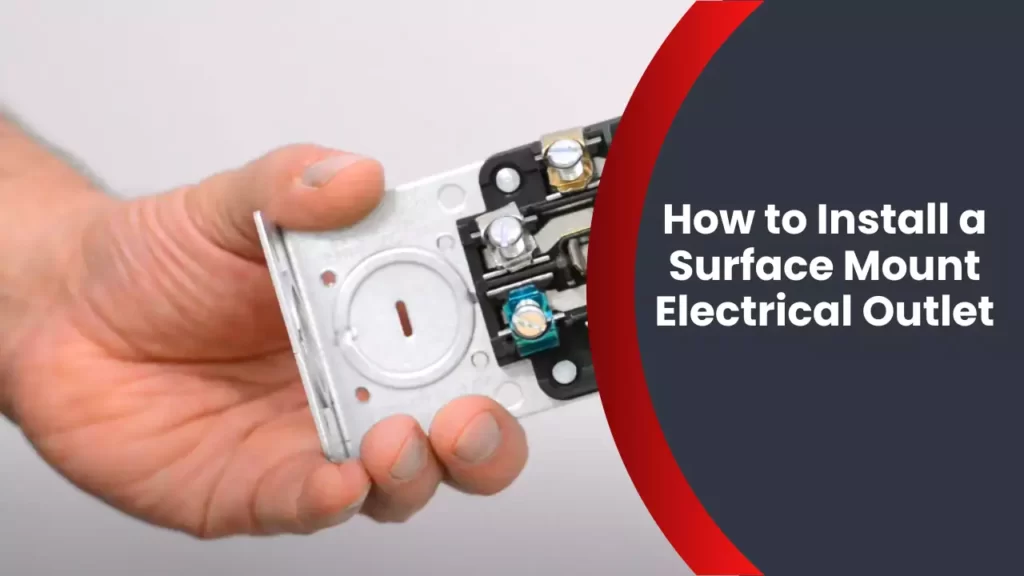
Whether you need to install an outlet in a new location or replace an existing one, this process can be easily done with a few simple steps. In this guide, we will walk you through the process of installing a surface mount electrical outlet, ensuring a safe and efficient outcome. By following these steps and taking the necessary precautions, you can successfully complete this project without the need for professional assistance. So, let’s get started and learn how to install a surface mount electrical outlet in your home or office.
Tools And Materials Needed
Before you dive into the process of installing a surface mount electrical outlet, it’s important to gather all the necessary tools and materials. This will ensure a smooth and efficient installation process, saving you time and frustration down the line. In this section, we will provide a detailed description of the tools and materials you need for this project.
Description of the Tools Required
1. Screwdriver: You will need a flat-head or Phillips screwdriver, depending on the type of screws used in your particular outlet. This tool is essential for removing and attaching screws during the installation process.
2. Wire strippers: Wire strippers are an important tool for removing the insulation from the electrical wires. This allows for proper connections to be made with the outlet.
3. Wire cutters: Wire cutters are used to trim and cut electrical wires to the desired length. They are essential for ensuring a neat and tidy installation.
4. Voltage tester: A voltage tester is used to ensure that the power is completely turned off before starting any electrical work. This tool helps in preventing any accidents or electrical shocks.
5. Drill: Depending on the surface material, you may need a drill to create holes to mount the electrical box securely. Make sure to use an appropriate drill bit for the material you are drilling into.
6. Level: A level ensures that the outlet is installed evenly and straight. This tool is essential for achieving a professional-looking installation.
Description of the Materials Required
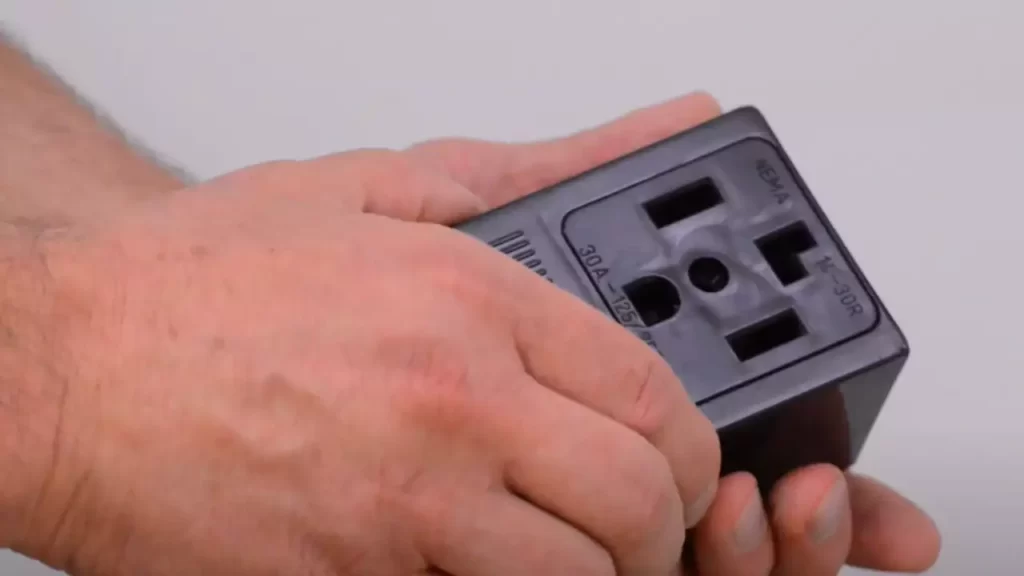
1. Surface mount electrical outlet: Choose a surface mount electrical outlet that suits your needs and preferences. There are various types available, so make sure to select one that fits with the specifications of your electrical system.
2. Mounting box: A mounting box is needed to securely hold the electrical outlet in place. Choose a box that is compatible with the surface material and dimensions of your outlet.
3. Electrical wires: Depending on the electrical system in your home, you may need different types and sizes of electrical wires. It’s important to choose the right wires to ensure proper connectivity and safety.
4. Wire connectors: Wire connectors are used to join the electrical wires together, forming secure connections. Choose connectors that are appropriate for the size and type of wires you are working with.
5. Mounting screws: Mounting screws are used to attach the mounting box to the surface material. Make sure to choose the appropriate screws that are suitable for the type of surface you are mounting the box on.
6. Electrical tape: Electrical tape is used to insulate and protect the electrical connections. It adds an extra layer of safety and helps to prevent any accidental contact with live wires.
By having all the necessary tools and materials at hand, you can ensure a successful and safe installation of a surface mount electrical outlet. Now that you are equipped with the information about what you need, it’s time to move on to the installation process.
Preparing For Installation
Locating the Electrical Panel
Before beginning the installation process for a surface mount electrical outlet, it is crucial to locate the electrical panel in your home. This panel is where the main power for your entire house is controlled and distributed. In order to install the outlet safely, you need to know where the power supply is coming from and how to properly disconnect it. Typically, the electrical panel is located in the basement, garage, or utility room, but it may vary depending on the layout of your home.
Turning Off the Power
The next step in preparing for the installation of a surface mount electrical outlet is to turn off the power supply. This is a vital safety measure to prevent any electric shocks or accidents during the installation process. To do this:
- Locate the main circuit breaker or fuses in your electrical panel.
- Identify the switch or fuse that controls the power to the area where you’ll be installing the outlet.
- Switch off the circuit breaker or remove the fuse to cut off the power supply.
It is essential to double-check that the power is completely switched off before proceeding with the installation.
Gathering Necessary Permits and Approvals
Prior to installing a surface mount electrical outlet, it is important to ensure that you have obtained any necessary permits or approvals required by your local building or electrical authority. Failing to do so may result in penalties or difficulties when selling your home in the future. Contact your local authority to check if a permit is required for this installation. They will provide you with the necessary guidelines and regulations to adhere to.
Mounting The Electrical Box
Mounting the electrical box is a crucial step when installing a surface mount electrical outlet. This is where you will secure the box in the chosen location, ensuring it is properly supported and aligned. The following are three important aspects to consider when mounting the electrical box: choosing the ideal location, marking and cutting the hole, and attaching the box securely.
Choosing the Ideal Location
Before you start mounting the electrical box, you need to choose the ideal location. This will depend on the specific requirements of your project. Here are some factors to consider when selecting the location:
- Accessibility: Ensure the location is easily accessible so that you can easily connect the wires and install the outlet.
- Code compliance: Make sure the chosen location is compliant with local electrical codes.
- Stud availability: Check if there are studs or support beams nearby that you can anchor the electrical box to for added stability.
Marking and Cutting the Hole
After choosing the ideal location for your surface mount electrical outlet, the next step is to mark and cut the hole for the electrical box. Follow these steps:
- Turn off the power: Before you begin any electrical work, always turn off the power supply to the area where you will be working.
- Mark the hole location: Use a pencil or marker to mark the exact spot where the hole needs to be cut.
- Measure and cut the hole: Using a drywall saw or a multi-tool, carefully cut out the marked hole following the dimensions of the electrical box.
Attaching the Box Securely
Once the hole has been cut, it’s time to attach the electrical box securely. Follow these steps:
- Position the box: Insert the electrical box into the hole and position it so that it is flush with the wall surface.
- Secure the box: Using screws or nails, fasten the box to the wall or stud, ensuring it is firmly attached.
- Check for stability: Give the box a gentle tug to ensure it is securely mounted and does not move or wobble.
By following these steps, you will successfully mount the electrical box for your surface mount electrical outlet. It’s important to pay attention to the details and ensure the box is properly secured, as this will help prevent any safety hazards or issues in the future.
Wiring The Outlet
Once you have gathered all the necessary tools and materials, it’s time to start wiring the surface mount electrical outlet. This step is crucial in ensuring the safe and efficient functioning of your outlet. Here, we will walk you through the process, starting with understanding electrical wiring basics.
Understanding Electrical Wiring Basics
Before you begin working with electrical wiring, it’s important to have a basic understanding of how electricity flows and how circuits are connected. Here are a few key points to keep in mind:
- Electricity always follows the path of least resistance.
- Wires are color-coded to indicate their purpose (e.g., black for hot wire, white for neutral wire, and green or bare copper for ground wire).
- Before working with any electrical components, it’s crucial to turn off the power supply to the area where you will be working.
Stripping and Connecting Wires
Once you have a clear understanding of electrical wiring basics, you can start stripping and connecting the wires to the surface mount electrical outlet. Follow these steps:
- Start by using wire strippers to remove about 3/4 inch of insulation from the ends of the wires.
- Caution: Be careful not to damage the copper or stranded wire while stripping the insulation.
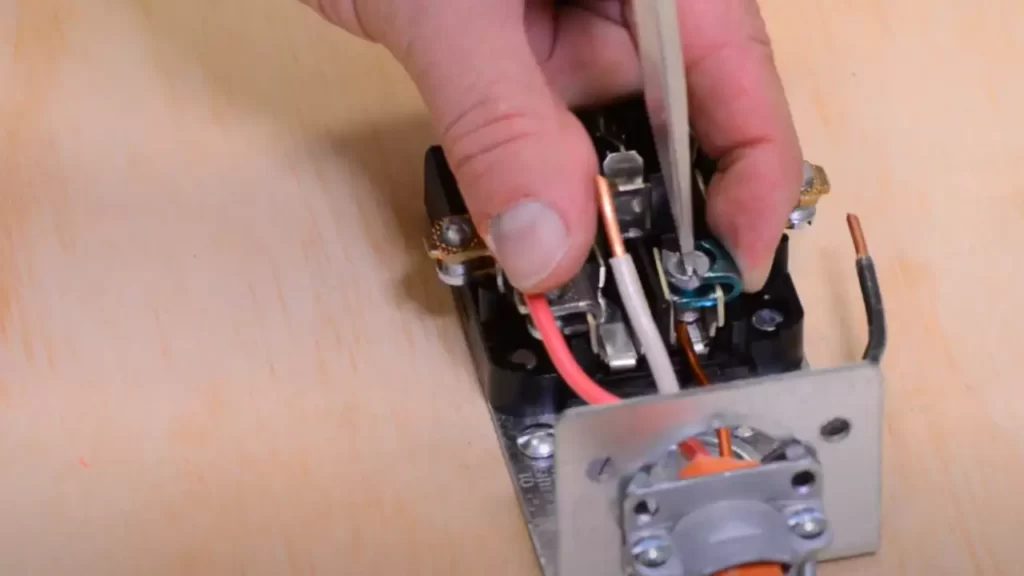
- Next, identify the hot wire (usually black or red) and the neutral wire (usually white). With wire nuts, twist together the corresponding wires from the outlet and the wall. For example, connect the hot wire from the outlet to the hot wire from the wall.
- Tip: To ensure a secure connection, it’s a good practice to twist the wires clockwise before screwing on the wire nut.
- If you have a ground wire (usually green or bare copper), connect it to the ground screw on the outlet. If your outlet doesn’t have a ground screw, consult a professional electrician to determine the best course of action.
Securing the Connections with Wire Nuts
Finally, after all the wires are properly connected, it’s time to secure the connections using wire nuts. Wire nuts are cone-shaped plastic caps that twist onto the exposed wires, ensuring a tight and safe connection. Follow these steps:
- Step 1: Hold the connected wires tightly together.
- Step 2: Place the wire nut over the exposed wire ends.
- Step 3: Twist the wire nut clockwise until it is firmly secured.
Make sure each wire nut is tight and there are no loose or exposed wires. This will prevent any potential safety hazards and ensure a reliable electrical connection.
With the wiring complete, you are one step closer to successfully installing a surface mount electrical outlet. In the next section, we will discuss the process of mounting the outlet to the wall or surface.
Installing The Outlet
Attaching the outlet to the electrical box
Once you have prepared the electrical box and secured it in the desired location, it’s time to attach the surface mount electrical outlet. Follow these steps to ensure a secure connection:
- Begin by identifying the two screws on the outlet, usually located on the top and bottom.
- Line up the holes on the outlet with the corresponding holes on the electrical box.
- Using a screwdriver or an appropriate tool, firmly tighten the screws to secure the outlet to the box. Ensure that the outlet is level and flush against the box.
Note: Take caution not to overtighten the screws, as this can damage the outlet or the electrical box.
Ensuring proper grounding
Proper grounding is essential for the safety and functionality of the electrical outlet. Follow these steps to ensure that the outlet is properly grounded:
- Connect the grounding wire, usually green or bare copper, to the grounding terminal at the back of the outlet.
- If the electrical box has a grounding screw, attach the grounding wire to it. Otherwise, connect the wire directly to the grounding wire in the circuit.
- Tighten any screws or connectors carefully to ensure a secure connection.
- Double-check that all connections are tight and secure before proceeding.
Note: If you are unsure about grounding or encounter any issues, it is strongly recommended to consult a licensed electrician for further assistance.
Testing for functionality
Before finalizing the installation, it’s crucial to test the outlet for proper functionality. Follow these steps to conduct a simple functionality test:
- Make sure the circuit breaker or fuse for the outlet is turned off to prevent any accidents.
- Use a voltage tester or a multimeter to check for the presence of electrical current.
- Carefully touch the probes of the tester to the live terminals (black and white) of the outlet.
- If the tester indicates the presence of voltage, the outlet is ready for use. If not, recheck the wiring connections or consult a professional for further assistance.
Note: Safety should always be a top priority when working with electrical installations. If you are not confident in your abilities or encounter any difficulties during the installation process, it’s best to seek professional help.

Finishing Touches
Patching any Holes or Imperfections
After successfully installing your surface mount electrical outlet, it’s important to ensure that the surrounding area looks neat and seamless. This means patching any holes or imperfections that may have occurred during the installation process.
If there are any small gaps or cracks around the outlet, you can use a patching compound or putty knife to fill them in. Apply the compound to the affected area, smoothing it out with the putty knife until it’s level with the surrounding surface. Allow it to dry as per the manufacturer’s instructions before continuing with the next step.
In case you encounter larger holes or openings, it may be necessary to use a patching kit or mesh tape to provide extra reinforcement. Simply apply the patching material over the hole, making sure to press it firmly against the surface. Once it’s in place, use a putty knife to apply a thin layer of joint compound over the patching material, feathering the edges so it blends seamlessly with the rest of the wall. Allow the compound to dry before sanding it smooth.
Painting or Concealing the Outlet if Desired
If you want your surface mount electrical outlet to blend in with the surrounding wall even further, you have the option to paint or conceal it. This step is entirely optional, as some people prefer to leave the outlet visible for easy access.
If you choose to paint the outlet, start by applying a primer to the entire surface. This will help the paint adhere better and ensure a more professional finish. Once the primer is dry, use a small brush or roller to apply your chosen paint color to the outlet, taking care to avoid getting paint inside the actual electrical components. Apply multiple thin coats for the best results, allowing each coat to dry before applying the next.
Alternatively, if you’d like to conceal the outlet, you can use a wall plate cover designed specifically for this purpose. These covers are available in various styles and finishes, allowing you to match them to your existing wall decor. Simply attach the cover over the outlet using the provided screws, following the manufacturer’s instructions.
Cleaning up the Workspace
To complete the finishing touches, it’s essential to clean up your workspace. This not only ensures a tidy appearance but also promotes safety by removing any potential hazards.
Start by gathering all the tools and materials you used during the installation and storing them in their appropriate places. Dispose of any packaging or waste materials in a responsible manner. Use a damp cloth or sponge to wipe down the area around the outlet, removing any dust or debris that may have accumulated.
Inspect the outlet itself and its surrounding area for any remaining smudges or fingerprints. Use a gentle cleaning solution and a soft cloth or paper towel to clean the outlet and restore its shine if necessary. Finally, double-check that all electrical connections are secure and that the outlet is functioning properly.
With the finishing touches complete, you can now enjoy your newly installed surface mount electrical outlet, knowing that it not only provides convenient power access but also complements the overall aesthetics of your space.
Frequently Asked Questions
Can You Surface Mount An Outlet?
Yes, you can surface mount an outlet.
Can You Surface Mount Electrical Wiring In A House?
Yes, it is possible to surface mount electrical wiring in a house. Surface mounting involves installing electrical conduit on walls or ceilings to hold the wiring securely. This method is commonly used when it is not feasible or preferred to conceal the wiring within the walls.
What Is A Surface Mount Outlet Box?
A surface mount outlet box is a box used to hold electrical outlets that are mounted directly on the surface of a wall or ceiling. It is a convenient solution when there is no access to an existing electrical box or when installing new outlets.
Can You Surface Mount A Metal Electrical Box?
Yes, you can surface mount a metal electrical box. It is a suitable option for mounting electrical boxes on walls or other surfaces. This method allows for secure installation and easy access to electrical connections.
Conclusion
Installing a surface mount electrical outlet is a simple and effective way to enhance the functionality and convenience of your home. By following the step-by-step instructions provided in this blog post, you can confidently complete the installation process yourself. With proper tools and precautions, this DIY project can be accomplished without any hassle.
So, say goodbye to tangled cords and hello to a more organized and efficient space. Get ready to enjoy the benefits of a well-placed electrical outlet in your home!