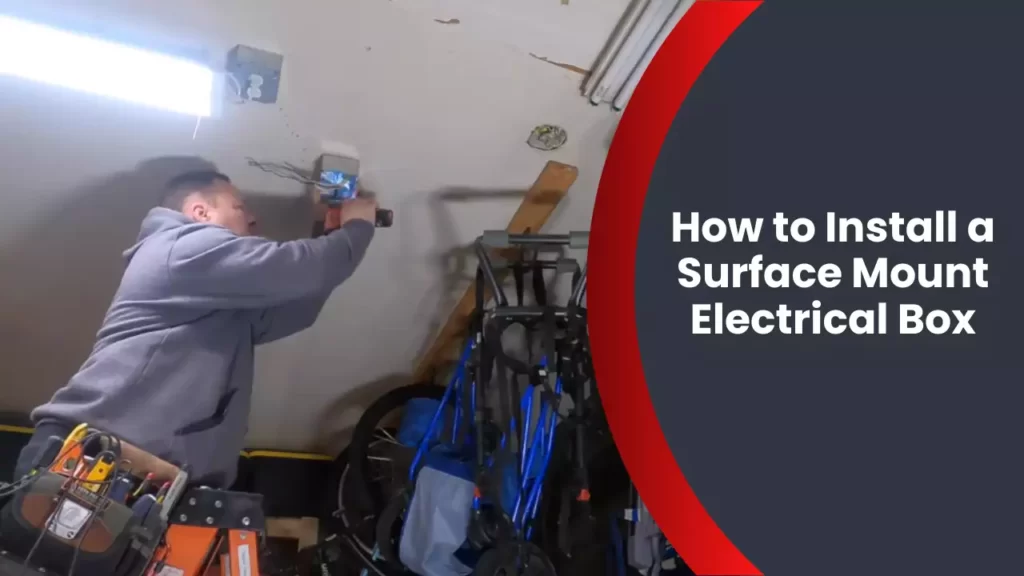
To install a surface mount electrical box, first, turn off the power supply to the area, mark the desired location on the wall, and use a cutting tool to create an opening for the box. Then, align the box with the opening, secure it with screws, and run the electrical wires through the box’s entry points.
Connect the wires to the appropriate terminals inside the box, and attach a cover plate to complete the installation. Installing a surface mount electrical box is a crucial step in wiring a room or renovating an existing electrical system. Whether you’re adding new outlets or relocating switches, a surface mount electrical box allows you to conveniently connect electrical fixtures to the wall surface.
This practical solution eliminates the need for cutting into the wall and provides a safe and attractive way to house the electrical connections. In this guide, we will walk you through the process of installing a surface mount electrical box, ensuring a hassle-free and efficient installation.
Getting Started With Surface Mount Electrical Box Installation
Introduction to Installing a Surface Mount Electrical Box
Before you begin with any electrical project, it is essential to have a basic understanding of the task at hand. This is especially true when it comes to installing a surface mount electrical box. Whether you are a DIY enthusiast or a seasoned electrician, knowing the ins and outs of this process can save you time, effort, and ensure a seamless installation. In this blog post, we will guide you through the steps required to successfully install a surface mount electrical box, ensuring that you have a solid foundation to build upon.
Importance of Proper Installation for Safety and Functionality
Proper installation of a surface mount electrical box is crucial for both safety and functionality. A poorly installed electrical box can lead to electrical malfunctions, potential hazards, and may even fail to meet the necessary safety codes and regulations. By taking the time to understand the importance of this installation, you can ensure that your electrical system operates flawlessly and avoids any potential risks.
Understanding the Components of a Surface Mount Electrical Box
Before diving into the installation process, it is vital to familiarize yourself with the different components of a surface mount electrical box. This understanding will allow you to work efficiently and make informed decisions during the installation process. Here are the key components you should be aware of:
- Box: The main component of the surface mount electrical box is the box itself. This is typically made of metal or plastic and houses the wiring connections.
- Mounting Bracket: The mounting bracket is used to secure the electrical box to the wall or ceiling. It provides stability and ensures that the box remains firmly in place.
- Cover Plate: The cover plate is the final touch of the surface mount electrical box. It is installed over the box, providing a protective barrier and a clean aesthetic finish.
Tools and Materials Required for Surface Mount Electrical Box Installation
Now that you have a basic understanding of the components, let’s gather the necessary tools and materials required for a successful surface mount electrical box installation. Having these items readily available will make the process much more streamlined. Here’s what you’ll need:
- Electrical Box: Choose a box that suits your specific needs, ensuring it is appropriate for the voltage and amperage of your electrical system.
- Screws and Wall Anchors: These are used to secure the mounting bracket to the wall or ceiling.
- Screwdriver or Drill: A screwdriver or drill will be needed to attach the mounting bracket and secure the electrical box.
- Electrical Nuts and Wire Connectors: These are essential for connecting the wires and ensuring a secure electrical connection.
- Wire Strippers: Wire strippers are used to remove the insulation from the wires, enabling proper connections.
- Cutting Tools: Depending on the situation, you may need wire cutters or a hacksaw to trim wires or the mounting bracket to fit properly.
- Level: A level will help ensure that the electrical box is installed perfectly straight.
- Pencil or Marker: You’ll need a pencil or marker to mark the locations for the electrical box and mounting bracket.
With these tools and materials handy, you are now prepared to begin the installation process. In the next section, we will guide you through the step-by-step instructions for installing a surface mount electrical box, ensuring a safe and effective result. Stay tuned!
Tools And Materials Needed
Installing a surface mount electrical box is a relatively simple task that can be accomplished by most homeowners. However, before you get started, it’s important to gather all the necessary tools and materials to ensure a smooth installation process. This section outlines the tools required, the materials needed, and the safety equipment necessary to create a safe working environment.
List of Tools Required for the Installation
Before beginning the installation, it’s crucial to have the right tools on hand. Here is a list of the essential tools you will need:
- Power drill
- Drill bits
- Screwdriver (flat-head and Phillips-head)
- Pliers
- Tape measure
- Pencil
- Level
- Utility knife
- Wire strippers
- Wire nuts
- Hammer
- Stud finder
Materials Needed to Complete the Installation
In addition to the tools mentioned above, you will also need the following materials:
| Quantity | Material |
|---|---|
| 1 | Surface mount electrical box |
| 1 | Mounting screws |
| 1 | Electrical cable (based on the length needed) |
| 1 | Wire connectors |
| 1 | Electrical outlet or switch |
| 1 | Outlet/switch cover plate |
Safety Equipment to Ensure a Safe Working Environment
Prioritizing safety is essential when working with electrical components. Make sure to have the following safety equipment to create a safe working environment:
- Safety goggles
- Work gloves
- Electrical tape
- Voltage tester
With all the necessary tools, materials, and safety equipment prepared, you are ready to begin the installation process. Remember to follow proper safety protocols throughout the project to ensure a successful and secure installation of your surface mount electrical box.
Preparing For Installation
When it comes to installing a surface mount electrical box, proper preparation is key to ensuring a safe and accurate installation. In this section, we will discuss the essential steps to follow before you start the installation process. From safety precautions to assessing the location and marking the position for installation, these steps will help you successfully install the surface mount electrical box. Let’s dive right in!
Safety precautions before starting the installation process
Before you begin the installation, it is crucial to take the necessary safety precautions to prevent any accidents or injuries. Here are some important safety guidelines:
- Turn off the power supply: Locate the circuit breaker or fuse box and switch off the power to the area where you will be installing the surface mount electrical box.
- Wear protective gear: To protect yourself from any potential hazards, wear safety goggles, gloves, and appropriate clothing.
- Use the right tools: Make sure you have all the necessary tools and equipment, such as a screwdriver, level, tape measure, and wire strippers.
- Work in a well-lit area: Ensure that the installation area is well-lit to avoid any errors or accidents.
Assessing the location for the surface mount electrical box
Before you can install the surface mount electrical box, you need to assess the location where you will be placing it. Here’s how to do it:
- Evaluate the wall: Examine the wall where the box will be mounted to ensure it is sturdy and free from any obstructions.
- Check for stud placement: Determine the location of the wall studs using a stud finder. This will help you secure the electrical box securely.
- Consider accessibility: Ensure that the electrical box is easily accessible for future maintenance or repairs.
- Mind the height: Depending on local electrical code requirements, the electrical box should be installed at a certain height from the floor.
Marking the position for accurate installation
Accurate marking of the position for the surface mount electrical box is crucial to ensure a secure and proper installation. Follow these steps to mark the position:
- Measure and center: Use a tape measure to find the center point of the wall and mark it with a pencil.
- Trace the box outline: Place the electrical box against the marked center point and trace around it with a pencil.
- Mark holes for mounting screws: Along the traced outline, mark the locations for the mounting screws.
- Double-check alignment: Use a level to ensure the traced outline is straight and properly aligned.
By following these steps to prepare for the installation, you can ensure a safe and accurate process. Now that you have assessed the location and marked the position, you are ready to move on to the next steps of installing the surface mount electrical box.
Installing The Surface Mount Electrical Box
Installing a surface mount electrical box is a crucial step when it comes to setting up electrical systems in your home or workspace. Whether you are a DIY enthusiast or a professional electrician, it’s essential to know the correct process of installing a surface mount electrical box to ensure safety and reliability.
Ensuring the power supply is turned off
Before you begin any electrical work, make sure to turn off the power supply. This step is crucial for your safety as it eliminates the risk of electrocution. Locate the circuit breaker or fuse box and switch off the power to the area where you’ll be installing the surface mount electrical box.
Choosing the appropriate surface mount electrical box for the job
There are various types and sizes of surface mount electrical boxes available in the market. Choosing the right one for your specific application is crucial. Take into consideration the size of the wires and the number of connections you will be making. A box that is too small may not accommodate all the wires properly, while a box that is too large may look unsightly or not fit in the desired location. Make sure to select a box that meets the requirements of your project.
Positioning the box and marking the screw holes
Once you have selected the appropriate surface mount electrical box, position it in the desired location on the wall. Make sure it is easily accessible and at the appropriate height. Use a pencil or a marker to mark the screw holes on the wall. This will serve as a guide when drilling the holes and securing the box.
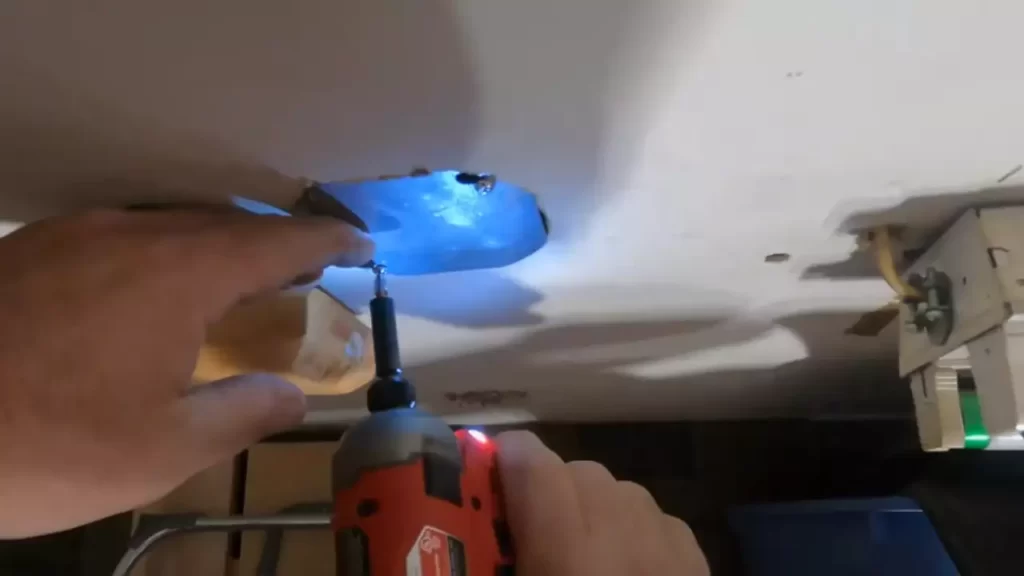
Drilling the holes and securing the box to the wall
Now that you have marked the screw holes, it’s time to drill them. Use an appropriate size drill bit to create holes where you have marked. Make sure the holes are deep enough to securely anchor the screws. Once the holes are drilled, align the surface mount electrical box with the holes and use screws to secure it to the wall. Make sure the box is level and firmly attached.
Connecting the electrical wires to the box
With the surface mount electrical box securely in place, it’s time to connect the electrical wires. Carefully strip the insulation from the ends of the wires to expose the bare copper. Insert each wire into its designated terminal in the box, ensuring that the connections are tight and secure. Take note of any color-coded wires and match them accordingly. Use wire connectors or terminal screws to make the necessary connections.
By following these steps, you can successfully install a surface mount electrical box. Remember to consult the manufacturer’s instructions and local electrical codes for any specific requirements or safety guidelines. Always prioritize safety and consult a licensed electrician if you are unsure about any aspect of the installation process.
Connecting Wires To The Electrical Box
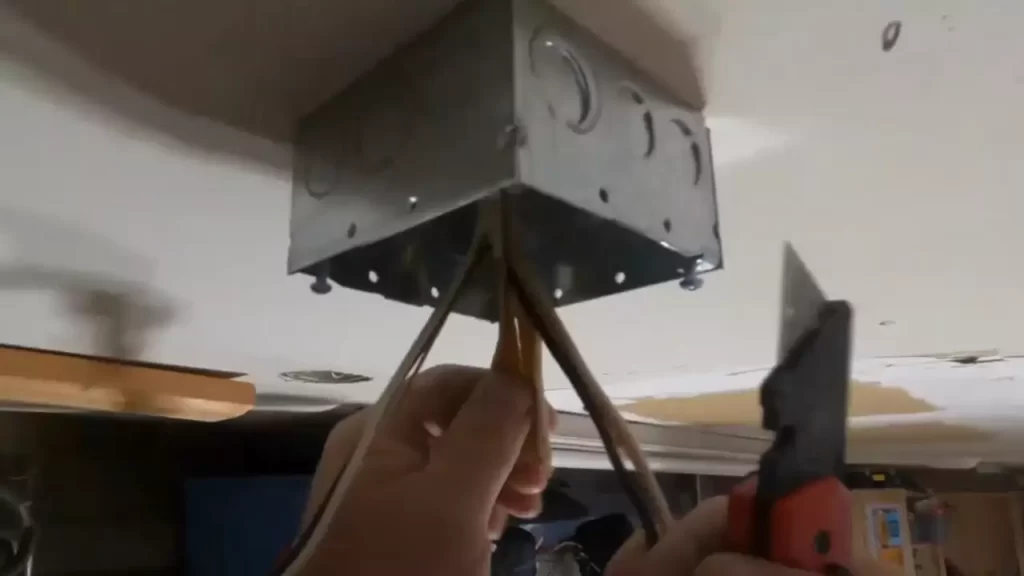
Stripping the insulation from the wires
Once you have mounted the surface mount electrical box securely on the wall, the next step is to connect the wires to the box. Before doing so, make sure the main power is turned off for safety reasons. In order to properly connect the wires, you need to strip the insulation from each wire. This allows for a secure and solid connection. To strip the insulation, follow these steps:
- Start by securing the wire stripper around the wire, ensuring a firm grip.
- Gently squeeze the wire stripper handles together to cut through the insulation.
- Rotate the wire stripper around the wire to remove the insulation completely.
- Repeat this process for each wire that needs to be connected.
It is important to note that you should only strip off enough insulation to make a proper connection, without damaging the actual wire.
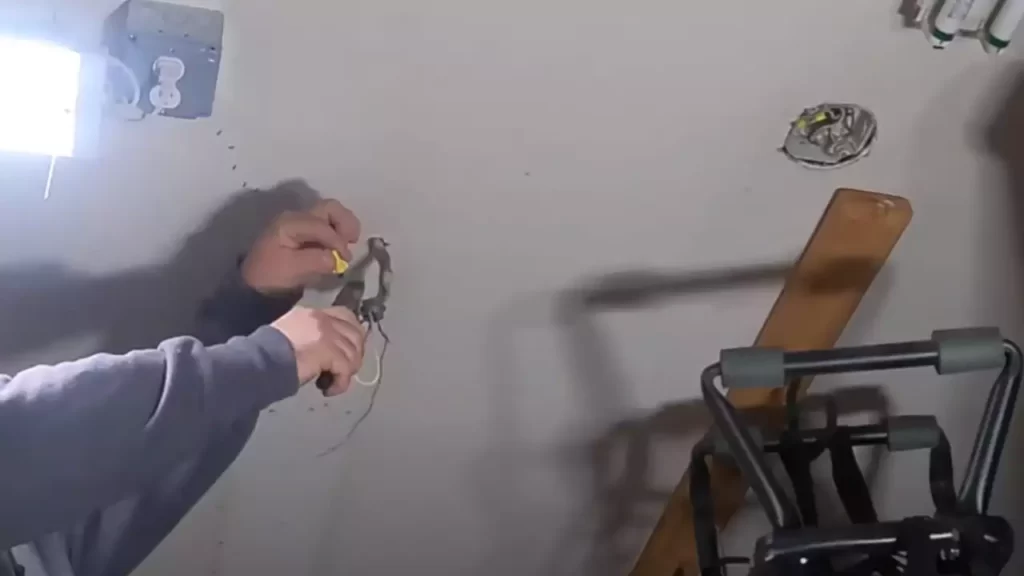
Using wire connectors to join the wires
Once the wires are stripped of their insulation, you can proceed to join them using wire connectors. Wire connectors provide a safe and efficient way to connect multiple wires together. Follow these steps to connect the wires using wire connectors:
- Take the exposed end of one wire and twist it together with the exposed end of the other wire.
- Insert the twisted wires into a wire connector, making sure all the exposed wires are inserted fully.
- Twist the wire connector clockwise until it is secured onto the wires, creating a tight and secure connection.
- Repeat this process for each pair of wires that need to be connected.
When using wire connectors, ensure that they are the correct size for the wires being connected. A properly installed wire connector should completely cover the twisted wires and provide a smooth, even connection.
Securing the connected wires inside the box
After successfully joining the wires using wire connectors, the final step is to secure the connected wires inside the electrical box. This step is crucial to prevent any accidental disconnections or damage to the wires. To secure the wires inside the box, follow these steps:
- Carefully guide the connected wires into the electrical box, ensuring they are arranged in a neat and organized manner.
- Using wire clips or staples, secure the wires to the inside of the box, keeping them away from the opening and any sharp edges.
- Make sure the wires are securely fastened, but not excessively tightened, to avoid damaging the insulation.
- Double-check that all the wires are properly secured and there are no loose connections.
By properly securing the connected wires inside the electrical box, you can ensure the safety and functionality of your electrical system. Take the time to organize the wires neatly and avoid any unnecessary strain or tension on the connections.
Remember to always follow the manufacturer’s instructions and consult a professional electrician if you have any doubts or concerns about your ability to install a surface mount electrical box safely.
Testing And Troubleshooting
Performing a thorough inspection of the installation
Before testing the surface mount electrical box, it is crucial to perform a thorough inspection of the installation. This step ensures that all the components are properly connected and positioned, minimizing the potential for future issues. Here are some key points to consider during the inspection:
- Check for any loose wires or connections that need tightening.
- Look for visible damages or signs of wear on the electrical box or its components.
- Inspect the surface where the electrical box is mounted. Ensure it is secure and clean.
- Verify that all wires are correctly organized, and there are no exposed or damaged wires.
- Ensure that the electrical box is tightly secured to the surface, preventing any movement or instability.
- Finally, check for any outstanding safety concerns or violations to local electrical codes.
Taking the time to thoroughly inspect the installation before proceeding with the testing ensures a safe and reliable electrical system.
Testing the electrical connections for proper functionality
After carrying out the inspection, the next step is to test the electrical connections for proper functionality. This step ensures that the surface mount electrical box is installed correctly and that it is ready to be integrated into the electrical system. Here’s how you can test the electrical connections:
- Start by turning off the power supply to the electrical circuit you’re working on.
- Use a multimeter or voltage tester to check for the presence of electrical current in the circuit.
- Carefully touch the probes to the hot wires, neutral wires, and ground wires to measure the voltage or continuity.
- Ensure that the voltage or continuity readings are within the acceptable range specified by your local electrical codes.
- If any readings are outside the acceptable range, double-check the connections and address any issues before proceeding.
Testing the electrical connections is crucial to confirm that everything is properly installed and functioning as expected. This step helps identify any potential issues before they become major problems and ensures a safe electrical system.
Troubleshooting common issues and solutions
During the testing process, you might come across some common issues with the surface mount electrical box. Here are a few common issues and their possible solutions:
| Issue | Solution |
|---|---|
| The circuit breaker trips frequently | Check for overloaded circuits, loose connections, or faulty components. Rebalance the load or consult a professional electrician for assistance. |
| No power to the electrical box | Verify the power supply, check for a blown fuse or tripped circuit breaker, inspect the wiring connections, and ensure the switch is in the ON position. |
| Dim or flickering lights | Check the wiring connections, ensure the bulbs are properly installed and compatible, replace faulty switches or dimmers, and inspect the voltage levels. |
By troubleshooting these common issues and applying the suggested solutions, you can resolve any problems you encounter during the testing process. Ensuring the proper functionality of the surface mount electrical box is essential for a safe and reliable electrical system.
Tips And Best Practices
When it comes to installing a surface mount electrical box, following the proper tips and best practices is crucial. This ensures the safety of both the installer and the electrical system. In this section, we will provide you with essential safety tips, best practices for a successful installation, and additional resources for more guidance and information.
Safety Tips to Keep in Mind During the Installation Process
Before you begin the installation process, it is important to prioritize safety. Here are some safety tips to keep in mind:
- Always turn off the power supply to the area where you will be installing the surface mount electrical box. This helps prevent any electrical shocks or accidents.
- Wear appropriate personal protective equipment (PPE) such as safety goggles and gloves to protect yourself from any potential hazards.
- Double-check that the electrical box you are installing is suitable for the specific purpose and meets the required safety standards.
- Ensure that all connections are properly grounded to minimize the risk of electrical issues.
- Avoid overloading the electrical box by not exceeding the maximum number of wires or devices it can accommodate.
Best Practices for a Successful Surface Mount Electrical Box Installation
To achieve a successful surface mount electrical box installation, consider the following best practices:
- Plan the location: Before installation, carefully plan the location of the electrical box. Consider factors such as accessibility, proximity to the power source, and the specific needs of the electrical system.
- Check for stud placement: Determine the location of wall studs to ensure proper anchoring for the electrical box. This helps provide stability and prevent any future damage.
- Proper wiring: Ensure that all wiring connections are done correctly and securely. Use appropriate wiring methods to protect the wires from damage and maintain a neat appearance.
- Secure mounting: Use suitable fasteners, such as screws or brackets, to securely mount the electrical box to the wall or ceiling. This prevents any movement or loosening over time.
- Test and validate: After installation, double-check all connections and perform a thorough electrical test to verify that everything is functioning properly.
Additional Resources for Further Guidance and Information
If you require further guidance or more information, consider referring to the following resources:
| Resource | Description |
|---|---|
| Example Resource 1 | A comprehensive guide on surface mount electrical box installation, including step-by-step instructions. |
| Example Resource 2 | An online forum where you can seek advice from experienced professionals and engage in discussions related to electrical box installations. |
| Example Resource 3 | A video tutorial demonstrating the proper techniques and tips for installing a surface mount electrical box. |
By following these safety tips, best practices, and utilizing additional resources, you can ensure a successful and safe surface mount electrical box installation. Remember, when it comes to electrical work, prioritizing safety and accuracy is always paramount.
Frequently Asked Questions
Can An Electrical Box Be Surface Mounted?
Yes, an electrical box can be surface mounted. It is a common practice to install electrical boxes directly onto the surface of walls or ceilings, providing a convenient option for wiring and connections without the need for recessed installations.
How Do You Install A Surface Mount Receptacle?
To install a surface mount receptacle, follow these steps: 1. Turn off the power to the area where you’ll install the receptacle. 2. Choose the appropriate circuit breaker for the receptacle and attach the wires accordingly. 3. Attach the receptacle to the wall or surface.
4. Restore power and test the receptacle. 5. Ensure the receptacle is securely installed and functioning properly.
Can You Surface Mount Electrical Wiring In A House?
Yes, you can surface mount electrical wiring in a house. It involves attaching the wiring to the surface of walls or ceilings using conduit or protective coverings. This method is a practical and safe solution for homes where access to the wall cavity is limited or when retrofitting electrical systems.
Can I Mount An Electrical Box On Drywall?
Yes, you can mount an electrical box on drywall. Just make sure to follow safety guidelines and use proper mounting techniques to ensure it is secure.
Conclusion
To summarize, installing a surface mount electrical box can be a simple yet crucial task for any DIY enthusiast or professional electrician. By following the step-by-step guide provided in this blog post, you can safely and efficiently install the electrical box in no time.
Remember to gather all the necessary tools and materials and ensure that you adhere to safety precautions throughout the process. With proper installation, you can ensure a secure and functional electrical system in your home or office. Happy installing!