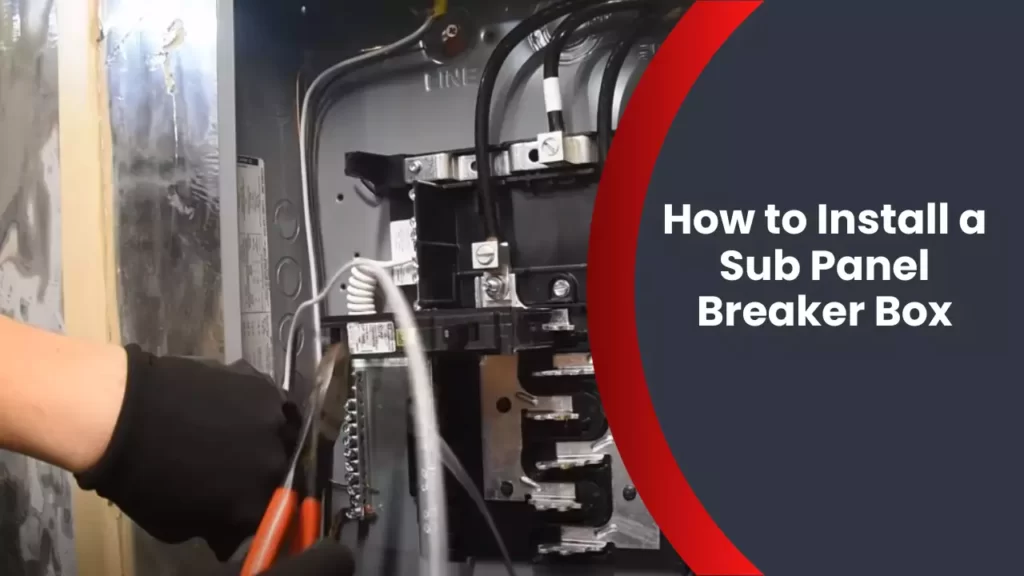
To install a sub panel breaker box, follow these steps: shut off the main breaker, disconnect the wires, mount the sub panel, connect the wires, and test the installation. Installing a sub panel breaker box requires careful steps to ensure safety and functionality.
By following these guidelines, you can successfully install a sub panel breaker box in your home or business with ease. Read on to learn more about each step in detail and the tools you will need for the installation process.
Determining The Required Capacity Of The Sub Panel Breaker Box
If you are planning to install a sub panel breaker box in your home, it is essential to determine the required capacity of the panel. This will ensure that it can handle the electrical load of your home effectively and safely. In this section, we will guide you through the process of assessing the electrical load, calculating the total amperage needed, and choosing the appropriate size and capacity for your sub panel breaker box.
Assessing the Electrical Load of Your Home
Before you can determine the required capacity of the sub panel breaker box, you need to assess the electrical load of your home. This involves evaluating all the appliances, devices, and systems that consume electricity in your house. To make this process easier, consider the following:
- List down all the major appliances in your home, such as refrigerators, air conditioners, and water heaters.
- Take note of the wattage or amperage rating for each appliance. You can find this information on the appliance itself or in the manufacturer’s documentation.
- Include the lighting fixtures, outlets, and other electrical devices that are frequently used in your home.
- Consider any potential future additions or upgrades that might increase the electrical load of your home.
Calculating the Total Amperage Needed for the Sub Panel Breaker Box
Now that you have a comprehensive list of the electrical load in your home, it’s time to calculate the total amperage needed for the sub panel breaker box. Here’s a simple formula you can use:
Total Amperage Needed = Sum of Amperage Ratings of All Appliances + Additional Load
The sum of the amperage ratings of all your appliances will give you a rough estimate of the amperage required. Additionally, you need to account for any additional load that you might anticipate or require in the future. It’s always better to have some extra capacity to accommodate future electrical needs.
Choosing the Appropriate Size and Capacity for the Sub Panel Breaker Box
Once you have calculated the total amperage needed, it’s time to choose the appropriate size and capacity for the sub panel breaker box. You must select a panel that can handle the anticipated electrical load without exceeding its capacity. Here are some key factors to consider:
- Ensure that the sub panel breaker box has a higher amperage rating than the calculated total amperage needed.
- Check the electrical code requirements and regulations in your area to determine the minimum size and capacity for the sub panel breaker box.
- Consider the available space for the installation. The sub panel breaker box should fit comfortably without any overcrowding.
- Consult with a licensed electrician to ensure that the chosen panel is suitable for your specific electrical needs.
By properly assessing the electrical load, calculating the total amperage needed, and selecting the appropriate size and capacity, you can have a sub panel breaker box that meets the requirements of your home’s electrical system. Remember, safety should always be the top priority when it comes to working with electricity.
Gathering The Necessary Tools And Materials
Before you begin installing a sub panel breaker box, it is essential to gather all the necessary tools and materials. By having everything prepared in advance, you can ensure a smooth and efficient installation process. In this section, we will list the tools required for the installation, identify the materials needed, and emphasize the importance of safety gear and equipment.
List of Tools Required for the Installation
Here is a comprehensive list of the tools you will need to install a sub panel breaker box:
- Screwdriver (flathead and Phillips)
- Wire stripper
- Utility knife
- Hammer
- Impact driver or drill
- Tape measure
- Level
- Hacksaw
- Needle-nose pliers
- Flashlight
- Socket set
- Label maker or marker
Having these tools readily available will enable you to handle any installation challenges that may arise.
Identifying the Materials Needed for the Sub Panel Breaker Box Installation
Now that you have your tools ready, it’s time to gather the necessary materials for the sub panel breaker box installation:
| Materials | Quantity |
|---|---|
| Sub panel breaker box | 1 |
| Breakers | As required |
| Electrical cables | According to the project’s needs |
| Wire connectors | As required |
| Grounding rod and wire | 1 set |
| Cable staples | As required |
| Electrical tape | 1 roll |
| Wire nuts | As required |
| Mounting brackets | According to the project’s needs |
Ensure that you have all the necessary materials before proceeding with the installation.
Ensuring Safety Gear and Equipment are Readily Available
Safety should be a top priority during any electrical installation. Before starting the sub panel breaker box installation, make sure to have the following safety gear and equipment readily available:
- Work gloves
- Safety goggles
- Ear protection
- Dust mask
- Hard hat
Wearing the appropriate safety gear will protect you from potential hazards and ensure a secure installation process.
Now that you know the tools, materials, and safety gear required for the installation, you are ready to proceed with the next steps of installing a sub panel breaker box.

Shutting Off Power And Disconnecting The Main Electrical Supply
Before you begin installing a sub panel breaker box, it is crucial to ensure your safety by shutting off the power and disconnecting the main electrical supply. Failure to do so can lead to serious electrical hazards. In this section, we will guide you through the process step by step, ensuring a safe and effective installation.
Locating the main electrical panel
The first step is to locate the main electrical panel in your home. This panel is usually found in a utility room, basement, or garage. It is important to familiarize yourself with the layout and components of the panel before proceeding. Take a moment to identify the main breaker switch, which controls the power supply to your entire home.
Switching off the main breaker
Once you have located the main breaker switch, it is time to switch it off. This will shut off the power supply to your entire home, ensuring a safe working environment for the installation process. To switch off the main breaker, simply flip the switch into the “off” position. It is essential to double-check that the main breaker is truly switched off by testing a few lights or outlets in your home.
Disconnecting the main electrical supply
With the main breaker switched off, it is now time to disconnect the main electrical supply completely. This involves removing the main service wires that connect the electrical panel to your home’s electrical meter. It is advised to seek the assistance of a licensed electrician for this step, as working with live wires can be dangerous if not done correctly.
During the process, the electrician will ensure that all necessary safety precautions are taken, such as wearing appropriate protective gear and using insulated tools. They will carefully disconnect the service wires, ensuring they are properly capped and secured to prevent any accidental contact or electrical discharge.
Once the main electrical supply is safely disconnected, you can proceed with the installation of the sub panel breaker box. Remember, safety should always be your top priority when working with electrical systems.
Choosing The Suitable Location For The Sub Panel Breaker Box
When it comes to installing a sub panel breaker box, one of the crucial steps is determining the optimal location for it. Choosing the right location ensures that the breaker box is easily accessible, meets clearance requirements, and has proper grounding and ventilation. In this section, we will delve into these key considerations to help you make an informed decision.
Determining the optimal location for the sub panel breaker box
The first step in choosing a suitable location for the sub panel breaker box is to find an area that is easily accessible and provides adequate space for installation and maintenance. Consider a location that is close to the main electrical service panel, as this will minimize the length of the wiring needed and simplify the installation process.
Additionally, ensure that the location is well-lit and free from obstructions, enabling you to easily perform any necessary repairs or modifications in the future.
Considering accessibility and clearance requirements
When installing a sub panel breaker box, it is essential to comply with accessibility and clearance requirements set by local building codes. These regulations are in place to ensure the safety of both homeowners and electricians.
Make sure that the chosen location provides enough space around the breaker box to allow for easy entry and exit without any hindrances. This will facilitate any repairs, upgrades, or troubleshooting that may be required. It’s important to follow the manufacturer’s instructions or consult a professional to determine the specific clearance requirements for your sub panel breaker box.
Adhering to these specifications will not only ensure the safety of the electrical system but also prevent potentially hazardous situations, such as accidental contact with live wires.
Ensuring proper grounding and ventilation for the sub panel breaker box
Proper grounding and ventilation are critical factors to consider when choosing the location for your sub panel breaker box. Grounding helps in redirecting electrical surges and preventing electrical faults that could pose a risk to the system and the users.
Ensure that the area where you plan to install the sub panel breaker box has proper grounding connections and meets the necessary electrical codes. This will help protect your electrical appliances, minimize the risk of electrical shocks, and maintain the integrity of your electrical system.
Furthermore, ventilation is crucial to dissipate heat produced by the breaker box. The location you choose should allow for sufficient air circulation around the box to prevent overheating. Overheating can lead to system malfunctions and pose fire hazards.
By selecting a suitable location that provides adequate grounding and ventilation, you can ensure the longevity and efficient operation of your sub panel breaker box.
In conclusion, choosing the right location for your sub panel breaker box requires careful consideration of accessibility, clearance requirements, grounding, and ventilation. Following these guidelines will not only ensure the overall safety of your electrical system but also make it easier to perform maintenance and modifications when needed.
Mounting The Sub Panel Breaker Box
Once you have gathered all the necessary tools and materials for installing a sub panel breaker box, the next step is to mount it securely. Properly mounting the sub panel breaker box is crucial as it provides a stable foundation for the electrical system and ensures the safety of your home. In this section, we will guide you through the process, step by step, to ensure a reliable and professional installation.
Preparing the mounting surface for installation
To start, it is essential to prepare the mounting surface to ensure a secure and level installation of the sub panel breaker box. Follow these steps:
- Clear the area: Remove any obstructions, debris, or unwanted objects from the mounting surface. This will allow for a clean and neat installation.
- Consider the location: Choose a suitable location for the sub panel breaker box, keeping in mind local code requirements and accessibility. Ensure that it is away from water sources and other potentially hazardous areas.
- Check for studs: Use a stud finder to locate the wall studs behind the mounting surface. This will ensure that the sub panel breaker box is securely anchored to the structure.
- Mark the mounting holes: With the help of a pencil or marker, mark the locations where the mounting holes will be drilled. These marks will guide you during the installation process.
Attaching the sub panel breaker box securely
Once the mounting surface is prepared, it’s time to attach the sub panel breaker box to the wall. Follow these steps:
- Drill pilot holes: Using the marked locations as a guide, drill pilot holes into the wall studs. Make sure the size of the pilot holes matches the screws or bolts you will be using to attach the sub panel breaker box.
- Position the sub panel breaker box: Carefully hold the sub panel breaker box against the wall, aligning the mounting holes with the pilot holes.
- Secure the box: Insert screws or bolts through the mounting holes and into the pilot holes, tightening them securely to anchor the sub panel breaker box to the wall.
- Double-check stability: Ensure that the sub panel breaker box is firmly attached and does not wobble or move when pressure is applied.
Ensuring proper alignment and levelness of the sub panel breaker box
The final step in mounting the sub panel breaker box is to ensure its proper alignment and levelness. This helps maintain the integrity of the electrical connections and prevents any potential issues with the circuit breakers. Follow these steps:
- Use a level: Place a level on top of the sub panel breaker box to check for horizontal alignment. Adjust as necessary until the bubble is centered, ensuring a level surface.
- Check for vertical alignment: Use the level vertically along the sides of the sub panel breaker box to ensure it is plumb. Adjust if needed to achieve a vertical position.
- Verify each breaker space: Inspect each breaker space to ensure it aligns properly with the corresponding knockout hole for cables or wiring. Make any necessary adjustments to maintain proper alignment.
By following these steps, you can confidently mount your sub panel breaker box, knowing that it is securely attached, properly aligned, and ready for the next phase of the installation process.
Wiring The Sub Panel Breaker Box
Now that you have successfully installed your sub panel breaker box, it’s time to tackle the crucial step of wiring it up. This is an important task that requires attention to detail and adherence to electrical safety guidelines. In this section, we will guide you through the process of running the feeder cable from the main panel to the sub panel, connecting the feeder cable to the sub panel breaker box, and wiring the circuit breakers and bus bars in the sub panel breaker box.
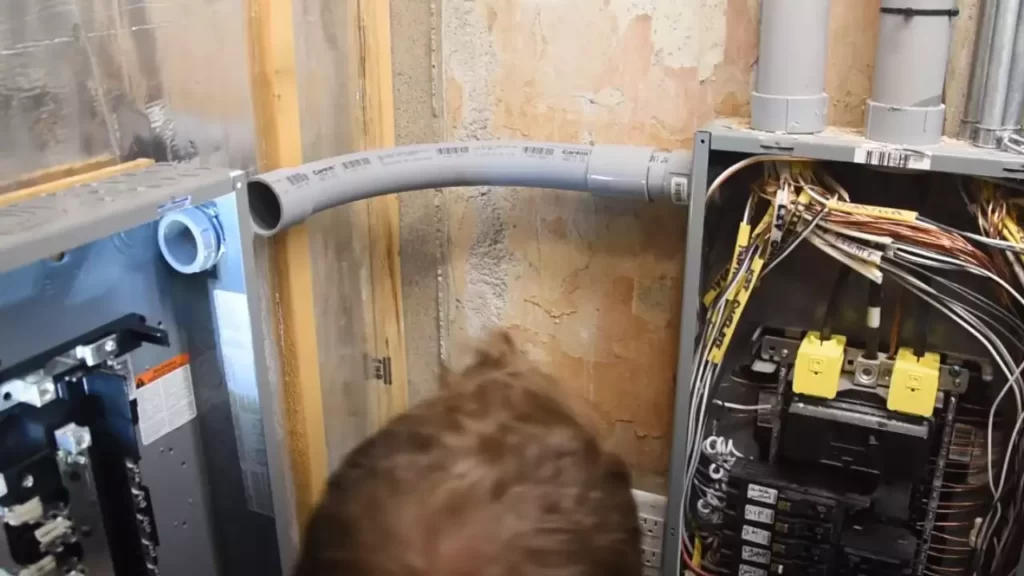
Running the feeder cable from the main panel to the sub panel
The first step in wiring the sub panel breaker box is to run the feeder cable from the main panel to the sub panel. This cable serves as the connection between the two panels and carries the electrical power. Follow these steps to ensure a smooth installation:
- Locate the main panel and sub panel. Position the sub panel in a suitable location, ensuring it is easily accessible and meets any local electrical code requirements.
- Obtain the appropriate size and type of feeder cable based on the electrical load that the sub panel will handle.
- Turn off the main power supply to the main panel to ensure safety.
- Using appropriate tools, drill a hole through which the feeder cable will pass from the main panel to the sub panel. Make sure the hole is large enough to accommodate the cable.
- Carefully feed the feeder cable through the drilled hole, ensuring it is properly secured and supported along the way.
- Once the cable reaches the sub panel, leave enough slack for ease of wiring and future maintenance. Don’t connect the cable to the sub panel just yet.
- Proceed to the next step to connect the feeder cable to the sub panel breaker box.
Connecting the feeder cable to the sub panel breaker box
After running the feeder cable from the main panel to the sub panel, the next step is to connect the cable to the sub panel breaker box. This connection ensures efficient transmission of electricity and a safe electrical system overall. Follow these steps for a proper connection:
- Identify the connection point in the sub panel breaker box where the feeder cable will be attached. This is typically located at the top or bottom of the breaker box.
- Strip the outer insulation of the feeder cable to expose the individual wires within.
- Using appropriate tools, connect the individual wires of the feeder cable to the designated terminals in the sub panel breaker box. Ensure a tight and secure connection.
- Double-check the connections to ensure they are properly tightened and free from any loose wires or excess insulation.
- Once the feeder cable is securely connected to the sub panel breaker box, you can proceed to wire the circuit breakers and bus bars.
Wiring the circuit breakers and bus bars in the sub panel breaker box
With the feeder cable successfully connected to the sub panel breaker box, the final step is to wire the circuit breakers and bus bars. This step ensures that electrical power is properly distributed and protected within the sub panel. Follow these steps for a seamless wiring process:
- Identify and familiarize yourself with the circuit breaker slots and bus bars in the sub panel breaker box.
- Start by inserting the circuit breakers into their designated slots, ensuring they are properly aligned. Use caution and follow any specific instructions provided by the manufacturer.
- Connect the wiring from each circuit to the corresponding terminal on the circuit breaker. Ensure a secure and tight connection is made.
- Once all the circuit breakers are wired, carefully connect the other end of each circuit to the appropriate bus bar in the sub panel breaker box.
- Double-check all connections to ensure they are tight, secure, and free from any exposed wires or loose connections.
By following these steps, you have successfully wired the sub panel breaker box. It’s essential to verify the proper functioning of the sub panel before turning on the power supply. Consulting a qualified electrician or checking with local electrical codes and regulations can provide you with additional guidance specific to your location.
Grounding And Bonding The Sub Panel Breaker Box
When it comes to electrical installations, one crucial aspect that should never be overlooked is the proper grounding and bonding of the sub panel breaker box. This ensures the safety of your electrical system and helps prevent electrical shocks and other hazards. In this section, we will discuss the important steps involved in grounding and bonding the sub panel breaker box.
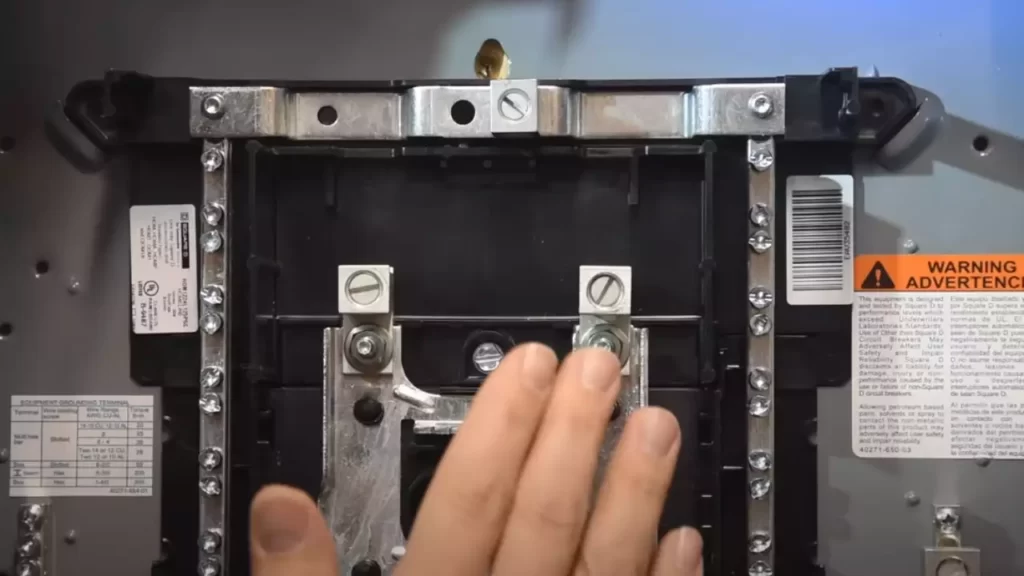
Installing Grounding Electrodes and Grounding Bus Bars
Proper installation of grounding electrodes and grounding bus bars is key to creating an effective grounding system for your sub panel breaker box. Grounding electrodes, like ground rods or plates, are usually installed outside the house and are made from materials that conduct electricity well. These electrodes are then connected to the grounding bus bar, which is typically located inside the sub panel breaker box.
When installing grounding electrodes, it is important to follow local electrical codes and guidelines. These codes may specify the number and size of grounding electrodes required based on the size of the electrical system. Grounding bus bars, on the other hand, should be securely mounted inside the sub panel breaker box and connected to the main grounding wire.
Ensuring Proper Bonding of the Sub Panel Breaker Box
Proper bonding is essential to ensure that all metal components of the sub panel breaker box are electrically connected and grounded. This helps create a path for electrical current to flow during a fault and prevents dangerous voltage differences between metal parts. Bonding is achieved by connecting bonding jumpers or bonding wires between metal components, such as the sub panel enclosure, the grounding bus bar, and any metal conduit or raceways.
It is crucial to ensure that the bonding connections are tight, secure, and free from corrosion or loose fittings. This helps maintain a low impedance path for fault current and ensures the effectiveness of the bonding system.
Testing and Verifying the Effectiveness of the Grounding System
Once the grounding and bonding of the sub panel breaker box are completed, it is important to test and verify the effectiveness of the grounding system. This ensures that the electrical system is properly grounded and can safely handle any fault or surge in current.
To test the grounding system, a ground resistance tester can be used to measure the resistance between the grounding electrodes and the grounding bus bar. The readings should be within acceptable limits as specified by local electrical codes. In addition to testing, regular inspections and maintenance of the grounding system should be performed to ensure its continued effectiveness.
By following these steps, you can ensure the proper grounding and bonding of your sub panel breaker box, guaranteeing the safety and reliability of your electrical system.
Connecting The Circuits To The Sub Panel Breaker Box
Once you have successfully installed the sub panel breaker box and completed the necessary preparations, it is time to connect the circuits to the sub panel breaker box. This step is crucial in ensuring that electricity flows correctly and safely throughout your home. In this section, we will cover the important steps involved in routing and connecting individual circuits in the sub panel breaker box, properly labeling and organizing the circuit wires, and ensuring tight and secure connections for all circuit breakers.
<h3>Routing and connecting individual circuits in the sub panel breaker box</h3>
Routing and connecting individual circuits involves carefully guiding the circuit wires to their respective locations in the sub panel breaker box. Here’s how you can do it:
- Begin by identifying each circuit wire and its corresponding breaker.
- Plan the route for each circuit, ensuring that wires are properly organized and separated.
- Carefully insert each wire into its designated position on the sub panel breaker box, making sure they are properly secured.
- Tighten the screws or clamps to hold the wires firmly in place.
<h3>Properly labeling and organizing the circuit wires</h3>
Properly labeling and organizing the circuit wires is essential for easy identification and maintenance. Follow these steps to ensure your circuit wires are labeled and organized effectively:
- Use waterproof labels to mark each wire with its corresponding circuit number or name.
- Arrange the wires neatly, ensuring they are separated and organized.
- If necessary, use cable ties or conduit to keep the wires in place and prevent tangling.
<h3>Ensuring tight and secure connections for all circuit breakers</h3>
Tight and secure connections are vital to prevent any electrical hazards or disruptions. Here’s what you need to do:
- Ensure that each circuit breaker is securely attached to the sub panel breaker box.
- Double-check all connections to make sure they are tight and properly fastened.
- Inspect for any loose wires or connections and fix them immediately.
- Test each circuit breaker to ensure proper functionality.
Following these steps will help you successfully connect the circuits to the sub panel breaker box, ensuring a safe and efficient electrical system in your home.
Restoring Power And Testing The Sub Panel Breaker Box
Reconnecting the main electrical supply
After successfully installing the sub panel breaker box, the next step is to restore power to your electrical system. To do this, you’ll need to reconnect the main electrical supply. Ensure the main breaker in the panel box is in the OFF position before proceeding.
1. Locate the main electrical supply cables connected to the sub panel breaker box. These cables typically come from your home’s main electrical panel.
2. Strip the ends of the cables to expose the wires using wire strippers. Make sure to remove enough insulation to connect the wires securely to the sub panel breaker box.
3. Connect the black or red wire (also known as the hot wire) from the main electrical supply to the main breaker in the sub panel breaker box. Tighten the connection securely using a screwdriver.
4. Connect the white wire (known as the neutral wire) to the neutral bus bar in the sub panel breaker box. Again, ensure the connection is tight and secure.
5. Connect the green or bare copper wire (known as the ground wire) to the ground bus bar in the sub panel breaker box. As always, make sure the connection is secure.
Turning on the main breaker and individual circuit breakers
Once the main electrical supply is reconnected, you can proceed to turn on the main breaker and individual circuit breakers in the sub panel breaker box.
1. Locate the main breaker switch in the sub panel breaker box. It is usually the largest breaker and is typically located at the top or bottom of the panel.
2. To turn on the main breaker, simply flip the switch to the ON position. You should hear a click, indicating that the breaker is engaged.
3. After turning on the main breaker, you can now proceed to turn on the individual circuit breakers. These breakers control power to specific areas or devices in your home.
4. Start by flipping all the individual circuit breakers to the OFF position.
5. Begin turning on the individual circuit breakers one by one, starting with the most essential areas or devices in your home. For example, you may want to turn on the breakers for lighting circuits first, followed by outlets and appliances.
6. Take note of any breakers that trip immediately after turning them on. This could indicate a wiring issue or an overloaded circuit. In such cases, consult a licensed electrician to ensure the safety of your electrical system.
Conducting a thorough test to ensure the sub panel breaker box functionality
After restoring power and turning on the main and individual circuit breakers, it’s crucial to conduct a thorough test to ensure the functionality of the sub panel breaker box. This will help identify any potential issues and ensure the safety of your electrical system.
1. Test each electrical outlet in your home to ensure they have power. Simply plug in a small appliance or use a circuit tester to check for voltage.
2. Test all lights and switches throughout your home to ensure they are functioning properly. If any lights or switches do not work, there may be an issue with the circuit connected to that area.
3. Verify that all appliances, such as refrigerators, washing machines, and air conditioners, are receiving power and operating correctly.
4. Check the operation of any dedicated circuits you may have installed, such as those for a hot tub or a separate garage.
5. Look for any signs of overheating, unusual sounds, or smells coming from the sub panel breaker box or any connected devices. If you notice anything unusual, switch off the power and consult a professional electrician.
By following these steps and conducting a thorough test, you can ensure the functionality and safety of your newly installed sub panel breaker box. Remember, if you have any doubts or concerns throughout the process, it’s always best to consult a licensed electrician to avoid any potential risks.
Finalizing The Sub Panel Breaker Box Installation
Now that you have successfully installed your sub panel breaker box, it’s important to complete a few important steps to ensure everything is in working order and ready for use. This finalization process will not only help address any potential issues or concerns that may have arisen during the installation but also provide you with the necessary documentation for future reference. Let’s dive into these final steps:
Conducting a Final Inspection of the Installation
Before you can consider your sub panel breaker box fully installed, it’s essential to conduct a final inspection. This inspection will allow you to verify that all the connections are secure, wires are properly connected, and there are no loose screws or other potential hazards that could affect the functionality of the breaker box. Follow these steps:
- Start by visually inspecting the breaker box and its components. Look for any visible signs of damage, such as cracks or dents.
- Check each wire connection to ensure they are tight and secure. Gently tug on each wire to make sure they are firmly connected.
- Inspect the circuit breakers to ensure they are correctly positioned and securely attached to the bus bars.
- Test the functionality of the circuit breakers. Turn each one on and off to ensure they trip as expected.
- Verify that the grounding system is properly installed and connected.
- Lastly, check all the labels on the circuit breakers, ensuring they match the connected circuits and are correctly marked for easy identification.
By conducting a thorough final inspection, you can rest assured that your sub panel breaker box has been installed correctly and is ready to safely distribute electrical power throughout your property.
Addressing Any Potential Issues or Concerns
During the final inspection, it’s not uncommon to encounter some issues or concerns that require attention. It’s crucial to address these promptly to avoid any future problems or hazards. Here are a few common issues you may encounter and how to address them:
| Issue/Concern | How to Address |
|---|---|
| Loose wire connections | Tighten the screws or nuts holding the wires in place to ensure a secure connection. |
| Visible damage to the breaker box | Replace any damaged components to maintain the integrity of the system. |
| Labels missing or incorrect | Apply new labels or correct the existing ones to ensure easy identification of circuits. |
| Tripping breakers | Investigate the cause of the tripped breakers, such as overloaded circuits, and make the necessary adjustments. |
By promptly addressing any potential issues or concerns, you can optimize the efficiency and safety of your sub panel breaker box installation.
Documenting the Installation and Keeping Records for Future Reference
Keeping detailed records of your sub panel breaker box installation is essential for future reference. These records will prove valuable when troubleshooting electrical issues, performing maintenance, or making any modifications. Follow these steps to document your installation:
- Take clear and well-lit photographs of the installed breaker box, including all the connections.
- Create a document or spreadsheet to record important details such as the breaker box model, the date of installation, and any circuit assignments.
- Note any specific installation techniques or considerations that might be relevant for future reference.
- Include contact information for professionals or manufacturers involved in the installation.
By documenting your sub panel breaker box installation, you can ensure you have the necessary information readily available whenever you need it, simplifying maintenance and troubleshooting processes in the future.
With these final steps completed, your sub panel breaker box installation is officially finalized. Now, you can enjoy the safe and efficient distribution of electrical power throughout your property with confidence.
Frequently Asked Questions
How Do I Add A Subpanel To My Main Panel?
To add a subpanel to your main panel, follow these steps: 1. Turn off the power to the main panel. 2. Choose a location for the subpanel near the main panel. 3. Install a conduit between the two panels. 4. Connect the neutral and ground wires to their respective bars in the subpanel.
5. Connect the hot wires to the breakers in the subpanel. 6. Turn the power back on and check for proper functioning.
How Much Does It Cost To Put In A Sub Panel Circuit Breaker Box?
The cost of installing a sub panel circuit breaker box varies depending on factors such as location, complexity, and materials. It can range from $500 to $1,500, including labor and materials.
How Big Of A Breaker Do I Need To Run A Sub Panel?
To determine the breaker size needed for a sub panel, consider the total amperage of the sub panel and the maximum amperage rating of the feeder wire connected to it. The breaker size should not exceed the rating of the wire to ensure safe operation.
Does A Sub Panel Need A Breaker In The Main Panel?
Yes, a sub panel needs a breaker in the main panel. The breaker in the main panel controls the power supply to the sub panel, providing an additional level of protection and allowing for the safe distribution of electricity.
Conclusion
Installing a sub panel breaker box may seem like a complex task, but with the right guidance, it can be done smoothly. By following the step-by-step instructions and safety precautions mentioned in this blog post, you will be well on your way to successfully installing a sub panel breaker box.
Remember to consult a professional electrician if you encounter any difficulties or feel unsure about any step. With proper knowledge and careful execution, you can ensure the safety and efficiency of your electrical system. Happy installing!