To install a speaker in a car, remove the old speaker and connect the new speaker using the corresponding wires and screws. Car enthusiasts often seek ways to improve their car’s audio system, and installing new speakers is a common upgrade.
Whether you want better sound quality or more powerful bass, installing a speaker in a car is a relatively simple task that can be done by following a few steps. In this guide, we will walk you through the process of installing a speaker in your car and ensure you can enjoy your favorite tunes while on the road.
So, let’s get started!
1. Tools And Equipment You’Ll Need
When it comes to upgrading your car audio system, installing new speakers can make a significant difference in sound quality. Whether you’re a car enthusiast or simply looking to enhance your driving experience, learning how to install speakers in your car is a valuable skill.
Before you get started with the speaker installation process, gather the following tools and equipment:
- Speaker(s): Choose high-quality speakers that are compatible with your car’s audio system. Check the specifications to ensure they fit the speaker openings in your car.
- Screwdriver: A screwdriver with the appropriate head (Phillips or flathead) will be essential for removing panels and securing the speakers.
- Wire cutter/stripper: This tool will help you cut and strip the wires for a clean and secure connection.
- Wire connectors: Wire connectors, such as crimp connectors or solder connectors, allow you to join the speaker wires to the existing wiring harness.
- Electrical tape: Electrical tape provides insulation and protects the connections from moisture and vibration.
- Panel removal tool: A panel removal tool helps safely remove interior panels without damaging them, allowing you to access the speaker mounting locations.
By having these tools and equipment on-hand, you’ll be well-prepared to successfully install your new car speakers. Let’s move on to the next step in the installation process.
2. Preparing For Installation
Before diving into the exciting world of installing speakers in your car, it’s essential to prepare for the task at hand. This involves choosing the right speakers for your car, gathering the necessary tools and equipment, disconnecting the car battery, as well as removing door panels or rear deck covers. So, let’s get started!
Choose the right speakers for your car
When it comes to enhancing your car’s audio system, selecting the right speakers is of utmost importance. Consider the size and specifications that are compatible with your car’s make and model. Opting for speakers that perfectly fit your vehicle ensures optimal sound quality and seamless installation.
Gather necessary tools and equipment
Before you begin the installation process, make sure to gather all the tools and equipment you’ll need. Having everything on hand will save you time and frustration. Here’s a list of the essential items you’ll want to have:
| Tools | Equipment |
|
|
Disconnect the car battery
Prior to beginning any work on your car’s electrical system, it’s crucial to disconnect the car battery. This step ensures your safety and prevents any accidental short circuits that may damage the components. Locate the battery in your car, and using a socket wrench, carefully loosen the negative (-) terminal connection. Once disconnected, be sure to secure the cable away from the battery.
Remove door panels or rear deck covers
To access the existing speakers for replacement, you’ll need to remove the door panels or rear deck covers. The procedure may vary depending on your car make and model, but typically involves the following steps:
- Using a panel removal tool or screwdriver, gently and carefully pry off any screws or clips that hold the panel in place.
- Once the fasteners are removed, lift the panel away from the door or deck, taking care not to force anything.
- Detach any electrical connections or wiring harnesses connected to the panel before fully removing it.
With the door panels or rear deck covers removed, you’re now ready to proceed with the speaker installation process.
3. Removing The Old Speaker(S)
Locate and remove the screws or clips holding the old speaker(s)
To begin the process of removing the old speaker(s), you first need to locate and remove the screws or clips that are holding them in place. These screws or clips can usually be found on the edges of the speaker or on the mounting bracket. You may need to use a screwdriver or a panel removal tool to loosen the screws or pry open the clips. Once you have removed all the screws or clips, the old speaker(s) should be free from the mounting bracket.
Disconnect the wiring harness from the old speaker(s)
The next step is to disconnect the wiring harness from the old speaker(s). The wiring harness is responsible for providing the electrical connection to the speaker(s). To disconnect the harness, you will need to locate the plug that is connected to the back of the speaker. It is usually a plastic plug with multiple wires coming out of it. Carefully unplug the harness from the speaker by firmly gripping the plug and pulling it straight out. Take care not to pull on the wires themselves as this can damage them.
Remove the old speaker(s) from the mounting bracket
After disconnecting the wiring harness, you can now remove the old speaker(s) from the mounting bracket. The mounting bracket is the structure that holds the speaker(s) in place within the car. To remove the speaker(s), you may need to unscrew them from the bracket or use a twisting motion to release them. Once the old speaker(s) are detached from the mounting bracket, you can set them aside for disposal or as backup.
4. Installing The New Speaker(S)
Installing new speakers in your car is an exciting upgrade that can significantly improve your audio experience while driving. With proper installation, you can enjoy better sound quality and enhanced music listening. In this section, we will guide you through the step-by-step process of installing your new speakers, ensuring a smooth and successful installation.
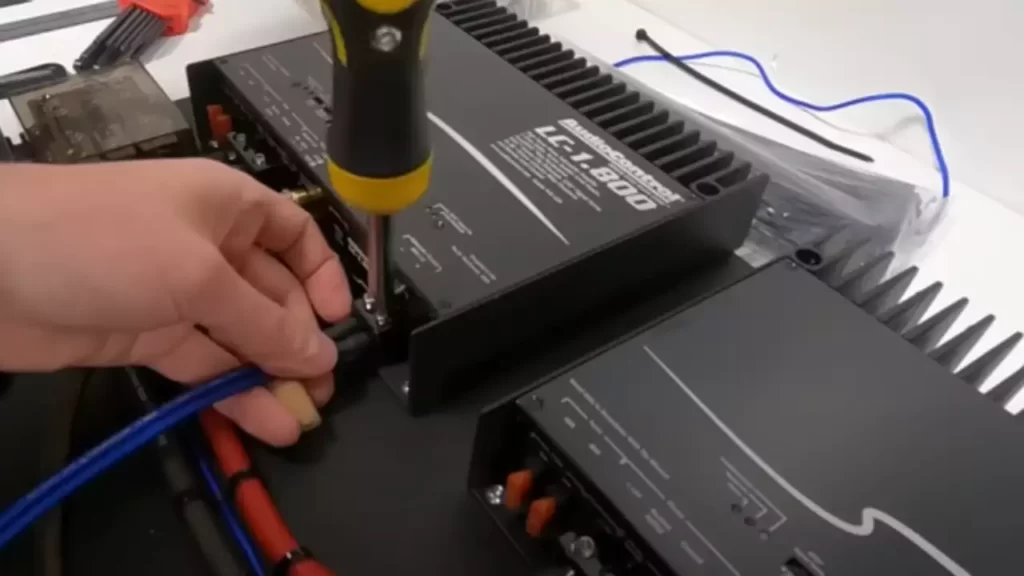
Connect the new speaker(s) to the wiring harness using wire connectors
To start installing your new speakers, you’ll need to connect them to the wiring harness in your car. The wiring harness is responsible for carrying electrical signals to your speakers, ensuring that they function properly. Follow these steps to connect the new speaker(s) to the wiring harness:
- Gather your wire connectors. Wire connectors are small devices that allow you to join wires together securely. They come in various types, such as butt connectors or twist-on connectors.
- Identify the positive and negative terminals on your new speaker(s). The positive terminal is usually marked with a “+” symbol, while the negative terminal is marked with a “-” symbol.
- Strip off a small portion of insulation from the end of the wires connected to the wiring harness using wire strippers. This will expose the bare metal wire.
- Insert the exposed wires into the corresponding wire connectors, making sure to match the positive and negative terminals correctly.
- Once inserted, use a pair of pliers to crimp the wire connector, securing the connection between the wires.
- Repeat this process for each new speaker, ensuring that all connections are properly made.
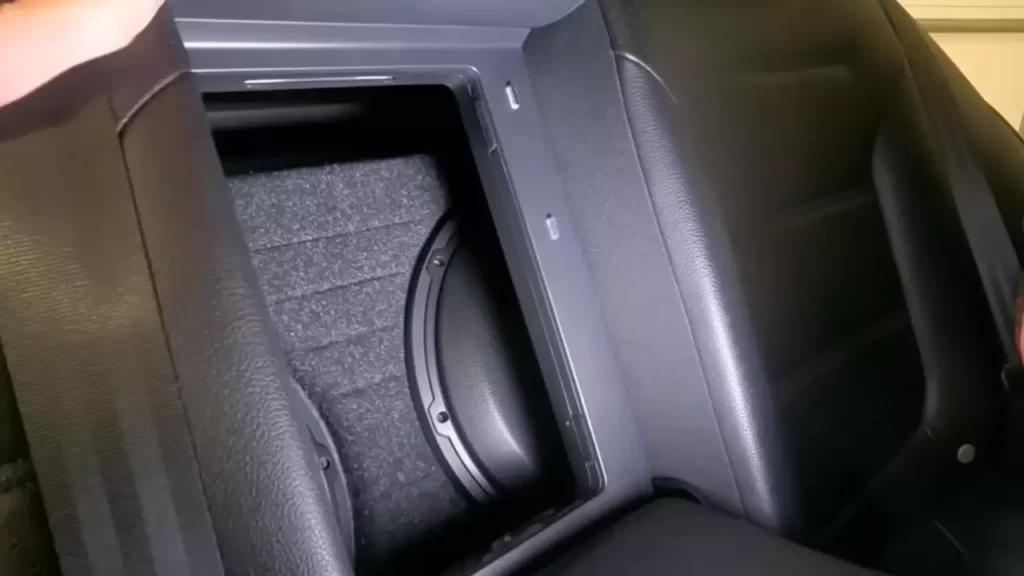
Mount the new speaker(s) into the mounting bracket
Now that you have connected the new speaker(s) to the wiring harness, you can proceed to mount them into the mounting bracket. The mounting bracket serves as a support structure for the speakers, keeping them securely in place. Follow the steps below to mount the new speaker(s) into the mounting bracket:
- Remove the old speaker(s) from the mounting bracket, if present. You may need to unscrew them or gently pry them out.
- Place the new speaker(s) into the mounting bracket, aligning the screw holes of the speaker(s) with those on the bracket.
- Ensure that the speaker(s) fit snugly into the bracket and that they are oriented correctly.
- If necessary, use screws or clips provided with the new speaker(s) to secure them to the mounting bracket. Tighten the screws until the speakers are firmly held in place, but be careful not to overtighten and damage the speakers.
Test the speaker(s) for proper functionality
Before considering the installation process complete, it’s crucial to test the speaker(s) to ensure they are functioning properly. Follow these steps to test the speaker(s) for proper functionality:
- Turn on your car’s audio system and play some music or other audio source.
- Gradually increase the volume to check if the new speaker(s) produce sound without any distortion or irregularities.
- Verify that all speakers are functioning as expected, giving attention to any potential imbalances or abnormalities in the audio output.
- If any issues are detected, double-check the connections and make necessary adjustments.
By following these steps, you can install your new speakers confidently, resulting in an improved audio experience within your car. Take your time during the installation process, and remember to exercise caution to avoid any damage to the speakers or car components.

5. Reassembling The Car Door Or Rear Deck
After successfully installing the speaker into your car, it’s time to put everything back together. Reassembling the car door or rear deck is an important step to ensure a proper fit and function. Follow these simple steps to complete the process:
Align the door panel or rear deck cover with the mounting holes
First and foremost, you need to align the door panel or rear deck cover with the mounting holes. This ensures that the panel or cover fits perfectly and doesn’t obstruct the speaker’s sound. Take your time to align it correctly, ensuring that all the mounting holes are properly aligned.
Secure the panel or cover in place with screws or clips
Once the panel or cover is aligned, it’s time to secure it in place. Depending on your car model, you might need to use screws or clips to hold the panel or cover firmly. Refer to your car’s manual to determine the right method of securing. Pay attention to the correct screw size or clip type to ensure a tight and secure fit.
Reconnect any electrical connections (if applicable)
If there were electrical connections that needed to be disconnected during the installation process, now is the time to reconnect them. Carefully attach any wiring harness or connectors to their respective ports. Ensure that they are properly connected and secure, as loose connections can affect the performance of your speaker.
Test the door panel or rear deck for proper fit and function
Now that everything is assembled, it’s important to test the door panel or rear deck for proper fit and function. Gently press on the panel or cover to check if it’s securely in place. Open and close the door to make sure there are no obstructions or unusual sounds. Additionally, test the speaker to ensure it’s working correctly and delivering the desired sound quality.
By following these steps, you can successfully reassemble the car door or rear deck after installing a speaker. Take your time and pay attention to each step to ensure a proper fit and optimal performance.
6. Final Steps
Once you have successfully installed the speakers in your car, there are a few final steps to complete the process and ensure optimal sound quality. Follow these steps to complete the installation and enjoy your newly upgraded car speakers.
Reconnect the car battery
With the new speakers in place, it’s important to reconnect the car battery that was disconnected earlier in the installation process. Locate the negative terminal and the positive terminal on the battery, and securely reattach the corresponding cables. Ensure the connections are tight and snug to avoid any loose connections or battery drainage.
Test all the speakers for sound quality and balance
Before hitting the road, it’s essential to test all the speakers to ensure they are functioning properly and producing the desired sound quality. Play a variety of music tracks that cover different frequencies and genres. Check if all the speakers are producing sound and adjust the volume levels accordingly. Pay attention to any imbalances in sound distribution and adjust the speaker settings if necessary.
Adjust the speaker settings as needed
Most car audio systems come with built-in controls and settings that allow you to customize the sound according to your preferences. Experiment with these settings to fine-tune the audio output. You can adjust the bass, treble, fade, and balance settings to achieve the best sound quality that suits your preferences and the acoustics of your car interior. Take your time to find the perfect balance and optimize your listening experience.
Enjoy your newly installed car speakers!
Now that the installation process is complete and all the necessary adjustments have been made, it’s time to sit back, relax, and enjoy the enhanced audio experience in your car. Crank up your favorite tunes and revel in the clarity, depth, and richness of sound from your newly installed speakers. Whether you’re going on a road trip or simply commuting to work, your journey will be more enjoyable with the right soundtrack playing in the background.
Disclaimer: The installation process may vary depending on the make and model of your car. Consult your vehicle’s manual or seek professional assistance if needed.
Frequently Asked Questions
Can You Install Car Speakers Yourself?
Yes, you can install car speakers yourself. It’s a DIY task that doesn’t require professional expertise. By following installation instructions and using basic tools, you can successfully replace or upgrade your car speakers.
How Do You Wire Speakers In A Car?
To wire speakers in a car, match the positive and negative wires from the car stereo to the corresponding terminals on the speakers. Connect them securely using crimp connectors or soldering, ensuring a good electrical connection. Test the speakers to ensure they work properly before reinstalling any panels.
Do You Need A Amp To Install Car Speakers?
No, you do not necessarily need an amp to install car speakers. However, using an amp can significantly enhance the sound quality and power of your speakers. It is recommended for those seeking a more powerful and immersive audio experience in their car.
Can You Add Speakers To A Car?
Yes, you can add speakers to a car. Adding aftermarket speakers is a popular upgrade for better sound quality. It’s important to choose speakers that are compatible with your car’s audio system and installation may require some knowledge or professional help.
Conclusion
To sum it up, installing a speaker in a car is a manageable task that enhances your driving experience. By following these step-by-step instructions and gathering the necessary tools, you can ensure a successful installation. Remember to consider your car’s specific requirements and wiring, and take your time to do it right.
With a little effort and patience, you can enjoy high-quality sound on the road. Happy installation!