To install a socket outlet, follow these simple steps: turn off the power, remove the cover plate, disconnect the wires, connect the new outlet, and replace the cover plate.
Tools And Materials Needed (Subheading)
Tools and Materials Needed
Before diving into the task of installing a socket outlet, it is important to gather the necessary tools and materials to ensure a smooth and successful installation. Having the right tools at your disposal will not only make the process easier but also ensure your safety. Here are the essential tools and materials you’ll need:
Screwdriver
A screwdriver is an indispensable tool for any electrical installation project. It allows you to tighten or loosen screws, which is crucial for securing wire connections. Make sure to have a screwdriver with the appropriate head size to fit the screws on the socket outlet.
Voltage tester
A voltage tester is a must-have tool for working with electrical outlets. It helps you determine if the power is off and provides an additional layer of safety during installation. Before starting any electrical work, always use a voltage tester to ensure that the circuit you’re working on is not live.
Wire strippers
Wire strippers are essential for removing the insulation from the electrical wires. They have specific notches for different wire sizes, allowing you to strip the insulation without damaging the conductor. By using wire strippers, you can ensure a clean and reliable connection between the wires and the socket outlet.
Socket outlet
A socket outlet is the component that you will be installing into the wall. It provides a point of connection for electrical appliances and devices. When choosing a socket outlet, make sure it meets the electrical standards and regulations in your area to ensure safety and compliance.
Electrical tape
Electrical tape is used to insulate and protect electrical connections. It provides an additional layer of protection against electrical shocks and helps keep the wires secure. Use electrical tape to wrap the exposed wires after making the connections to ensure a safe and reliable installation.
Wire connectors
Wire connectors, also known as wire nuts, are used to join and secure electrical wires together. They come in various sizes to accommodate different wire gauges. By using wire connectors, you can create a secure and insulated connection between the wires, ensuring a reliable electrical connection.
Having these tools and materials ready will make the process of installing a socket outlet much smoother and safer. Ensure that you have them on hand before embarking on any electrical work to avoid any interruption or compromise to the installation process.
Turn Off The Power
Safety Precautions
Before starting any electrical work, it’s crucial to prioritize your safety. Turning off the power is the first step in ensuring a safe installation process. Follow these simple steps to turn off the power before installing a socket outlet:
- Wear safety goggles and gloves to protect yourself from any potential electrical hazards.
- Ensure you have the necessary tools and equipment, including a voltage tester and a screwdriver.
- Always be aware of your surroundings, and keep the area clear of any potential obstacles.
Locate the Electrical Panel
The electrical panel, also known as the circuit breaker box, is where the main power supply for your home is located. To turn off the power, you need to locate this panel. Follow these steps to find the electrical panel:
- Walk around your home and look for a metal box, usually installed in the basement, utility room, or garage.
- If you can’t find it inside your home, check outside near the meter box.
- Once you’ve located the panel, ensure there is enough space to access it comfortably.
Switch Off the Circuit
After locating the electrical panel, it’s time to switch off the circuit. This will ensure that there is no electrical current flowing through the wires while you install the socket outlet. Follow these steps to switch off the circuit:
- Open the panel cover carefully using a screwdriver.
- Inside the panel, you’ll find multiple circuit breakers or fuses.
- Identify the circuit breaker that corresponds to the area where you’ll be installing the socket outlet.
- Gently switch off the circuit breaker by flipping it to the “off” position.
- To double-check if the power is off, use a voltage tester by touching it to the wires or outlet. If it doesn’t detect any voltage, proceed with caution.
Remember, turning off the power before installing a socket outlet is essential to avoid electrical shocks or hazards. Take necessary precautions and follow the steps mentioned above to ensure a safe and successful installation process.
Prepare The Wires
Before installing a socket outlet, it’s crucial to prepare the wires properly to ensure a safe and efficient connection. This will involve checking for any damage, stripping the wire insulation, and attaching the new socket outlet securely. Let’s dive into each step in more detail.
1. Check for any damage
The first step in preparing the wires is to carefully inspect them for any signs of damage. Damaged wires can cause electrical hazards and pose a risk of shorts or fires. Here’s what you need to do:
- Visually examine the wires for fraying, exposed metal, or other obvious signs of wear.
- Check for any burn marks or discoloration on the insulation, which could indicate a previous overheating issue.
- If you come across any damaged wires, it’s important to replace them before proceeding with the installation.
2. Strip the wire insulation
Once you have ensured that the wires are in good condition, the next step is to strip the insulation from the ends. This will allow for a secure connection to the new socket outlet. Follow these steps:
- Gather the necessary tools, including wire strippers, pliers, and a utility knife.
- Identify the appropriate length of insulation to remove, typically about 1/2 inch to 3/4 inch.
- Position the wire within the wire strippers, aligning the marked length with the cutting edges.
- Apply gentle pressure and rotate the wire strippers around the wire to score the insulation.
- Once scored, use the pliers or utility knife to pull or cut away the insulation, revealing the bare wire.
- Repeat this process for all wires that will be connected to the new socket outlet.
3. Attach the new socket outlet, ensuring each H3 heading adheres to HTML syntax
Now that the wires are prepared, it’s time to attach the new socket outlet. Follow these steps:
- Identify the appropriate terminals on the socket outlet for each wire, typically labeled with letters such as L, N, and E.
- Position the prepared wires near their respective terminals.
- Using pliers or a screwdriver, loosen the terminal screws on the socket outlet.
- Insert the bare end of each wire into its designated terminal.
- Tighten the terminal screws to secure the wires in place, ensuring a reliable connection.
- Double-check that all wires are securely attached and that no stray strands are protruding from the terminals.
Congratulations! You have successfully prepared the wires and attached the new socket outlet. This careful and accurate process ensures a safe and functional electrical connection. Now you’re ready to enjoy the convenience of your newly installed socket outlet!
Connect The Wires
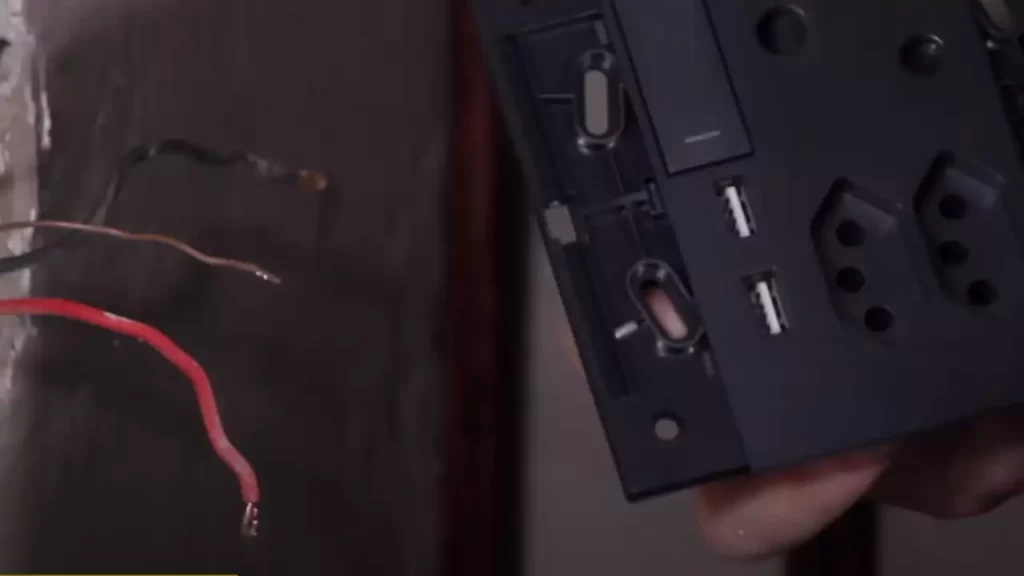
Once you have identified the hot, neutral, and ground wires, it’s time to connect them to the socket outlet. Connecting the wires correctly is crucial to ensure the outlet functions properly and is safe to use. Here are the steps to connect the wires:
Identify the hot, neutral, and ground wires
Before making any connections, you need to identify the three wires: hot, neutral, and ground.
- Hot wire: The hot wire carries the electrical current from the power source to the outlet. It is usually colored black or red.
- Neutral wire: The neutral wire carries the electrical current back to the power source. It is usually colored white or gray.
- Ground wire: The ground wire is a safety measure that provides a path for electrical current to safely discharge in case of a fault. It is usually colored green or bare copper.
Connect the wires to the outlet
Once you have identified the wires, it’s time to connect them to the socket outlet. Follow these steps:
- Start by stripping off about 1/2 inch of insulation from the end of each wire using wire strippers. Be careful not to damage the wire strands inside.
- Next, identify the terminal screws on the socket outlet. There are usually two brass-colored screws, one silver-colored screw, and one green screw for the ground wire.
- Connect the hot wire to one of the brass-colored screws and tighten it securely using a screwdriver. Make sure the exposed wire is wrapped clockwise around the screw.
- Connect the neutral wire to the silver-colored screw in the same manner as the hot wire.
- Finally, connect the ground wire to the green screw and tighten it securely.
Secure with wire connectors
Once the wires are connected to the socket outlet, it’s essential to secure them properly using wire connectors. Wire connectors ensure a secure and reliable connection, preventing any loose wires or potential electrical hazards. Here are the steps to secure the wires with wire connectors:
- Twist the exposed wire ends together clockwise to create a tight connection.
- Slide a wire connector over the twisted wires, making sure it covers all exposed wire strands.
- Twist the wire connector clockwise until it is tightly secured.
- Repeat the process for each wire connection.
Once you have completed these steps, your socket outlet is successfully installed and ready to use. It’s important to double-check all the connections and ensure they are secure before turning on the power. Following these steps will not only ensure a safe and functional socket outlet but also give you the satisfaction of accomplishing a DIY electrical task effectively.
Attach The Outlet
Attaching the outlet is the next step in installing a socket outlet. Here, we will guide you through the process of aligning the outlet with the wall box, screwing it into place, and finally installing the outlet cover.
Align the outlet with the wall box
Before attaching the outlet, it is crucial to align it properly with the wall box. This ensures a secure and snug fit. Here’s how you can do it:
- Start by identifying the position of the wall box. It is usually located at a convenient height and distance from the floor.
- Hold the socket outlet next to the wall box, ensuring that the screw holes on the outlet align with the holes on the wall box.
- Make any necessary adjustments to ensure proper alignment. Use a level to check if the outlet is horizontally straight.
- Double-check the alignment to ensure a perfect fit.
Screw the outlet into place
Once you have aligned the outlet with the wall box, it’s time to secure it in place. Follow these steps to ensure a sturdy installation:
- Using a screwdriver, insert the screws provided with the socket outlet into the aligned screw holes.
- Tighten the screws until the outlet is securely fastened to the wall box. Be cautious not to overtighten, as it may damage the outlet or wall box.
- Ensure that the outlet is flush against the wall, with no gaps or spaces between the outlet and the wall box.
- Confirm that the outlet is stable and does not wobble. If necessary, re-tighten the screws to achieve a secure fit.
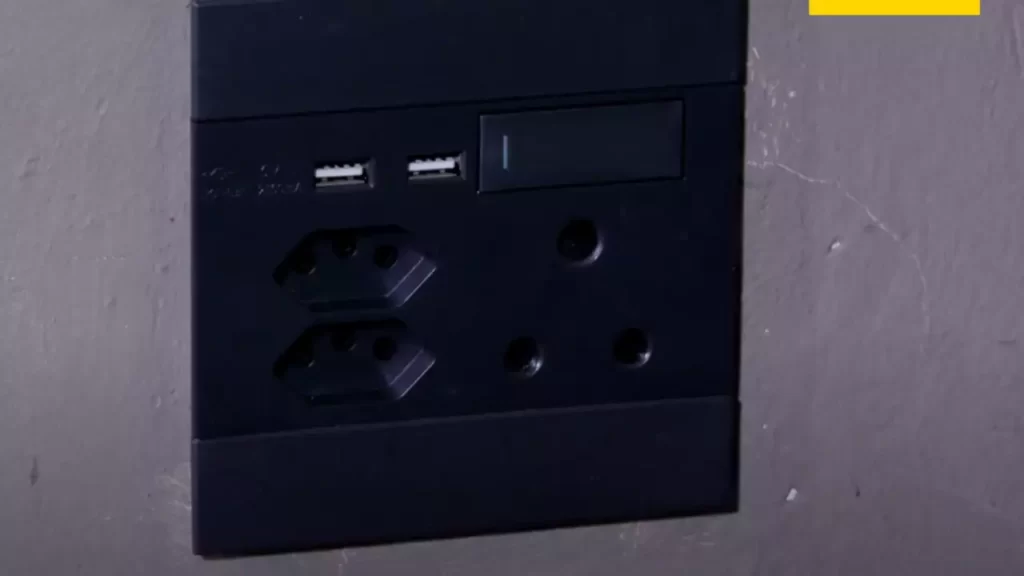
Install the outlet cover
Once the outlet is securely attached to the wall box, the final step is to install the outlet cover. The cover not only enhances the appearance of the outlet but also provides protection. Follow these steps to seamlessly install the outlet cover:
- Align the outlet cover with the socket outlet, ensuring that the screw holes on the cover align with the screw holes on the outlet.
- Insert the screws into the aligned holes and tighten them using a screwdriver. Again, be cautious not to overtighten and damage the cover or outlet.
- Make sure the outlet cover is firmly attached and does not move or come loose.
- Once installed, clean the cover to remove any dust or dirt, giving your finished outlet a polished appearance.
Congratulations! You have successfully attached the socket outlet to the wall box, securing it firmly and installing the outlet cover. This completes the process of installing a socket outlet, providing you with a reliable and convenient power source.
Test The Outlet
Test the Outlet
Before you can start using your newly installed socket outlet, you’ll need to ensure that it is functioning correctly. Testing the outlet is a crucial step to guaranteeing safety and functionality.
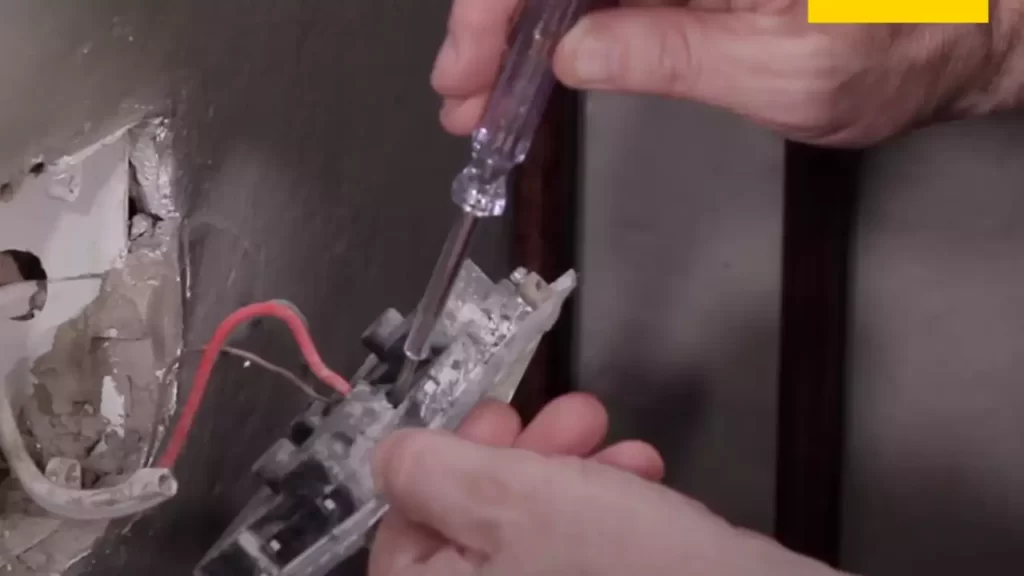
Use a Voltage Tester
A voltage tester is an essential tool for checking the electrical supply of your socket outlet. Before testing the outlet, make sure you have turned off the power to the circuit at the main electrical panel.
Here’s how to use a voltage tester to test your socket outlet:
- Insert the two probes of the voltage tester into the slots of the socket outlet.
- If the voltage tester lights up or beeps, it means there is an active electrical current flowing through the outlet, and it is dangerous to proceed with any further installation steps. In this case, you should seek professional assistance from a licensed electrician to resolve the issue.
- If the voltage tester does not light up or beep, it indicates that the power is off, and you can continue with the installation process. However, It’s always a good practice to double-check by using a multimeter to confirm that there is no electrical current present.
Remember, safety is a priority, and if you are unsure about anything or encounter any anomalies during the testing process, it is best to consult with a professional.
Ensure Proper Functioning
Once you have successfully tested the socket outlet and confirmed that there is no electrical current present, you can proceed to ensure its proper functioning. Here are a few key steps to follow:
- Connect the wires securely to their respective terminals on the outlet, ensuring that the connections are tight and free from any loose strands or exposed wires.
- Carefully insert the outlet into the electrical box, ensuring that it is flush with the wall surface and the screw holes align properly.
- Tighten the screws to secure the socket outlet in place. Take care not to overtighten, as this can damage the outlet or the electrical box.
- Once secured, restore power to the circuit at the main electrical panel and test the socket outlet again using a voltage tester to verify that it is operating correctly.
By following these steps, you can confidently install and test a socket outlet in your home. However, it’s essential to note that if you are unfamiliar with electrical work or unsure about any steps, it is highly recommended to seek assistance from a qualified electrician for a safe, compliant, and reliable installation.
Restore Power
Switch on the circuit
Now that you have successfully installed the socket outlet, it’s time to restore power and test if everything is working as it should be. Here’s how you can switch on the circuit:
- Locate and identify the circuit breaker that you previously turned off.
- Flip the circuit breaker switch back to the “On” position. Ensure it is securely in place.
This simple step will restore power to the socket outlet and the surrounding area. However, before assuming everything is functioning correctly, it’s essential to conduct a thorough check.
Check the outlet again
Take a moment to inspect the socket outlet to ensure that it has been installed and connected properly. Keep the following checklist in mind:
- Ensure that the socket outlet is flush against the wall and there are no visible gaps.
- Check if the screws securing the outlet plate are tightened securely.
- Inspect the wiring connections behind the outlet plate, making sure they are tight and correctly positioned.
- Verify that the socket outlet has the appropriate voltage rating for your electrical system.
By performing this thorough inspection, you can identify any potential issues and make the necessary adjustments. Once you are confident that the socket outlet is in proper working condition, you can begin using it safely.
Installing a socket outlet may seem like a complex task, but by following these step-by-step instructions, you can easily accomplish it. It is always recommended to seek professional assistance if you are uncertain about any aspect of the installation process.
Remember, safety should be your priority throughout the installation process. Now that you know how to install a socket outlet, you can confidently tackle this home improvement project, ensuring a reliable power source for all your devices.
Safety Tips
Consult a professional if unsure
When it comes to installing a socket outlet, it’s important to prioritize safety above everything else. While some individuals may have experience with electrical work, it’s always a good idea to consult a professional if you are unsure about any aspect of the installation process.
A professional electrician can provide expert guidance and ensure that the socket outlet is installed correctly, reducing the risk of potential hazards such as electrical shocks or fire. Don’t hesitate to reach out to a qualified electrician who can assist you in safely installing your socket outlet.
Follow electrical codes and regulations
Installing a socket outlet requires adherence to electrical codes and regulations, which are in place to ensure the safety of individuals and their property. It is crucial to familiarize yourself with these codes before starting the installation.
Here are some key electrical codes and regulations that you should be aware of:
- Electrical permits: In many jurisdictions, permits are required for electrical work, including socket outlet installations. Make sure to obtain the necessary permits and follow the associated procedures.
- Circuit load: Each circuit has a specific load limit that must not be exceeded. It is essential to calculate the load before installing a socket outlet to prevent overloading the circuit.
- GFCI protection: Ground Fault Circuit Interrupters (GFCIs) are designed to protect against electrical shock in areas where water may be present, such as bathrooms or kitchens. Install GFCI outlets where required by code.
- Proper grounding: Ensuring that the socket outlet is properly grounded is critical for safety. Faulty or ungrounded outlets can lead to electrical hazards. Follow the appropriate grounding procedures specified by electrical codes.
By following these electrical codes and regulations, you can ensure a safe and compliant installation of your socket outlet.
Troubleshooting
Installing a socket outlet is a practical DIY project that can save you money and give you the satisfaction of completing a task on your own. However, like any electrical project, you may encounter some issues along the way. In this section, we will address common problems and provide solutions to troubleshoot your socket outlet installation. It’s important to remember that electrical work can be dangerous, so if you’re uncertain or uncomfortable with any step, it’s always best to seek professional help.
Common issues and solutions
While installing a socket outlet, there are a few common issues that you may encounter. Below, we discuss these issues and provide solutions to rectify them:
- No power: If your socket outlet is not receiving any power, the first thing to check is whether the circuit breaker is tripped. If it is, reset the circuit breaker and check if power is restored to the outlet. If resetting the breaker doesn’t work, ensure the wiring connections are secure. If you’re still experiencing issues, it’s best to consult a professional electrician.
- Inconsistent power: If your socket outlet is receiving intermittent power or the power cuts off intermittently, the wiring connections might be loose. Turn off the power, remove the outlet cover, and check for loose connections. If you find any, tighten them and ensure they are secure. If the issue persists, it’s recommended to consult a professional for further investigation.
- Sparking or overheating: If you notice sparks or overheating coming from your socket outlet, it’s crucial to address the issue immediately. Turn off the power, remove the outlet cover, and inspect the wiring connections for loose or frayed wires. If you find any damaged wires, they need to be replaced. Consult a professional electrician to handle this situation as it might indicate a more serious underlying problem.
- Incorrect polarity: Ensuring the correct polarity of the wiring is vital for safety. If you find that the hot and neutral wires are reversed, it’s necessary to fix the issue. Consult an electrician to correct the polarity of the wiring and ensure your socket outlet is properly installed.
When to seek professional help
While installing a socket outlet can be a DIY project, there are instances where it’s best to seek professional help. Consider the following scenarios:
- Inexperience: If you are inexperienced when it comes to electrical work, it’s safer to consult a professional electrician to install the socket outlet. They have the expertise to ensure the job is done correctly and safely.
- Complex wiring: If you’re dealing with complex wiring or multiple outlets, it’s recommended to seek professional help. A licensed electrician can navigate the intricate wiring and ensure everything is properly connected.
- Unresolved issues: If you’ve encountered any of the common issues mentioned earlier and have been unable to resolve them, it’s advisable to consult a professional electrician. They can identify and rectify the problem, ensuring your socket outlet functions safely.
- Overall safety: If you’re concerned about your safety or the safety of your home, it’s always a good idea to consult a professional. They can assess the electrical system, identify potential hazards, and provide the necessary solutions to ensure your safety.
Remember, your safety should always be the top priority when dealing with electrical work. If you’re unsure or uncomfortable, it’s better to seek professional help than risk electrical hazards.
Maintenance And Upkeep
Proper maintenance and upkeep of your socket outlet are crucial to ensure its functionality and prevent any potential hazards. By following some simple steps, you can keep your socket outlet in pristine condition for years to come. In this section, we will discuss regular cleaning and the importance of timely replacement and repairs.
Regular Cleaning
Regular cleaning of your socket outlet is essential to keep it free from dirt, dust, and other debris that can accumulate over time. Not only does this improve the overall appearance of your outlet, but it also helps maintain its electrical connections. Here are a few steps you can follow to clean your socket outlet:
- Ensure the power to the socket is turned off before performing any cleaning.
- Start by gently wiping the surface of the socket with a soft cloth to remove any loose dirt or dust.
- If there are any stubborn stains or marks, you can use a mild detergent diluted with water to clean the area. Make sure to wring out the cloth properly to avoid any liquid from entering the outlet.
- Dry the socket thoroughly with a clean, dry cloth before turning the power back on.
Regular cleaning not only helps to extend the lifespan of your socket outlet but also minimizes the risk of short circuits and other electrical problems.
Replacement and Repairs
Over time, socket outlets may experience wear and tear due to constant use. It is essential to inspect your socket outlets regularly for any signs of damage or malfunction. In cases where repairs or replacements are necessary, timely action is crucial to prevent any potential electrical hazards. Here’s what you need to know:
- If you notice any loose connections, exposed wires, or physical damage to the socket outlet, it is important to replace it immediately with the help of a qualified electrician.
- Regularly check the functionality of your socket outlets by plugging in an electronic device and ensuring proper power supply.
- If you experience any flickering lights or intermittent power supply, it may indicate a faulty socket outlet that requires repair or replacement.
- Always follow the manufacturer’s guidelines when replacing or repairing your socket outlet and seek professional assistance if you are uncertain about any electrical work.
By taking proactive measures and addressing any issues promptly, you can ensure the safety and efficiency of your socket outlet.
Frequently Asked Questions
Can I Install An Electrical Outlet Myself?
No, it is not recommended to install an electrical outlet yourself. It should be done by a licensed electrician to ensure safety and compliance with building codes. Hiring a professional ensures proper installation and reduces the risk of electrical hazards.
What Is The Proper Way To Install An Outlet?
The proper way to install an outlet is by following these guidelines: 1. Turn off the power. 2. Remove the old outlet. 3. Connect the wires to the new outlet. 4. Install the outlet into the electrical box. 5. Turn the power back on and test the outlet for functionality.
How Do You Add An Outlet To A Socket?
To add an outlet to a socket, you’ll need to follow these steps: Turn off power to the circuit, remove the outlet cover, disconnect the wires from the old outlet, attach the wires to the new outlet, and secure it in the socket.
Make sure to test the outlet before using it.
Does It Matter Which Wire Goes Where On An Outlet?
Yes, it matters which wire goes where on an outlet. Incorrect wiring can result in safety hazards and damage to electrical devices. It is important to follow the manufacturer’s instructions or consult a professional to ensure proper wiring for safety and functionality.
Conclusion
To sum up, installing a socket outlet is a simple and crucial task that every homeowner should be familiar with. By following the step-by-step guide provided in this blog post, you can confidently tackle this electrical project on your own.
Remember to prioritize safety, double-check your work, and seek professional help if needed. With the right tools and knowledge, you can successfully install a socket outlet and enjoy the convenience it brings to your home.