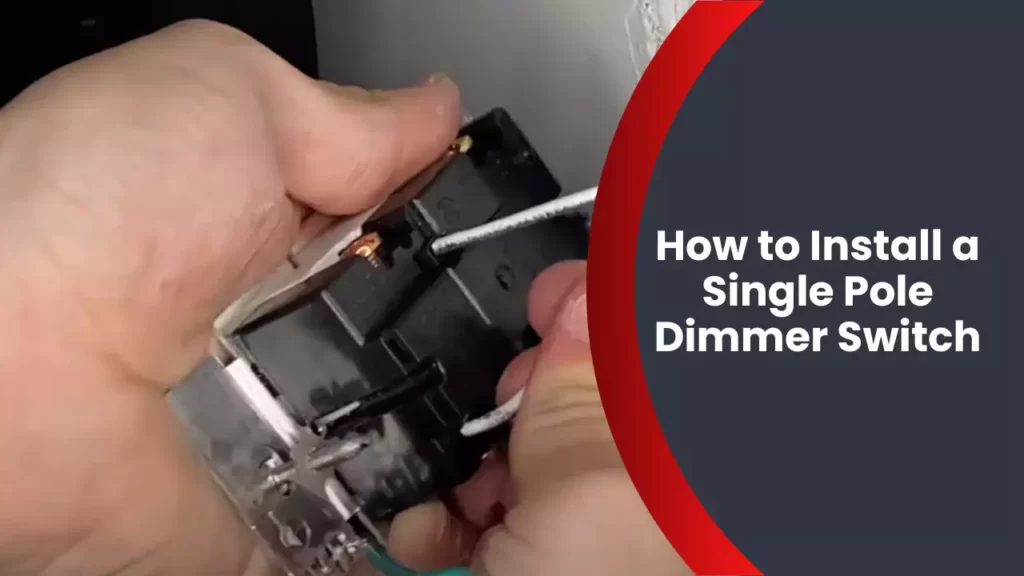
To install a single pole dimmer switch, turn off the power at the circuit breaker, remove the existing switch and connect the dimmer switch following the manufacturer’s instructions. Are you looking to upgrade your home lighting control?
Installing a single pole dimmer switch allows you to adjust the brightness of your lights and create the perfect ambiance for any occasion. In this guide, we will walk you through the simple steps to install a single pole dimmer switch, ensuring a safe and effective installation.
By following these instructions, you can easily enhance the functionality and aesthetic appeal of your lighting system. So let’s dive in and learn how to install a single pole dimmer switch in just a few simple steps.
Understanding Single Pole Dimmer Switches
When it comes to creating the perfect ambiance in your space, installing a single pole dimmer switch is the way to go. Whether you want to soften the lighting for a romantic dinner or brighten the room for a task at hand, a dimmer switch allows you to have full control over the intensity of your lights. In this section, we will delve into the details of single pole dimmer switches, discussing what they are, their benefits, and the different types available.
What is a Single Pole Dimmer Switch?
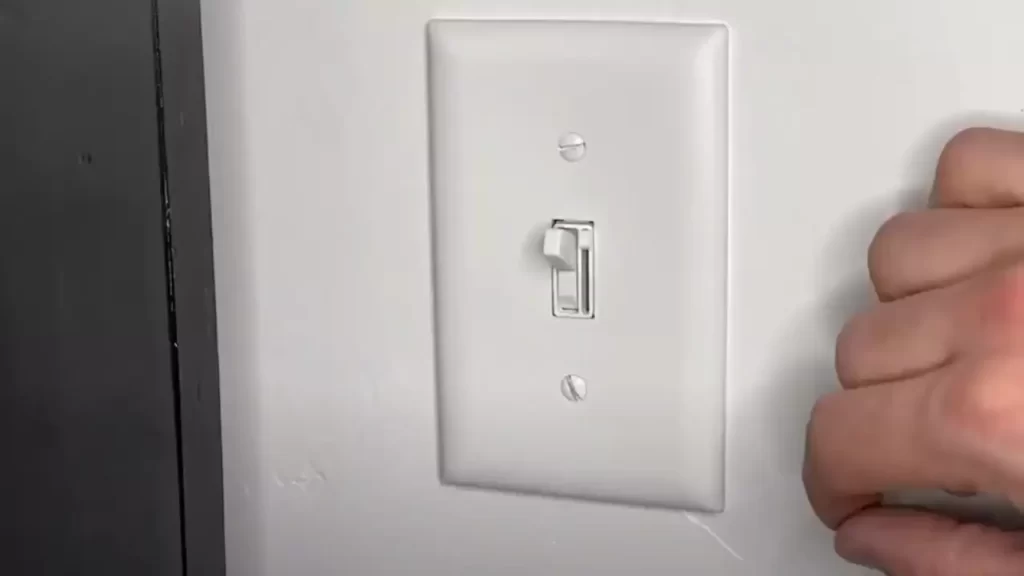
A single pole dimmer switch is an electrical device that allows you to adjust the brightness of a light fixture. It replaces the traditional on/off switch, providing a variable range of light output. With a single pole dimmer switch, you can set the desired brightness level to suit your needs and preferences. It offers a simple and convenient way to customize the lighting in any room.
Benefits of Using a Dimmer Switch
Using a dimmer switch comes with several benefits that enhance both the aesthetics and functionality of your lighting. Here are key advantages of installing a single pole dimmer switch:
- Controlled Lighting: Dimmer switches offer precise control over the lighting intensity, allowing you to adjust it as needed for various activities or moods.
- Energy Savings: By dimming the lights, you can save energy and reduce electricity consumption, ultimately leading to lower utility bills.
- Extended Bulb Life: Dimming the lights can increase the lifespan of your bulbs, as they are subjected to less stress and operate at lower temperatures.
- Enhanced Ambiance: By adjusting the brightness, you can create the perfect ambiance for any occasion, whether it’s a cozy dinner at home or a lively party.
- Customizable Settings: With a dimmer switch, you have the freedom to find the ideal lighting level that suits your personal preference and style.
Different Types of Dimmer Switches
There are various types of dimmer switches available in the market, each offering unique features and compatibility options. Here are the main types you can choose from:
| Type | Description |
|---|---|
| Incandescent Dimmer Switches | Designed to work specifically with traditional incandescent bulbs. |
| LED Dimmer Switches | Compatible with energy-efficient LED bulbs, providing smooth dimming capabilities. |
| CFL Dimmer Switches | Ideal for controlling the brightness of compact fluorescent lamps, ensuring proper operation and longevity. |
| Multi-Location Dimmer Switches | Enables control of a single light from multiple switches, allowing for convenient operation from various locations. |
With an understanding of single pole dimmer switches, their benefits, and the different types available, you can confidently proceed with the installation process. In the next section, we will guide you through the step-by-step instructions for installing a single pole dimmer switch.
Gathering The Necessary Tools And Materials
When it comes to installing a single pole dimmer switch, it is necessary to gather the necessary tools and materials beforehand. This preparation not only ensures a smooth installation process but also guarantees a safe and successful outcome. In this section, we will discuss the tools and materials required for the installation. Let’s dive in!
Tools needed for installation
Before you start the installation, make sure you have the following tools:
- Screwdriver
- Wire stripper
- Voltage tester
- Needle-nose pliers
Materials required for installation
In addition to the tools mentioned above, you will need the following materials:
- Single pole dimmer switch
- Wire connectors
- Electrical tape
- Wire nuts
Having the right materials ensures that you have everything necessary to correctly install a single pole dimmer switch. The single pole dimmer switch itself is a crucial component that allows you to easily control the lighting intensity in your space. Wire connectors are essential for connecting the wires securely and ensuring effective functioning of the dimmer switch. Electrical tape helps protect the connections from any potential damage. Finally, wire nuts are needed to securely fasten the wires together, completing the installation process.
Now that we have gathered all the necessary tools and materials, we are ready to proceed with the installation of the single pole dimmer switch.
Preparing For Installation
Before you embark on the installation process of a single pole dimmer switch, it’s crucial to take the necessary precautions and ensure your safety. In this section, we will guide you through the steps required to prepare for installation, including turning off the power, verifying that the power is off, and removing the existing switch. By adhering to these guidelines, you’ll be well on your way to successfully installing your new dimmer switch.
Turning off the power
To begin the installation process, you need to ensure that the power to the switch is completely shut off. This step is of utmost importance for your safety. Follow these steps to turn off the power:
- Locate your home’s main electrical panel.
- Open the panel door to expose the circuit breakers.
- Identify the breaker that controls the power supply to the switch you’ll be working on.
- Flip the corresponding breaker to the “Off” position.
By turning off the power at the breaker, you eliminate the risk of electric shocks during the installation process. It’s crucial to double-check that the power is indeed off before proceeding further.
Verifying the power is off
Once you’ve turned off the power, it’s time to verify that the switch does not have any active current flowing through it. Follow these precautions to ensure your safety before proceeding with the installation:
- Switch on a nearby light or use a non-contact voltage tester to confirm that the power is out.
- If the light fails to turn on or the voltage tester does not detect any current, it is safe to proceed with the installation.
- If the light turns on or the voltage tester detects current, immediately cease all installation activities and revisit the power-off process.
Taking the time to verify that the power is off adds another layer of safety to your installation process. It’s always better to be safe than sorry, so double-checking is essential.
Removing the existing switch
Before you can install your new dimmer switch, you must remove the existing switch from the electrical box. Follow these steps to ensure a proper removal:
- Locate the screws securing the switch to the electrical box.
- Using a screwdriver, unscrew and remove these screws carefully.
- Gently pull the switch out of the electrical box, exposing the wiring behind it.
- Unfasten the wires connected to the switch by loosening the wire nuts.
Ensure that you handle the wires with caution and keep them separate to avoid accidental contact. By properly removing the existing switch, you’re one step closer to installing your new dimmer switch.
Wiring The Single Pole Dimmer Switch
If you’re looking to enhance the ambiance of your living space or save energy by controlling the brightness of your lights, installing a single pole dimmer switch is a great solution. As with any electrical project, safety should be your top priority. Once you’ve turned off the power and removed the old switch, it’s time to start wiring the single pole dimmer switch. In this section, we’ll guide you through the process step by step, from identifying the live wire to securing the switch in place.
Identifying the live wire
The first step in wiring your single pole dimmer switch is to identify the live wire. The live wire is usually colored black or red and carries the electric current from the power source to the light fixture. To ensure your safety, it’s important to turn off the power at the circuit breaker before proceeding with this step. Once the power is off, use a non-contact voltage tester to confirm that the wires are not live.
Attaching the wires to the dimmer switch
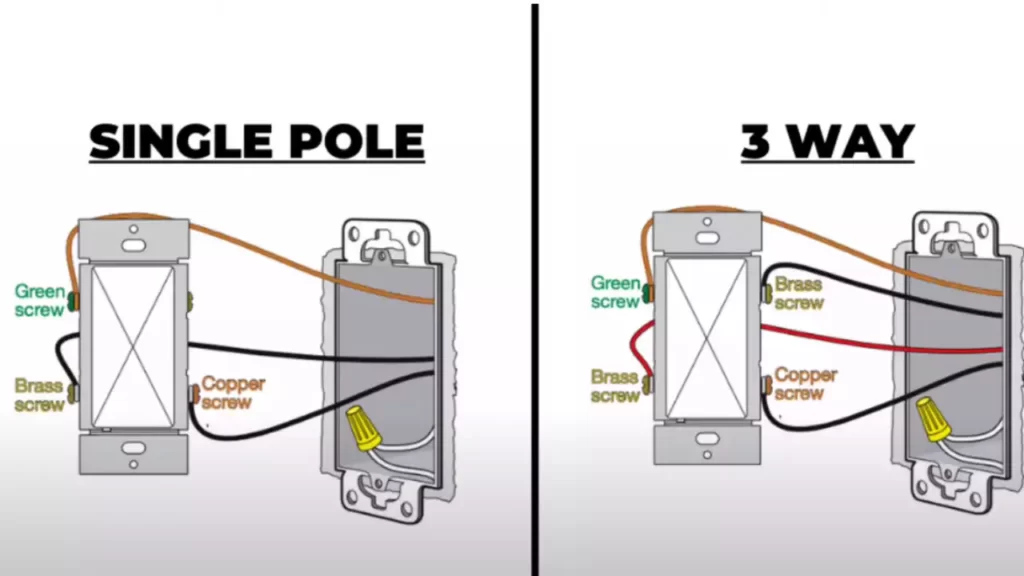
Next, you’ll need to attach the wires to the dimmer switch. Start by stripping about ¾ inch of insulation from the ends of the wires. The dimmer switch typically has three wires: a black or red wire, a green or bare copper ground wire, and a white neutral wire. Depending on your wiring setup, the colors may vary, so refer to the manufacturer’s instructions for exact identification.
Once you’ve identified the wires, use wire nuts to connect the black or red wire from the dimmer switch to the live wire. Make sure the connection is secure, and then attach the green or bare copper ground wire to the ground wire in the electrical box. Finally, connect the white neutral wire to the neutral wire in the box. Ensure that all connections are tight and there are no exposed wires.
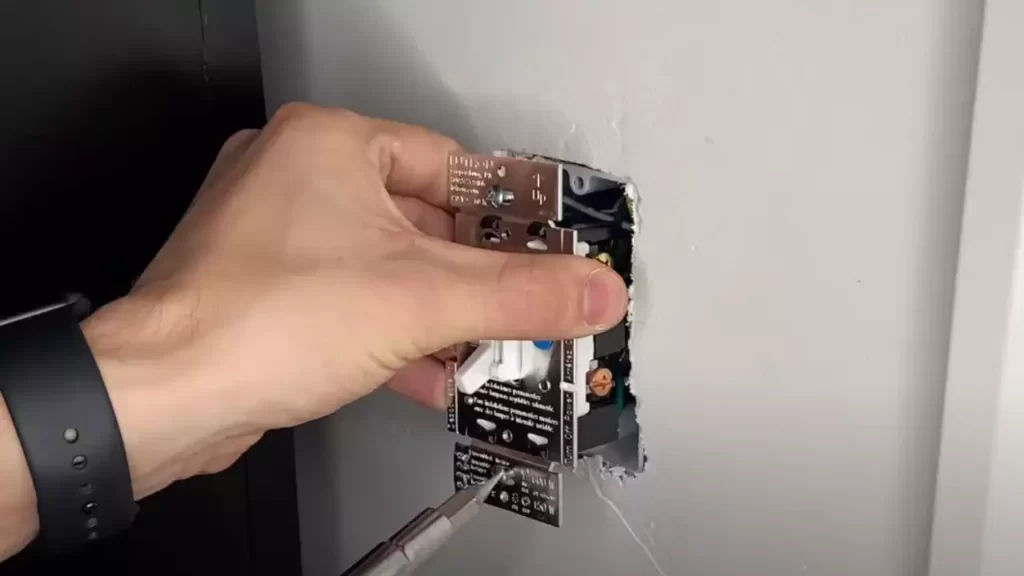
Securing the switch in place
Now that the wires are properly connected, it’s time to secure the switch in place. Gently fold the wires into the electrical box and position the dimmer switch over the box, aligning the screw holes of the switch with those in the box. Insert the screws provided with the switch and tighten them to secure the switch.
After securing the switch, gently push it back into the electrical box while making sure the wires are not pinched or damaged. Once everything is in place, restore power to the circuit by flipping the breaker back on. Test the dimmer switch to ensure it’s working properly by turning the lights on and adjusting the brightness using the control knob. If any issues arise, double-check your wiring or consult a qualified electrician.
By following these steps to wire and install your single pole dimmer switch, you’ll be able to create the perfect lighting atmosphere in your home while increasing energy efficiency. Remember to prioritize safety at all times and consult a professional if you’re unsure about any aspect of the installation process.
Testing And Troubleshooting
Once you have successfully installed your single pole dimmer switch, it is important to test and troubleshoot to ensure everything is working properly. This step is crucial in ensuring the functionality and safety of your dimmer switch.
Turning the power back on
After completing the installation, you can proceed to turn the power back on. It is important to do this step carefully and attentively. Follow the steps below:
- Locate the main circuit breaker panel in your house.
- Identify the corresponding circuit breaker for the room or area where you installed the dimmer switch.
- Flip the circuit breaker to the “on” position to restore power to the circuit.
- Verify that the power is restored by testing the lights controlled by the dimmer switch.
Testing the dimmer switch
Testing the dimmer switch is a crucial step to ensure its proper functioning. Follow the steps below to test your newly installed single pole dimmer switch:
- Turn the dimmer switch knob or slider to its lowest setting (usually all the way down).
- Gradually increase the brightness by turning the knob or sliding the switch upwards.
- Observe if the lights smoothly transition from dim to bright.
- Check if the dimming range is satisfactory for your needs.
Troubleshooting common issues
While installing and testing the dimmer switch, you may encounter some common issues. Here are some troubleshooting steps to address these problems:
- 1. Lights not turning on or off: Make sure the circuit breaker is in the correct position and that power is flowing to the switch. Additionally, check the wiring connections to ensure they are secure and properly connected.
- 2. Flickering lights: Flickering lights can indicate a loose wiring connection. Turn off the power and double-check all the connections, tightening them if necessary.
- 3. Buzzing or humming sounds: Buzzing or humming sounds can occur if the dimmer switch is not compatible with the type of light bulbs being used. Try using different bulbs or consult the dimmer switch manufacturer for compatibility information.
- 4. Overheating: If the dimmer switch feels hot to the touch or emits a burning odor, turn off the power immediately. This could indicate an issue with the wiring or an overload. Consult a professional electrician for assistance.
By following these testing and troubleshooting steps, you can ensure that your single pole dimmer switch is installed correctly and functioning properly. Remember to always prioritize safety and consult a professional if you encounter any difficulties or doubts during the installation process.
Safety Precautions
Before you begin installing a single pole dimmer switch, it is important to follow certain safety precautions. By taking these precautions, you can minimize the risk of accidents and ensure a safe installation process.
Using Proper Safety Equipment
One of the first steps to ensure your safety is to use the right safety equipment. Here are some essential items you should have:
- Safety goggles to protect your eyes from any potential debris or electrical sparks.
- Work gloves to protect your hands from sharp objects or burns.
- A voltage tester to accurately identify live wires and avoid the risk of electrocution.
- A non-contact voltage tester to check if wires are live without touching them directly.
By wearing the appropriate safety equipment, you can minimize the risk of injuries during the installation process.
Working in a Well-lit Area
Another important safety precaution is to work in a well-lit area. Inadequate lighting can make it difficult to identify wires, determine proper connections, or spot potential hazards. Before you begin, ensure there is sufficient lighting in the area where you will be working. Additional lighting sources such as headlamps or portable work lights can also be helpful to improve visibility.
Avoiding Contact with Live Wires
When installing a single pole dimmer switch, it is vital to avoid contact with live wires. Coming into contact with live electrical wires can result in electrical shocks or other serious injuries. To stay safe, make sure to:
- Switch off the power to the circuit at the main electrical panel before starting any work.
- Use a voltage tester to double-check that the wires are not live before handling them.
- Handle the wires carefully, keeping them away from your body and other conductive materials.
- Ensure the electrical connections are secure, using wire nuts or terminal screws.
By adhering to these precautions, you can greatly reduce the risk of electrical accidents during the installation process.
Remember, your safety should always be the top priority when working with electricity. By following these safety precautions and using common sense, you can install a single pole dimmer switch with confidence and peace of mind.
Frequently Asked Questions
How Do You Hook Up A Single Pole Dimmer Switch?
To hook up a single pole dimmer switch, turn off the power, remove the old switch, connect the new switch’s wires to the corresponding ones in the electrical box, and secure the switch in place. Then, restore power and test the dimmer switch.
Can You Wire A Single Pole Dimmer Switch?
Yes, you can wire a single pole dimmer switch. It is a straightforward process that can be done by following the instructions provided with the switch. Make sure to turn off the power, connect the wires, and secure them tightly.
Always consult an electrician if you’re unsure about anything.
How To Wire A Lutron Single Pole Dimmer Switch?
To wire a Lutron single pole dimmer switch, turn off the power, remove the old switch, and connect the black wire to the “hot” wire. Connect the red and white wires to the remaining two wires, and secure the wires with wire nuts.
Finally, screw the dimmer switch into place and restore power.
Does It Matter Which Wire Goes Where On A Dimmer Switch?
It is important to connect the wires correctly on a dimmer switch for proper functioning.
Conclusion
Installing a single pole dimmer switch is a simple DIY project that can transform the ambiance of any room. By following the step-by-step instructions provided in this blog post, you can easily upgrade your lighting controls and create a more comfortable and energy-efficient environment.
With just a few basic tools and minimal electrical knowledge, you’ll be able to enjoy the benefits of a dimmable lighting solution in no time. So, go ahead and give it a try – you won’t be disappointed!