To install a remote control ceiling fan, follow the instructions provided by the manufacturer and ensure that you have the necessary tools and equipment. Installing a remote control ceiling fan can be done easily by carefully following the step-by-step guidelines.
This will typically involve assembling the fan, mounting it securely to the ceiling, wiring the fan to the electrical system, and connecting the remote control receiver. By properly installing a remote control ceiling fan, you can enjoy the convenience and comfort it provides in controlling the fan speed and lighting options from anywhere in the room.
Necessary Tools And Materials
Before you embark on the installation process of a remote control ceiling fan, it’s crucial to ensure that you have all the necessary tools and materials at hand. Being well-prepared will not only make the installation smoother but also save you time and frustration. In this section, we will list the specific tools and materials you’ll need to complete this project successfully.
Ensure you have all the tools and materials before starting the installation process
It’s always wise to double-check your toolbox and gather all the materials needed before you start installing a remote control ceiling fan. This way, you won’t face any unwelcome surprises or interruptions during the process. Keep in mind that the specific tools and materials required may vary slightly depending on the fan brand and model you’re working with, so it’s essential to consult the manufacturer’s instructions or guidelines.
List of specific tools and materials needed for this project:
Here is a comprehensive list of the tools and materials you’ll need to install a remote control ceiling fan:
| Tools | Materials |
|---|---|
|
|
Having these tools and materials readily available will ensure a smoother and more efficient installation process. Remember to prioritize safety by following any specific guidelines provided by the manufacturer and turning off the power supply before starting any electrical work. Now that you’re equipped with the necessary tools and materials, you’re ready to move on to the next step: preparing the installation area.
Preparing For Installation
Before you begin installing a remote control ceiling fan, it’s important to take the necessary precautions and gather the right safety equipment. This step-by-step guide will help you prepare for a smooth and hassle-free installation process. Follow these three essential steps to ensure safety and convenience:
Turn off power from the main circuit to avoid any electrical accidents
Before you start working on installing a remote control ceiling fan, the first and most important step is to turn off the power from the main circuit. This will prevent any electrical accidents from occurring while you handle the wires and components. To do this, locate the circuit breaker panel in your home and switch off the power to the area where the fan will be installed. Make sure to double-check that the power is off using a voltage tester. Safety should always be the top priority in any electrical project.
Gather additional safety equipment such as gloves and safety glasses
When installing a remote control ceiling fan, it’s crucial to protect yourself with the right safety equipment. Before you get started, gather additional items such as gloves and safety glasses. These will provide an extra layer of protection against potential injuries. Wear gloves to shield your hands from any sharp edges or electrical shocks, and safety glasses to safeguard your eyes from flying debris.
Clear the area underneath the location where the fan will be installed to ensure safety
Prior to installing a remote control ceiling fan, it’s important to clear the area underneath the location where the fan will be installed. This will ensure a safe and secure installation process. Remove any furniture, decorations, or other objects that may obstruct your workspace. By creating a clear and clutter-free area, you’ll have ample room to work and minimize the risk of accidents or injury. Safety is paramount, and creating a hazard-free zone is essential for a successful installation.
Mounting The Ceiling Fan
Mounting the ceiling fan is a crucial step in the installation process. To ensure optimal performance and functionality, it’s essential to choose the appropriate location for your ceiling fan, install the ceiling fan mounting bracket securely, and ensure the ceiling fan is properly supported and balanced.
Choose the appropriate location for your ceiling fan
Before mounting your ceiling fan, take a moment to carefully select the right location. Consider the following factors:
- The fan should be centered in the room for optimal air circulation.
- Make sure the blades have enough clearance from the surrounding walls or furniture, typically recommended at least 18 inches.
- Ensure the distance from the floor to the fan is appropriate, usually around 7 feet or more.
- For safety purposes, keep the fan away from any direct contact with water or moisture sources.
Install the ceiling fan mounting bracket securely
Once you’ve decided on the perfect location, it’s time to install the ceiling fan mounting bracket. Follow these steps:
- Identify a ceiling joist or support beam using a stud finder.
- Once located, mark the position with a pencil.
- Use a drill and appropriate screws to secure the mounting bracket to the ceiling joist or support beam.
- Ensure that the bracket is tightly fastened and stable.
Ensure the ceiling fan is properly supported and balanced
After mounting the bracket, it’s essential to properly support and balance the ceiling fan. Here’s what you need to do:
- Refer to the manufacturer’s instructions for the specific model you are installing.
- Attach the fan motor assembly to the hanging bracket, following the provided guidelines.
- Securely tighten all screws and bolts to ensure stability.
- Using a balance kit, follow the instructions to check and adjust the balance of the ceiling fan if needed.
- Turn on the fan briefly at a low speed to check for any wobbling or unusual noises. If necessary, adjust and balance again.
By carefully choosing the location, securely installing the mounting bracket, and properly supporting and balancing the ceiling fan, you will ensure a successful and functional installation. Now that you have completed the mounting process, you are ready to move on to the next step of installing the electrical components and controls for your remote control ceiling fan.
Wiring The Ceiling Fan
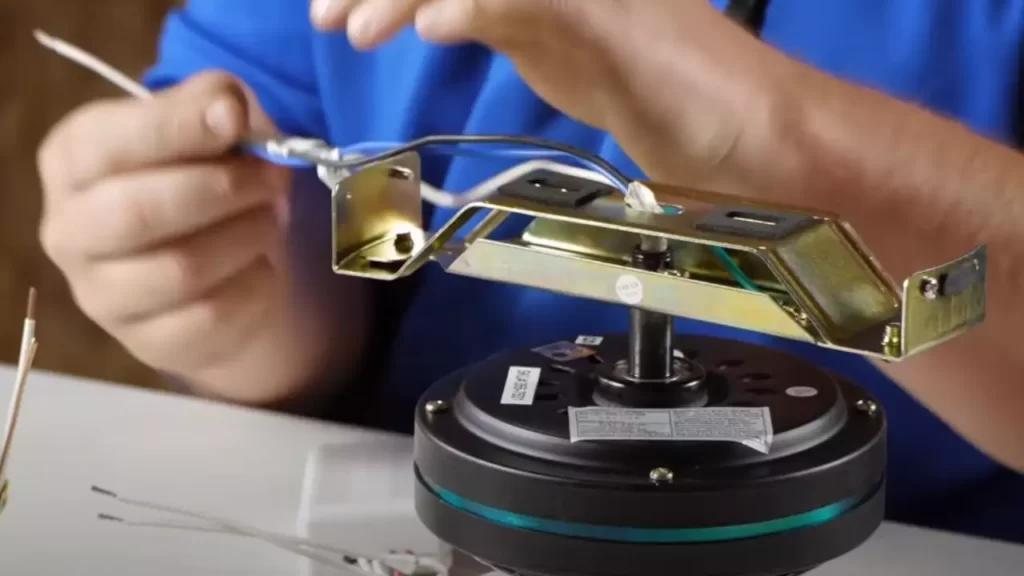
Familiarize yourself with the electrical connections of the fan
Before you start wiring the remote control ceiling fan, it’s crucial to familiarize yourself with the electrical connections of the fan. This will help you understand how the fan functions and ensure a smooth installation process. Take a close look at the wires and their colors, noting which wires correspond to power, ground, and the different fan functions.
Connect the wires from the ceiling fan to the corresponding wires in the electrical box
To properly wire your remote control ceiling fan, you need to connect the wires from the fan to the corresponding wires in the electrical box. This ensures that the fan operates correctly and safely. Refer to the manufacturer’s instructions to identify which wires should be connected to each other.
Here is a simple guide to help you make the connections:
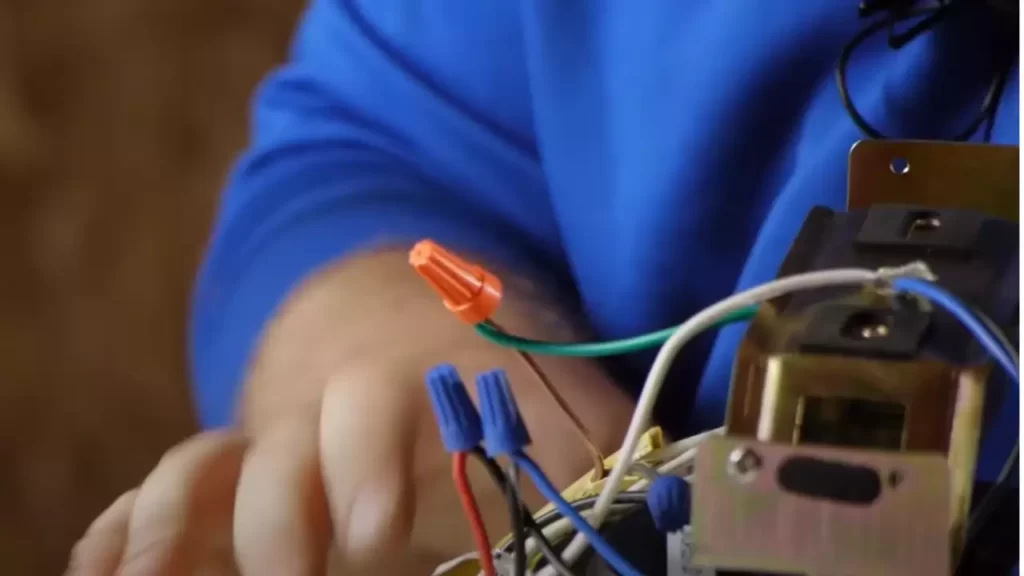
- Start by connecting the green or bare copper wire from the fan to the grounding wire in the electrical box.
- Next, connect the white wire from the fan to the neutral wire in the electrical box. This wire is typically labeled as “white” or “neutral” and is often connected to other white wires in the box.
- Finally, connect the remaining wires from the fan to the corresponding colored wires in the electrical box. Typically, the black wire from the fan is connected to the black or red wire in the box, while the blue wire from the fan is connected to the blue or red wire in the box. Consult the manufacturer’s instructions for specific color-coding.
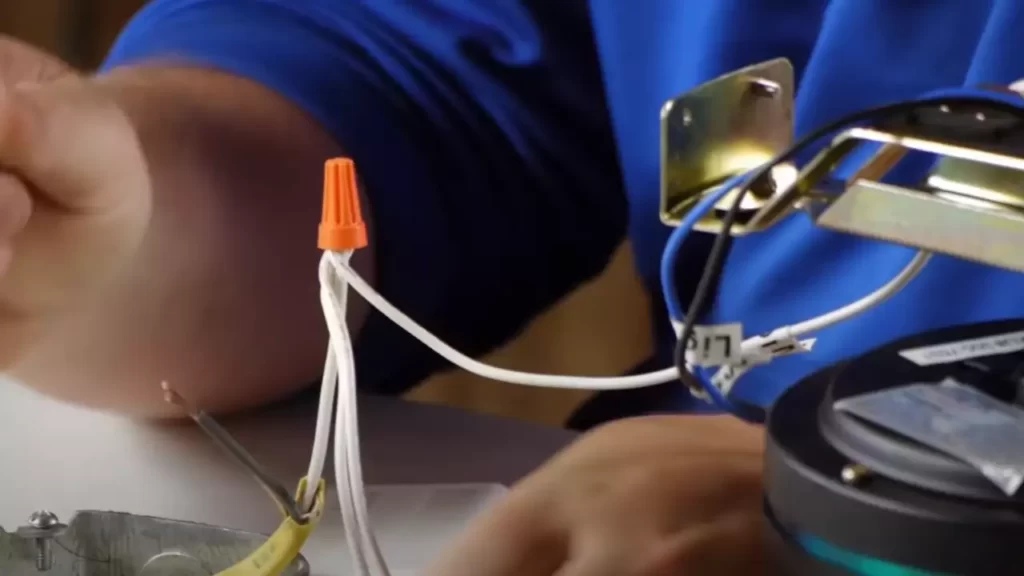
Securely tighten the wire connections to prevent any potential hazards
Ensuring that the wire connections are securely tightened is essential to prevent any potential hazards or issues with the remote control ceiling fan. Loose connections can lead to overheating, electrical shorts, or even a fire. Take the time to carefully tighten each wire connection using wire nuts or other appropriate connectors.
To securely tighten the wire connections:
- Twist the exposed copper ends of the wires together.
- Place a wire nut over the twisted ends, ensuring it covers all exposed wire.
- Hold the wire nut and twist it clockwise until it is snug. Do not overtighten, as this can damage the wires.
- Give each wire a gentle tug to ensure it is securely connected.
By following these steps, you can ensure a safe and successful installation of your remote control ceiling fan. Remember to always follow the manufacturer’s instructions and consult a professional electrician if you are unsure about any aspect of the wiring process.
Installing The Remote Control Receiver
Installing a remote control receiver for your ceiling fan is a convenient way to control its speed and settings from anywhere in the room. This step-by-step guide will walk you through the process, ensuring a secure and easily accessible installation.
Locate the appropriate spot for the remote control receiver
To begin, you need to find the perfect spot for your remote control receiver. It should be in close proximity to the ceiling fan and easily accessible for future maintenance or battery replacements. Look for a location that is free from any obstructions and provides a clear line of sight between the receiver and the remote control.
Install the remote control receiver in a secure and easily accessible location
Once you have determined the ideal spot, it’s time to install the remote control receiver. Ensure that you have turned off the power supply to the ceiling fan before proceeding. Use a ladder or step stool to reach the installation location. Securely fasten the receiver to the ceiling or ceiling fan canopy using the provided screws or brackets.
If the receiver has an antenna wire, make sure it is properly extended and positioned for optimal signal reception. Keep in mind that maintaining a solid connection between the receiver and the remote control is crucial for seamless operation.
Connect the wires of the ceiling fan and the remote control receiver
Before connecting any wires, carefully read the instructions provided with your remote control receiver. It is important to follow the manufacturer’s guidelines to ensure a safe and proper installation.
- Begin by identifying the power supply wires from your ceiling fan. These wires are typically colored black, white, and green (or copper).
- Next, locate the corresponding wires on the remote control receiver. The receiver will have labeled wires, which may include a black wire for power, a white wire for neutral, and a green or copper wire for grounding.
- Connect the black wire from the ceiling fan to the black wire of the receiver, securing them tightly with a wire connector.
- Similarly, connect the white wires together, ensuring a snug connection.
- If your ceiling fan includes a grounding wire, connect it to the green or copper wire of the receiver.
- Once all the connections are secure, neatly tuck the wires inside the ceiling fan canopy.
- Finally, double-check all the connections and ensure that they are properly insulated.
That’s it! You have successfully installed the remote control receiver for your ceiling fan. Remember to turn on the power supply and test the remote control to ensure it is functioning correctly. Enjoy the convenience and comfort of controlling your ceiling fan with just the touch of a button!
Attaching The Blades And Light Kit
Attaching the blades and light kit is a crucial step in the installation process of a remote control ceiling fan. This step ensures that the fan operates properly and provides optimal airflow for a comfortable environment. In this section, we will guide you through each step in attaching the fan blades to the motor housing and connecting the light kit (if applicable). Following these instructions carefully will help you enjoy all the benefits of your remote control ceiling fan.
Carefully attach the fan blades to the motor housing
Attaching the fan blades to the motor housing requires precision and attention to detail. To ensure a secure fit, follow these steps:
- Place the motor housing on a flat surface with the screw holes facing up.
- Align the holes on the fan blade with the holes on the motor housing.
- Insert the screws through the holes and tighten them using a screwdriver.
- Repeat this process for each fan blade, making sure they are evenly spaced.
- Once all the blades are attached, gently wiggle them to ensure they are firmly in place.
Follow the manufacturer’s instructions to connect the light kit (if applicable)
If your ceiling fan comes with a light kit, it is important to follow the manufacturer’s instructions to connect it properly. Here are some general steps to guide you:
- Identify the light kit and its components, including the mounting bracket and wiring.
- Attach the mounting bracket to the motor housing using the provided screws.
- Connect the wiring from the light kit to the corresponding wires in the motor housing.
- Secure the connections by twisting the wires together and covering them with wire connectors.
- Ensure the light kit is properly aligned and flush with the motor housing.
- Tighten any screws or bolts to secure the light kit in place.
Ensuring all connections are securely fastened is essential to the proper functioning of your remote control ceiling fan. By carefully attaching the fan blades to the motor housing and following the manufacturer’s instructions for the light kit, you can enjoy a comfortable and well-lit space in your home. Next, we will cover the final steps of the installation process before you can start enjoying the benefits of your new remote control ceiling fan.
Testing And Troubleshooting
Testing and Troubleshooting
Now that you have successfully installed your remote control ceiling fan, it’s time to test its functionality and troubleshoot any issues that may arise. This crucial step ensures that your ceiling fan operates smoothly and provides you with the comfort you desire. In this section, we will guide you through the process of restoring power to the main circuit, testing the functionality of the ceiling fan, troubleshooting any problems, and ensuring the remote control is working effectively.
Restore power to the main circuit
To begin, make sure the power to your ceiling fan is turned off at the main circuit breaker. This step is important to ensure your safety while working on the fan. Once confirmed, restore power by flipping the main circuit breaker switch back on. You should hear a click or see the lights turning back on, indicating that the power supply has been restored.
Test the functionality of the ceiling fan
After restoring power, it’s time to test the functionality of your newly installed remote control ceiling fan. Start by turning on the fan using the remote control. Verify that the fan blades start rotating smoothly without any wobbling or unusual noises. This confirms that the fan is properly installed and balanced.
Next, adjust the fan speed using the remote control. Ensure that all the speed settings (low, medium, and high) work correctly and provide the desired airflow. If you notice any abnormalities, such as slow or inconsistent speeds, it may indicate a problem that needs further attention.
Troubleshoot any issues that may arise
In the event that you encounter issues during the testing phase, it is important to troubleshoot and address them promptly. Improper operation or noise can be common issues, and it’s crucial to identify the cause before resolving them.
If the fan is not operating as expected or making unusual noises, check the installation to ensure all components are securely fastened. Loose screws or incorrect alignment can cause improper operation or wobbling, which may lead to noise issues. Tighten any loose screws and make any necessary adjustments to the installation.
Ensure the remote control is working effectively
To ensure the remote control is working effectively, test all its functions. Check that each button on the remote control corresponds to the desired action of the fan, such as turning it on or off, adjusting the speed, or activating any additional features.
If you encounter any issues with the remote control, make sure the batteries are fresh and properly inserted. Consider replacing the batteries if necessary. Additionally, double-check that there are no obstructions between the remote control and the ceiling fan as it needs a clear line of sight for effective operation.
In conclusion, testing and troubleshooting your remote control ceiling fan is an essential step in ensuring its proper functionality. By adhering to these guidelines and addressing any issues promptly, you can enjoy the comfort and convenience of your newly installed ceiling fan for years to come.
Cleaning And Maintenance Tips
Regularly clean the ceiling fan blades to remove dust and debris
Regular cleaning of your remote control ceiling fan is essential to maintain its efficiency and enhance its overall lifespan. Dust and debris tend to accumulate on the fan blades over time, which can affect its performance and even distribute allergens into the air. To ensure that your ceiling fan remains clean and dust-free:
- Dust the blades with a soft microfiber cloth or a duster regularly. Swiftly wiping each blade from the base to the tip will help remove the accumulated dust.
- For a more thorough cleaning, you may use a mild detergent mix. Dilute a small amount of gentle cleanser in water to create a cleaning solution. Dampen a cloth with the solution, making sure it is not dripping wet, and carefully wipe each blade. Remember to dry the blades completely after cleaning, as excess moisture can lead to damage and rust.
- To catch any loose dust particles as you clean, placing an old pillowcase or garbage bag underneath the fan will help gather the debris and make cleanup easier.
Ensure all connections are tightened and secure
Properly securing the connections of your remote control ceiling fan not only guarantees its smooth operation but also ensures safety. Loose connections can lead to wobbling or electrical issues, which can be hazardous. To prevent any potential problems:
- Turn off the power supply to the ceiling fan. You can either switch off the main circuit breaker or turn off the specific breaker for the fan.
- Check and tighten all visible screws and bolts, including those securing the fan blades, the motor assembly, the downrod, and the canopy.
- Ensure that the mounting bracket or hanger ball is securely tightened to the ceiling, providing a stable base for the fan.
- Verify that the electrical connections, such as wire nuts or terminal screws, are tight and firmly attached. If you notice any loose or frayed wires, it is recommended to seek professional assistance to avoid electrical risks.
- Once all connections are secure, restore the power supply and test the fan to ensure it is functioning properly.
Perform routine maintenance to prolong the lifespan of your ceiling fan
Routine maintenance is vital for extending the lifespan of your remote control ceiling fan and keeping it in optimal condition. By incorporating these simple maintenance practices into your regular routine, you can maximize the longevity of your fan:
- Check the fan’s balance periodically. A wobbling fan can cause unnecessary strain and potential damage. Use a fan balancing kit to adjust and stabilize the blades if needed.
- Inspect the fan motor for any signs of wear or damage, such as loose wires, overheating, or unusual noises. If you notice any issues, it is advisable to consult a professional electrician or contact the manufacturer for guidance.
- Inspect the remote control and its batteries. Replace the batteries when necessary to ensure uninterrupted operation.
- Keep the surrounding area of the fan clean by dusting regularly and avoiding the accumulation of dirt or debris.
Enhancing The Functionality Of Your Remote Control Ceiling Fan
Installing a remote control ceiling fan is just the beginning of creating a stylish and convenient atmosphere in your home. By exploring additional features, integrating with smart home systems, and personalizing the settings, you can take your fan’s functionality to a whole new level. In this article, we will delve deeper into these aspects, giving you valuable insights on how to optimize the performance of your remote control ceiling fan.
Explore additional features of your remote control ceiling fan, such as speed and direction settings
Modern remote control ceiling fans come equipped with a range of features to enhance comfort and efficiency within your living space. By gaining a thorough understanding of these features, you can make the most of your fan’s capabilities.
One of the key settings to explore is the fan speed control. With adjustable speed options, you can effortlessly create a gentle breeze for a relaxing ambiance or crank up the speed for a refreshing ventilation. This flexibility allows you to adapt the fan’s performance to your specific needs and preferences.
Directional settings are another exciting feature to experiment with. Depending on the season, you can easily switch between the forward and reverse mode to optimize your fan’s efficiency. During the summer, the forward mode creates a cooling effect by pushing air downwards, while in the winter, the reverse mode gently circulates warm air accumulated near the ceiling, ensuring even temperature distribution.
Consider integrating your fan with smart home systems for added convenience
If you crave even greater convenience, consider integrating your remote control ceiling fan with smart home systems. By doing so, you can effortlessly control your fan using voice commands or mobile devices, creating a seamless experience within your home.
Imagine walking into your living room and simply saying, “Hey Google, turn on the fan” or using your smartphone to adjust the fan speed without leaving your seat. With the integration of smart home systems, you can enjoy hands-free control, making your life easier and more enjoyable.
Personalize the settings to suit your preferences and optimize energy efficiency
Every individual has unique preferences when it comes to comfort and energy efficiency. Thankfully, remote control ceiling fans offer a wide range of customization options, allowing you to tailor the settings to your liking.
Take advantage of the programmable timer feature, which enables you to set specific on/off times for your fan. By scheduling your fan to automatically turn off during periods of the day when it’s not needed, you can optimize energy efficiency and reduce your electricity bill.
In addition, many remote control ceiling fans offer convenient memory functions, allowing you to save your preferred settings. Whether it’s your preferred fan speed or direction, you can easily recall these settings with a click of a button, making it incredibly convenient and hassle-free.
In conclusion, by exploring the additional features, integrating your fan with smart home systems, and personalizing the settings of your remote control ceiling fan, you can create an atmosphere of comfort and convenience in your home. Whether you want to adjust the fan speed and direction or optimize energy efficiency, these tips will help you maximize the functionality of your remote control ceiling fan.
Frequently Asked Questions
Can A Remote Control Be Installed On Existing Ceiling Fan?
Yes, a remote control can be easily added to an existing ceiling fan.
How Do You Wire A Ceiling Fan With A Remote?
To wire a ceiling fan with a remote, first turn off the power. Remove the cover plate to access the wiring. Connect the black wire from the fan to the black wire from the ceiling, and the white wire to the white wire.
Connect the blue wire from the fan to the red wire from the ceiling, and the green wire to the grounding screw. Finally, replace the cover plate and turn the power back on.
Does A Remote Controlled Ceiling Fan Need A Wall Switch?
A remote controlled ceiling fan does not necessarily need a wall switch. The remote control allows you to turn the fan on/off, adjust the speed and settings without using a wall switch. This provides convenience and flexibility in operating the fan from anywhere in the room.
What Do I Do With The Red Wire When Installing A Ceiling Fan With Remote?
Connect the red wire to the corresponding red wire from the ceiling. The red wire is for controlling the light fixture, so it needs to be connected for the remote to work properly. This step ensures the remote can control both the fan and the light.
Conclusion
To sum it up, installing a remote control ceiling fan doesn’t have to be daunting. By following the step-by-step instructions provided in this blog post, you can upgrade your space with ease. With the convenience of controlling your ceiling fan at the touch of a button, you’ll experience improved comfort and energy efficiency.
So why wait? Get started on your installation journey today and enjoy the benefits of a remote control ceiling fan in no time!