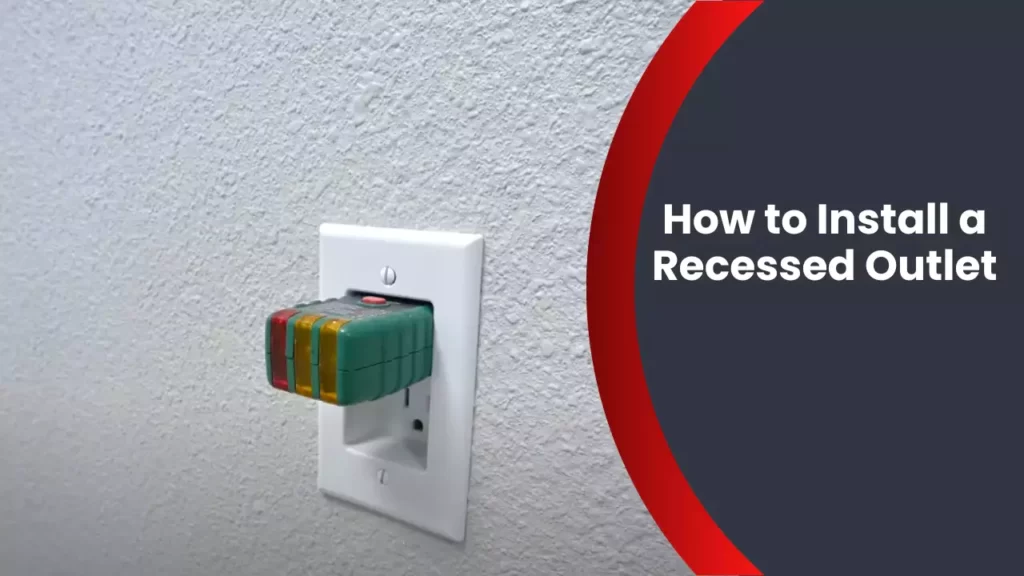
To install a recessed outlet, first identify the location on the wall, cut a hole, connect the wiring, and secure the outlet. In this guide, we will walk you through the step-by-step process of installing a recessed outlet in your home.
By following these simple instructions, you can ensure a safe and efficient installation that meets your electrical needs. So, let’s dive in and get started with the installation process for a recessed outlet in your home.
Planning And Preparation
Before diving into the process of installing a recessed outlet, you need to make sure you have a solid plan in place. This will help you avoid any unnecessary complications along the way and ensure a smooth installation process. In this section, we will discuss the key factors to consider and the necessary steps to take during the planning and preparation stage.
Assessing your electrical needs
The first step in planning for a recessed outlet installation is to assess your electrical needs. Take a moment to evaluate the specific requirements of your space. Consider the number of outlets you will need and the location of the power source. This will help you determine where to install the recessed outlet for maximum convenience and functionality.
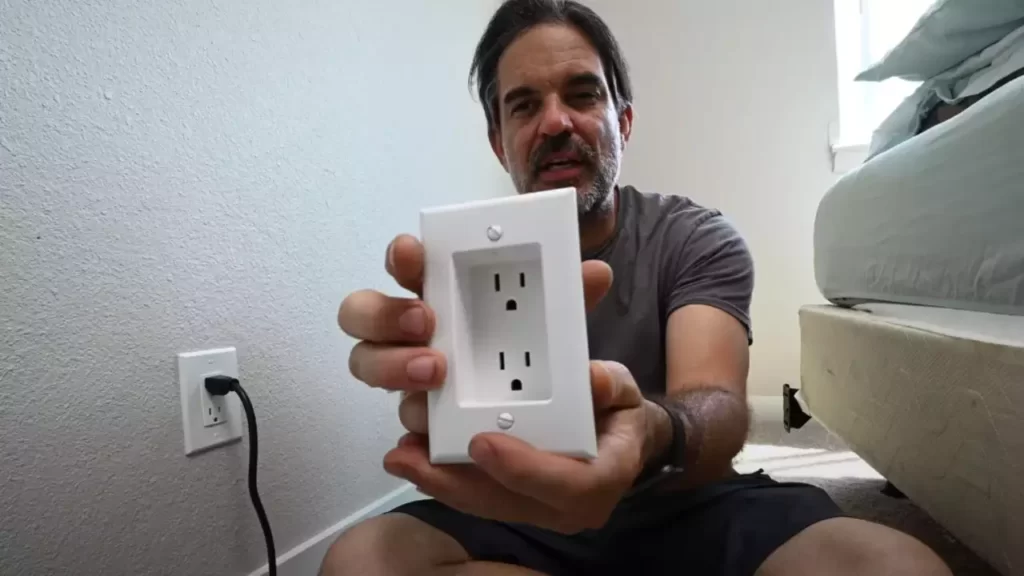
Choosing the right recessed outlet
Once you have identified the areas where you need outlets, it’s time to choose the right recessed outlet for your needs. There are various options available in the market, so selecting the one that aligns with your requirements is crucial. Consider factors such as the number of sockets, type of plug support, and aesthetic appeal. Additionally, ensure that the recessed outlet you choose is compatible with the electrical wiring in your home to avoid any compatibility issues later on.
Gathering the necessary tools and materials
Now that you have planned and selected the ideal recessed outlet, it’s time to gather the necessary tools and materials for the installation process. To ensure a smooth and efficient installation, here’s a list of items you will need:
| Tools | Materials |
|---|---|
|
|
Having these tools and materials readily available before starting the installation will save you time and ensure that you have everything you need to complete the project.
With your plan in place, the right recessed outlet selected, and all the necessary tools and materials gathered, you are now ready to move on to the next stage of the installation process. In the upcoming section, we will guide you through the step-by-step process of installing a recessed outlet.
Safety Precautions
Before attempting to install a recessed outlet, it is crucial to prioritize safety precautions. By taking the proper steps and following industry guidelines, you can minimize the risk of accidents and ensure a safe working environment. This section will cover three key safety precautions to keep in mind during the installation process:
Turning off the Power
One of the first steps to ensure safety is to turn off the power supply to the area where you will be installing the recessed outlet. This step is crucial to protect yourself from electric shock and potential injury. To do this, follow these steps:
- Locate the circuit breaker panel in your home or building.
- Identify the correct circuit breaker that controls the power supply to the area.
- Flip the switch to the “off” position to cut off the electricity.
- Double-check that the power has been successfully turned off by testing nearby outlets or using a voltage tester.
Using Personal Protective Equipment (PPE)
When working with electrical components, it is vital to protect yourself using personal protective equipment (PPE). These items serve as a barrier between you and potential hazards. Remember to wear the following PPE during the recessed outlet installation:
- Insulated gloves: Properly insulated gloves will protect your hands from electric shock and burns.
- Safety goggles: Safety goggles will shield your eyes from any flying debris or particles.
- Protective clothing: Wear non-conductive clothing to minimize the risk of electric shock.
Ensuring a Clean and Safe Workspace
A clean and organized workspace is essential for safe installation. Cluttered and messy workspaces can increase the risk of accidents. Follow these steps to maintain a clean and safe workspace:
- Clear any unnecessary objects or debris from the area.
- Ensure proper lighting to have a clear view of the installation area.
- Keep electrical cords organized and away from potential trip hazards.
- Use a sturdy and stable ladder if necessary, and position it securely.
- Have a fire extinguisher nearby in case of emergencies.
By taking these safety precautions seriously, you can significantly reduce the risk of accidents and maintain a safe working environment during the recessed outlet installation.
Installing The Recessed Outlet
Installing a recessed outlet can help to enhance the aesthetics of your room by eliminating unsightly cords and cables. It also provides a more convenient and discreet power source. In this section, we will walk you through the step-by-step process of installing a recessed outlet, from marking the location on the wall to running the electrical wires. Let’s get started!
Marking the location on the wall
Before you begin the installation process, it is crucial to determine the ideal location for your recessed outlet. To do this, consider the functionality and accessibility of the outlet and the proximity to other electrical components. Once you have chosen the spot, you can mark the location on the wall using the following steps:
- Use a stud finder to locate the nearest wall stud. This will provide a secure anchor point for the outlet.
- Measure the desired height for the outlet, typically around 12-18 inches above the floor.
- Using a level, draw a vertical line on the wall to mark the center of the outlet.
- Next, mark the position of the outlet box by using a template or tracing the outline of the box onto the wall.
Cutting the hole for the outlet box
Now that you have marked the location of the outlet box, it’s time to cut the hole in the wall. This process requires precision and careful attention to detail. Follow these steps to ensure a clean and accurate cut:
- Turn off the power to the room at the circuit breaker to avoid any electrical hazards.
- Using a drywall saw or a keyhole saw, carefully cut along the traced outline of the outlet box.
- Work slowly and steadily, keeping the saw blade aligned with the outline to create a clean and precise cut.
- Once the hole is completed, remove any excess drywall or debris from the area.
Running electrical wires to the outlet location
With the hole for the outlet box in place, it’s time to run the electrical wires. This step ensures that your recessed outlet will have a reliable power source. Follow these guidelines to safely and efficiently install the wires:
- Measure the distance from the outlet location to the nearest electrical source, such as an existing outlet or junction box.
- Cut the appropriate length of electrical wire, ensuring that there is enough to reach the outlet box comfortably.
- Strip the insulation from the ends of the wire, exposing the bare copper wires.
- Connect the wires to the outlet box, following the manufacturer’s instructions and using wire nuts or appropriate connectors.
- Secure the wires along the wall, ensuring that they are hidden and protected, using cable staples or wire clips.
- Finally, test the installation by turning on the power and checking if the recessed outlet is functioning correctly.
By following these steps, you can successfully install a recessed outlet in your home or workspace. Remember to always prioritize safety and consult a professional if you are unsure about any aspect of the installation process.
Wiring The Recessed Outlet
Wiring the Recessed Outlet
One important step in installing a recessed outlet is to properly connect the wires to the outlet box. This ensures that the outlet functions safely and efficiently. In this section, we will discuss how to connect the wires, properly ground the outlet, and test the wires for accuracy and safety.
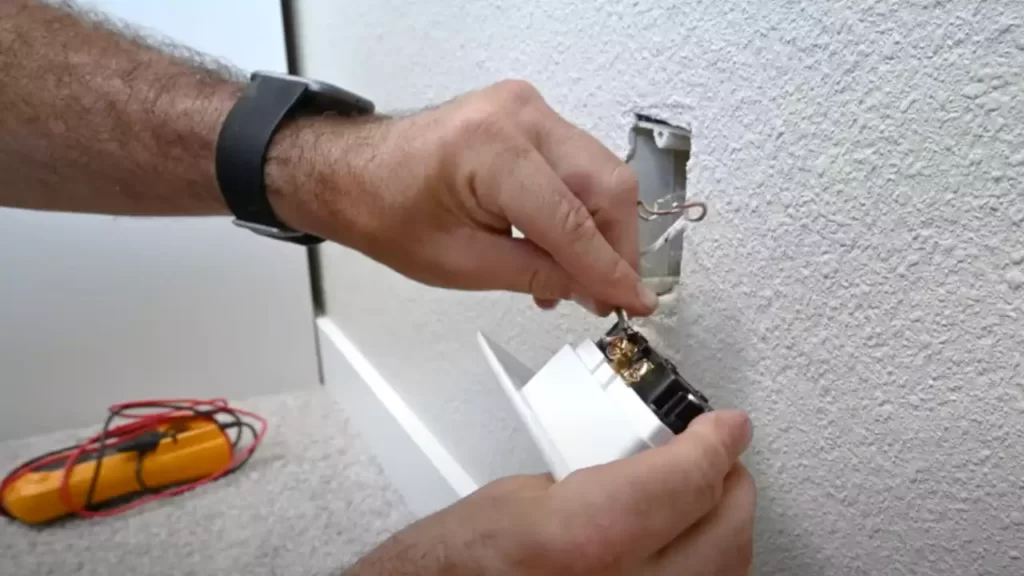
Connecting the wires to the outlet box
When connecting the wires to the outlet box, it’s crucial to follow the appropriate steps to ensure proper installation.
To begin, turn off the power supply to the outlet by switching off the breaker or removing the fuse. This ensures your safety during the installation process.
Next, identify the black (hot) wire, the white (neutral) wire, and the green or bare copper (ground) wire in the outlet box. These wires are typically color-coded for easy identification.
Strip the insulation from the ends of the wires, making sure to expose about 1/2 inch of bare wire. This allows for a secure connection.
Connect the black wire to the brass or dark-colored screw on the outlet. This is generally the hot wire that carries the electrical current.
Attach the white wire to the silver or light-colored screw on the outlet. This is the neutral wire that completes the electrical circuit.
Lastly, connect the green or bare copper wire to the green screw or grounding location on the outlet. This ensures proper grounding, which is essential for safety.
Properly grounding the outlet
Proper grounding is essential to protect against electrical shock and prevent damage to electrical devices. Here’s how to ensure the outlet is properly grounded:
- Connect the green or bare copper wire to the grounding screw on the outlet.
- Ensure that the grounding wire is securely attached and does not come into contact with any other wires.
- Verify that the grounding screw is tightened to ensure a secure connection.
- Check that the outlet box is properly grounded by testing it with a voltage tester.
Testing the wires for accuracy and safety
Testing the wires after installation is essential to ensure their accuracy and safety. Here’s how to perform a basic test:
- Turn on the power supply to the outlet.
- Using a voltage tester, check that the outlet is receiving power.
- Test each outlet using the voltage tester to ensure they are properly connected to the wires.
- Confirm that the readouts on the voltage tester are within the expected range.
- If any issues are identified during the testing process, consult a professional electrician for further assistance.
By following these steps for connecting the wires, properly grounding the outlet, and testing the wires for accuracy and safety, you can ensure a successful installation of a recessed outlet. Remember to always prioritize safety and consult a professional if needed.
Securing The Recessed Outlet
Once you have successfully wired your recessed outlet, the next step is to secure it into the wall. This involves mounting the outlet box, attaching the outlet cover plate, and double-checking the stability and alignment to ensure a professional installation.
Mounting the outlet box into the wall
The first step in securing the recessed outlet is to mount the outlet box into the wall. Here’s how you can do it:
- Choose the desired location for the recessed outlet. Make sure it is easily accessible and meets the necessary building codes.
- Using a stud finder, locate the studs behind the wall where you plan to install the outlet. Mark the edges of the stud with a pencil.
- Position the outlet box against the wall, aligning it with the marked stud locations. Ensure that the box is level and centered.
- Using a power drill and the appropriate screws, secure the outlet box to the wall by driving the screws through the mounting holes on the box and into the studs. Make sure the box is tightly secured to provide stability.
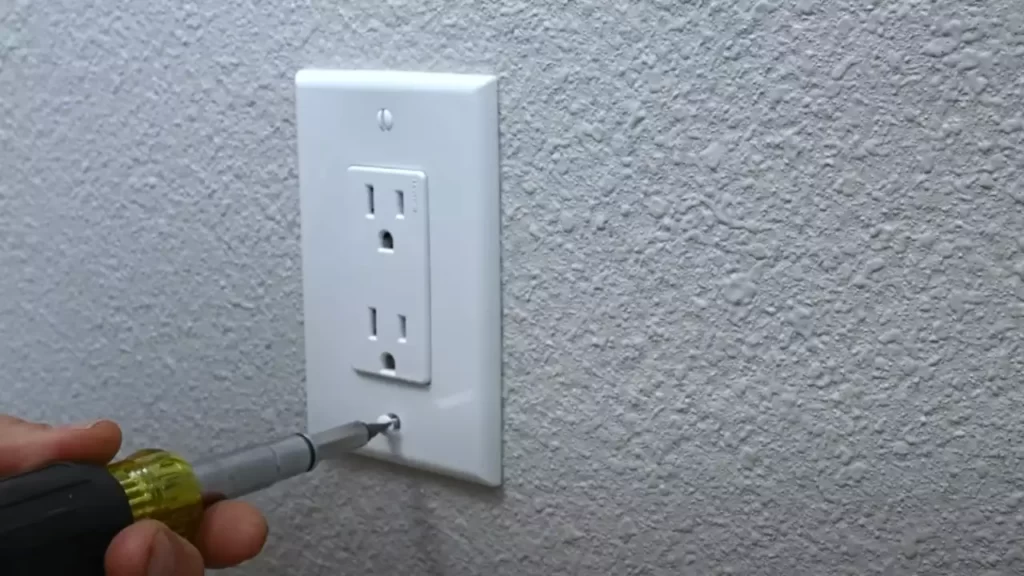
Attaching the outlet cover plate
After mounting the outlet box, the next step is to attach the outlet cover plate. Follow these steps to complete the installation:
- Choose an outlet cover plate that matches your wall decor and the style of your room.
- Align the cover plate over the outlet box, ensuring that the screw holes on the plate match with the holes on the box.
- Insert the screws through the holes on the cover plate and into the corresponding holes on the outlet box.
- Tighten the screws using a screwdriver until the cover plate is securely attached to the box.
Double-checking the stability and alignment
Lastly, it is important to double-check the stability and alignment of the recessed outlet to ensure a professional and safe installation:
- Gently tug on the outlet and cover plate to check for any loose connections. If there is any movement, tighten the screws further to secure the outlet.
- Use a level to ensure that the outlet cover plate is perfectly aligned with the wall. Adjust if necessary.
- Verify that the outlet is straight and flush with the wall. If it is not, adjust the mounting screws to achieve proper alignment.
By following these steps and double-checking the stability and alignment, you can securely install a recessed outlet, enhancing the functionality and aesthetics of your space.
Testing And Troubleshooting
Testing and Troubleshooting
Restoring the power and testing the outlet
After installing a recessed outlet, it is crucial to restore power and test the outlet to ensure it is functioning properly. Follow these steps to complete this essential task:
1. Double-check the circuit breaker: Once the installation is complete, return to the circuit breaker box and flip the corresponding breaker switch back to the “on” position. This will restore power to the outlet.
2. Use a voltage tester: Before proceeding, it is necessary to test the outlet to ensure it is receiving the correct amount of power. A voltage tester is a handy tool for this task. Simply insert the tester’s prongs into the outlet slots and check for a clear and consistent reading. If the voltage level is within the appropriate range, you can move on to the next step. However, if there is no power or an irregular reading, it indicates a problem with the wiring or installation that needs to be addressed.
Troubleshooting common issues
Even with careful installation, it is not uncommon to encounter some issues during the testing phase. Here are some common problems you might encounter and the steps to troubleshoot them:
1. No power to the outlet: If the voltage tester indicates that there is no power to the outlet, double-check the circuit breaker to ensure it is properly switched on. If the switch appears to be in the correct position, try flipping it off and on again to reset any possible tripped connection. If the problem persists, it is advisable to seek professional assistance as there may be a more serious electrical issue.
2. Irregular voltage reading: In the event of an irregular voltage reading, it is necessary to investigate further. Start by turning off the circuit breaker and carefully removing the outlet cover. Inspect the wiring connections to ensure they are secure and properly connected. If any loose or damaged wires are found, they will need to be fixed or replaced. Additionally, check for any signs of burn marks or overheating, as this could indicate a faulty connection or a potential fire hazard.
Ensuring proper functionality and safety compliance
Once any issues have been resolved and the voltage reading is regular, it is essential to ensure the recessed outlet is functioning correctly and meets safety standards. Follow these final steps:
1. Plug in a test device: To test the outlet’s functionality, plug in a small electrical device like a lamp or phone charger. Ensure that the device receives power, turns on, and functions as expected. If the device fails to work or if there are any sparks, smoke, or unusual noises, immediately unplug it and consult a professional electrician.
2. Safety compliance check: Lastly, ensure the recessed outlet meets safety compliance by visually inspecting it for any signs of physical damage, such as cracks or exposed wires. Confirm that the outlet cover sits flush against the wall and securely covers the outlet. Additionally, check if any nearby furniture or objects obstruct the outlet’s access. It is important to keep the area around the outlet clear and unobstructed to avoid potential hazards.
By following these steps and conducting thorough testing and troubleshooting, you can ensure the proper functionality and safety compliance of your newly installed recessed outlet.
Additional Considerations
When installing a recessed outlet, there are a few additional considerations that you should keep in mind. These include understanding local electrical codes and regulations, considering hiring a professional electrician for complex installations, and adding decorative finishing touches to the outlet cover.
Understanding local electrical codes and regulations
Before beginning any electrical installation, it’s crucial to have a clear understanding of the local electrical codes and regulations that apply to your area. These codes are designed to ensure safety and compliance with industry standards. Failure to adhere to these regulations may result in fines or even legal issues.
When installing a recessed outlet, you must be aware of the specific requirements regarding the depth and positioning of the outlet box. Local codes may vary, so it’s important to consult with a licensed electrician or refer to your local building department for the exact requirements in your area.
Hiring a professional electrician for complex installations
- Complex installations involving multiple electrical connections or modifications to existing wiring should be left to the expertise of a professional electrician.
- Attempting complex electrical work without the necessary knowledge and experience can lead to serious safety hazards or damage to your property.
- A licensed electrician will have the expertise to ensure that the recessed outlet is installed correctly and safely, minimizing the risk of electrical issues or accidents in the future.
- Furthermore, hiring a professional will give you peace of mind knowing that the installation has been done in accordance with the local codes and regulations.
Adding decorative finishing touches to the outlet cover, ensuring
While the primary purpose of a recessed outlet is functionality, there’s no reason why it can’t also be aesthetically pleasing. Adding decorative finishing touches to the outlet cover can help it blend seamlessly into your interior design:
- Consider opting for a recessed outlet cover that matches the color or finish of your wall, so it blends in seamlessly.
- Some outlet covers come with additional features such as built-in USB ports or integrated night lights. These can be both functional and visually appealing.
- Ensure that the outlet cover is flush with the wall and properly aligned for a clean and tidy appearance. Any gaps or misalignment can detract from the overall look.
- Additionally, you can consider using a decorative wall plate or cover to further enhance the appearance of the recessed outlet. These are available in various designs and materials to suit your personal style.
By paying attention to these additional considerations, you can ensure that your recessed outlet installation not only meets the necessary safety standards and regulations but also adds a touch of style to your home.
Frequently Asked Questions
Can An Electrical Outlet Be Recessed?
Yes, electrical outlets can be recessed. Recessing outlets allows them to be installed flush with the wall surface, creating a more visually appealing and seamless look. It is a common practice in homes and buildings to hide outlet boxes behind the wall for a cleaner appearance.
Does A Recessed Outlet Need A Special Box?
Yes, a recessed outlet does require a special box. The special box is designed to be installed inside the wall, providing a safe and secure housing for the outlet. This ensures proper insulation and protection, meeting electrical safety standards.
How Do I Change My Power Outlet To Recessed?
To change your power outlet to a recessed one, follow these steps: 1. Turn off the power to the outlet at the circuit breaker. 2. Unscrew the existing outlet cover and disconnect the wires. 3. Remove the old outlet from the electrical box.
4. Install the recessed outlet box into the wall. 5. Connect the wires to the new outlet and secure it in the box. 6. Attach the cover plate and restore power at the circuit breaker.
How Much Does It Cost To Install A Recessed Outlet?
The cost to install a recessed outlet varies, but it typically ranges from $150 to $250. The price depends on factors such as the location of the outlet, complexity of the installation, and any additional wiring or electrical work required.
It’s best to consult with a licensed electrician for an accurate estimate.
Conclusion
Installing a recessed outlet is a relatively simple task that can enhance the functionality and aesthetics of any space. By carefully following the steps outlined in this guide, you can successfully complete the installation process. Remember to turn off the power before beginning and use caution when handling electrical wiring.
With a little bit of patience and attention to detail, you’ll have a new recessed outlet up and running in no time. Happy DIY-ing!