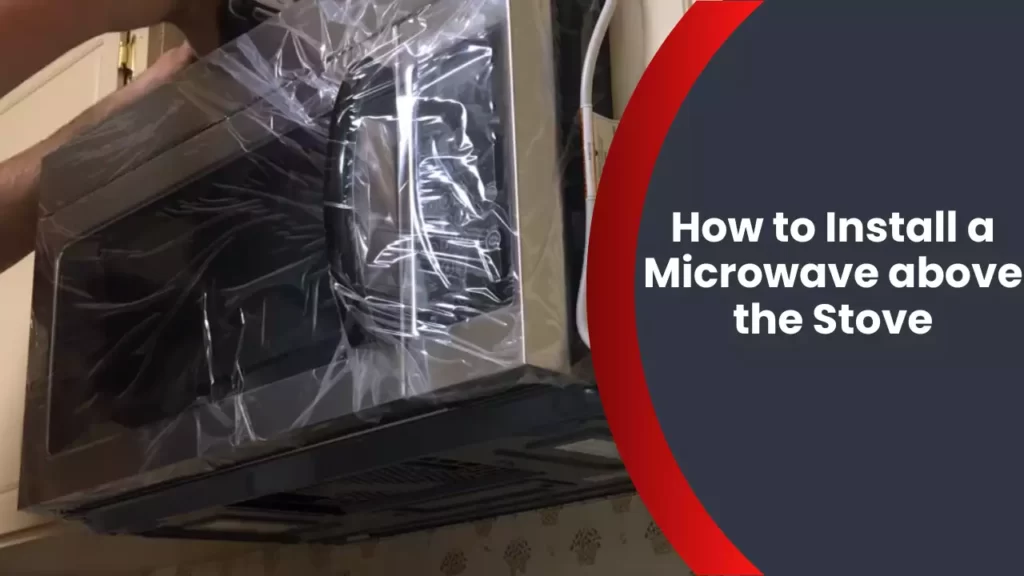
To install a microwave above the stove, first, measure the available space and check the manufacturer’s instructions for any specific requirements. Then, use a template or guide to mark the mounting holes on the wall and cabinet.
After that, attach the mounting brackets securely, making sure they align with the marked holes. Finally, align the microwave with the brackets and secure it in place according to the instructions provided. In just a few simple steps, you can have a conveniently placed microwave above your stove.
Introduction (120 words): Installing a microwave above the stove can be a practical solution for saving counter space and maximizing kitchen efficiency. This convenient location allows easy access to heat or cook food while keeping the microwave within arm’s reach. However, proper installation is crucial to ensure safety and functionality.
Before embarking on this project, it is important to measure the available space and consult the manufacturer’s instructions to determine any specific requirements. Additionally, using a template or guide will help mark the mounting holes accurately on the wall and the cabinet. By carefully following the necessary steps, such as securely attaching the mounting brackets and aligning the microwave correctly, you can successfully install a microwave above your stove.
Preparing For Installation
Checking the Required Tools and Materials
Before starting the installation process, it is crucial to gather all the necessary tools and materials. You don’t want to find yourself halfway through the installation only to realize that you are missing a key component. To ensure a successful installation, check that you have the following:
- A microwave mounting kit
- Drill with appropriate drill bits
- Measuring tape
- Stud finder
- Screwdriver or screw gun
- Level
- Pencil or marker
Measuring the Available Space above the Stove
Accurate measurements are essential when installing a microwave above the stove. Take the time to measure the available space carefully to ensure that the microwave will fit properly. Follow these steps:
- Measure the width of the space from left to right, taking note of any obstructions such as cabinets or walls.
- Measure the height of the space from the bottom of the cabinet above the stove to the countertop below.
- Measure the depth of the space, ensuring there is enough clearance for the microwave to fit without interfering with any existing cabinets or other appliances.
Ensuring Proper Ventilation
Proper ventilation is crucial for maintaining the functionality and longevity of your microwave. Without sufficient ventilation, the microwave may overheat and fail prematurely. Here are a few key points to consider regarding ventilation during the installation process:
- Ensure that the microwave is equipped with a vent fan or has the capability to be vented externally.
- If possible, locate the microwave near an exterior wall to facilitate venting directly outside.
- If venting through an interior wall or ceiling is necessary, ensure that appropriate ductwork is installed to effectively remove any exhaust.
- Check local building codes or manufacturer guidelines to determine the specific ventilation requirements for your microwave model.
Removing The Old Microwave
Uninstalling the existing microwave
Before installing a new microwave above the stove, it is crucial to remove the old one properly. Here’s a step-by-step guide on how to uninstall the existing microwave:
-
- Step 1: Preparation
Begin by clearing the area around the microwave to ensure safe and easy access. This includes removing any items on the stove or nearby countertops. Make sure to have a clean workspace before proceeding.
-
- Step 2: Power off
It is crucial to disconnect the power supply to avoid any potential electrical hazards. Locate the circuit breaker associated with the microwave and switch it off. Double-check that the power is indeed disconnected by testing the microwave’s buttons or turning on the stove light.
-
- Step 3: Remove the vent grille
The vent grille is typically located above the microwave’s door and secured by screws. Unscrew these screws and carefully remove the grille while keeping it in a safe place. This will expose the mounting bolts and brackets.
-
- Step 4: Detach the control panel
Depending on the microwave model, the control panel may need to be removed next. Check for any clips or screws securing it in place. Loosen or remove these connections to free the control panel.
-
- Step 5: Disconnect the door
With the control panel out of the way, it’s time to detach the microwave’s door. Be careful as the door may still have some weight to it. Locate the hinges on each side of the microwave, lift them upward, and slide the door off.
-
- Step 6: Unscrew mounting bolts
Now, it’s time to get rid of the microwave entirely. Begin by locating the mounting bolts behind the microwave. These bolts secure the unit to the wall, usually through a mounting plate. Using a screwdriver, carefully unscrew each bolt, ensuring nobody is supporting the weight from below. Gradually lower the microwave to avoid any sudden movements or damages.
Disconnecting the power supply
Once the old microwave is removed, the next step is to disconnect the power supply:
-
- Step 1: Locate the power cord
Firstly, find the power cord connected to the microwave. This cord may go through the cabinet or directly into a power outlet. Depending on the setup, you may need to remove the plug from the outlet or disconnect it from the microwave.
-
- Step 2: Secure the power cord
Once the power cord is disconnected from the microwave, it’s essential to secure it to prevent it from falling back behind the stove. Use zip ties or clips to attach the cord securely to the cabinet or nearby hardware.
-
- Step 3: Consider hiring an electrician
If you are uncomfortable dealing with electrical connections or are unsure about your ability to safely disconnect the power supply, it is highly recommended to hire a licensed electrician. They can ensure the job is done correctly and in compliance with safety regulations.
Removing the old microwave and disconnecting the power supply are crucial steps in installing a new microwave above the stove. By following these instructions, you can safely and effectively prepare for the installation of your new appliance. Remember to exercise caution and, if necessary, seek professional assistance to ensure everything is done correctly.
Installing The New Microwave
Installing a new microwave above the stove not only saves valuable counter space but also provides a convenient cooking solution. When it comes to installing the new microwave, there are a few key steps you need to follow to ensure a successful installation. In this guide, we will walk you through each step, from choosing the right microwave model and size to connecting the electrical wires and ensuring proper grounding.
Choosing the right microwave model and size
Before you begin the installation process, it’s important to choose the right microwave model and size for your kitchen space. Measure the available space above your stove and consider the size of the microwave that would fit comfortably in that area. Additionally, think about the features you are looking for in a microwave, such as wattage, cooking presets, and ventilation options. Once you have found the perfect microwave, you can proceed with the installation process.
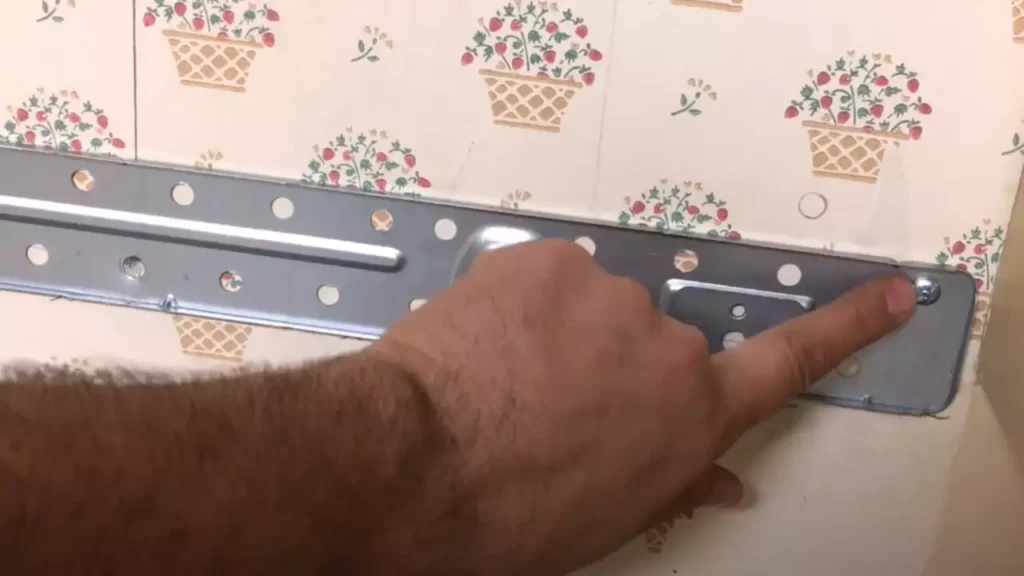
Mounting the bracket on the wall
To mount the microwave above the stove, you will need to install a bracket on the wall. Begin by locating the studs in the wall using a stud finder. Once you have identified the stud locations, mark them with a pencil. Next, align the bracket with the stud marks and attach it securely to the wall using screws. Make sure the bracket is level to ensure proper alignment of the microwave.
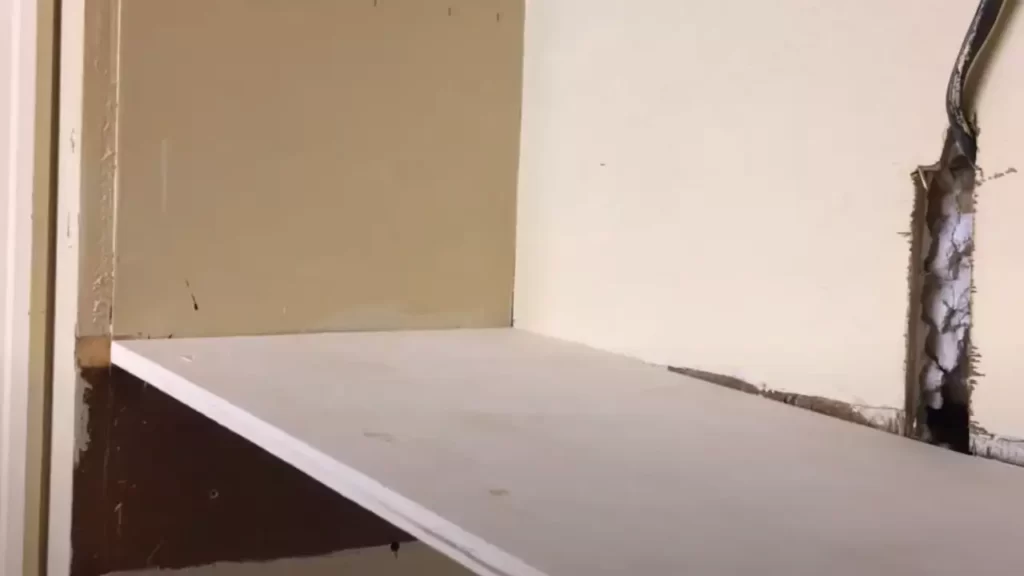
Aligning the microwave with the bracket and securing it in place
Now it’s time to align the microwave with the bracket and secure it in place. With the help of a friend or family member, lift the microwave and position it above the stove, making sure to align the mounting slots on the microwave with the brackets on the wall. Once the microwave is properly aligned, insert the mounting screws through the slots and tighten them to secure the microwave in place. Double-check that the microwave is level and secure before moving on to the next step.
Connecting the electrical wires and ensuring proper grounding
Before connecting the electrical wires, it is crucial to turn off the power supply at the circuit breaker. Use a voltage tester to confirm that there is no electricity running to the area where you will be working. Next, remove the electrical cover plate on the microwave and identify the wires for connecting to the power source. Follow the manufacturer’s instructions to properly connect the wires, ensuring proper grounding to prevent any electrical hazards. Once the electrical connections are made, carefully attach the cover plate back in place.
In conclusion, by carefully following these steps, you can successfully install a new microwave above the stove. Remember to choose the right model and size, mount the bracket securely on the wall, align the microwave with the bracket, and connect the electrical wires properly. This installation guide will help you enjoy the convenience and functionality that a microwave above the stove can offer in your kitchen.
Adjusting The Microwave
Setting the optimal height for comfortable use
When installing a microwave above the stove, it is essential to set the optimal height for comfortable use. The height determines how easily you can access the microwave and use it without any strain. To determine the ideal height, follow these steps:
- Measure your height: Stand in front of the stove and measure your height from the floor to your chest level.
- Calculate the distance: Subtract 15 inches from your height measurement to determine the approximate bottom placement height of the microwave.
- Mark the wall: Use a pencil to mark the calculated height on the wall. This mark will indicate where the bottom of the microwave will be placed.
- Check the measurements: Use a level to ensure that the marked height is straight and aligned properly.
Once you have set the optimal height, you can move on to the next step of adjusting the microwave.
Checking the alignment and leveling of the microwave
Ensuring that your microwave is properly aligned and leveled is essential for both functionality and aesthetics. Here’s how you can check and adjust the alignment and leveling of the microwave:
- Use a carpenter’s level: Place the level on top of the microwave from left to right and front to back. Adjust the microwave as needed until it is perfectly level.
- Check the alignment: Stand in front of the microwave and examine its alignment with the adjacent cabinets and stove. Adjust as necessary to achieve a visually pleasing and symmetrical appearance.
- Secure the microwave: Once you are satisfied with the alignment and leveling, use a screwdriver to tighten the mounting screws at the top of the microwave. This will secure it in its position.
By following these steps, you can ensure that your microwave is properly aligned and leveled, ready to be used without any issues.
Adjusting the door swing direction if needed
The door swing direction of a microwave can sometimes interfere with the surrounding cabinets or obstruct your movement in the kitchen. Luckily, most microwaves allow you to adjust the door swing direction. Here’s how you can do it:
- Refer to the manufacturer’s instructions: Different microwave models have varying methods to adjust the door swing direction. Consult the user manual provided by the manufacturer for specific instructions.
- Remove the door: In many cases, adjusting the door swing direction requires removing the microwave door. Follow the instructions to safely remove the door without damaging it.
- Reposition the hinges: Depending on the desired swing direction, reposition the hinges accordingly. This may involve unscrewing and reattaching the hinges in the desired configuration.
- Reinstall the door: Once the hinges are repositioned, carefully reattach the microwave door, following the manufacturer’s instructions.
- Test the door swing: Open and close the door to ensure that it swings in the desired direction without any obstructions. Make any necessary adjustments to the hinges if needed.
By adjusting the door swing direction, you can maximize the functionality and convenience of your microwave installation above the stove.

Testing And Safety Measures
Before installing a microwave above the stove, it is essential to test its functionality and consider the necessary safety measures. This ensures not only proper functioning of the appliance but also the prevention of any potential hazards. In this section, we will discuss the importance of testing the microwave and checking for safety hazards, as well as following the manufacturer’s instructions for maintenance and usage guidelines.
Testing the functionality of the microwave
Testing the functionality of the microwave is crucial to ensure it operates correctly and meets your expectations. Here are the steps for testing the microwave:
- Plug the microwave into a functioning electrical outlet.
- Set the timer or select a cooking program.
- Place a microwave-safe bowl filled with water inside the microwave.
- Start the microwave and observe if it heats the water.
- Verify that the turntable rotates smoothly.
- Check if the microwave produces any unusual noises or emits strange odors.
If the microwave passes all these tests, it indicates that it is functioning properly and ready for installation above the stove.
Checking for any potential safety hazards
Prior to installing the microwave over the stove, it is crucial to inspect for any potential safety hazards. Here are the steps to follow:
- Ensure that the microwave is the appropriate size for the designated space above the stove.
- Inspect the area to ensure there is sufficient clearance from the stove and surrounding cabinets.
- Check for the presence of any flammable materials near the installation location.
- Ensure that the electrical outlet is grounded and has the appropriate voltage for the microwave.
- Inspect the wall for any structural weaknesses or damage that may affect the installation.
- Confirm that the microwave’s mounting brackets are securely attached and aligned with the wall studs.
By carefully examining these factors, you can identify and eliminate any potential safety hazards, guaranteeing a secure installation above the stove.
Following manufacturer’s instructions for maintenance and usage guidelines
After installing the microwave, it is essential to follow the manufacturer’s instructions for maintenance and usage guidelines. These guidelines provide vital information on how to use and care for the appliance effectively. Here are a few key points to consider:
- Regularly clean the microwave inside and out to prevent the buildup of food residue.
- Avoid using metal or aluminum foil in the microwave, as it can cause sparks and damage the appliance.
- Use microwave-safe containers and covers to prevent melting or leaching of harmful chemicals into the food.
- Follow the recommended cooking times and power settings specified in the user manual.
By adhering to these instructions, you can prolong the lifespan of your microwave and ensure safe and efficient usage for years to come.
Tips And Troubleshooting
Installing a microwave above the stove can be a convenient and space-saving solution for many kitchens. However, it’s important to follow certain tips and troubleshooting guidelines to ensure a smooth installation process and maximize the efficiency and performance of your microwave. In this section, we’ll cover some essential tips to help you get the most out of your microwave installation, as well as address common issues you may encounter along the way.
Maximizing efficiency and performance of the microwave
When installing a microwave above the stove, there are a few key considerations to keep in mind to maximize its efficiency and performance. Following these tips will help you get the best cooking experience:
- Choose the right location and height: Before installing your microwave, ensure that you select an appropriate location above the stove. This will typically be determined by the available space and the manufacturer’s guidelines. It’s also important to consider the height at which the microwave should be installed, as this can impact accessibility and ease of use.
- Proper ventilation: Microwaves generate heat during operation, so it’s crucial to provide proper ventilation to prevent overheating. Make sure that your microwave is installed with sufficient space around it, especially at the sides and rear, to allow for proper airflow. This will enhance the longevity and efficiency of your appliance.
- Secure mounting: To ensure safety and stability, it’s essential to follow the manufacturer’s instructions for mounting the microwave securely. Use the appropriate mounting brackets and hardware provided with the microwave to securely attach it to the wall or cabinet above the stove. This will reduce any movement and vibration during use.
By following these tips, you can ensure that your microwave operates at its best, providing you with efficient and reliable cooking performance.
Addressing common installation issues
During the installation process, you may encounter some common issues that can be easily addressed. Here are a few troubleshooting tips to help you overcome them:
- Uneven cabinet surface: If your cabinet surface is uneven, it may pose a challenge during installation. To resolve this, you can use shims or spacers to level the surface and provide a stable base for your microwave. Ensure that the microwave is level both horizontally and vertically to prevent any tilting or movement.
- Power supply and outlet placement: It’s important to ensure that you have an appropriate power supply and outlet placement near the installation area. If there’s no outlet available, consider hiring a professional electrician to install one for you. Avoid using extension cords or power strips, as they can pose safety hazards and affect the performance of your microwave.
- Hidden obstacles: Before you begin the installation, check for any hidden obstacles behind the wall or cabinet that may interfere with the installation process. Electrical wiring, plumbing, or structural elements may require special attention or adjustments.
By addressing these common installation issues, you can overcome potential challenges and achieve a successful microwave installation above your stove.
Seeking professional help when needed
While installing a microwave above the stove can be a DIY project, it’s important to recognize when professional help may be needed. Here are a few situations where it’s advisable to seek assistance:
- Complex installations: If your kitchen setup is complex, with unique cabinetry or limited space, it’s wise to consult a professional installer who is experienced in handling such installations. They can ensure that the microwave is installed safely and to the manufacturer’s specifications.
- Electrical wiring: If you’re not confident in your electrical wiring skills, it’s recommended to hire a licensed electrician to handle the electrical connections. They can ensure proper wiring and compliance with safety regulations.
Seeking professional help in these situations can provide peace of mind, ensuring that your installation is done correctly and safely.
By following these tips and troubleshooting guidelines, you can install your microwave above the stove with ease and maximize its efficiency and performance in your kitchen. Enjoy the convenience and functionality that a well-installed microwave can bring to your cooking experience!
Frequently Asked Questions
How Hard Is It To Put A Microwave Above The Stove?
Putting a microwave above the stove is not too difficult. It requires proper installation and appropriate space. Ensure you have the right tools and follow safety guidelines. Hire a professional if you’re unsure. Consider the weight, size, and venting requirements, and ensure your stove has the necessary support.
How Do You Install A Microwave Above The Stove?
To install a microwave above the stove, first measure the space and ensure there’s a proper electrical outlet nearby. Mount the microwave bracket on the wall using a stud finder, then lift the microwave and slide it onto the bracket.
Secure it in place using the provided hardware. Finally, plug in the microwave and test if it’s working.
Does Over The Range Microwave Have To Be Vented?
Yes, over the range microwaves should be vented to improve airflow and remove smoke and odors from cooking. Proper ventilation helps prevent damage to the microwave and keeps the kitchen air clean.
How Much Does It Cost To Install An Over The Range Microwave?
The cost to install an over the range microwave varies depending on factors like the type of microwave and installation requirements. On average, it can range from $100 to $500. It is recommended to consult with a professional for an accurate estimate.
Conclusion
Installing a microwave above the stove can be done with the right tools and careful preparation. By following the step-by-step instructions provided, you can create a convenient and efficient cooking space in your kitchen. Remember to prioritize safety measures and consult professionals if needed.
With this knowledge, you can confidently tackle this DIY project and enjoy the convenience of having a microwave conveniently located above your stove.