To install an ignition switch, follow these steps: First, disconnect the battery. Then, remove the steering column cover and disconnect the wiring harness from the switch.
Finally, install the new ignition switch and reconnect the wiring harness and the battery. Installing an ignition switch is a straightforward process that requires a few steps. Whether your old switch is faulty or you simply want to replace it, this guide will walk you through the necessary actions.
By disconnecting the battery, removing the steering column cover, disconnecting the wiring harness, and finally installing the new switch, you’ll have your ignition system up and running smoothly in no time. This article will provide you with a concise and easy-to-follow explanation of each step so that you can confidently tackle this task on your own. So, let’s dive in and get your ignition switch installed successfully.
Tools Required
List of tools needed to install an ignition switch
When it comes to installing an ignition switch, having the right tools at hand is crucial. These tools will make the installation process smooth and hassle-free. Let’s take a look at the essential tools that you’ll need:
- Screwdriver: A screwdriver is essential for removing screws and fasteners that hold the ignition switch in place. Make sure you have both a flathead and a Phillips-head screwdriver available to accommodate different screw types.
- Pliers: Pliers are useful for various tasks during the installation process, such as removing wire connectors and crimping new ones. Having a pair of needle-nose pliers and a wire cutter/stripper is highly recommended.
- Socket set: A socket set with different sizes will come in handy when you need to remove and install bolts or nuts. Ensure that you have the appropriate socket size for the ignition switch installation.
- Wire crimper: A wire crimper is necessary if you need to crimp connectors or join wires securely. This tool ensures a reliable connection and prevents loose or faulty wiring.
- Electrical tape: Electrical tape is essential for insulating and protecting the wires. It prevents short circuits and ensures a safe electrical connection.
- Wire connectors: Having a selection of wire connectors, such as butt connectors, ring terminals, and spade terminals, will enable you to properly connect the wires for the ignition switch.
- Test light: A test light is useful for checking the power supply and ensuring that the ignition switch is functioning correctly. This tool helps troubleshoot any electrical issues before finalizing the installation.
- Safety gloves and goggles: Safety should always be a priority. Wearing protective gloves and goggles will help safeguard your hands and eyes from potential hazards during the installation process.
With these tools in your arsenal, you’ll be well-equipped to install an ignition switch efficiently. Remember to take necessary safety precautions and follow the recommended procedures to ensure a successful installation.
Preparation
When it comes to installing an ignition switch, proper preparation is key. By following the necessary steps beforehand, you can ensure a smooth and successful installation process. In this section, we will guide you through the essential preparations you need to make before installing an ignition switch in your vehicle.
Turn off the car engine and disconnect the battery
Before beginning any work on your vehicle’s electrical system, it is crucial to turn off the car engine and disconnect the battery. This step is vital to ensure your safety and prevent any electrical mishaps or short circuits during the installation process.
Locate the ignition switch position in the vehicle
Each vehicle may have a slightly different ignition switch placement, so it is important to locate the exact position before starting the installation. The ignition switch is typically found on or near the steering column, dashboard, or center console. Refer to your vehicle’s manual or conduct a quick online search to determine the precise location of the ignition switch in your specific make and model.
Gather all necessary materials and tools
Prior to starting the installation, gather all the necessary materials and tools to ensure a seamless process. Here is a checklist of items you will likely need:
| Materials | Tools |
|---|---|
| – New ignition switch | – Screwdriver set |
| – Wire connectors | – Socket wrench |
| – Electrical tape | – Pliers |
| – Wire strippers | – Wire crimpers |
| – Heat shrink tubing | – Electrical tester |
Make sure you have all the necessary materials and tools readily available before proceeding with the installation. This will save you time and frustration during the process.

Removing The Old Ignition Switch
In order to install a new ignition switch, the first step is to remove the old one. Although it may seem like a daunting task, with a little guidance, anyone can accomplish this. The process involves taking off the dashboard panels around the ignition switch, disconnecting the electrical connections from the switch, and unscrewing the ignition switch mounting screws. Let’s go through these steps in detail below:
Remove dashboard panels around the ignition switch
Before accessing the ignition switch, you need to remove the dashboard panels surrounding it. These panels serve as protective coverings, and by removing them, you can gain clear access to the ignition switch. Here’s how you can do it:
- Turn off the vehicle’s engine and make sure the key is out of the ignition.
- Identify the screws or clips that hold the dashboard panels in place.
- Using a screwdriver or panel removal tool, carefully remove the screws or unclip the panels.
- Set aside the panels in a safe location.
Disconnect the electrical connections from the switch
After removing the dashboard panels, you will be able to see the electrical connections attached to the ignition switch. These connections need to be disconnected before you can proceed. Follow these steps to disconnect them:
- Inspect the electrical connections and locate any locking mechanisms or tabs.
- Using a small flathead screwdriver or your fingers, gently release any locking mechanisms or tabs.
- Once the locking mechanisms or tabs are released, carefully pull apart the electrical connections from the ignition switch.
- Double-check that all connections are properly disconnected and set aside.
Unscrew the ignition switch mounting screws
With the dashboard panels removed and the electrical connections disconnected, you can now focus on unscrewing the ignition switch mounting screws. These screws secure the ignition switch in place, and removing them will allow you to take out the old switch. Follow these steps:
- Identify the mounting screws that hold the ignition switch in place.
- Using an appropriate screwdriver, carefully unscrew each mounting screw counterclockwise.
- Set aside the mounting screws in a safe location.
- Once all the screws are removed, gently pull out the old ignition switch from the dashboard.
By successfully completing these steps, you have successfully removed the old ignition switch. Now it’s time to move on to the next phase – installing the new ignition switch and reconnecting the electrical connections. Stay tuned for our upcoming blog post on the installation process!
Installing The New Ignition Switch
Position the new ignition switch in place
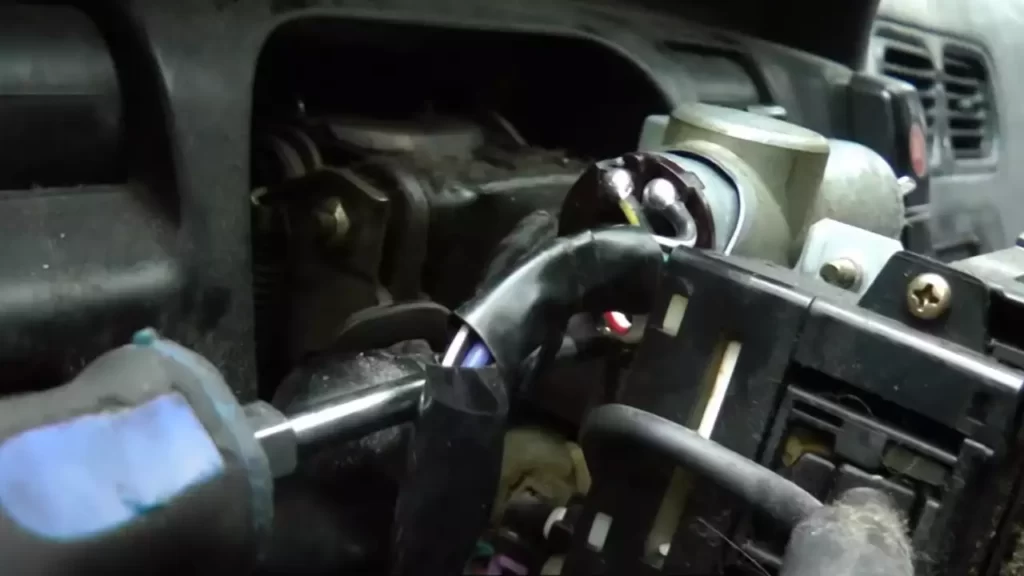
First, locate the mounting location for the new ignition switch, which is typically on the steering column. Take note of any tabs or hooks that will assist in securing the switch in the correct position. Once you have identified the correct placement, gently position the new ignition switch in place. Ensure that it is oriented correctly, with any alignment notches or keyways aligned with the corresponding parts of the steering column.
Secure the switch with mounting screws
Once the new ignition switch is positioned correctly, it’s time to secure it in place using the mounting screws. These screws are usually provided with the switch or can be purchased separately if needed. Begin by inserting the screws into the mounting holes and tightening them until the switch is securely attached to the steering column. Be careful not to over-tighten the screws, as this can damage the switch or the steering column.
Reconnect the electrical connections
With the new ignition switch securely in place, it’s time to reconnect the electrical connections. Start by identifying the wire harnesses or connectors that were disconnected during the removal process. Carefully align the connectors with their corresponding terminals on the ignition switch and push them firmly together until you hear a click or feel them lock into place. Take your time to ensure that each connection is secure and properly seated.
Testing The Ignition Switch
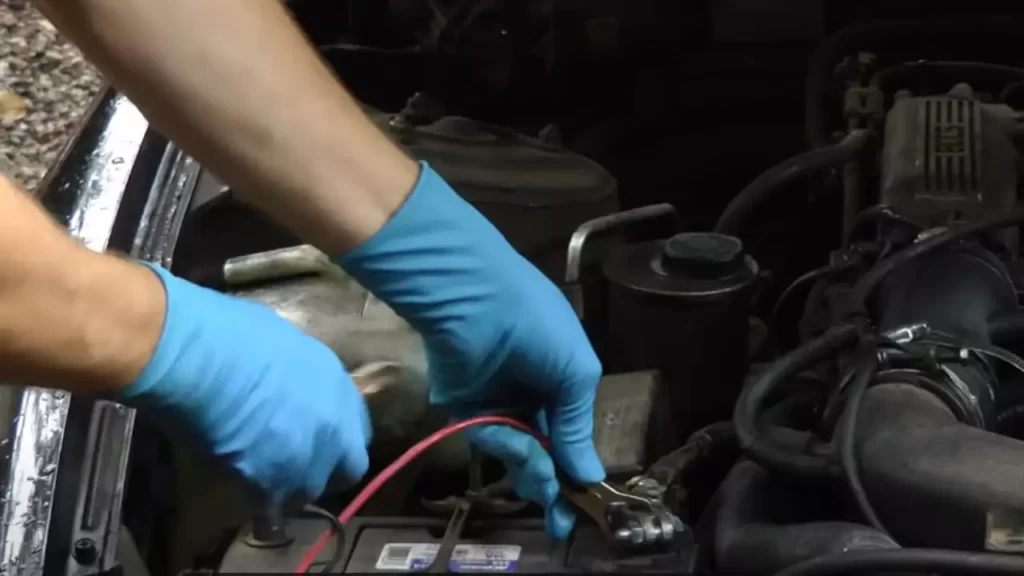
Reconnect the car battery
Before testing the ignition switch, it’s important to reconnect the car battery. This ensures that the electrical system has power and allows the switch to function properly. To reconnect the car battery, follow these steps:
- Locate the car battery in the engine compartment.
- Identify the positive (+) and negative (-) terminals on the battery.
- Using a wrench or pliers, remove the negative cable from the battery and keep it away from the terminal.
- Next, remove the positive cable and keep it away from the terminal as well.
- Wait for a few minutes before reconnecting the battery. This helps to discharge any residual power in the electrical system.
- Finally, reattach the positive cable to the positive terminal and tighten it securely. Then, attach the negative cable to the negative terminal and tighten it as well.
Turn on the car and confirm functionality of the switch
Once you’ve reconnected the car battery, it’s time to test the ignition switch. Follow these steps to turn on the car and confirm the functionality of the switch:
- Take a seat in the driver’s seat and insert the key into the ignition switch.
- Turn the key clockwise to the “on” position. This position activates the electrical system of the car.
- If you have a modern car with push-button start, press the start button instead.
Once the car is turned on, pay attention to the following:
- Listen for any unusual noises coming from the ignition switch, such as clicking or buzzing sounds.
- Observe whether the dashboard lights and accessories are functioning properly. These include the headlights, turn signals, radio, and air conditioning.
- Try turning the steering wheel. If the ignition switch is working correctly, it should move freely without any resistance.
- Ensure that the key or start button easily returns to the “off” position after starting the car.
Ensure the switch is properly aligned and working correctly
After confirming the functionality of the ignition switch, it’s essential to ensure that the switch is properly aligned and working correctly. Follow these steps to make sure everything is in order:
- Inspect the alignment of the switch. The key or start button should fit snugly into place without any wobbling or difficulty in turning.
- If there are any alignment issues, you may need to gently adjust the switch’s position. Refer to your car’s manual or seek professional assistance if necessary.
- If you notice any problems or inconsistencies during the testing process, it’s crucial to address them promptly. Ignoring these issues can lead to further complications down the road.
By following these steps, you can test your new ignition switch and ensure that it is functioning correctly. Remember to handle all electrical components with care and consult a professional if you encounter any difficulties or uncertainties.
Reassembling The Dashboard
Once you have successfully replaced the faulty ignition switch in your vehicle, it is time to reassemble the dashboard. This step is crucial to ensure that all the panels are properly aligned and securely in place. Follow the steps below to safely put back the dashboard panels that were removed earlier.
Put back the dashboard panels that were removed earlier
1. Start by carefully placing the main dashboard panel back into position. Make sure to align it correctly with the existing screw holes.
2. Once the main panel is in place, reattach the screws that were removed earlier. Use a screwdriver to tighten them securely, but be careful not to overtighten as it may damage the panel or the screw threads.
3. Next, move on to the side panels of the dashboard. These panels might have been removed to access the ignition switch. Align them properly with the main dashboard panel and the vehicle’s interior. Ensure that all the clips and connectors are correctly in place before proceeding.
Verify that all panels are properly aligned and secured
1. Once all the panels are back in place, take a moment to visually inspect them. Check for any misalignment or gaps between the panels. This can indicate that something is not securely fastened.
2. Gently press on each panel to ensure it is firmly attached. It should not move or flex when pressed. If you notice any panels that are loose or unstable, remove them and reattach them correctly.
3. Double-check that all the screws and clips are tightened properly. Use a torque screwdriver if necessary to achieve the recommended tightness for each type of screw.
In conclusion, reassembling the dashboard is an important step after installing an ignition switch. By following these steps and verifying that all panels are properly aligned and secured, you can ensure a safe and successful installation process.
Safety Measures
<h2>Safety Measures</h2>
<h3>Double-check all connections and screws</h3>
When installing an ignition switch, it is crucial to prioritize safety measures. After connecting the wires and securing the switch into place, take the time to double-check all connections and screws. Ensure that each wire is firmly connected and securely tightened, minimizing the risk of any loose components that could cause malfunction or electrical hazards. Remind yourself to pay close attention to the tightness of the screws, ensuring they are properly fastened to prevent any potential hazards or accidents.
<h3>Test the ignition switch one more time for functionality</h3>
After checking the connections and screws, don’t rush the installation process. Take a moment to test the functionality of the ignition switch one more time, ensuring that it works properly before finalizing the installation. By testing the switch, you can identify any potential issues or malfunctions at this stage and make the necessary adjustments. Engage the switch to see if it fully engages and disengages the vehicle’s electrical system as intended.
<h3>Ensure that there are no loose wires or exposed terminals</h3>
Before considering the installation complete, it is essential to thoroughly inspect the wiring. Check for any loose wires or exposed terminals that could potentially pose safety risks or cause electrical malfunctions. Ensure that each wire is snugly connected and properly insulated. This step will help mitigate any potential electrical hazards and ensure a secure and reliable ignition switch installation.
Remember, prioritizing safety when installing an ignition switch is of paramount importance. It’s crucial to double-check all connections and screws to minimize the risk of loose components. Testing the switch for functionality is necessary to ensure its proper operation. Lastly, inspect the wiring to ensure there are no loose wires or exposed terminals, promoting a safe and well-installed ignition switch. By following these safety measures, you can ensure a successful and secure ignition switch installation.
Frequently Asked Questions
Is It Easy To Replace An Ignition Switch?
Yes, replacing an ignition switch is relatively easy. It can be done by following a few basic steps, such as disconnecting the battery, removing the old switch, and installing the new one. It is recommended to consult a professional if you are unsure or unfamiliar with the process.
Does A New Ignition Switch Need To Be Programmed?
Yes, a new ignition switch typically needs to be programmed to work with your vehicle. The programming process ensures proper integration and functionality of the switch with the car’s security system. It is important to consult a professional or refer to the manufacturer’s instructions for this procedure.
How Much Does It Cost To Replace A Key Ignition Switch?
The cost of replacing a key ignition switch may vary, but typically ranges from $150 to $350. The exact price depends on several factors such as the make and model of the car, the location, and whether the switch needs to be reprogrammed or rekeyed.
What Are The Steps Of The Ignition Switch?
The steps of the ignition switch involve inserting the key, turning it clockwise, and releasing it when the engine starts. The switch activates the electrical system in the car, allowing power to be directed to the engine and other components.
Conclusion
To sum it up, installing an ignition switch may seem like a daunting task, but with the right tools and guidance, it can be a manageable DIY project. By following the step-by-step instructions outlined in this blog post, you’ll be able to safely replace your ignition switch and get your vehicle up and running in no time.
Remember, always prioritize safety and consult a professional if you’re unsure about any aspect of the installation process. Happy installing!