To install an ignition kill switch, follow these steps: disconnect the negative terminal of the battery, locate the ignition switch wiring harness, cut the wire leading to the ignition switch, connect one end of the kill switch to the wire leading to the ignition switch, and connect the other end to a ground source. Installing an ignition kill switch is a simple process that can add an extra layer of security to your vehicle.
Introducing an ignition kill switch to your vehicle can provide an additional level of protection against theft. This device allows you to disable the ignition system, preventing unauthorized individuals from starting the engine. We will guide you through the step-by-step process of installing an ignition kill switch.
By following these instructions, you can enhance the security of your vehicle and have peace of mind knowing that your car is protected. So, let’s get started with the installation process.
Understanding The Ignition Kill Switch
Understanding the Ignition Kill Switch
The ignition kill switch is a vital component in vehicle security systems. It provides an added layer of protection against theft by preventing unauthorized individuals from starting the engine. In this section, we will delve deeper into the concept of the ignition kill switch, exploring what it is, why it is important for vehicle security, and how it works.
What is an Ignition Kill Switch?
An ignition kill switch, also known as an engine immobilizer, is a device that disrupts the flow of electricity to the ignition system, thereby preventing the engine from starting. It is typically installed as an additional security feature in automobiles, motorcycles, boats, and other motorized vehicles. The purpose of this switch is to render the vehicle inoperable without the proper key or code, making it extremely difficult for a thief to steal the vehicle.
Why is an Ignition Kill Switch important for vehicle security?
The importance of an ignition kill switch in vehicle security cannot be overstated. Gone are the days when mere physical barriers, such as steering wheel locks and alarms, were enough to deter thieves. Today, criminals have become more sophisticated, making it necessary for vehicle owners to adopt advanced security measures. An ignition kill switch adds an extra level of protection to your vehicle, boosting its security and giving you peace of mind.
- Prevents hot-wiring: The ignition kill switch interrupts the electrical current required to start the engine, making it almost impossible for thieves to hot-wire the vehicle.
- Deters thieves: The presence of an ignition kill switch acts as a visual deterrent, deterring thieves from even attempting to steal your vehicle.
- Discreet protection: Unlike visible security devices, an ignition kill switch is often hidden from plain sight, making it difficult for thieves to locate and bypass.
- Insurance benefits: Installing an ignition kill switch may make you eligible for insurance discounts, as it increases the overall security of your vehicle.
How does an Ignition Kill Switch work?
The working principle of an ignition kill switch is relatively simple yet highly effective. When activated, it interrupts the circuit between the ignition switch and the starter motor or fuel pump. This interruption prevents the electrical current from flowing, subsequently disabling the engine. Only when the ignition kill switch is disarmed using a special key or code can the circuit be reestablished, allowing the vehicle to start.
While the exact installation process may vary depending on the make and model of your vehicle, the ignition kill switch is typically wired into the existing ignition system. It can be discreetly installed in various locations, such as under the dashboard or inside the engine compartment. To ensure maximum security, it is often recommended to have the ignition kill switch installed by a professional.
In conclusion, the ignition kill switch serves as a crucial component in vehicle security systems. By understanding its purpose and how it functions, you can better protect your vehicle from theft and ensure peace of mind knowing that it is safeguarded by an advanced security measure.
Tools And Materials Needed
List of Tools Required for Installation
A successful installation of an ignition kill switch requires the use of specific tools. Having these tools ready before starting the installation process will help ensure a smooth and efficient process. Here’s a list of tools you’ll need:
- Wire cutter/strippers: These tools are essential for cutting and stripping wires properly without damaging them. They allow for precise and clean cuts, ensuring a secure connection.
- Screwdriver set: A variety of screwdrivers, including flathead and Phillips-head, will be necessary for removing screws and securing the ignition kill switch in place.
- Drill and drill bits: If your vehicle doesn’t have existing holes for mounting the switch, you’ll need a drill and the appropriate drill bits to create new holes.
- Socket set: A socket set with various sizes will come in handy when disconnecting electrical components or removing panels to access the wiring.
- Electrical tape: This is used to insulate and protect the exposed wires after cutting and stripping them. It ensures a secure and safe connection by preventing short circuits or damage from moisture.
- Heat shrink tubing: Heat shrink tubing can be used instead of electrical tape to provide a more professional and secure finish. By shrinking when heated, it forms a tight seal around the wires, offering enhanced protection.
- Multimeter: A multimeter is a versatile tool used to measure electrical voltage, current, and resistance. It can be helpful for identifying the correct wires when connecting the ignition kill switch.
- Marker pen: Having a marker pen nearby will allow you to label wires or make notes during the installation process, helping you stay organized and avoid confusion.
Required Materials and Their Importance
In addition to the necessary tools, you’ll also need specific materials to complete the installation of an ignition kill switch. These materials play a crucial role in ensuring the effectiveness and durability of the switch. Here are the required materials and their importance:
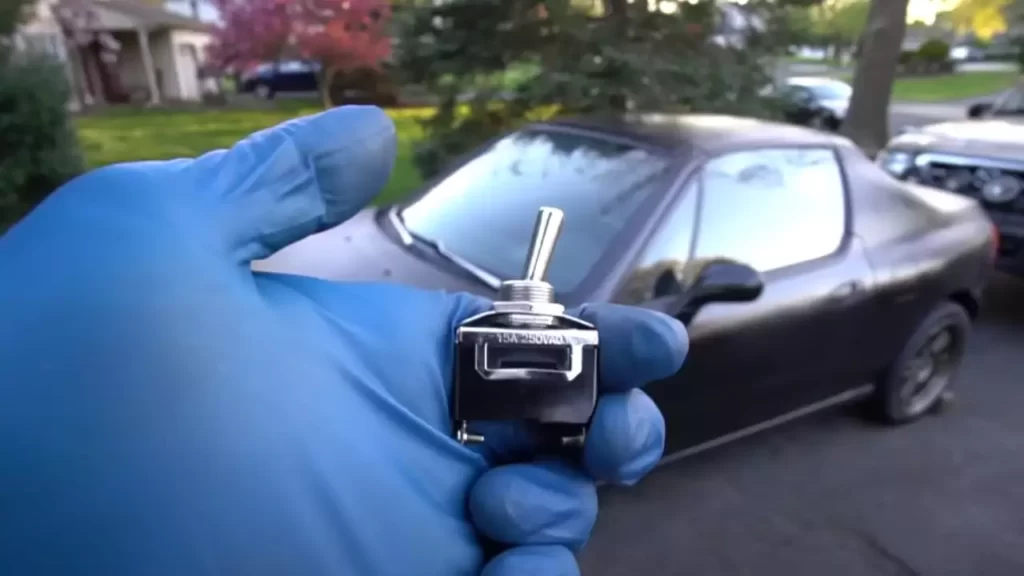
- Ignition kill switch: This is the main component of the installation. It works by interrupting the power flow to the ignition system, preventing the engine from starting.
- Wire connectors: Wire connectors, such as butt connectors or crimp connectors, are essential for joining wires securely. They create a reliable electrical connection that withstands vibrations and prevents accidental disconnections.
- Mounting bracket: A mounting bracket holds the ignition kill switch in place, ensuring it remains securely attached to your vehicle. It provides stability and reduces the risk of damage due to movement or exposure to external factors.
- Mounting screws: These screws are used to secure the mounting bracket and the ignition kill switch to the desired location. They offer stability and prevent any unwanted movement.
- Wire loom or conduit: A wire loom or conduit helps protect the wires from abrasion, heat, and environmental factors. It keeps the wiring organized and reduces the risk of damage caused by friction or exposure to extreme conditions.
- Fuse holder and fuse: Installing a fuse holder and fuse in the circuit adds an extra layer of protection. In case of a short circuit or excessive current flow, the fuse will blow, preventing damage to the electrical system.
- Electrical cleaner and lubricant: Using electrical cleaner and lubricant helps maintain the electrical connections and prevents corrosion. It ensures that the ignition kill switch functions properly over time.
By having all the required tools and materials at hand, you’ll be ready to proceed with the installation process smoothly. Remember to follow the manufacturer’s instructions for both the tools and materials to achieve the best results.
Steps To Install An Ignition Kill Switch
Installing an ignition kill switch is a great way to enhance the security of your vehicle and protect it from theft. Whether you want to add an extra layer of protection or simply have peace of mind, this step-by-step guide will walk you through the process of installing an ignition kill switch. Follow these steps carefully to ensure a successful installation.
Step 1: Preparing the vehicle
Gathering necessary information about the vehicle’s wiring system is the first step in the installation process. This information will help you identify the right location for installing the kill switch. Take your time to research and understand the wiring system of your vehicle. Knowing which wires are involved in the ignition process is crucial.
- Gather necessary information about the vehicle’s wiring system
- Identify the right location for installing the kill switch
Step 2: Gathering the necessary tools and materials
Before you begin the installation, it’s important to gather all the necessary tools and materials. Having everything readily available will save you time and ensure a smoother installation process.
- List of required tools and materials:
- Wire cutters/strippers
- Wire crimping tool
- Electrical tape
- Insulated connectors
- Kill switch
- Mounting bracket or adhesive
- Screwdriver or drill (if necessary for mounting)
- Ensure all tools and materials are readily available
Step 3: Disconnecting the battery
It is crucial to take safety precautions while working with the battery. Before starting any wiring work, disconnect the vehicle’s battery properly to avoid any accidents or electrical shorts.
- Safety precautions while working with the battery
- Properly disconnecting the vehicle’s battery to avoid any accidents
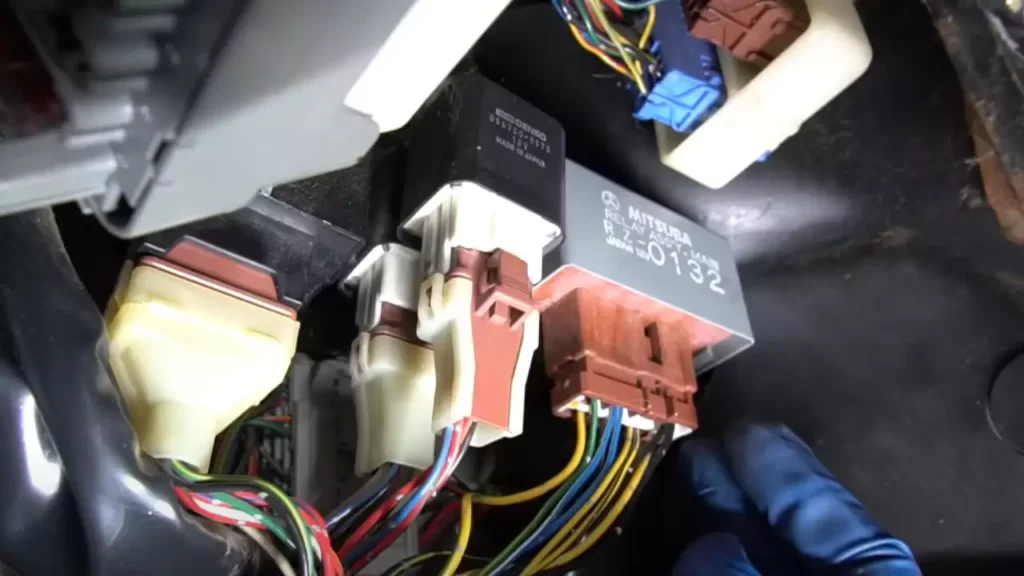
Step 4: Locating the ignition wires
Locating the ignition wires is essential for installing the kill switch. Take your time to identify the ignition wires in the vehicle’s wiring system and understand their color coding and purpose.
- Identify the ignition wires in the vehicle’s wiring system
- Understand the color coding and purpose of each wire
Step 5: Installing the kill switch
Selecting the appropriate kill switch for your vehicle is crucial. Once you have chosen the right kill switch, it’s time to install it in the identified location. Ensure that the chosen location is easily accessible and doesn’t interfere with the vehicle’s normal operation.
- Select the appropriate kill switch for your vehicle
- Install the kill switch in the chosen location
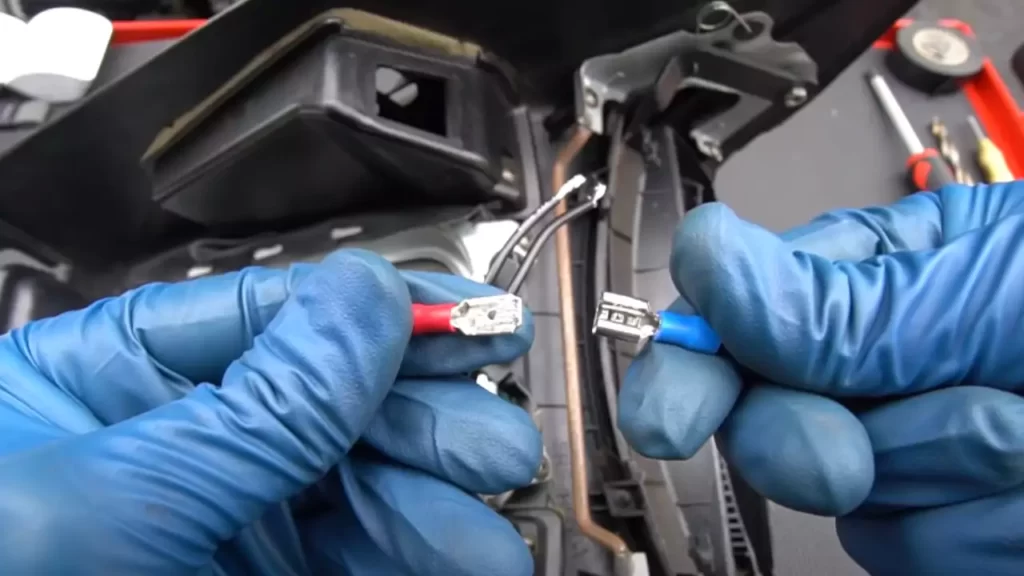
Step 6: Wiring the kill switch
To enable the functionality of the kill switch, it is important to properly connect it to the ignition wires. Take your time to ensure the connections are secure and will allow the kill switch to effectively prevent the vehicle from starting.
- Connect the kill switch to the ignition wires
- Ensure proper connections to enable the kill switch functionality
Step 7: Testing the kill switch
After the installation is complete, it’s crucial to verify its functionality. Test the kill switch to ensure it successfully prevents the vehicle from starting when engaged.
- Verify the installation by testing the kill switch
- Check if the kill switch successfully prevents the vehicle from starting
Step 8: Reconnecting the battery and final checks
Once you have confirmed that the kill switch is functioning as desired, it’s time to reconnect the vehicle’s battery. Perform final inspections to ensure proper functionality before completing the installation process.
- Reconnect the vehicle’s battery after successful installation
- Perform final inspections to ensure proper functionality
Step 9: Securing the kill switch
For enhanced security, it is recommended to conceal the kill switch. This will prevent potential thieves from easily locating and tampering with the switch. Additionally, ensure that the kill switch is securely mounted to further discourage tampering.
- Conceal the kill switch for enhanced security
- Secure the kill switch to prevent tampering
By following these steps, you can successfully install an ignition kill switch and enhance the security of your vehicle. Remember to always prioritize safety and consult a professional if you are unsure about any step in the process.
Common Mistakes To Avoid During Installation
When it comes to installing an ignition kill switch, it’s crucial to be diligent and meticulous. One wrong move can render the whole process useless, or worse, cause damage to your vehicle. In this section, we will discuss the common mistakes that people make during installation and how to avoid them. By paying attention to the following points, you can ensure a smooth and successful installation of your ignition kill switch.
Mistake 1: Incorrect identification and connection of ignition wires
One of the most common mistakes made during the installation of an ignition kill switch is incorrectly identifying and connecting the ignition wires. This mistake can result in the kill switch not working as intended or even causing system malfunctions. Therefore, it is essential to take the time to properly identify the ignition wires before connecting the kill switch.
To avoid this mistake, start by consulting your vehicle’s wiring diagram or an online resource specific to your make and model. Locate the ignition wires, which are usually colored and often found near the steering column. Take note of the wire colors and their corresponding functions, such as ignition on, ignition off, and accessory.
When connecting the kill switch, ensure that you are cutting and splicing the correct ignition wires. It is essential to make clean cuts and secure connections to prevent any loose or exposed wires. Once connected, use electrical tape or heat shrink tubing to insulate the exposed areas to avoid any short circuits or electrical hazards.
Mistake 2: Insufficient testing of the kill switch after installation
Another common mistake that people make is failing to test the kill switch thoroughly after installation. Testing is crucial to ensure that the kill switch functions correctly and that your vehicle starts and stops as intended.
After installing the kill switch, test it in a safe and controlled environment. Start by trying to turn on the ignition with the kill switch in the “off” position. If the engine fails to start, this indicates that the kill switch is functioning correctly. Next, attempt to start the vehicle with the kill switch in the “on” position, and the engine should start without any issues.
Additionally, test the kill switch while the engine is running to ensure that it effectively kills the ignition and stops the engine when engaged. Repeat these tests multiple times to eliminate any potential anomalies or false positives. By thoroughly testing the kill switch, you can guarantee its reliability and effectiveness.
Mistake 3: Poor concealment of the kill switch
A common oversight during installation is poor concealment of the kill switch. Failure to properly conceal the switch can make it obvious to potential thieves, defeating the purpose of installing the kill switch in the first place.
Ensure that the kill switch is discreetly installed in an inconspicuous location, such as beneath the dashboard or within a panel. Use zip ties, adhesive mounts, or custom brackets to secure the kill switch in place. If necessary, drill holes to mount the switch securely, making sure not to damage any vital vehicle components in the process.
For an added layer of security and to deter thieves, consider concealing the kill switch even further by adding a decoy switch or integrating it with other aftermarket security measures. Remember, the more hidden and inconspicuous the kill switch is, the less likely it is to be tampered with.
In conclusion, by avoiding these common mistakes during the installation of your ignition kill switch, you can ensure its proper functionality, reliability, and effectiveness in protecting your vehicle from unauthorized use or theft.
Additional Tips For Installing An Ignition Kill Switch
When it comes to installing an ignition kill switch, there are a few additional tips that can help ensure a successful installation and optimal performance. These tips include:
Tip 1: Researching vehicle-specific guidelines and precautions
Before diving into the installation process, it’s important to research and familiarize yourself with the specific guidelines and precautions for your vehicle. Each car model may have different requirements or precautions to consider, so taking the time to gather this information can save you from potential issues down the line.
Tip 2: Consulting a professional for complex installations
If you’re not confident in your technical skills or the installation process seems too complex, it’s always a good idea to consult a professional. They can provide expert advice and ensure that the ignition kill switch is installed correctly and safely. Don’t hesitate to seek professional assistance, especially if the wiring or electrical components of your vehicle are involved.
Tip 3: Regularly maintaining and inspecting the kill switch for optimal performance
Just like any other car component, the ignition kill switch requires regular maintenance and inspections to ensure its optimal performance. This includes checking for any loose connections, signs of wear or damage, and testing the switch periodically. By staying proactive with maintenance, you can catch any potential issues early on and avoid any inconvenience or safety concerns.
By following these additional tips, you can enhance the installation of your ignition kill switch and ensure its long-lasting performance. Remember to always prioritize safety and consult the necessary guidelines or professionals when needed.
Frequently Asked Questions
Where Is The Best Place To Install A Kill Switch?
The best place to install a kill switch is near the ignition or in a concealed location. This prevents thieves from starting your vehicle without the switch. Install it where it is easily accessible to you but hidden from others.
Can You Put A Kill Switch On A Ignition Coil?
Yes, it is possible to put a kill switch on an ignition coil. A kill switch can interrupt the flow of electricity to the coil, preventing the engine from starting. This can be done for security or safety reasons.
Do Ignition Kill Switches Work?
Ignition kill switches can effectively deter car theft. When activated, they disable the vehicle’s ignition system, preventing unauthorized starting. These switches are a popular anti-theft device as they add an extra layer of security to vehicles.
Is A Kill Switch Connected To The Battery?
Yes, a kill switch is typically connected directly to the battery of a vehicle. It serves as a safety device to quickly disable the electrical power, preventing the engine from starting or running.
Conclusion
To sum it up, installing an ignition kill switch is a straightforward process that offers an added layer of security to your vehicle. By following the step-by-step instructions and considering the different types of switches available, you can ensure that your car is protected against theft and unauthorized use.
Remember to consult the user manual or seek professional help if you encounter any difficulties during the installation. Stay proactive and safeguard your vehicle from potential risks.