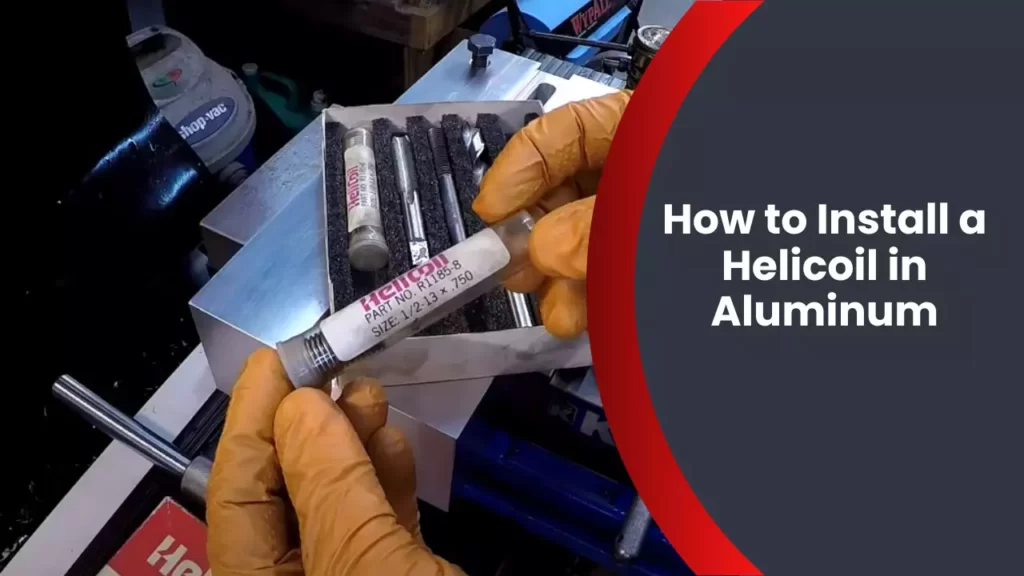
To install a Helicoil in aluminum, first, drill a hole using the recommended size and tap it with a suitable tap. Then, insert the Helicoil using an installation tool, ensuring it is fully seated and flush with the surface.
Understanding The Importance Of Helicoils In Aluminum Threads
Introduction to the Role of Helicoils in Aluminum Threads
When it comes to securing fasteners in aluminum, helicoils play a crucial role. These small, coiled metal inserts are designed to reinforce threads in weak and vulnerable materials like aluminum, providing increased strength and durability. Understanding the importance of helicoils in aluminum threads is essential for anyone working with this material, as it can prevent costly and time-consuming repairs down the line.
Advantages of Using Helicoils in Aluminum
The use of helicoils in aluminum threads offers several advantages.
- Enhanced Strength: Aluminum is known for its lightweight nature, which can sometimes compromise the thread’s integrity. By utilizing helicoils, the threaded hole becomes much stronger, allowing it to withstand greater forces and reducing the risk of thread damage.
- Improved Thread Life: Helicoils distribute the stress evenly along the entire length of the threaded hole, significantly increasing the thread life. This is particularly important in cases of frequent assembly and disassembly or in applications subject to vibration, where traditional threads can quickly wear out.
- Resolves Stripped Threads: Helicoils can effectively restore damaged or stripped threads in aluminum. By creating new threads within the helicoil insert, it provides a reliable and secure anchor for fasteners, saving you the cost and hassle of replacing the entire component.
- Compatibility: Helicoils come in a range of sizes and thread pitches, making them compatible with various fastener types. This versatility allows for easy integration into existing aluminum designs without the need for significant modifications.
Common Applications of Helicoils in Aluminum Threads
Helicoils find numerous applications in aluminum threads, making them a vital component in the manufacturing and maintenance industries. Here are some common examples:
| Application | Benefits |
|---|---|
| Automotive Industry: | Helicoils are widely used in automotive applications, such as engine blocks, cylinder heads, and transmission housings. They provide increased thread strength and prevent costly thread damage due to the constant vibrations and thermal cycling experienced by these components. |
| Aerospace Industry: | For critical components in aircraft, such as aluminum engine mounts and wing structures, helicoils ensure reliable and durable fastening. They can handle the high stresses and vibrations encountered during flight, reducing the risk of catastrophic failures caused by stripped threads. |
| Electronics and Telecom: | Helicoils are utilized in aluminum housings for electronic devices like smartphones, laptops, and other consumer electronics. These inserts provide strong and long-lasting threads, accommodating frequent disassembly and assembly without compromising the integrity of the aluminum. |
By understanding the importance of helicoils in aluminum threads, you can ensure the longevity and reliability of your fastening applications. Whether you are in the automotive, aerospace, or electronics industry, helicoils offer enhanced strength, improved thread life, and the ability to restore damaged threads. Incorporating helicoils into your design or repair process is a cost-effective solution that ensures the integrity of aluminum threads, preventing potential setbacks and costly repairs.
Tools And Materials Needed For Installing A Helicoil In Aluminum
When it comes to repairing damaged threads in aluminum, installing a helicoil is a reliable and cost-effective solution. This process requires a specific set of tools and high-quality materials to ensure a successful installation. In this section, we will discuss the essential tools, the importance of using top-notch materials, and the safety precautions you should consider before starting the installation process.
Overview of tools required
Before diving into the installation process, it’s crucial to gather all the necessary tools. Having the right tools at hand not only ensures a smooth installation but also saves you valuable time. Here are the key tools you will need:
| Tools | Usage |
|---|---|
| Drill | To create a precise hole in the damaged area |
| Tap | To cut threads into the hole for the helicoil |
| Helicoil Insertion Tool | To install the helicoil securely and uniformly |
| Helicoil Inserts | Coil-shaped inserts that provide a stronger threaded connection |
| Thread Locking Compound | To secure the helicoil and prevent it from loosening |
| Calipers | To measure the length and diameter of the damaged hole accurately |
| Grease | To lubricate the tap and helicoil inserts |
Importance of using high-quality materials
When undertaking any repair project, the quality of materials used plays a vital role in the overall success and longevity of the repair. The same applies to installing a helicoil in aluminum. Using high-quality materials ensures a durable thread repair that can withstand the demanding forces and conditions the fastener may encounter. Here are some reasons why using top-notch materials is essential:
- High-quality helicoil inserts provide a stronger and more reliable threaded connection, minimizing the chances of future thread damage.
- Thread locking compounds made from superior materials offer better resistance to vibrations, preventing the helicoil from loosening over time.
- Premium-grade drill bits and taps ensure precise hole and thread formation, resulting in a secure and accurate installation.
- Using calipers made from quality materials ensures accurate measurements, allowing you to select the correct helicoil insert size.
By investing in high-quality materials, you can ensure a successful helicoil installation that will stand the test of time.
Safety precautions to consider before starting the installation process
While installing a helicoil in aluminum is a relatively straightforward process, it’s important to prioritize safety to prevent accidents and injuries. Here are a few safety precautions you should consider before starting the installation:
- Wear safety goggles to protect your eyes from metal chips or debris that may be produced during drilling or tapping.
- Use gloves to safeguard your hands from sharp edges and protect them while handling greased components.
- Ensure you are working in a well-ventilated area to avoid inhaling harmful fumes or dust particles.
- Secure the workpiece firmly to prevent any movement or slippage during the drilling and tapping process.
- Always follow the manufacturer’s instructions for each tool and material, and never exceed the recommended operating limits or speeds.
By adhering to these safety precautions, you can ensure a safe and successful helicoil installation, avoiding any unnecessary accidents or mishaps.
Now that you have a clear understanding of the tools, materials, and safety precautions involved in installing a helicoil in aluminum, let’s move on to the step-by-step installation process in the next section.

Step 1: Preparing The Aluminum Surface For Helicoil Installation
Before you begin the helicoil installation process on an aluminum surface, it is important to properly prepare the area to ensure a successful repair. This involves cleaning the area to remove any debris or contaminants, inspecting the damaged threads, and determining the appropriate helicoil size. Additionally, tapping the hole to create a proper thread for the helicoil is crucial to the overall strength and longevity of the repair.
Cleaning the area to remove any debris or contaminants
The first step in preparing the aluminum surface for helicoil installation is to clean the area thoroughly. This will ensure that there are no debris or contaminants that could interfere with the helicoil’s functionality or compromise the repair. Here’s how you can do it:
- Remove any loose particles or surface dirt by gently brushing the area with a soft-bristle brush.
- Use a mild solvent or degreaser to clean the surface and remove any oil, grease, or other contaminants that may be present.
- Wipe the area clean with a lint-free cloth to ensure a smooth and clean surface for the helicoil installation.
Inspecting the damaged threads and determining the appropriate helicoil size
Inspecting the damaged threads is crucial to determine the appropriate helicoil size for the repair. Here’s how you can do it:
- Visually examine the damaged threads to identify the extent of the damage, such as any stripped or cross-threaded areas.
- Use a thread gauge tool to determine the exact size and pitch of the damaged threads.
- Refer to the helicoil manufacturer’s specifications to choose the appropriate helicoil size based on the thread size and pitch of the damaged area.
Tapping the hole to create a proper thread for the helicoil
Tapping the hole is an essential step to create a proper thread for the helicoil installation. Follow these steps for a successful tapping process:
| Step | Description |
| 1 | Choose a suitable tapping tool based on the helicoil size and the type of aluminum being repaired. |
| 2 | Apply cutting fluid to the tapping tool to reduce friction and aid in the creation of clean threads. |
| 3 | Align the tapping tool with the hole and start slowly turning it clockwise to create threads. |
| 4 | Ensure that the tapping tool is perpendicular to the surface to create straight and properly aligned threads. |
| 5 | Regularly remove and clear any metal chips or debris that may accumulate during the tapping process. |
| 6 | Continue tapping until the desired depth is reached, ensuring the tapped hole matches the helicoil length specified by the manufacturer. |
By following these steps to prepare the aluminum surface for helicoil installation, you are setting the foundation for a strong and reliable repair. The cleanliness of the area, appropriate helicoil size selection, and precise tapping process will ensure the helicoil performs optimally, providing a long-lasting solution for threaded aluminum components.
Step 2: Installing The Helicoil In Aluminum
Now that you have tapped the hole in the aluminum, it’s time to move on to the next step – installing the Helicoil. This process requires precision and careful handling to ensure a secure and long-lasting fix. In this section, we will walk you through the necessary steps to successfully install the Helicoil in aluminum.
Applying a suitable thread-locking compound to prevent loosening
Before inserting the Helicoil, it is crucial to apply a thread-locking compound to prevent any loosening of the insert. This ensures that the Helicoil remains firmly in place, even under high vibrations or intense use.
To implement the thread-locking compound, follow these steps:
- Clean the threaded hole and the Helicoil insert using a suitable degreaser.
- Apply a suitable thread-locking compound evenly to the external surface of the Helicoil insert.
- Make sure to cover the entire length of the Helicoil to guarantee maximum adherence.
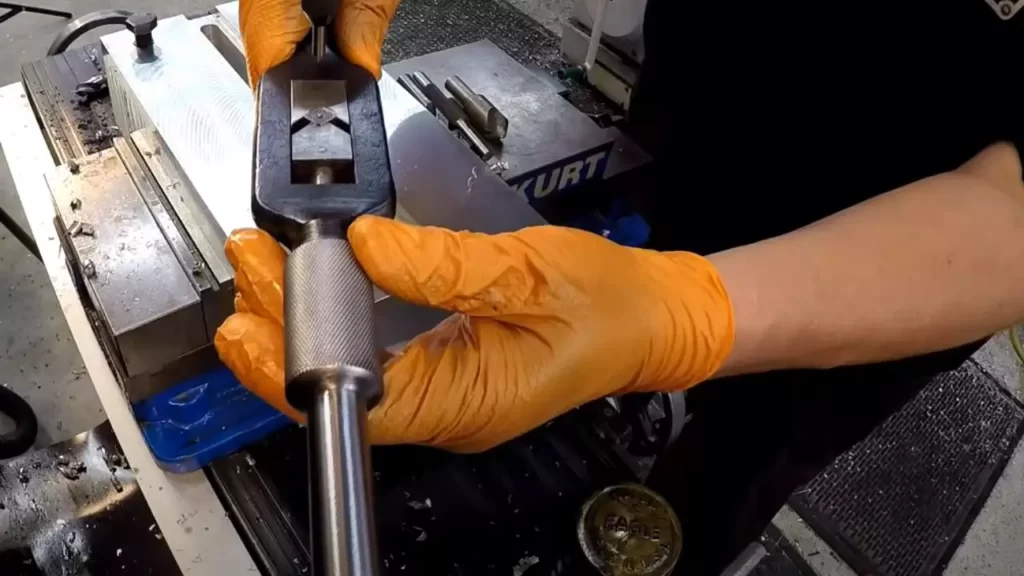
Inserting the Helicoil into the tapped hole using a helicoil installation tool
With the thread-locking compound in place, it’s time to insert the Helicoil into the tapped hole. The use of a helicoil installation tool ensures smooth and efficient installation. Here’s a step-by-step guide:
- Place the Helicoil onto the installation tool, ensuring that the tang is facing outwards.
- Carefully align the installation tool with the tapped hole.
- Slowly thread the Helicoil into the hole, applying gentle pressure.
- Continue turning until the Helicoil is fully inserted into the hole.
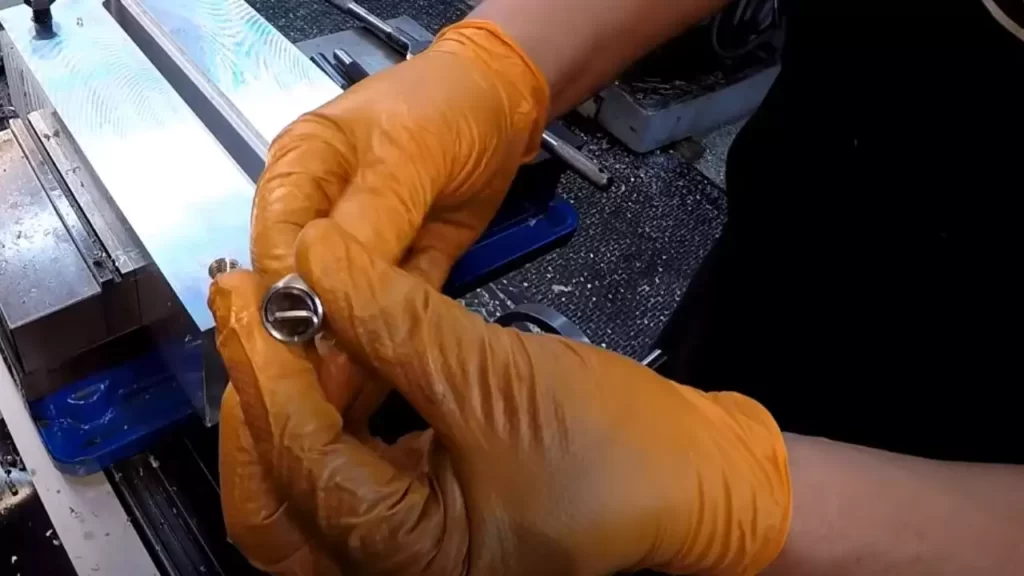
- Once the Helicoil is positioned correctly, use a tang break-off tool or a pair of pliers to break off the tang, leaving the Helicoil flush with the surface of the aluminum.
Ensuring the Helicoil is fully seated and properly aligned with the original thread
To ensure a proper installation and prevent any future issues, it is essential to confirm that the Helicoil is fully seated and properly aligned with the original thread. This step guarantees that the repaired thread functions seamlessly with other elements.
Here are a few key points to consider:
- Verify that the Helicoil is flush with or slightly below the surface of the aluminum.
- Use a thread gauge to check if the newly installed Helicoil matches the surrounding threads.
- If necessary, adjust the installation using the helicoil installation tool to achieve proper alignment.
By following these steps, you can successfully install a Helicoil in aluminum, restoring the integrity of the thread and ensuring a reliable connection. Remember to exercise caution and precision throughout the process to achieve the best results.
Step 3: Finishing The Helicoil Installation In Aluminum
Removing any excess thread-locking compound or debris from the installation area
After successfully installing the helicoil in aluminum, it is crucial to take the necessary steps for a clean and secure finishing. The next step involves removing any excess thread-locking compound or debris from the installation area. This ensures proper functionality and eliminates any potential issues that may arise from the presence of unwanted materials.
To remove any excess thread-locking compound or debris, follow these simple steps:
- Carefully inspect the installation area to identify any visible residue or debris that might have accumulated during the helicoil installation process.
- If you notice any excess thread-locking compound, gently wipe it away using a clean, lint-free cloth or a suitable cleaning solution. You can also use a small brush to remove any particles or debris that might be present.
- Ensure that the area is completely clean and free from any foreign material before proceeding to the next step. This will help guarantee a smooth and reliable helicoil installation in aluminum.
Verifying the integrity of the helicoil and ensuring it is securely in place
Once you have cleared the installation area of any excess thread-locking compound or debris, the next crucial step is to verify the integrity of the helicoil and ensure that it is securely in place. This will help guarantee its proper functioning and prevent any potential issues down the line.
To verify the integrity and secure placement of the helicoil, follow these steps:
- Inspect the helicoil carefully to ensure that it is seated flush with the surface of the aluminum material. If there are any gaps or misalignments, it might indicate an improper installation.
- Gently apply pressure on the helicoil using your finger or a suitable tool to check if it moves or rotates. If it remains firmly in place, it indicates a secure installation.
- Make sure to examine the surrounding area of the helicoil for any signs of cracks or damage that may affect its stability. Any abnormalities should be addressed promptly to prevent further complications.
Testing the repaired threads to ensure proper functionality and strength
Testing the repaired threads is essential to guarantee their proper functionality and strength. This step ensures that the helicoil installation in aluminum has been successful and that the threads can withstand the anticipated stress and forces.
Follow these guidelines to test the repaired threads:
- Carefully insert a suitable bolt or screw into the repaired threads, ensuring proper alignment.
- Gradually tighten the bolt or screw to the recommended torque specification, ensuring it feels secure without excessive force or resistance.
- Slowly unscrew the bolt or screw and inspect the threads for any signs of cross-threading, stripping, or other irregularities. If the threads appear intact and show no signs of damage, it indicates a successful repair.
- Repeat the process with different bolts or screws of various sizes to further test the integrity of the repaired threads, ensuring they can accommodate a range of fasteners.
By following these steps and conducting thorough inspections, you can confidently finish the helicoil installation in aluminum, ensuring strong and reliable threaded connections that will withstand the test of time. This meticulous approach helps guarantee the functionality, strength, and durability of the repaired threads, providing a secure foundation for future applications.
Troubleshooting Common Issues With Helicoil Installation In Aluminum
Identifying potential problems during the installation process
Installing a helicoil in aluminum can sometimes be a challenging task. However, identifying potential problems during the installation process is the key to ensuring a successful outcome. Here are some common issues you might encounter:
- Thread Misalignment: One of the most common problems during helicoil installation is thread misalignment. This occurs when the helicoil doesn’t align properly with the existing threads in the aluminum. It can lead to a sloppy thread connection and weaker holding power.
- Improper Seating of the Helicoil: Another common issue is the improper seating of the helicoil. This means that the helicoil doesn’t sit flush with the surface of the aluminum, resulting in an uneven or unstable connection.
- Thread Damage: Aluminum is a relatively soft material, and it’s prone to damage during the installation process. Threads on the aluminum can become stripped, cross-threaded, or distorted, making it difficult for the helicoil to be inserted properly.
Solutions for common issues such as thread misalignment or improper seating of the helicoil
If you encounter any of the above-mentioned issues during helicoil installation, don’t worry; there are solutions available:
- Thread Misalignment: To avoid thread misalignment, make sure to clean the threads thoroughly before inserting the helicoil. Additionally, use a suitable thread tap to ensure the helicoil aligns perfectly with the existing threads.
- Improper Seating of the Helicoil: To address improper seating, apply gentle pressure while inserting the helicoil. Ensure it sits flush with the surface of the aluminum. If needed, use a helicoil insertion tool to ensure a proper, even seating.
- Thread Damage: If you encounter damaged threads on the aluminum, it’s important to repair them before installing the helicoil. You can use a thread repair kit to fix the damaged threads and provide a sound foundation for the helicoil.
Tips for ensuring a successful helicoil installation in aluminum threads
Here are some valuable tips to ensure a successful helicoil installation in aluminum:
- Choose the Right Helicoil Size: Selecting the correct helicoil size is crucial for achieving a secure and durable connection. Consider factors such as the diameter of the hole, thread pitch, and desired holding power to choose the appropriate size.
- Prep the Aluminum Surface: Before installing the helicoil, make sure to clean the surface of the aluminum thoroughly. Remove any dirt, debris, or oil that may interfere with the helicoil’s performance. A clean surface ensures better adhesion and reduces the risk of future issues.
- Apply the Correct Installation Technique: Use the recommended installation technique for helicoil insertion. Follow the manufacturer’s instructions carefully to ensure the helicoil is aligned properly and inserted at the correct depth.
- Consider Using a Thread Locker: If you want to enhance the stability and resistance of the helicoil connection, consider applying a thread locker. This adhesive helps secure the helicoil in place, protecting it from loosening due to vibrations or other external factors.
In conclusion, troubleshooting common issues during helicoil installation in aluminum is essential for achieving a reliable and long-lasting connection. By identifying potential problems, implementing appropriate solutions, and following best practices, you can ensure a successful helicoil installation in aluminum threads.
Best Practices For Maintaining Helicoils In Aluminum Threads
When it comes to installing helicoils in aluminum threads, it is crucial to follow best practices to ensure their longevity and optimal performance. Proper maintenance techniques and periodic inspections are essential for identifying potential issues and avoiding costly repairs. In this section, we will explore preventive measures, maintenance techniques, and recommended inspection intervals for helicoils in aluminum threads.
Preventive Measures to Extend the Lifespan of the Helicoils
Preventing damage to helicoils in aluminum threads is much more cost-effective than repairing them. By implementing these preventive measures, you can extend the lifespan of your helicoils:
- Apply a thread lubricant specifically designed for aluminum threads before inserting the helicoil. This reduces friction and protects the threads during installation.
- Ensure that the aluminum threads are clean and free from any debris or contaminants before installing the helicoil. Use a suitable cleaning agent to remove any dirt or grease.
- Avoid over-tightening the fasteners in the helicoils. Use a torque wrench to ensure the proper tightening torque is applied. Over-tightening can cause excessive stress on the helicoils and may lead to thread failure.
- Consider using a thread insert with a larger diameter to distribute the load over a larger area of the aluminum threads. This can help prevent localized stress and thread stripping.
Proper Maintenance Techniques for Aluminum Threads with Helicoils
Maintaining helicoils in aluminum threads is essential for their ongoing performance and durability. Follow these maintenance techniques to keep your helicoils in optimal condition:
- Regularly inspect the helicoils for signs of wear or damage. Look for any cracks, thread deformation, or loosening of the helicoils.
- Ensure that the surrounding area is clear of any debris or foreign particles that could affect the function of the helicoils.
- If you notice any signs of corrosion on the aluminum threads, take immediate action. Remove the affected helicoil, clean the threads, and apply an appropriate anti-corrosion coating before reinstalling the helicoil.
- Periodically check the torque of the fasteners in the helicoils. If any fasteners are found to be loose, tighten them to the recommended torque settings.
Recommended Inspection Intervals and Procedures for Identifying Potential Issues
To ensure the continued reliability of helicoils in aluminum threads, regular inspections are necessary. Follow these recommended inspection intervals and procedures:
| Inspection Interval | Procedure |
|---|---|
| Every 6 months | Visually inspect all helicoils for any signs of wear, damage, or corrosion. Replace any helicoils that show significant deterioration. |
| Every 12 months | Perform a torque check on all fasteners in the helicoils. Retighten any loose fasteners to the recommended torque settings. |
| Every 24 months | Remove and replace helicoils as part of preventive maintenance, even if they show no visible signs of wear or damage. |
By adhering to these best practices and performing regular maintenance, you can ensure the smooth operation and longevity of helicoils in aluminum threads. Taking the time to follow these guidelines will save you from potential downtime and costly repairs in the future.
Frequently Asked Questions
Can You Use Helicoils In Aluminum?
Yes, Helicoils can be used in aluminum. They are commonly used to reinforce or repair damaged threads in aluminum parts. The Helicoil threads provide a stronger and more durable connection, making it a reliable solution for aluminum applications.
What Keeps A Heli-Coil In Place?
A Heli-Coil stays in place due to its precise design and installation process. The insert’s unique thread pattern and locking features securely grip the surrounding material, preventing unwanted movement or loosening.
How Are Heli-Coil Inserts Installed?
To install Heli-Coil inserts, ensure the tapped hole is clean and free of debris. Use the appropriate installation tool to screw the insert into the hole until it is flush with the surface. Use care not to over-torque the insert, as it may damage the threads.
Do You Have To Drill For Heli-Coil?
No, drilling is not always necessary for Heli-Coil installation. The Heli-Coil system allows for thread repair in damaged holes without the need for drilling. It offers a cost-effective and efficient solution for restoring threads in various materials.
Conclusion
Installing a helicoil in aluminum can be a challenging task, but with the right tools and technique, it is achievable. By following the step-by-step process outlined in this blog post, you can confidently repair damaged threads and ensure a secure and long-lasting connection.
Remember to take your time, be patient, and always prioritize safety. With practice, you’ll become a helicoil installation pro in no time! Happy repairing!