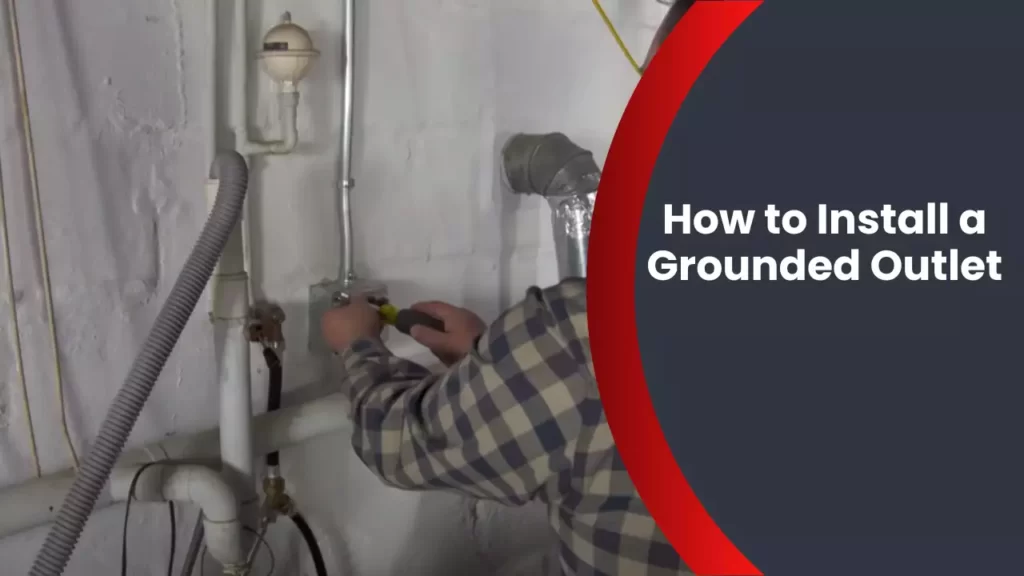
To install a grounded outlet, turn off the power supply, remove the cover plate and unscrew the existing outlet, connect the ground wire to the outlet’s grounding screw, attach the hot and neutral wires to the corresponding terminals, and secure the outlet back into the electrical box. This DIY project requires basic electrical knowledge and safety precautions.
Understanding Grounded Outlets: Why Are They Important?
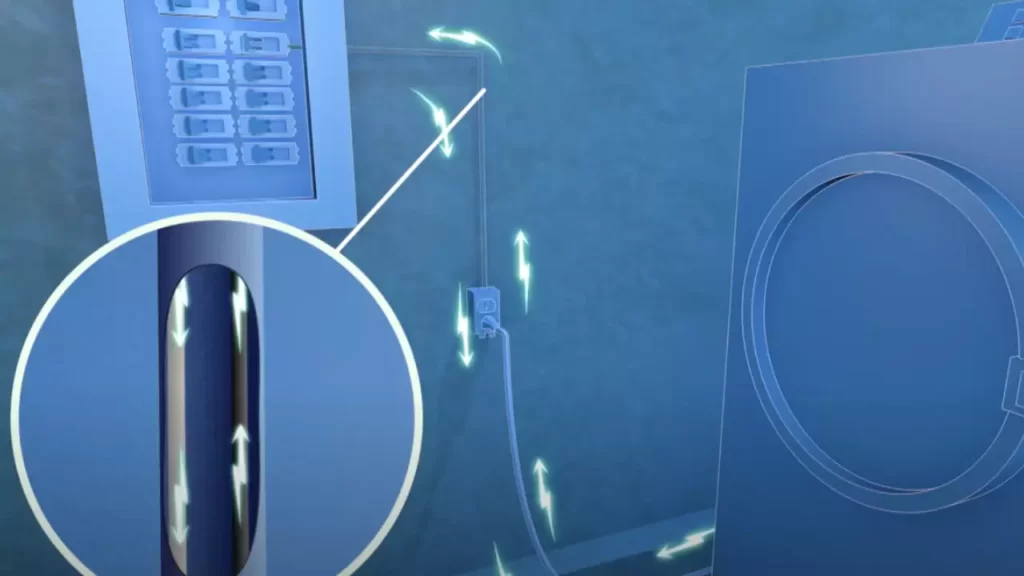
Grounded outlets play a crucial role in electrical safety in our homes and workplaces. They provide an essential pathway for electrical currents to travel safely into the ground, preventing electrical shock and minimizing the risk of fires caused by electrical malfunctions. Understanding the importance of grounding electrical outlets can help you make informed decisions when it comes to electrical installation or renovation projects.
Importance of Grounding Electrical Outlets
Ensuring that your electrical outlets are grounded is essential for various reasons:
- Electrical Safety: Grounding outlets is designed to protect you, your loved ones, and your electronic devices from potential harm. By connecting the outlet to the earth’s surface, excess electrical energy is directed away from your appliances and into a safe pathway, helping to prevent shocks and damage.
- Protection Against Overloading: Grounding outlets provide a safeguard against overloading. In the event of a power surge or lightning strike, excess electricity is efficiently discharged into the ground, rather than causing damage to sensitive electronics or starting a fire.
- Meeting Electrical Codes and Standards: Grounding electrical outlets is not just good practice; it is also required by electrical codes and standards. Compliance with these regulations is necessary to ensure the safety and efficiency of your electrical system, as well as to avoid any potential legal issues that may arise from non-compliance.
Potential Risks of Ungrounded Outlets
While the importance of grounding electrical outlets is clear, it’s equally important to understand the risks associated with ungrounded outlets. Without proper grounding, you could face the following hazards:
- Electrical Shocks: Ungrounded outlets can expose you to the risk of electrical shocks. Without a designated pathway for excess electrical energy to escape, any electrical faults or malfunctions can lead to potentially life-threatening shocks when you come into contact with an electrical device.
- Fire Hazards: Uncontrolled electrical currents can generate excessive heat, increasing the likelihood of electrical fires. Fires caused by ungrounded outlets can spread rapidly throughout your home or workspace, endangering lives and causing extensive property damage.
- Damage to Electronics: Without proper grounding, electronic devices are more susceptible to electrical surges and voltage fluctuations. This can lead to permanent damage or shorten the lifespan of your expensive electrical equipment and appliances.
Now that we understand the significance of grounding electrical outlets and the potential risks associated with ungrounded ones, it’s important to ensure that all outlets within your home or workplace are properly grounded. Doing so will provide a safer environment, protect your valuable electronics, and comply with electrical codes and standards.
Tools And Materials Needed
List of tools required for the installation
When it comes to installing a grounded outlet, you’ll need a few essential tools to ensure a successful and efficient process. These tools are specifically designed for electrical work and will help you complete the installation with ease. Here’s a list of tools you’ll need for the installation:
- Multimeter: This tool is used to measure voltage, current, and resistance. It is crucial for ensuring that the outlet is properly grounded.
- Wire stripper: This tool is used to remove the insulation from the electrical wires, allowing for easy connection.
- Needle-nose pliers: These pliers are excellent for gripping and manipulating small wires and connections.
- Flat-head screwdriver: This tool will be needed to unscrew and tighten the outlet plate.
- Phillips-head screwdriver: Similar to the flat-head screwdriver, this tool will be used for screwing and unscrewing connections.
- Voltage tester: This tool helps identify whether an electrical circuit is live or not, ensuring your safety during the installation process.
- Staple gun: The staple gun will be used to secure the electrical wires to the walls or baseboards, keeping them neatly in place.
Materials needed for the installation process
In addition to the tools mentioned above, you will also need a few materials to complete the installation of a grounded outlet. These materials will ensure a safe and reliable electrical connection. Here’s a breakdown of the materials you’ll need:
- Grounded outlet: Make sure to purchase a grounded outlet that meets the necessary safety standards. A grounded outlet provides an extra level of protection against electrical shocks.
- Electrical wires: You’ll need a sufficient amount of electrical wires to make the necessary connections. Ensure that the wires are compatible with the electrical load and follow the appropriate gauge guidelines.
- Outlet box: An outlet box is used to house the electrical connections and provide a secure mounting for the grounded outlet. Make sure to choose a box that fits the size and requirements of your installation.
- Wire connectors: These connectors are used to secure and join electrical wires together. They provide a reliable and safe connection, ensuring proper conductivity.
- Cable staples: Cable staples will be needed to secure the electrical wires to the walls or baseboards. This will prevent any accidental pulling or disconnection.
- Screws: You’ll need screws to attach the outlet plate to the outlet box. Make sure to choose the appropriate size and type of screws for a secure fit.
- Electrical tape: Electrical tape is used to insulate and protect electrical connections from moisture and accidental contact. Make sure to use high-quality electrical tape for optimal performance.
By ensuring you have all the necessary tools and materials, you’ll be well-prepared to install a grounded outlet in no time. Remember to prioritize your safety and follow the appropriate guidelines when working with electricity.
Step 1: Ensuring Safety First
Ensuring safety first is crucial when it comes to installing a grounded outlet. Before you begin any electrical work, it is important to take the necessary precautions to protect yourself and prevent accidents. In this step-by-step guide, we will discuss the importance of turning off power before working on electrical outlets and provide some tips for safely shutting off power to the specific outlet.
Importance of turning off power before working on electrical outlets
One of the most crucial steps for safety when installing a grounded outlet is turning off the power supply. This ensures that you will not be exposed to any live wires or risk electrocution during the installation process. Electricity is a powerful force and can be extremely dangerous if not handled properly. By turning off the power, you eliminate this risk and create a safer working environment.
When working with electrical outlets, it is important to remember that even if the switch in the room is turned off, there may still be electricity running through the circuit. This is because some outlets may be connected to a different circuit or have a shared connection. To ensure complete safety, it is best to shut off power to the specific outlet you will be working on.
Tips for safely shutting off power to the specific outlet, ensuring each H3 heading adheres to HTML syntax
- Locate the electrical panel in your home.
- Open the panel cover using a screwdriver or by flipping the latch.
- Identify the circuit breaker corresponding to the outlet.
- Flip the switch of the circuit breaker to the “Off” position.
- Confirm that the power has been shut off by testing the outlet with a non-contact voltage tester.
It is important to note that if you are unsure about which circuit breaker is connected to the outlet, it is recommended to shut off the main power supply to the entire house to be on the safe side. This will ensure that there is no risk of electrical shock or accidental power supply during the installation process.
Step 2: Gathering Necessary Information
Before installing a grounded outlet, it is essential to gather the necessary information to ensure a safe and successful installation process. This step involves identifying the circuit breaker that controls the specific outlet and verifying the rated voltage for the outlet. By gathering this information beforehand, you can proceed with the installation confidently and avoid any potential issues or hazards along the way.
Identifying the Circuit Breaker That Controls the Specific Outlet
To identify the circuit breaker that controls the specific outlet, follow these steps:
- Locate the electrical panel in your home or building.
- Open the panel door to reveal the circuit breakers.
- Observe the labels on the circuit breakers to find the one associated with the outlet you plan to install.
- If the circuit breakers are not labeled, you can identify the correct one by a process of elimination.
- Turn off the circuit breaker that corresponds to the outlet to ensure no electrical power is running through it during the installation process.
Verifying the Rated Voltage for the Outlet
Verifying the rated voltage for the outlet is crucial to ensure compatibility and prevent any electrical mishaps. To do this:
| Step | Action |
|---|---|
| 1 | Refer to the manufacturer’s instructions or labeling on the outlet to find the rated voltage. |
| 2 | Double-check the voltage requirements with a multimeter or voltage tester to ensure accuracy. |
| 3 | If the rated voltage matches the voltage in your electrical system, you can proceed with the installation. However, if there is a discrepancy, consult a professional electrician for guidance. |
By identifying the circuit breaker that controls the specific outlet and verifying the rated voltage, you are equipped with the necessary information to safely install a grounded outlet. Proceeding with caution and accuracy will result in a functional outlet that adheres to safety standards and eliminates potential electrical hazards.
Step 3: Preparing The Work Area
“`html
Before you begin installing a grounded outlet, it is crucial to properly prepare the work area. This step ensures your safety and smooth execution of the installation process. By following these simple guidelines, you can create an organized and clutter-free environment, making the task at hand much more manageable.
Clearing the area around the outlet
To start, clear the area around the outlet of any furniture, objects, or debris that may hinder your access. You need ample space to work comfortably and safely. Remove any nearby rugs or mats that could potentially cause a tripping hazard. Remember, a clutter-free work area is essential for a successful installation.
Organizing tools and materials
An organized work area makes your job easier and more efficient. Before you proceed, gather all the necessary tools and materials for the installation. This prevents unnecessary interruptions and frustration during the process. Plan and lay out your tools and materials in an orderly manner, ensuring everything is readily accessible. Here’s a list of items you will need:
| Tools | Materials |
|---|---|
|
|
By organizing your tools and materials in advance, you save time searching for them while working on the installation, ensuring a smoother and more effective process.
“`
Note: Please copy the above code and paste it in an HTML editor or any text editor with HTML language as it is.
Step 4: Removing The Old Outlet
Step 4: Removing the Old Outlet
Once you have gathered all the necessary tools and equipment, it’s time to move on to the next step in installing a grounded outlet – removing the old outlet. This step is crucial as it ensures proper disconnection of the existing outlet before installing the new one.
Steps to disconnecting the existing outlet
- Start by turning off the electricity supply to the outlet at the circuit breaker or fuse box. This will help prevent any accidents or injuries while working.
- Use a voltage tester to confirm that no electricity is flowing through the outlet. Simply insert the tester’s probes into the outlet slots, and if the tester does not emit any sound or light up, it is safe to proceed.
- Remove the outlet cover plate by unscrewing the screws that hold it in place. Set the plate aside for later use.
- Next, unscrew the screws holding the outlet itself to the electrical box. Carefully pull the outlet out from the box, exposing the wires attached to it.
- Take a photograph or make a diagram of the wire connections before disconnecting them. This will help you during the reconnection process later on.
- Using a screwdriver, loosen the terminal screws that secure the wires to the outlet. Gently pull each wire out of its respective terminal. Make sure to grip the wire only by the insulation, not the bare metal.
- Once all the wires are disconnected, you can remove the old outlet from the electrical box and set it aside.
Properly labeling wires for easy reconnection
Before proceeding further, it is essential to label the wires to ensure their easy reconnection during the installation of the new grounded outlet. Proper labeling safeguards against confusion and potential wiring mistakes.
Here’s how you can label the wires:
- Start by using colored electrical tape or small adhesive labels to mark each wire with its corresponding terminal screw color or designation. For example, you can use red tape for the wire connected to the brass or gold-colored screw and black tape for the wire connected to the dark-colored screw.
- If the wires are not color-coded or labeled on the old outlet, you can use a multimeter to identify hot, neutral, and ground wires. This will help you determine the appropriate labeling for each wire.
By properly labeling the wires, you make the reconnection process much simpler and reduce the risk of incorrect wiring, ensuring a safe and functional grounded outlet.
Now that you have successfully removed the old outlet and labeled the wires, you’re ready to move on to the next step – preparing the electrical box for the installation of the new grounded outlet!
Step 5: Installing The Grounding Wire
Once you have successfully attached the new grounded outlet to the electrical box, it’s important to complete the installation by properly connecting the grounding wire. Understanding the importance of the grounding wire and securing it to the outlet is crucial for ensuring the safety and functionality of the electrical system.
Understanding the importance of the grounding wire
The grounding wire is an essential component of any electrical system as it serves to protect against electrical shock and prevent electrical fires. It provides a safe path for electrical currents to follow in the event of a fault or short circuit. By connecting the outlet’s grounding wire to the electrical system’s grounding conductor, you are creating a low-resistance pathway for excess electrical current to flow, which redirects the energy away from the appliances and into the ground.
Securing the grounding wire to the outlet
To properly secure the grounding wire to the outlet, follow these steps:
- Locate the grounding terminal or screw on the outlet. This terminal is typically green in color and is located at the bottom of the outlet.
- Unscrew the grounding terminal to expose the hole.
- Strip about half an inch of insulation from the end of the grounding wire. This can be done using a wire stripper or utility knife.
- Insert the stripped end of the grounding wire into the grounding terminal, making sure it is securely inserted into the hole.
- Tighten the grounding terminal screw to ensure a firm connection between the wire and the outlet.
- To double-check the connection, gently tug on the grounding wire. If it is securely attached, it should not come loose.
In addition to securing the grounding wire to the outlet, it’s important to ensure that it is properly connected to the electrical system’s grounding conductor. This conductor is typically a bare copper wire or a green insulated wire that is connected to a grounding rod or the electrical panel. Consult a qualified electrician if you are unsure about how to connect the grounding wire to the electrical system’s grounding conductor.
By correctly installing the grounding wire, you are taking an important step in ensuring the safety and functionality of your electrical outlets. Remember, if you have any doubts or concerns, it’s always best to consult a professional electrician who can provide expert guidance specific to your situation.
Step 6: Wiring The New Outlet
Congratulations! You’re almost done with installing a grounded outlet. Now comes the crucial part – wiring the new outlet. In this step, we will connect the black (hot) wire to the brass-colored screw and the white (neutral) wire to the silver-colored screw. This ensures a proper and safe connection for your grounded outlet. Let’s get started!
Connecting the black (hot) wire to the brass-colored screw
1. Before beginning this step, ensure that the power to the circuit is turned off at the main electrical panel. This is crucial to your safety as you’ll be handling live wires.
2. Now, locate the black (hot) wire attached to the old outlet. This wire carries the electrical current and must be correctly connected to the new outlet.
3. Take the black wire and strip about ¾ inch of insulation from the end using a wire stripper or a sharp utility knife.
4. Once stripped, you’ll notice two brass-colored screws on the new outlet. These screws are designed to connect the hot wires. Unscrew the brass screw on the side where the black wire will be attached.
5. Insert the stripped end of the black wire behind the brass screw. Make sure the wire is inserted securely and there are no loose strands.
6. Using a screwdriver, tighten the brass screw to secure the connection. Do not overtighten, as this may damage the wire or the outlet.
Connecting the white (neutral) wire to the silver-colored screw
1. Now, let’s move on to connecting the white (neutral) wire to the silver-colored screw on the new outlet. This wire carries the return current and completes the circuit.
2. Locate the white wire attached to the old outlet. This wire should already be stripped and ready for connection.
3. Unscrew the silver screw on the opposite side of the outlet where the white wire will be attached.
4. Insert the stripped end of the white wire behind the silver screw, ensuring a secure fit with no loose strands.
5. Use a screwdriver to tighten the silver screw, securing the connection. Again, avoid overtightening to prevent damage.
Congratulations! You have successfully wired the new outlet. Make sure all connections are secure and there are no exposed wires. Now it’s time to move on to the final step – attaching the outlet to the electrical box. Stay tuned for the next section!
Step 7: Testing The Outlet
Now that you have successfully installed a grounded outlet, it’s important to test it to ensure it has been wired correctly. Testing the outlet not only ensures your safety but also guarantees proper functionality. Follow the steps below to ensure your newly installed grounded outlet is working as it should.
Using a voltage tester to ensure the outlet is wired correctly
Using a voltage tester is a simple yet effective way to check if the grounded outlet is wired correctly. Here’s how to do it:
- First, make sure the voltage tester you’re using is properly calibrated and in good working condition.
- Turn off the power to the outlet by flipping the corresponding circuit breaker in your electrical panel.
- Insert one prong of the voltage tester into the short slot of the outlet and the other prong into the long slot. The tester should light up if the outlet is wired correctly.
- Repeat the process by inserting one prong into the short slot and the other into the ground hole. The tester should light up once again, indicating proper grounding.
- If the voltage tester fails to light up during either of these tests, there may be a wiring issue that needs to be addressed before using the outlet.
Troubleshooting common issues during testing
While testing the outlet, you may encounter some common issues. Here are a few troubleshooting steps you can take to ensure everything is in order:
- If the voltage tester doesn’t light up during either of the tests, double-check the wiring connections. Make sure the hot (black) wire is connected to the brass terminal, the neutral (white) wire is connected to the silver terminal, and the ground (green or bare) wire is attached to the green screw.
- If the voltage tester only lights up when inserted into the short slot but not when inserted into the ground hole, there may be a grounding problem. Confirm that the ground wire is properly connected to the outlet and the grounding system in your home.
- If everything seems to be wired correctly and the voltage tester still doesn’t light up, it’s time to call a qualified electrician to assess the issue further. Electrical problems can be complex and dangerous, so it’s always better to seek professional help if needed.
By following these testing and troubleshooting steps, you can ensure that your newly installed grounded outlet is wired correctly and functioning properly. Remember, safety should always be a priority when working with electricity.
Step 8: Securing The Outlet And Restoring Power
Securing the Outlet in the Electrical Box
Once you have connected all the wires to the outlet and ensured they are tightly secured, it’s time to secure the outlet itself in the electrical box. This step is crucial to ensure the outlet is stable and safe to use. To secure the outlet, follow these simple instructions:
- Position the outlet in the electrical box, making sure the wires are neatly tucked inside and not pinched or strained.
- Align the screw holes on the outlet with the screw holes on the electrical box.
- Using a screwdriver, insert the screws into the holes and tighten them until the outlet is securely fastened in place. Take care not to overtighten the screws, as this may damage the outlet or the electrical box.
- Double-check that the outlet is level and flush with the wall, making any necessary adjustments if needed.
Instructions for Turning the Power Back On
With the outlet secured, you are now ready to restore power and test the newly installed grounded outlet. Follow these instructions to turn the power back on:
- Locate the circuit breaker panel in your home. This is usually found in a basement, garage, or utility room.
- Open the circuit breaker panel cover to reveal the circuit breakers.
- Identify the circuit breaker that controls the electricity to the outlet you just installed. It should be labeled accordingly.
- Switch the circuit breaker to the “Off” position by pushing the switch down.
- Wait for a few seconds to ensure the power is fully disconnected.
- Now, switch the circuit breaker back to the “On” position by pushing the switch up until it clicks into place.
- The power to the outlet should now be restored. You can verify this by plugging in a device and checking if it receives power.
- If the device does not receive power, double-check the wiring connections and ensure they are correct. If necessary, consult a licensed electrician for further assistance.
Congratulations! You have successfully secured the outlet in the electrical box and restored power to it. By following these steps carefully, you have ensured a safe and functional grounded outlet for your home. Enjoy the benefits of having reliable and grounded electrical outlets throughout your living space.
Final Thoughts: Benefits Of Grounded Outlets
Discussing the Advantages of Using Grounded Outlets
Grounded outlets are an essential part of any electrical system in your home or office. These outlets provide a safe way to connect your electrical devices and protect you from potential electrical hazards. In this section, we will discuss the advantages of using grounded outlets.
1. Electrical Safety:
One of the primary benefits of grounded outlets is electrical safety. A grounded outlet includes a third grounding wire that connects to the earth, providing a path for electrical currents to safely dissipate in case of a short circuit or electrical fault. This grounding wire helps to prevent electrical shocks, electrical fires, and other electrical accidents, keeping you and your loved ones safe.
2. Equipment Protection:
Grounded outlets not only protect you but also safeguard your electrical devices. The grounding wire helps to stabilize the electrical equipment by diverting excess voltage into the ground. This means that your devices are less likely to suffer damage from power surges, voltage fluctuations, or electrical spikes. By using grounded outlets, you can extend the lifespan of your expensive electronic devices, such as computers, televisions, and appliances.
3. Fire Prevention:
Another advantage of grounded outlets is their ability to prevent fires caused by electrical faults. Without a grounded outlet, electrical faults can result in arcing, sparking, or overheating, which can lead to fires. A grounded outlet helps to prevent these issues by redirecting any excess electrical current into the ground, minimizing the risk of fires and protecting your property.
Encouraging Regular Maintenance and Safety Checks
While using grounded outlets provides numerous benefits, it is essential to remember that regular maintenance and safety checks are equally important. These actions ensure that your grounded outlets continue to function effectively, providing you with the necessary protection. Here are some steps you can take to maintain grounded outlets:
- Inspect all outlets periodically for any signs of damage, such as cracks or discoloration.
- Check that the grounding wire is securely connected to both the outlet and the grounding system.
- Test your outlets regularly using a circuit tester to ensure they are properly grounded.
- Avoid overloading outlets with multiple devices to prevent overheating and electrical hazards.
- Consider installing Ground Fault Circuit Interrupters (GFCIs) in areas prone to water exposure, such as kitchens and bathrooms, for additional protection.
By following these maintenance and safety measures, you can ensure that your grounded outlets are in optimal working condition, providing you with the benefits they were designed for.
Frequently Asked Questions
How Should A Grounded Outlet Be Installed?
To install a grounded outlet, follow these steps: 1. Turn off power to the circuit at the main electrical panel. 2. Remove the old outlet cover and disconnect wires from the old outlet. 3. Connect the grounding wire to the grounding terminal of the new outlet.
4. Connect the black and white wires of the new outlet to their respective terminals. 5. Securely mount the new outlet and replace the cover.
Can You Ground An Outlet Yourself?
No, you should not ground an outlet yourself. It is a complex task that requires professional expertise to ensure safety and compliance with electrical codes.
Is It Ok If An Outlet Isn’T Grounded?
An outlet should ideally be grounded to protect against electrical shocks and fires. Grounding provides a safe path for electric current to flow in case of a fault. It is important for the safety of both you and your electrical devices.
How Do You Ground An Outlet Without Ground Wire?
To ground an outlet without a ground wire, use a GFCI (Ground Fault Circuit Interrupter) outlet. Install the GFCI outlet, connect the grounding wire to the green terminal, and label the outlet as “No Equipment Ground. ” This provides protection against electric shock.
Conclusion
Installing a grounded outlet is a simple yet important task that ensures safety in your electrical system. By following the steps outlined in this guide, you can confidently complete the installation process yourself. Remember to always prioritize safety and consult a professional electrician if you encounter any difficulties.
With a properly grounded outlet, you can enjoy the convenience and peace of mind knowing that your electrical devices are protected. Upgrade your home today and take the necessary steps to create a secure electrical environment.