To install a GFCI outlet outside, you need to follow specific steps for proper installation and safety. First, turn off the power supply to the circuit you’ll be working on.
Then, remove the existing outlet and disconnect the wires. Next, connect the wires to the GFCI outlet using proper wire connectors, ensuring the connections are secure. Finally, mount and secure the GFCI outlet to the electrical box, and test it to ensure it’s working correctly.
Outdoor electrical outlets can be convenient for powering various devices and lighting in your outdoor space. However, it’s essential to ensure that they are installed correctly and safely. One crucial safety feature to consider is the installation of a Ground Fault Circuit Interrupter (GFCI) outlet outside.
A GFCI outlet provides protection against electric shock by automatically shutting off the power if it detects a ground fault or a current imbalance. In this guide, we will walk you through the step-by-step process of installing a GFCI outlet outside, ensuring the safety and functionality of your outdoor electrical setup. So, let’s dive in and learn how to install a GFCI outlet outside in a few simple steps.
Planning Your Installation
Before you start installing a GFCI outlet outside, it’s important to plan your installation carefully. This involves determining the location for the GFCI outlet, assessing the electrical requirements and capacity, gathering the necessary tools and materials, and preparing the installation area. Following these steps will help ensure a smooth and successful installation.
Determine the location for the GFCI outlet
Choosing the right location for your GFCI outlet is crucial. It should be easily accessible and conveniently located for your outdoor electrical needs. Consider factors such as the proximity to power sources and the devices you intend to connect. Additionally, it’s important to make sure that the location meets local electrical code requirements, such as being a certain distance from water sources.
Assess the electrical requirements and capacity
Before installing a GFCI outlet outside, it’s important to assess the electrical requirements and capacity of your existing electrical system. Determine if you have enough available space in your electrical panel to install a new breaker for the GFCI outlet. Additionally, calculate the total load that the outlet will be responsible for and make sure it doesn’t exceed the circuit’s capacity. This will help prevent any overloaded circuits or electrical hazards.
Gather the necessary tools and materials
Having the right tools and materials on hand will make the installation process much smoother. Here’s a list of the essential tools and materials you’ll likely need:
| Tools | Materials |
| Wire cutters/strippers | GFCI outlet |
| Screwdriver | Electrical wires |
| Drill | Wire connectors |
| Hole saw | Electrical tape |
| Voltage tester | Wire clamps |
| Caulking gun | Outdoor electrical box |
Prepare the installation area
Prior to installing the GFCI outlet, it’s important to prepare the installation area properly. This may involve clearing any obstructions, such as shrubs or debris, to ensure easy access to the outlet. Additionally, consider weatherproofing the installation area by using an outdoor electrical box and sealing any gaps with caulk to protect the outlet from the elements. Taking these steps will help ensure the longevity and functionality of your outdoor GFCI outlet.

Ensuring Safety Precautions
When it comes to installing a GFCI outlet outside, safety should always be your top priority. Taking the appropriate safety precautions not only protects you from potential harm but also ensures a smooth and successful installation. Before you start the installation process, make sure to follow these essential guidelines to ensure a safe and secure electrical setup.
Turn off the power at the circuit breaker
To begin the installation process safely, you must first turn off the power at the circuit breaker. This step is crucial as it eliminates the risk of electric shock during the installation. Follow these steps to turn off the power:
- Locate the circuit breaker box in your house.
- Identify the specific circuit that powers the area where you will install the GFCI outlet.
- Switch off the corresponding breaker by flipping it to the “off” position.
Use a voltage tester to verify the power is off
After turning off the power at the circuit breaker, it’s essential to double-check if there is still any electrical current running through the wires. To do this, use a voltage tester and follow these steps:
- Select a voltage tester suitable for your needs.
- Insert the tester’s probes into the outlet slots.
- If the tester does not indicate any voltage or power, it is safe to proceed. However, if the tester indicates any electrical current, stop immediately and re-check the circuit breaker.
Wear appropriate personal protective equipment (PPE)
When working with electricity, it is crucial to protect yourself by wearing the appropriate personal protective equipment (PPE). This includes:
- Safety gloves: Insulated gloves protect your hands from electrical shock.
- Safety goggles: Goggles prevent any potential eye injuries from flying debris or electrical sparks.
- Hard hat: A hard hat safeguards your head from any falling objects.
- Protective clothing: Wear non-conductive clothing to minimize the risk of electric shock.
Clear any potential hazards
Prior to installation, it’s crucial to identify and clear any potential hazards that may interfere with the process or pose risks later on. Ensure that:
- The area is dry: Install the GFCI outlet in a dry area to avoid any water or moisture damage.
- No flammable materials are nearby: Keep the installation area free from flammable materials that could ignite during the process.
- All tools are in good condition: Inspect your tools, ensuring they are in proper working condition and free from any defects.
- No objects obstruct the work area: Remove any objects or debris that may hinder your access to the wiring or cause accidents.
By adhering to these safety precautions, you are minimizing the risks associated with electrical installations and ensuring a secure environment for yourself and others. Remember, safety should never be compromised, so take the time to follow these guidelines and proceed with confidence.
Installing The Gfci Outlet
When it comes to outdoor electrical outlets, safety is of utmost importance. One essential safety feature to consider is the installation of a Ground Fault Circuit Interrupter (GFCI) outlet. A GFCI outlet is designed to protect against electrical shocks and is required by the National Electrical Code (NEC) for outdoor locations. In this guide, we will walk you through the step-by-step process of installing a GFCI outlet outside.
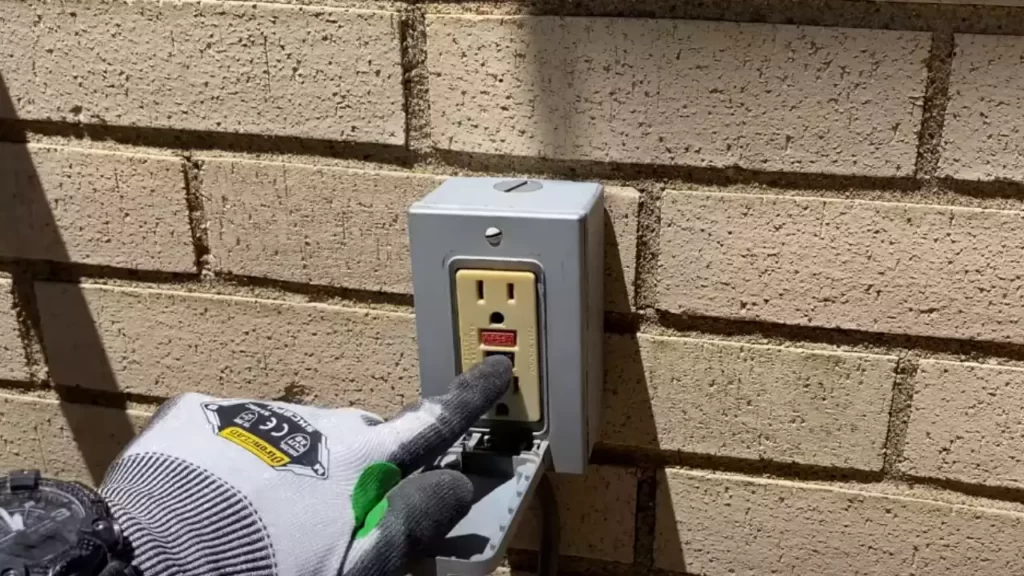
Remove the existing outlet cover and receptacle
The first step in installing a GFCI outlet is to remove the existing outlet cover and receptacle. Ensure that the power to the outlet is turned off at the circuit breaker before proceeding. Carefully unscrew the outlet cover plate and set it aside. Next, unscrew the receptacle from the electrical box and gently pull it out, exposing the wires connected to it.
Disconnect the wires from the old outlet
To install the GFCI outlet, you need to disconnect the wires from the old outlet. Start by carefully loosening the screws that secure the wires to the receptacle. Once the screws are loose, gently pull the wires out from under them. Pay attention to the color-coded wires: black (hot), white (neutral), and green or copper (ground). Take note of which wire is connected to which terminal on the receptacle for easier installation of the GFCI outlet.
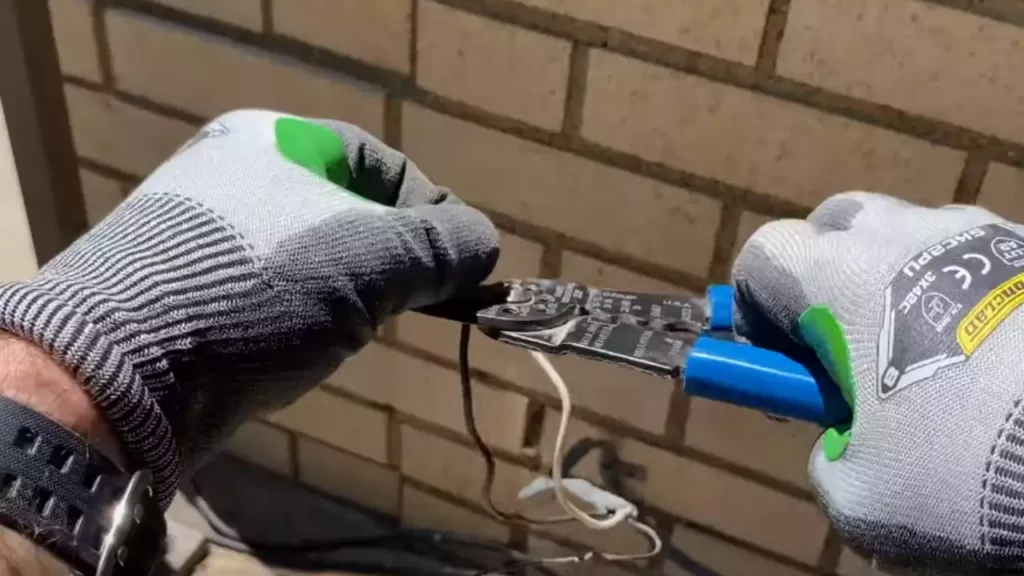
Connect the wires to the GFCI outlet
With the old wires disconnected, it’s time to connect them to the GFCI outlet. Begin by stripping about 1/2 inch of insulation from the ends of the wires. Then, starting with the black (hot) wire, insert it into the terminal labeled “Line” or “Hot” on the GFCI outlet. Tighten the screw to secure the wire in place. Repeat this step with the white (neutral) wire in the terminal labeled “Neutral” and the green or copper (ground) wire in the terminal labeled “Ground”.
Mount the GFCI outlet in the electrical box
Once the wires are securely connected, carefully tuck them into the electrical box. Position the GFCI outlet over the box, making sure the mounting screw holes align with those on the box. Insert the screws through the outlet and into the box, and tighten them until the GFCI outlet is firmly mounted in place.
Secure the outlet cover
To complete the installation, securely attach the outlet cover. Align the cover with the GFCI outlet, ensuring that it covers the electrical box completely. Insert the screws provided with the cover into the holes on the cover and tighten them until the cover is firmly secured.
In conclusion, installing a GFCI outlet outside is an important step in ensuring the safety of your outdoor electrical system. By following the steps outlined above, you can successfully install a GFCI outlet and provide protection against electrical shocks. Remember to always consult the NEC and follow local electrical codes when performing any electrical work.
Testing And Finishing The Installation
After completing the installation of your GFCI outlet outside, there are a few important steps to take to ensure that everything is set up correctly and functioning properly. These steps involve testing the outlet, verifying its functionality, sealing any openings in the electrical box, and replacing the outlet cover. Let’s dive into each of these steps in detail:
Turn on the power at the circuit breaker
In order to test the GFCI outlet and verify its functionality, you need to ensure that the power is turned on at the circuit breaker. Locate the circuit breaker panel in your home or outdoor area and identify the switch that controls the power supply to the GFCI outlet. Flip the switch to the “on” position. This step is crucial as it allows electricity to flow through the outlet and enables you to properly test its features.
Test the GFCI outlet using the test and reset buttons
Once the power is turned on, you can proceed to test the GFCI outlet. This outlet is equipped with test and reset buttons, which are key components in ensuring its safety mechanisms are functioning as intended. Press the “test” button on the outlet. You should hear a clicking sound, and the indicator light, if present, should turn off. This action simulates a ground fault circuit interruption and should cause the outlet to shut off immediately.
To verify that the GFCI outlet has properly shut off, plug in a device such as a lamp or hairdryer into the outlet, and turn it on. The device should not receive any power and remain off. This indicates that the GFCI outlet has successfully detected the ground fault and cut off the electrical supply to prevent any potential electrical hazards.
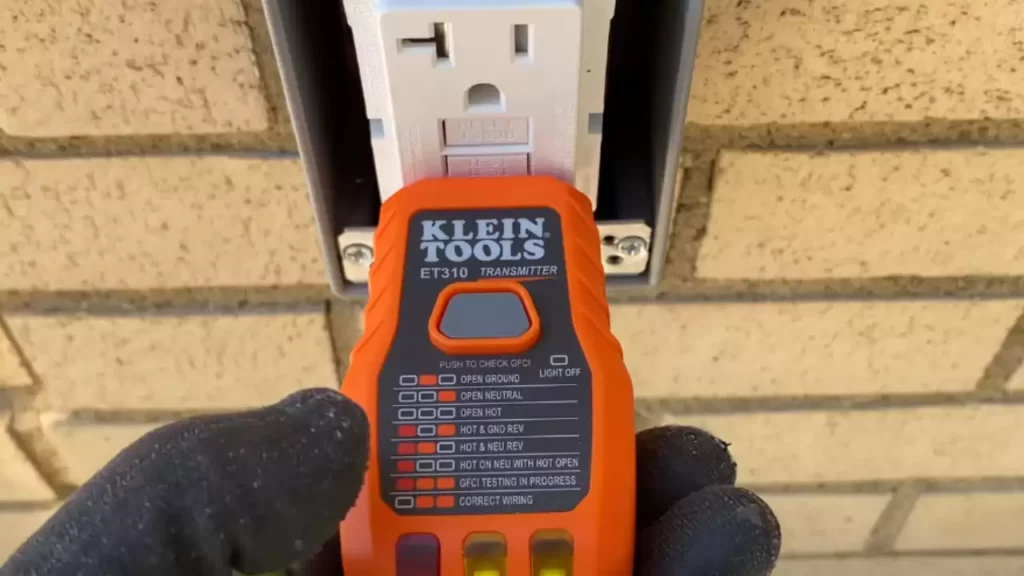
Verify proper functionality with a GFCI tester
Aside from testing the GFCI outlet using its own buttons, it is recommended to use a GFCI tester to further validate its proper functionality. This handheld testing device is specifically designed to check if the GFCI outlet is wired correctly and functioning as expected. Insert the GFCI tester into the outlet and press the test button on the tester. The GFCI outlet should trip and cut off the power, indicated by the tester’s lights or audible signal. If this happens, it means that the GFCI outlet is functioning properly and wired correctly.
Seal any openings in the electrical box
With the testing completed, it’s time to ensure that the electrical box containing the GFCI outlet is fully sealed. This step is essential to protect the outlet from outdoor elements such as rain, snow, or dirt. Inspect the electrical box for any openings or gaps that could allow moisture or debris to enter. Use silicone caulking or weatherproof sealant to seal any openings and ensure a tight seal. This will help to prolong the lifespan of the GFCI outlet and maintain its functionality over time.
Replace the outlet cover
Lastly, replace the outlet cover to provide a finished look and protect the GFCI outlet from any accidental damage. Ensure that the cover is compatible with the specific model of the GFCI outlet and fits securely. Tighten the screws to hold the cover in place, making sure it is flush against the outlet and the sealing gasket if provided. This final step ensures the safety of the GFCI outlet and adds a professional touch to the overall installation.
Troubleshooting Common Issues
Installing a GFCI outlet outside can greatly enhance the safety and functionality of your outdoor electrical system. However, like any electrical installation, issues may arise that require troubleshooting. By being familiar with common issues that can occur with outdoor GFCI outlets, you can quickly resolve them and ensure that your outdoor area remains powered and secure.
Resetting a tripped GFCI outlet
One of the most common issues with GFCI outlets, both indoors and outdoors, is tripping. When a GFCI outlet trips, it cuts off power to protect against electrical shocks. To reset a tripped GFCI outlet, follow these steps:
- Locate the GFCI outlet that has tripped. This is usually the one with the ‘Test’ and ‘Reset’ buttons.
- Press the ‘Reset’ button firmly until you feel it click.
- If the GFCI outlet stays reset, test it by plugging in a small electrical device and turning it on.
- If the GFCI outlet trips again immediately or won’t reset, there may be an underlying issue that needs to be addressed.
Addressing wiring mistakes
Incorrect wiring is another common issue that can cause GFCI outlets to malfunction. If you suspect a wiring mistake, it’s essential to address it promptly to ensure the safe operation of your outdoor electrical system. Here are some steps to follow when addressing wiring mistakes:
- Verify the wiring connections at the GFCI outlet. Ensure the line (incoming power) and load (outgoing power) wires are correctly connected.
- Check for loose or frayed wires. Tighten any loose connections and replace any damaged wires.
- If you’re unsure about the wiring or encounter any issues, consult a professional electrician to assist you.
Dealing with insufficient power capacity
If your outdoor electrical system is experiencing insufficient power capacity, it can lead to GFCI outlet issues. Here are some steps to deal with this problem:
- Check if the GFCI outlet is overloaded. Remove any unnecessary devices or appliances from the outlets connected to the GFCI.
- If the problem persists, consider upgrading your electrical panel or consulting a licensed electrician to evaluate and enhance your power capacity.
Identifying faulty components
In some cases, a faulty component within the GFCI outlet itself may cause issues. Here’s how to identify and address faulty components:
- Inspect the GFCI outlet for any physical damage, burn marks, or signs of overheating.
- If you notice any such issues, replace the GFCI outlet with a new one of the same make and model.
- If the problems persist after replacing the outlet, it’s recommended to seek professional assistance to identify and resolve the underlying electrical issue.
Seeking professional assistance when needed
While troubleshooting GFCI outlet issues, it’s important to know your limitations. If you’re unsure about the problem or uncomfortable dealing with electrical repairs, it is always best to seek professional assistance. An experienced electrician will have the knowledge and tools necessary to diagnose and fix any complex issues with your outdoor GFCI outlets.
By following these troubleshooting steps and knowing when to seek professional assistance, you can effectively address common issues with outdoor GFCI outlets. Ensuring your outdoor electrical system is in proper working order will provide peace of mind and enjoyment for all your outdoor activities.
Frequently Asked Questions
How Do I Install A Gfci Outlet Outside?
To install a GFCI outlet outside, first, turn off the power to the circuit. Then, remove the old outlet and disconnect the wires. Attach the GFCI outlet to the mounting box and connect the wires. Finally, secure the outlet, turn the power back on, and test the outlet for proper functionality.
Is A Special Outlet Required For Outdoor Use?
Yes, a special outlet called a Ground Fault Circuit Interrupter (GFCI) outlet is required for outdoor use. GFCI outlets are designed to provide added protection against electrical shocks and should be installed in any outdoor area where there is a risk of water coming into contact with the electrical circuits.
Can I Install A Gfci Outlet Myself?
Yes, you can install a GFCI outlet yourself if you have basic electrical knowledge and follow safety precautions. However, it is recommended to consult a licensed electrician if you are not comfortable working with electrical circuits. Professional help ensures that the outlet is installed correctly and meets all necessary safety requirements.
Conclusion
Installing a GFCI outlet outside is an important step towards ensuring safety and convenience in your outdoor electrical setup. By following the step-by-step guide provided in this blog post, you can confidently handle the installation process. Remember to prioritize safety measures, pay attention to the necessary wiring and connections, and test the GFCI outlet to ensure its functionality.
By taking these precautions, you can enjoy the benefits of a secure and reliable outdoor electrical system. Happy DIY-ing!