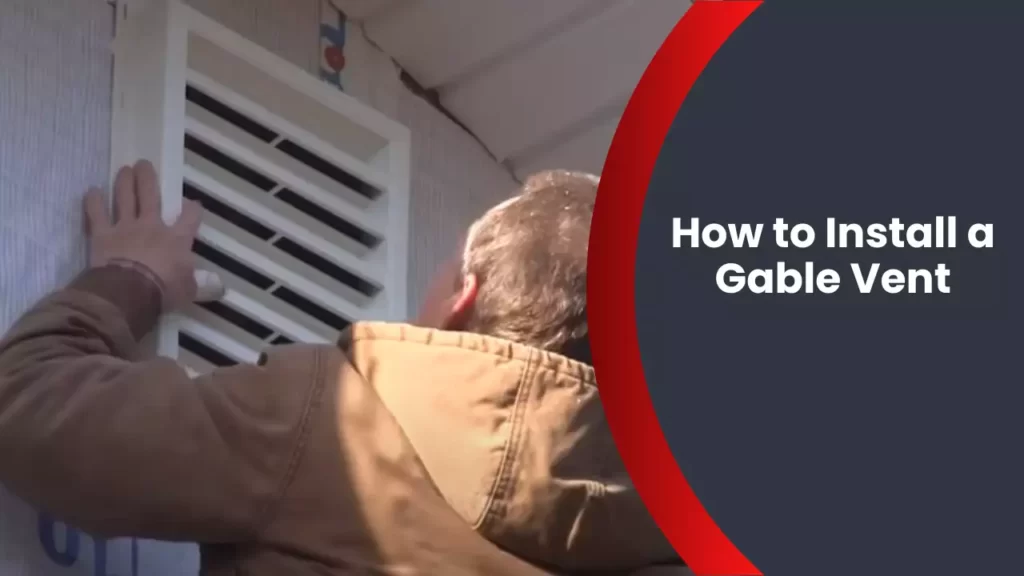
To install a gable vent, locate the desired area on the gable wall and mark the opening. Cutting the hole in the marked area using a reciprocating saw or jigsaw.
Preparing For Installation
Before you dive into the installation process, it’s crucial to prepare adequately. This means assessing your ventilation needs, selecting the appropriate gable vent type, and gathering all the necessary tools and materials for a smooth and successful installation. Taking the time to prepare properly will ensure that your gable vent functions effectively and efficiently in promoting airflow and maintaining a comfortable environment in your home. Let’s walk through each step of the preparation process.
Assessing the ventilation needs
Begin by evaluating the ventilation needs of your space. Proper ventilation is essential in preventing issues like condensation, mold growth, and stale air. It helps in maintaining a healthy indoor environment and preserving the structural integrity of your home. Assess the size of the area you wish to ventilate, the current ventilation system in place, and any specific requirements unique to your space.
Consider factors such as the climate and local regulations when determining the amount of ventilation needed. A good rule of thumb is to have 1 square foot of vent area for every 150 square feet of attic space. However, if you live in a humid or hot climate, you may want to increase the ventilation ratio to ensure optimal airflow.
Selecting the appropriate gable vent type
With your ventilation needs understood, it’s time to select the appropriate gable vent type. Gable vents come in various styles and materials, so choose one that complements your home’s aesthetic while efficiently allowing air to pass through.
Consider factors such as the size of the gable opening, the architectural style of your home, and the durability of the material. Common gable vent materials include vinyl, aluminum, and wood. Each material has its benefits and considerations, so be sure to weigh them before making a decision.
Gathering the necessary tools and materials
Once you’ve determined the ventilation needs and selected the appropriate gable vent type, gather all the necessary tools and materials required for installation. Having everything ready in advance will save you from unnecessary delays and frustration in the middle of the project.
Here’s a checklist of the tools and materials you may need:
| Tools | Materials |
|---|---|
| Screwdriver | Gable vent |
| Measuring tape | Screws |
| Nail gun (if using a wooden vent) | Sealant |
| Level | Flashing (if necessary) |
| Utility knife | Paint (if desired) |
Double-check if you have all the tools and materials in place before you begin the installation process. This will ensure a seamless experience and allow you to focus solely on installing your gable vent with precision.
By carefully assessing your ventilation needs, selecting the appropriate gable vent type, and gathering the necessary tools and materials, you are now fully prepared to install a gable vent. Stay tuned for the next section, where we will guide you through the step-by-step installation process to achieve optimal ventilation in your home.
Measuring And Marking
Determining the ideal vent location on the gable wall
Before beginning the installation process, it is crucial to determine the perfect location for your gable vent on the gable wall. A gable vent is designed to facilitate proper air circulation in your attic, so finding the optimal spot is essential for optimal ventilation. Take a moment to consider the following factors when determining the vent location:
- The gable vent should be placed high on the gable wall to allow hot air to rise and escape easily.
- Ensure that the vent is positioned near the center of the gable wall for even distribution of airflow.
- Take into account any nearby obstructions such as trees or roof dormers that may hinder the vent’s effectiveness.
Once you have carefully considered these factors, you can begin the process of measuring and marking the vent opening dimensions.
Measuring and marking the vent opening dimensions accurately
Accurate measurements are crucial to ensuring a proper fit for your gable vent. Before you begin, gather the necessary tools:
- A measuring tape to measure the size of the vent opening.
- A pencil or marker to mark the dimensions on the gable wall.
- A level to ensure your markings are straight and even.
Follow these steps to measure and mark the vent opening dimensions:
- Start by measuring the width and height of the vent you are planning to install.
- Using your measuring tape, mark the center of the gable wall using a vertical line. This will serve as a reference point.
- Measure and mark the width of the vent from the center line, ensuring that the markings are symmetrical on both sides.
- Repeat the process to mark the height of the vent, ensuring it is vertically aligned with the center line.
- Using a level, double-check that your markings are straight and level.
- Make any necessary adjustments before proceeding to cut the vent opening.
By taking the time to measure and mark accurately, you can ensure a proper fit and an aesthetically pleasing installation.
Ensuring proper alignment with the existing attic venting system
As you proceed with the installation, it is important to ensure that the gable vent aligns properly with your existing attic venting system. This alignment will facilitate efficient air circulation and prevent any disruptions to the airflow. Keep the following points in mind:
- Avoid placing the gable vent too close to any existing roof vents, as this may impede proper airflow.
- Consider the location of your ridge vents or soffit vents and ensure that the gable vent complements the overall ventilation system.
- Inspect the existing venting system for any signs of damage or blockage and address them before proceeding with the installation.
By aligning the gable vent properly with your existing venting system, you can maximize its effectiveness in maintaining a well-ventilated attic space.
Cutting The Opening
Installing a gable vent is a great way to improve ventilation in your attic and prevent moisture buildup. But before you can install the vent, you need to cut an opening in the gable wall. In this section, we will explore the steps to cut through the gable wall using a reciprocating saw, while taking precautions for safety and maintaining the structural integrity of your home.
Using a reciprocating saw to cut through the gable wall
The reciprocating saw is a versatile and powerful tool that makes cutting through the gable wall a breeze. Here’s how you can use it:
- Start by measuring the dimensions of the vent you will be installing. Use a tape measure to mark the outline of the opening on the gable wall. Double-check the measurements to ensure accuracy.
- Put on your safety goggles and gloves to protect yourself from any debris that may be generated during the cutting process. Safety should always be a top priority when working with power tools.
- Secure the reciprocating saw with a sharp blade appropriate for cutting through the material of your gable wall. Ensure the blade is securely attached and has enough clearance from any obstructions.
- Position the saw at the marked outline and gently squeeze the trigger to start the cutting motion. Let the saw do the work and guide it along the marked line, applying steady pressure.
- As you cut through the gable wall, be mindful of any electrical wiring, plumbing, or structural elements that may be concealed behind the wall. Take extra caution to avoid damaging them.
Taking precautions for safety and structural integrity
While cutting through the gable wall, it’s crucial to take precautions to ensure your safety and maintain the structural integrity of your home. Here are some important steps to follow:
- Before starting any work, turn off the electricity supply to the area where you will be working. This will prevent any accidents caused by accidental contact with live wires.
- Inspect the gable wall for any signs of water damage, rot, or structural issues. If you notice any problems, it’s best to address them before proceeding with the installation.
- Support the gable wall as needed during the cutting process. If there are any load-bearing walls or structures nearby, take additional measures to ensure their stability.
- Dispose of the debris generated during the cutting process in a responsible manner. Collect it in a sturdy bag or container and dispose of it according to your local regulations.
Creating a clean and precise vent opening
When cutting the opening for your gable vent, you want to ensure a clean and precise result. Here are some tips to help you achieve that:
- Take your time and make slow, steady cuts with the reciprocating saw. Rushing may lead to uneven edges or accidental damage to the surrounding area.
- Use a straightedge or level to guide your cuts and maintain a straight line. This will help you achieve a clean opening that fits the vent perfectly.
- Take breaks if needed, especially if you’re working on a larger opening. Fatigue can affect your focus and precision, so it’s important to stay fresh throughout the cutting process.
- After completing the cut, inspect the opening for any rough edges or irregularities. Use sandpaper or a file to smooth out any imperfections and create a professional-looking finish.
By following these steps and taking the necessary precautions, you can successfully cut the opening for your gable vent with ease. Remember to always prioritize safety and consult a professional if you’re unsure about any aspect of the installation process.
Installing The Vent
Proper installation of a gable vent is crucial to ensure optimal airflow and ventilation throughout your home. In this section, we will guide you through the step-by-step process of installing a gable vent. From positioning the vent within the opening to securing it with fasteners or adhesive, we’ll cover everything you need to know to achieve a tight and secure fit.
Positioning the vent properly within the opening
The first step in installing a gable vent is to position it properly within the opening. This ensures that the vent functions effectively and enhances the aesthetic appeal of your home’s exterior. To position the vent correctly, follow these simple steps:
- Clean the gable vent opening: Before positioning the vent, make sure the opening is clean and free from any debris or obstructions. This will ensure a smooth installation process.
- Measure the opening: Use a measuring tape to determine the exact dimensions of the opening. This will help you select a gable vent that fits perfectly within the space.
- Center the vent: Once you have the measurements, position the gable vent in the center of the opening. This will provide a symmetrical appearance and maximize the vent’s effectiveness.
Securing the vent with fasteners or adhesive
Once the vent is properly positioned within the opening, it’s time to secure it in place. There are two common methods for attaching a gable vent: using fasteners or adhesive. Here’s what you need to do:
- Fastener installation: If you choose to use fasteners, such as screws or nails, start by pre-drilling holes in the corners of the vent. Then, align the vent with the opening and insert the fasteners through the holes, securing them tightly against the gable.
- Adhesive installation: Alternatively, you can use adhesive to attach the vent. Apply a generous amount of construction adhesive to the back of the vent, ensuring complete coverage. Press the vent firmly against the gable and hold it in place until the adhesive sets.
Ensuring a tight and secure fit
To ensure the gable vent has a tight and secure fit, follow these additional steps:
- Check for gaps: Once the vent is installed, inspect the edges and corners for any visible gaps. If you spot any, apply a small amount of adhesive or caulk to seal them, preventing any air leaks.
- Test the fit: After securing the vent, give it a gentle tug to ensure it is firmly in place. A properly installed vent should be stable and not move or shift easily.
- Paint or finish: Lastly, consider painting or finishing the gable vent to match your home’s exterior. This will give it a polished, cohesive look while offering additional protection against the elements.
By following these steps, you can install a gable vent with confidence, ensuring proper airflow and ventilation throughout your home. Remember, a well-ventilated home promotes a healthier living environment and helps to prevent issues like excess moisture and stagnant air.
Sealing And Insulating
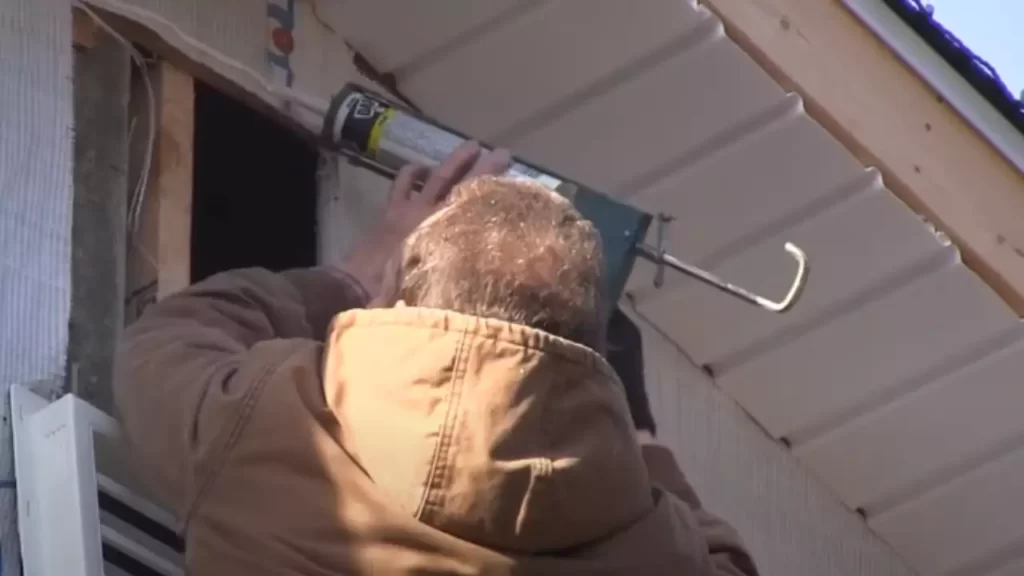
Applying weather-resistant sealant around the edges of the vent
One crucial step in installing a gable vent is to properly seal the edges to prevent any water or air leakage. By applying weather-resistant sealant, you create a barrier that keeps out moisture and ensures a tight seal. This ensures your vent functions optimally without any unwanted drafts or water seepage. Follow these simple steps to apply sealant around the edges of your gable vent:
- Clean the surface: Before applying the sealant, make sure the edges of the vent are clean and free from any dirt, debris, or old sealant remnants. Use a brush or rag to wipe away any loose particles.
- Choose the right sealant: Select a high-quality weather-resistant sealant that is designed for outdoor use and compatible with the material of your gable vent. Consult with your local home improvement store for recommendations.
- Apply the sealant: Using a caulk gun, carefully apply a thin and even layer of sealant around all the edges of the vent. Make sure to cover any gaps or openings where water or air could potentially enter.
- Smooth the sealant: After applying the sealant, use a putty knife or your finger to create a smooth and neat finish. This not only enhances the appearance but also ensures a better seal.
- Allow the sealant to dry: Follow the manufacturer’s instructions regarding drying time. It’s essential to allow the sealant enough time to cure properly before exposing it to any external factors.
Adding insulation to prevent air leakage and increase energy efficiency
In addition to sealing the edges, adding insulation to your gable vent helps prevent air leakage and boosts energy efficiency in your home. Insulation acts as a thermal barrier, reducing the transfer of heat or cold air through the vent. Follow these steps to effectively insulate your gable vent:
- Select the appropriate insulation material: Choose a type of insulation suitable for your gable vent, such as rigid foam board or fiberglass batts. Consider factors such as R-value and moisture resistance when making your selection.
- Measure and cut the insulation: Measure the dimensions of your vent and use a utility knife or a suitable cutting tool to trim the insulation material to fit. Ensure a snug fit without causing any bulges or gaps.
- Place the insulation inside the vent: Place the cut insulation piece into the gable vent, ensuring it covers the entire opening. Press it gently against the interior surface to secure it in place.
- Secure the insulation: If necessary, use adhesive or tape recommended for the insulation material to keep it firmly in position. This prevents it from shifting or falling out over time.
Checking for any gaps or potential leaks and sealing them accordingly
Even after applying sealant and insulation, it’s crucial to perform a thorough inspection to identify any potential gaps or leaks that may compromise the effectiveness of your gable vent. Follow these steps to ensure your vent is properly sealed:
- Visually inspect the vent: Carefully examine the edges, corners, and seams of the gable vent for any visible gaps or areas where the sealant may have not adhered properly.
- Feel for drafts: Run your hand around the perimeter of the vent, feeling for any drafts or air leakage. This can help identify hidden gaps or weak seals.
- Check for water intrusion: During rain or using a hose, observe the vent for any signs of water seeping through. This indicates potential leaks that need to be addressed.
- Seal any gaps or leaks: If you discover any gaps, weak seals, or areas where moisture is entering, apply additional sealant to those specific areas. Ensure a thorough and consistent seal to prevent future issues.
By following these steps and properly sealing and insulating your gable vent, you can enhance its performance, prevent air or water leaks, and increase the energy efficiency of your home.
Testing And Maintenance
Testing and Maintenance are essential steps to ensure the proper functioning of your gable vent installation. Verifying the effectiveness of the gable vent installation allows you to confirm that it is working efficiently in removing excess heat and moisture from your attic. Regular inspection is required to check for any blockages or damage that may hinder its performance. Performing routine maintenance is crucial to keep your gable vent in optimal condition, ensuring continuous ventilation of your attic space.
Verifying the effectiveness of the gable vent installation
Verifying the effectiveness of your gable vent installation is a vital step to ensure that it is providing the desired results. There are a few simple tests you can perform to check its efficiency:
- On a sunny day, step outside and visually inspect the vent from the exterior. Ensure that the vent is open and allowing air to flow freely. If you notice any obstructions, clear them promptly to maintain proper ventilation.
- Use a thermometer to measure the temperature in your attic before and after the vent installation. If the temperature difference is significant, it indicates that the gable vent is effectively expelling hot air.
Regularly inspecting the vent for any blockages or damage
Regular inspection of your gable vent is necessary to identify any blockages or damage that may hinder its performance. Follow these steps to conduct a thorough inspection:
- Examine the exterior of the vent for any signs of debris, such as leaves, twigs, or animal nests. Remove any obstructions to maintain unobstructed airflow.
- Check the vent flap or louvers to ensure they can open and close properly. If they are damaged or stuck, repair or replace them as needed.
- Inspect the screen or mesh covering the vent to ensure it is intact and free from holes or tears. Replace it if necessary to prevent animals or insects from entering your attic.
Performing routine maintenance to ensure optimal ventilation
To ensure your gable vent continues to provide optimal ventilation, regular maintenance is essential. Follow these maintenance tips:
- Clean the vent and surrounding area periodically to remove any dirt or mildew buildup. Use a soft brush or cloth and mild detergent to gently scrub the vent surface.
- Inspect the vent for any signs of wear or damage, such as cracks or loose parts. Repair or replace damaged components to maintain the vent’s functionality.
- Check the vent’s connections and seals to ensure they are tight and secure. Loose connections can compromise the effectiveness of the vent. Tighten any loose screws or fittings as necessary.
- If you live in an area with severe weather conditions, such as strong winds or heavy rain, inspect the vent after each storm. Look for any signs of damage or dislodgment, and address them promptly to prevent further issues.
Troubleshooting Common Issues
Installing a gable vent can provide numerous benefits, such as improved ventilation and enhanced energy efficiency. However, it is not uncommon to face certain issues during the installation process that can affect the performance of your vent. In this section, we will address some common problems that you may encounter and provide solutions to troubleshoot them effectively.
Addressing potential problems such as water infiltration or pest entry
Water infiltration and pest entry are two key concerns when it comes to gable vent installation. If not properly addressed, these issues can lead to problems such as water damage, mold growth, and unwanted pests in your attic. Fortunately, there are measures you can take to prevent and mitigate these problems:
- Seal all gaps and cracks: Before installing your gable vent, thoroughly examine the surrounding area for any gaps or cracks that may allow water or pests to enter. Use a high-quality sealant or weatherstripping tape to seal these openings effectively.
- Install mesh screens: To prevent insects or small animals from entering the vent, consider installing mesh screens behind the vent louvers. These screens will act as barriers, allowing for proper ventilation while keeping pests out.
- Ensure proper drainage: When installing your gable vent, pay attention to the angle at which it is positioned. It should be angled downward slightly to promote proper drainage and prevent water from pooling around the vent.
- Maintain regular inspections: After installation, conduct regular inspections of your gable vent to identify any signs of water infiltration or pest activity. Early detection can help you address issues promptly, minimizing potential damage.
Troubleshooting issues related to improper vent installation
Improper vent installation can significantly impact the performance and effectiveness of your gable vent. In order to troubleshoot issues related to improper installation, consider the following solutions:
- Check the vent alignment: Improperly aligned vents can hinder ventilation and lead to inefficient airflow. Make sure the vent is aligned correctly and parallel to the ground for optimal performance.
- Inspect the vent connections: Ensure that all connections between the vent components are secure and properly fastened. Loose connections can cause rattling noises or even lead to the vent detaching from the wall.
- Verify the vent size: A vent that is too small for the attic space may not provide sufficient airflow, while an oversized vent can create pressure imbalances. Ensure that the chosen vent size is appropriate for your attic dimensions.
- Check for obstructions: Obstructions inside the vent, such as debris or insulation, can impede airflow and reduce ventilation effectiveness. Regularly clean the vent and remove any obstructions to maintain optimal performance.
Seeking professional assistance when necessary
In some cases, gable vent troubleshooting may require professional assistance. If you encounter persistent issues or lack the necessary knowledge or skills to address them, it is advisable to seek help from an experienced technician or contractor. They can inspect your vent system thoroughly, identify the root cause of the problem, and suggest the most appropriate solutions.
Remember, timely troubleshooting and resolution of common issues in gable vent installation will not only ensure the optimal performance of your vent but also help maintain a comfortable and well-ventilated attic space.
Best Practices For Gable Vent Installation
When it comes to installing a gable vent, following the best practices is crucial to ensure proper ventilation and to avoid any issues down the line. This section highlights three important factors that you need to consider for a successful gable vent installation: following manufacturer guidelines and recommendations, adhering to local building codes and regulations, and considering additional factors like climate and roof pitch.
Following Manufacturer Guidelines and Recommendations
Before embarking on your gable vent installation, it is essential to thoroughly read and understand the manufacturer’s guidelines and recommendations. Each gable vent may have specific instructions regarding the mounting process, required tools, and any additional steps that need to be taken. By diligently following these guidelines, you can ensure that your gable vent is installed correctly and functions optimally.
Adhering to Local Building Codes and Regulations
In addition to manufacturer recommendations, it is imperative to adhere to the local building codes and regulations in your area. Building codes vary from location to location, with specific requirements regarding the installation and placement of gable vents. By familiarizing yourself with these regulations, you can avoid any potential violations and ensure that your gable vent meets the necessary standards.
Considering Additional Factors like Climate and Roof Pitch
When installing a gable vent, it is essential to consider additional factors such as climate and roof pitch. These factors can greatly impact the effectiveness of your ventilation system. In regions with extreme weather conditions, it may be necessary to install additional weather-resistant measures, such as weatherstripping or louvers, to prevent the ingress of moisture or debris. Additionally, the pitch of your roof can affect the ventilation requirements, so it’s important to choose a suitable gable vent size and placement to ensure optimal airflow.
Making informed decisions based on these factors can enhance the efficiency and longevity of your gable vent, ensuring that it functions effectively for years to come.
Enhancing Gable Vent Efficiency
When it comes to improving the efficiency of your gable vent, there are a variety of options to consider. Enhancing the performance of your gable vent not only helps keep your home comfortable, but it can also contribute to energy savings. In this section, we will explore some optional features, discuss the use of complementary attic ventilation systems, and recommend upgrades to insulation and sealing.
Exploring Optional Features like Louvers or Insect Screens
Adding optional features to your gable vent can significantly enhance its efficiency. One such feature is the installation of louvers or insect screens. Louvers are angled slats that allow for the passage of air while preventing the entry of rain, snow, or debris. Insect screens, on the other hand, protect your home from unwanted pests without obstructing the airflow.
By installing louvers or insect screens, you can ensure that your gable vent functions optimally throughout the year. These features not only improve the overall efficiency but also help keep your attic and home well-ventilated and protected.
Using Complementary Attic Ventilation Systems for Improved Airflow
In addition to gable vents, incorporating complementary attic ventilation systems can enhance the overall airflow in your attic. One popular option is ridge vents, which are installed along the ridge of the roof, allowing hot air to escape and facilitating better air circulation. Combining ridge vents with gable vents creates a cross-ventilation effect, optimizing the ventilation throughout your attic space.
Furthermore, the installation of soffit vents under the eaves of your roof can provide additional intake ventilation. Soffit vents allow fresh air to enter the attic, complementing the airflow facilitated by gable and ridge vents. This coordinated system helps prevent the buildup of heat and moisture, ultimately improving the efficiency and longevity of your roof and attic.
Upgrading Insulation and Sealing to Maximize Energy Savings
In addition to ventilation, upgrading insulation and sealing is crucial for maximizing energy savings and enhancing the efficiency of your gable vent. Insulation acts as a barrier against heat transfer, helping to keep your home cooler in the summer and warmer in the winter.
Check your attic insulation for any gaps, leaks, or insufficient coverage. Properly insulating these areas will prevent the unwanted movement of air, ensuring that the airflow is directed through the gable vent and other ventilation systems. Additionally, sealing any cracks or gaps in the attic space helps maintain consistent temperatures, reducing the strain on your cooling and heating systems.
In conclusion, by exploring optional features like louvers or insect screens, using complementary attic ventilation systems, and upgrading insulation and sealing, you can enhance the efficiency of your gable vent. These simple yet effective measures contribute to energy savings, improve airflow, and maintain a comfortable living space. Take the necessary steps today to optimize your gable vent and reap the benefits for years to come.
Frequently Asked Questions
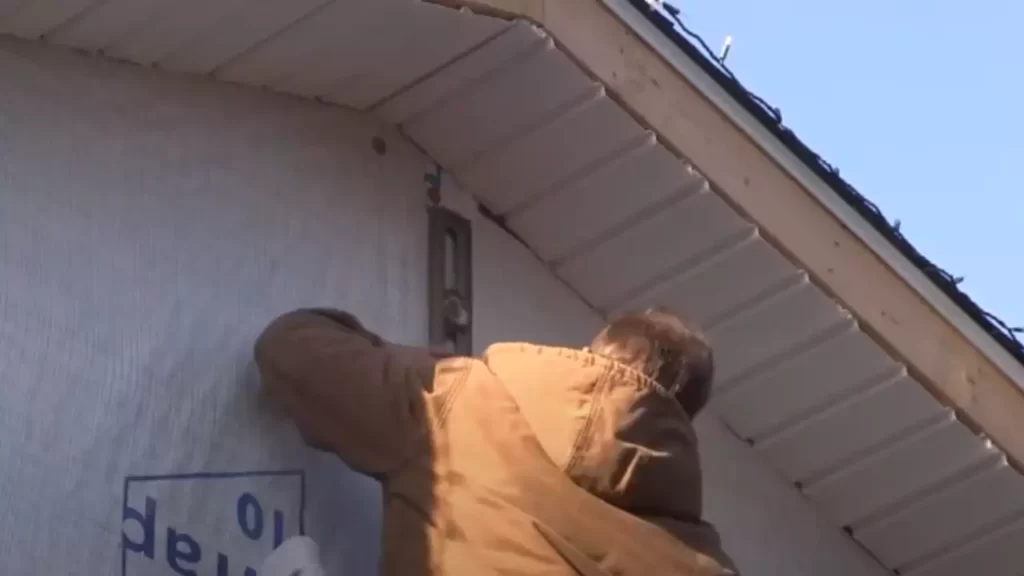
How Do You Install A Gable Vent After Siding?
Installing a gable vent after siding is a straightforward process. First, measure the vent size needed and mark the location on the gable. Use a jigsaw to cut the siding and create an opening. Attach the vent using screws or nails, ensuring it is secure.
Finally, caulk around the edges for a watertight seal.
Are Gable Vents Worth It?
Gable vents are worth it. They help to improve air circulation, reducing moisture and preventing damage to your roof, attic, and home. They also help to regulate temperature and increase energy efficiency. Properly installed gable vents can prolong the lifespan of your roof and save you money in the long run.
Where Should A Gable Vent Be Placed?
A gable vent should be placed near the peak of the gable to allow hot air to escape and improve ventilation in the attic. It should be positioned high enough to avoid obstructions and be at least one square foot in size for every 150 square feet of attic space.
What Is The Best Way To Vent A Gable Roof?
The most effective way to vent a gable roof is by installing gable vents on both ends. These vents facilitate proper air circulation and prevent heat and moisture buildup, promoting a healthier and more energy-efficient environment.
Conclusion
To sum up, installing a gable vent is a straightforward process that can greatly improve the ventilation and overall comfort of your home. By following the steps outlined in this guide, you can successfully install a gable vent and reap the benefits of better air circulation and reduced energy costs.
Remember to measure accurately, choose the right materials, and take the necessary safety precautions. With a little effort and attention to detail, you’ll have a functional and aesthetically pleasing gable vent in no time. Happy venting!