To install a foundation vent, measure and mark the vent location, create an opening in the foundation wall using a saw or hammer, and secure the vent in place using screws or adhesive. Introducing proper ventilation into your foundation is crucial for maintaining a healthy and stable home.
By allowing air to flow freely, foundation vents prevent moisture buildup, reducing the risk of mold and mildew growth. Fortunately, installing a foundation vent is a straightforward process that can be done with a few tools and materials. We will guide you through the steps to install a foundation vent effectively.
So, let’s get started!
Understanding The Importance Of Foundation Vents
Installing foundation vents is an important step to maintain the integrity and stability of your home’s foundation. Foundation vents play a crucial role in preventing moisture buildup and promoting air circulation beneath the building, which can protect your home from potential damage caused by excess moisture and mold growth. In this section, we will delve into why foundation vents are important for your home and the benefits of properly installed foundation vents.
Why Foundation Vents are Important for Your Home
Foundation vents are not just a decorative feature for your home; they serve a vital purpose in maintaining a healthy foundation. Here are a few reasons why foundation vents are important:
- Moisture Control: One of the primary benefits of foundation vents is that they help control moisture levels beneath your home. Moisture can accumulate in the crawl spaces and basements, leading to structural damage, rot, and even mold growth. Foundation vents allow air to circulate, reducing humidity levels and preventing moisture buildup.
- Prevention of Mold and Mildew: Excess moisture and lack of ventilation can create the perfect environment for mold and mildew to thrive. These organisms not only cause unsightly stains but can also compromise indoor air quality, leading to respiratory issues and allergies. Foundation vents help prevent the formation and growth of mold and mildew by allowing fresh air to flow beneath your home.
- Radon Mitigation: Radon gas is a colorless, odorless, and radioactive gas that can seep into your home through the foundation. Prolonged exposure to high levels of radon can increase the risk of lung cancer. Foundation vents can help mitigate radon gas by allowing ventilation and preventing its accumulation.
Benefits of Properly Installed Foundation Vents
Properly installed foundation vents offer several benefits for your home’s foundation and overall indoor environment. Here are some advantages of having well-maintained foundation vents:
- Enhanced Air Circulation: Foundation vents improve the airflow beneath your home, preventing stagnant air pockets and promoting a healthier indoor environment. Fresh air circulation helps prevent the buildup of odors, allergens, and pollutants.
- Lower Energy Costs: By improving ventilation, foundation vents can help regulate the temperature beneath your home. This can reduce the workload on your HVAC system, ultimately leading to lower energy consumption and decreased energy bills.
- Extended Foundation Lifespan: Proper ventilation through foundation vents helps prevent excess moisture-related issues, such as foundation settling, cracking, or erosion. By maintaining optimal humidity levels, you can extend the lifespan of your home’s foundation.
Understanding the importance of foundation vents and their benefits highlights their significance in ensuring the structural stability and longevity of your home. Whether you are constructing a new house or looking to upgrade your existing ventilation system, installing and maintaining foundation vents is a wise investment to protect your property.

Preparing For Foundation Vent Installation
Before diving into the installation process of foundation vents, it is crucial to adequately prepare for the task at hand. This step ensures a smooth and efficient installation, minimizing any potential complications down the line. There are several essential aspects to consider, including determining the number and size of vents needed, selecting the right ventilation system for your foundation, and gathering the necessary tools and materials.
Determining the Number and Size of Vents Needed
When it comes to foundation vent installation, it is important to determine the number and size of vents required for your specific foundation type. The number of vents you need largely depends on the square footage of your foundation, as well as local building codes and requirements. By properly calculating these variables, you can ensure optimal airflow and ventilation throughout your foundation.
Selecting the Right Ventilation System for Your Foundation
Choosing the right ventilation system for your foundation is crucial to promote proper air circulation, prevent moisture buildup, and protect against potential foundation issues. There are various ventilation systems available, each with its own benefits and specifications. Whether you opt for a simple passive system or a more advanced powered system, consider factors such as climate, foundation materials, and personal preferences before making your selection.
Gathering the Tools and Materials Required for Installation
Before starting the installation process, it is essential to gather the necessary tools and materials. Having everything prepared in advance will save you valuable time and make the task more streamlined. The specific tools and materials required may vary depending on the type of ventilation system you are installing. However, some common items you might need include a drill, screws, foundation vent covers, measuring tape, and a level. Take stock of these essentials to ensure a hassle-free installation process.
Step 1: Choosing The Right Location For Foundation Vents
Before you start installing foundation vents, it is crucial to select the right location for optimum effectiveness. Improper placement can lead to restricted airflow and ventilation, reducing the overall benefits of the vents. In this step, we will discuss the factors you need to consider when selecting vent locations and how to ensure proper airflow and ventilation.
Factors to Consider When Selecting Vent Locations
Selecting the ideal location for foundation vents is essential for maintaining a healthy and stable environment in your home. Here are a few factors that you should take into account:
- Moisture Levels: Identify areas in your foundation where moisture tends to accumulate. These locations are typically prone to mold growth, which can cause potential health hazards. By positioning vents in these areas, you can effectively control moisture and prevent mold-related issues.
- Obstructions: Ensure that there are no obstructions such as shrubs, trees, or debris blocking the vents. These obstructions can hinder proper ventilation and restrict the airflow, rendering the vents ineffective.
- Local Building Codes: Familiarize yourself with the local building codes and regulations governing foundation vent installation. Some areas have specific requirements for the number of vents and their placement to ensure adequate ventilation.
- Accessibility: Consider the accessibility of the chosen vent location. Make sure it is easily accessible for regular maintenance and cleaning. Additionally, having vents near utility areas can provide an efficient way to access the foundation for any necessary repairs.
Ensuring Proper Airflow and Ventilation
Proper airflow and ventilation are crucial when it comes to foundation vent installation. Here are a few tips to ensure optimal ventilation:
- Strategic Placement: Position the foundation vents on opposite sides of your home to promote cross-ventilation. This allows for the free flow of fresh air, flushing out excess humidity and preventing stale air buildup.
- Appropriate Vent Size: Use vents that are properly sized for your foundation. A balance between intake (lower) and exhaust (upper) vents ensures a continuous cycle of fresh air movement throughout the crawl space or basement.
- Ventilation Pathways: Clear any obstructions that may hinder the airflow around the vents. Remove any debris, vegetation, or objects that obstruct the vent openings to ensure a clear pathway for air circulation.
- Consider Local Climate: Choose vent locations based on your local climate. In colder regions, vents should be placed higher on the foundation to prevent cold air from entering. In warmer climates, vents should be positioned lower to allow hot air to escape.
By considering these factors and following these tips, you can ensure that your foundation vents are installed in the right locations, allowing for optimal airflow and ventilation throughout your home. In the upcoming steps, we will guide you through the process of preparing for and installing foundation vents, ensuring a successful and efficient installation.

Step 2: Preparing The Foundation For Vent Installation
Once you have determined the ideal location for your foundation vent, it’s time to prepare the area for installation. This step is crucial to ensure the vent functions properly and serves its purpose effectively. In this section, we will discuss two important tasks: clearing debris and obstructions around the foundation and cleaning and repairing foundation walls, if necessary.
Clearing Debris and Obstructions around the Foundation
Before you can install a foundation vent, it’s important to clear away any debris or obstructions that are present around the foundation. This will not only create a clean and neat environment for the vent, but it will also prevent any potential issues in the future.
To clear away debris and obstructions, follow these simple steps:
- Start by inspecting the area around the foundation. Look for any leaves, branches, or other natural debris that may have accumulated.
- Use a broom or rake to remove this debris. Be sure to dispose of it properly.
- Next, check for any man-made obstructions such as trash, old construction materials, or gardening tools. These items can obstruct the ventilation airflow, affecting the overall effectiveness of the vent.
- Remove any such items from the area, storing or disposing of them appropriately. It’s essential to create a clear path for air to flow through the vent.
Cleaning and Repairing Foundation Walls, if Necessary
In addition to clearing debris and obstructions, it’s crucial to ensure that the foundation walls are clean and in good condition before installing the vent. This will promote a strong and secure installation, preventing any potential issues down the line.
Follow these steps to clean and repair the foundation walls, if necessary:
- Inspect the foundation walls for any signs of dirt, mold, mildew, or cracks.
- If you notice any dirt or mold, use a stiff brush and a mixture of mild soap and water to scrub the affected areas. Rinse thoroughly with clean water and allow the walls to dry completely.
- If there are any cracks in the foundation walls, consider filling them with an appropriate sealant or epoxy compound. This will help prevent any water leakage or damage to the walls.
- Allow the sealant or epoxy compound to cure according to the manufacturer’s instructions.
By thoroughly clearing away debris and obstructions and ensuring clean and well-maintained foundation walls, you are setting the foundation for a successful vent installation. This proper preparation will guarantee optimal performance and longevity for your foundation vent.
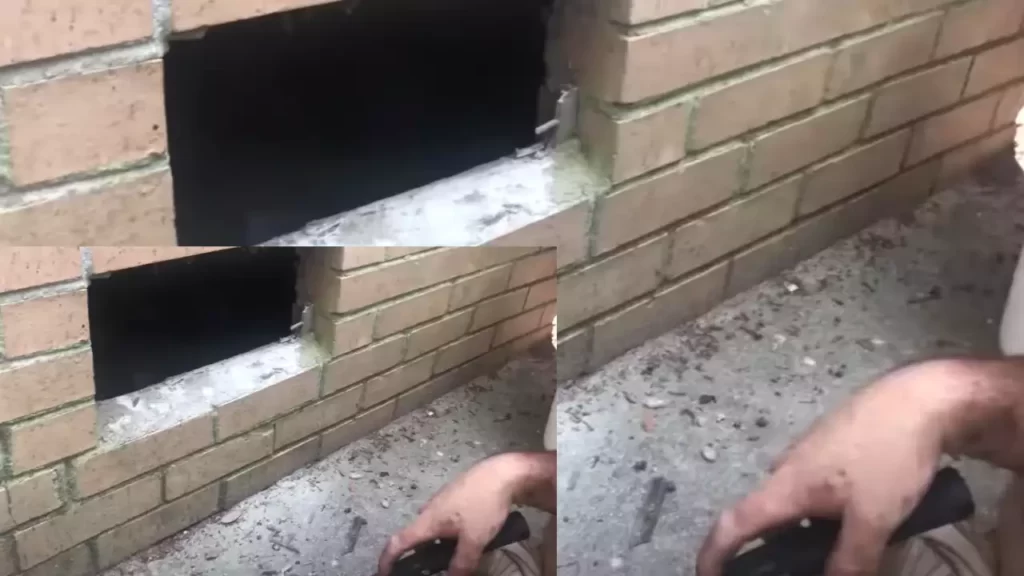
Step 3: Installing The Foundation Vent
Now that you have marked the exact location for the vent hole and drilled it, it’s time to move on to the next step – installing the foundation vent. This is an important step in ensuring proper ventilation for your foundation, so let’s get started!
Marking the Exact Location for the Vent Hole
Before you begin installing the foundation vent, it’s crucial to mark the exact location where the vent hole needs to be. This will ensure that the vent is positioned correctly and functions efficiently. Here’s how to mark the vent hole location:
- Using a measuring tape, measure the dimensions of the vent cover or grill. Take note of the length and width.
- Position the tape measure at the center of where you want the vent hole to be.
- Using a pencil or marker, mark the length and width of the vent cover or grill on the foundation wall. Make sure the marking is clear and easily visible.
- Double-check the measurements and placement of the markings to ensure accuracy.
By following these steps, you can mark the precise location for the vent hole, which will make the installation process much easier.
Drilling the Vent Hole
With the vent hole location marked, it’s time to move on to drilling the hole. Follow these steps to ensure a clean and precise vent hole:
- Put on safety goggles to protect your eyes from debris.
- Using a power drill and the appropriate drill bit, start drilling at one corner of the marked location.
- Apply firm and steady pressure while drilling, making sure to keep the drill straight and perpendicular to the wall.
- Continue drilling until you have reached the maximum depth required for the vent hole.
- Stop drilling and carefully remove any dust or debris from the hole using a brush or vacuum cleaner.
By following these steps, you can successfully drill the vent hole without any difficulties or complications.
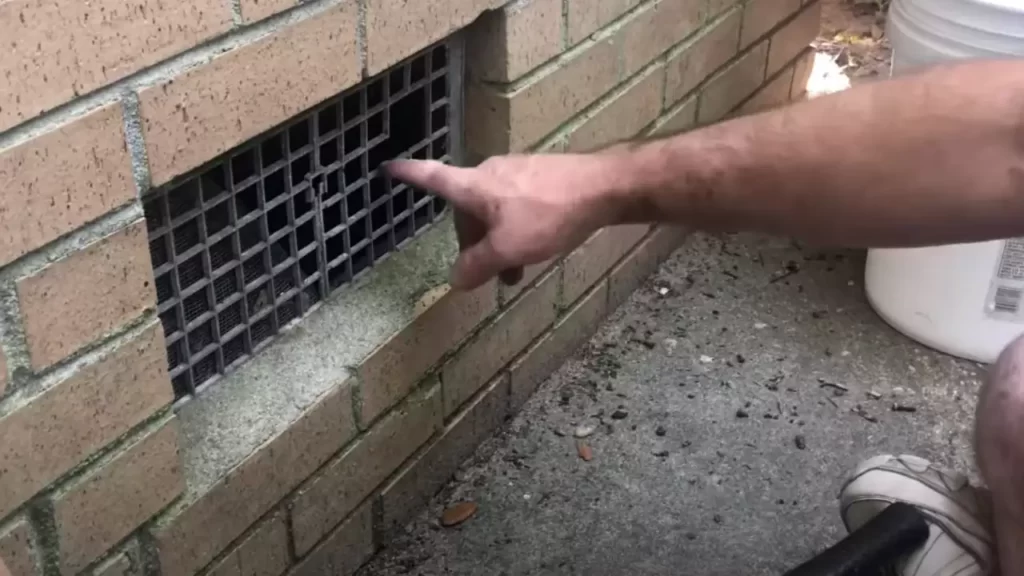
Installing the Vent Cover or Grill
Now that the vent hole has been drilled, it’s time to install the vent cover or grill. This is the final step in completing the installation of the foundation vent. Here’s how to do it:
- Position the vent cover or grill over the vent hole, ensuring that it aligns with the markings made on the foundation wall.
- Secure the vent cover or grill in place using screws or nails, depending on the type of vent you have.
- Double-check that the vent cover or grill is securely fastened and in the correct position.
By following these steps, you can successfully install the foundation vent and ensure proper ventilation for your foundation.
Remember, proper installation of the foundation vent is essential for maintaining the structural integrity of your property. Take the time to carefully follow these steps, and you’ll reap the benefits of a well-ventilated foundation for years to come.
Step 4: Sealing And Insulating The Foundation Vent
Now that you have successfully installed the foundation vent, it is crucial to take the necessary steps to ensure a tight seal and proper insulation. This will not only prevent any unwanted drafts or moisture from entering your crawl space but also maximize energy efficiency in your home. In this step, we will discuss two important aspects: ensuring a tight seal around the vent and adding insulation for maximum efficiency.
Ensuring a Tight Seal around the Vent
To prevent any air leaks or moisture infiltration, it is vital to ensure a tight seal around the foundation vent. A loose or poorly sealed vent can lead to energy loss and potential damage to your crawl space. So, let’s take a look at how you can achieve a secure seal:
- Inspect the vent: Before sealing, examine the foundation vent for any cracks, gaps, or signs of damage. If you notice any issues, address them before proceeding.
- Clean the surrounding area: Clear away any debris, dust, or dirt around the vent. A clean surface will enhance the effectiveness of the sealing process.
- Apply a high-quality sealant: Using a caulking gun, carefully apply a generous amount of silicone or foam sealant around the edges of the foundation vent. This will create a reliable barrier against air and moisture penetration.
- Ensure proper adhesion: Smooth out the sealant with a putty knife or your finger to ensure a uniform seal. This will help eliminate any gaps or inconsistencies.
By following these simple steps, you can ensure a tight seal around your foundation vent, providing added protection and energy efficiency for your crawl space.
Adding Insulation for Maximum Efficiency
In addition to sealing the vent, adding insulation to your foundation vent can further enhance energy efficiency and prevent heat loss. Proper insulation helps maintain a stable temperature inside your crawl space, reducing energy consumption and potential moisture-related issues. Here’s how you can go about it:
- Measure the dimensions: Take accurate measurements of your foundation vent to determine the amount of insulation material required.
- Select the insulation material: Choose insulation specifically designed for foundation vents, such as rigid foam boards or insulation blankets.
- Cut the insulation: Using a utility knife or appropriate cutting tool, carefully cut the insulation material to fit the dimensions of your vent.
- Insert the insulation: Gently place the cut insulation into the opening of the vent, ensuring a snug fit. Make sure not to block the free airflow while providing adequate coverage.
By following these steps, you can add insulation to your foundation vent, significantly improving energy efficiency and maintaining optimal conditions in your crawl space.
Now that you have completed step 4, your foundation vent is properly sealed and insulated, providing reliable protection for your crawl space. Proceed to the final step to ensure a successful installation process.
Step 5: Testing And Maintaining The Foundation Vent System
Once you have successfully installed the foundation vent, it is crucial to test and maintain the ventilation system to ensure it is functioning properly. This step is essential for promoting air circulation and preventing moisture buildup in your foundation. Here are some important actions you can take to test and maintain your foundation vent system:
Checking the Ventilation System for Proper Airflow
After the installation, it is vital to check if your foundation vent system is allowing sufficient airflow into your foundation. This airflow is crucial for preventing musty odors, reducing condensation, and preventing the growth of mold and mildew. To check the ventilation system for proper airflow, follow these steps:
- Inspect the vents: Ensure the vents are free from any obstructions such as leaves, debris, or nests. Clear any blockages that might restrict the airflow.
- Open and close the vents: Test the opening and closing mechanism of the vents to make sure they are functioning correctly. If any vents are stuck or difficult to operate, lubricate the hinges or replace the vent if necessary.
- Feel the airflow: Stand near the vents and feel the airflow. Pay attention to any weak or nonexistent airflow. If you notice any issues, it may indicate a problem with the vent or ductwork that requires further inspection or repairs.
Regular Maintenance Tips to Keep the Vents in Working Condition
To ensure your foundation vents continue to operate efficiently, regular maintenance is essential. Here are some tips to keep your vents in optimal working condition:
- Clean the vents: Regularly clean the vents to remove any dirt, dust, or debris that may accumulate over time. This can be done using a soft brush or vacuum cleaner.
- Inspect for damage: Periodically inspect the vents for any signs of damage, such as cracks or rust. Replace any damaged vents promptly to ensure proper functioning.
- Check the screens: If your vents have screens, inspect them for tears or blockages. Ensure the screens are intact and clear of any debris that could impede airflow.
- Monitor moisture levels: Keep an eye on the moisture levels in your foundation. Excessive moisture can lead to various problems, including mold growth. Use a moisture meter to regularly check the moisture levels and take appropriate action if high levels are detected.
By following these testing and maintenance tips, you can ensure that your foundation vent system functions optimally, providing adequate ventilation and preventing moisture-related issues. Remember that regular inspections and maintenance are key to extending the lifespan of your vents and promoting a healthy foundation.
Frequently Asked Questions
How Do Foundation Vents Work?
Foundation vents work by allowing air to flow into the crawl space under the foundation, preventing moisture and condensation buildup. Proper airflow helps to regulate temperature and prevent mold or rot issues.
Why Should I Install A Foundation Vent?
Installing foundation vents is important to maintain the structural integrity of your home. They help to prevent moisture buildup, which can cause damage to the foundation, promote mold growth, and attract pests.
When Should I Install Foundation Vents?
Foundation vents should be installed during the construction phase or as a part of the foundation repair process. It is also a good idea to install them if you notice high humidity levels or dampness in your crawl space.
How Many Foundation Vents Do I Need?
The number of foundation vents you need depends on the size and layout of your crawl space. As a general rule, it is recommended to have one vent for every 150 square feet of crawl space. However, it is best to consult with a professional to determine the specific requirements for your home.
Conclusion
Installing a foundation vent is a crucial step in maintaining the health and stability of your home’s foundation. By following the steps outlined in this blog post, you can ensure proper ventilation, which helps to prevent moisture buildup and the potential for mold and mildew growth.
Taking the time to install a foundation vent can save you from costly repairs down the line and provide you with peace of mind for years to come. So, don’t wait any longer, get started on your foundation vent installation today!