Install a duct booster fan by locating the desired area and attaching the fan using screws. If you want to improve the airflow in your HVAC system, installing a duct booster fan can be an effective solution.
These fans work by increasing the velocity of air moving through your ductwork, which helps to improve overall airflow. In this guide, we will walk you through the steps to install a duct booster fan in your home. By following these instructions, you can have your fan up and running in no time.
To begin, you will need to locate the area in your ductwork where you want to install the booster fan. This is typically an area where you are experiencing low airflow or poor ventilation. Once you have identified the spot, use screws to secure the fan in place. Make sure to screw it tightly so that it remains stable during operation. After installing the fan, make sure to test it to ensure that it is functioning properly.
Understanding The Need For A Duct Booster Fan
Poor airflow in duct systems can have a significant impact on the overall performance of your heating, ventilation, and air conditioning (HVAC) system. When areas of your home or office receive inadequate airflow, it not only affects the comfort levels but also leads to reduced energy efficiency. This is where a duct booster fan plays a crucial role.
Common Issues Faced due to Poor Airflow in Duct Systems
Poor airflow in duct systems can give rise to a range of common issues that affect the overall functionality of your HVAC system. These issues include:
- Uneven cooling or heating: Improper airflow can result in certain areas of your living or workspace being warmer or cooler than others. This inconsistency can lead to discomfort and an inefficient use of energy.
- Increased energy consumption: When airflow is restricted or obstructed in the ductwork, the HVAC system has to work harder to maintain the desired temperature. As a result, your energy consumption increases, leading to higher utility bills.
- Poor air quality: Inadequate airflow can prevent the proper distribution of fresh air and, as a result, diminish indoor air quality. This can have negative impacts on your health, causing respiratory issues or allergies.
Signs That Indicate the Need for a Booster Fan
If you notice any of the following signs, it may be an indication that your duct system requires a booster fan to improve airflow:
- Rooms that are consistently hotter or colder than others.
- Weak or minimum airflow from vents.
- Incomplete airflow reaching all areas of your living or workspace.
- Noise coming from the HVAC system due to increased strain.
- Frequent equipment breakdowns or malfunctions.
Benefits of Installing a Duct Booster Fan
Considering the importance of maintaining proper airflow in your HVAC system, installing a duct booster fan offers several benefits:
| 1. Enhanced comfort: | By improving airflow, a duct booster fan helps distribute conditioned air evenly throughout your home or office, ensuring consistent and comfortable temperature levels in every room. |
| 2. Energy efficiency: | A duct booster fan can help optimize your HVAC system by reducing strain. This not only lowers energy consumption but also extends the lifespan of your equipment, saving you money in the long run. |
| 3. Improved indoor air quality: | Proper airflow facilitated by a booster fan helps circulate fresh air more effectively, reducing the presence of pollutants, allergens, and mold. This leads to improved indoor air quality and a healthier living or working environment. |
Overall, the installation of a duct booster fan can greatly enhance the performance and efficiency of your HVAC system, ensuring a more comfortable and healthier living or working environment.
Tools And Materials Required
Installing a duct booster fan is a great way to improve the airflow and temperature regulation in your home. Whether you want to enhance the performance of your HVAC system or balance the temperature in different rooms, a duct booster fan can help. Before you get started with the installation process, it’s important to gather all the necessary tools and materials. This will ensure a smooth and successful installation. In this guide, we’ll go over the tools and materials required for installing a duct booster fan.
List of tools needed for installation
When it comes to installing a duct booster fan, you’ll need a specific set of tools to get the job done efficiently. Here is a list of the essential tools you will need:
- Power drill
- Tape measure
- Stud finder
- Hacksaw
- Screwdriver set
- Pliers
- Wire strippers
- Electrical tester
- Allen wrench set
- Adjustable wrench
These tools will help you with various tasks during the installation process. It’s important to have them ready before you start working on your duct booster fan installation to avoid any delays or interruptions.
Necessary materials for a successful installation
In addition to the tools, you will also need a few materials to ensure a successful duct booster fan installation. Here is a list of the necessary materials:
- Duct booster fan unit
- Mounting brackets
- Screws and anchors
- Duct tape
- Electrical wire
- Wire nuts
- Wire connectors
- Electrical box
- Electrical cable
- Duct clamps
These materials are essential for properly installing and connecting the duct booster fan in your home. Make sure to obtain these materials beforehand to avoid any last-minute trips to the hardware store.
In conclusion, gathering the necessary tools and materials before installing a duct booster fan is crucial for a successful installation. Having everything prepared and within reach will save you time and ensure a smooth process. Now that you have a list of the required tools and materials, you are ready to move on to the next step in the installation process.
Assessing Your Duct System
Identifying the Problem Areas in Your Duct System
Before installing a duct booster fan, it’s crucial to assess your duct system to identify any problem areas. These problem areas can include inadequate airflow, uneven temperature distribution, or weak ventilation. By understanding these issues, you can effectively determine the appropriate solution for your home’s airflow needs.
Here are a few key steps to help you identify the problem areas:
- Inspect the Ducts: Begin by visually inspecting your ductwork for any signs of leaks, gaps, or blockages. Look for loose connections, damaged insulation, or debris that may be obstructing the airflow.
- Check Airflow: Turn on your HVAC system and observe the airflow in each room. Feel for any weak or inconsistent airflow and take note of the rooms that seem to have the most significant air distribution problems.
- Use a Smoke Test: If you suspect a specific area has poor airflow, you can use a smoke test to confirm. Light a thin incense stick or a smoke pencil and hold it near the vents. Observe the smoke pattern to identify any spots where the air is not flowing efficiently.
- Consult a Professional: If you’re uncertain about the condition of your ductwork or need expert advice, it’s wise to consult a professional HVAC technician. They can conduct a thorough inspection and provide recommendations tailored to your specific needs.
Determining the Appropriate Location for the Booster Fan
Once you’ve identified the problem areas in your duct system, the next step is to determine the appropriate location for the booster fan. This is essential to ensure optimal airflow throughout your home or specific rooms. Consider the following factors when selecting the ideal spot:
- Proximity to Problematic Areas: Install the booster fan near the rooms that experience weak airflow or temperature imbalances. This will help maximize the effectiveness of the fan in addressing those specific issues.
- Accessible Locations: Choose a location that allows for easy installation, inspection, and maintenance of the booster fan. Avoid areas with obstructions or limited space.
Calculating the Required CFM (Cubic Feet per Minute) for Your Specific Needs
Calculating the required CFM (Cubic Feet per Minute) for your specific needs is crucial to ensure the duct booster fan is capable of providing adequate airflow. Here’s a simple formula to help you calculate the required CFM:
Required CFM = Room Volume (cubic feet) x Air Changes per Hour / 60
To use this formula, determine the volume of the room where you plan to install the booster fan. Measure the length, width, and height in feet and multiply these measurements to obtain the room volume in cubic feet. Then, determine the recommended number of air changes per hour for the room. This will depend on factors such as room size, occupancy, and specific ventilation requirements.
By following these steps and assessing your duct system thoroughly, you’ll be able to install the duct booster fan effectively, ensuring improved airflow, temperature regulation, and overall comfort in your home.
Selecting The Right Duct Booster Fan
When it comes to improving the airflow in your home, installing a duct booster fan can be a game-changer. These fans are specifically designed to increase the efficiency of your HVAC system by enhancing the flow of air through your ductwork. However, with so many options available in the market, selecting the right duct booster fan can feel overwhelming. To help you make an informed decision, consider the factors below, understand the different types and models available, and find the perfect fit for your specific requirements.
Factors to consider when choosing a duct booster fan
Before diving into the different types and models available, it’s essential to understand the key factors to consider when selecting a duct booster fan. These factors will help you determine which fan is best suited for your needs:
- CFM capacity: The cubic feet per minute (CFM) capacity of a duct booster fan indicates the volume of air it can move within a given time. Ensure that the fan you choose can handle the airflow requirements of your ductwork to ensure maximum efficiency.
- Noise level: Consider the noise level of the fan, especially if you plan to install it in a living area or bedroom. Look for models with noise-reducing features to ensure a peaceful environment.
- Power consumption: Energy efficiency is crucial to avoid skyrocketing utility bills. Choose a fan that consumes minimal power without compromising its performance.
- Installation requirements: Different duct booster fans have varying installation requirements. Some may require professional installation, while others can be easily installed as a DIY project. Consider your skill level and tools available before making a decision.
- Duct size compatibility: Ensure that the fan you select is compatible with the size of your ductwork. Refer to your HVAC system’s specifications or consult with a professional to determine the appropriate size.
Understanding different types and models available in the market
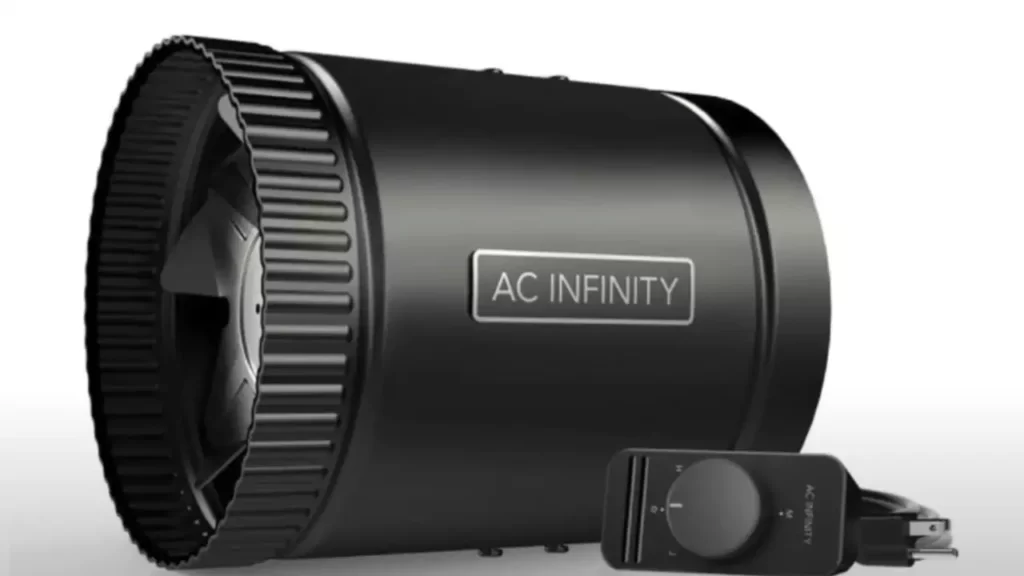
Now that you are aware of the key factors, let’s explore the different types and models of duct booster fans available in the market. Understanding these options will enable you to make a more informed choice:
| Type | Description |
|---|---|
| In-line duct booster fan | Mounted inside the ductwork and optimized for both residential and commercial applications. |
| Register booster fan | Designed to sit directly on the floor or mount onto a vent register to provide localized airflow improvement. |
| In-duct axial fan | Compact fans installed inline, especially suitable for long duct runs or areas with limited space. |
| Centrifugal duct booster fan | Ideal for overcoming high static pressure in duct systems, providing greater air pressure and velocity. |
Finding the perfect fit for your specific requirements
With a comprehensive understanding of the factors to consider and the various types of duct booster fans available, you can now find the perfect fit for your specific requirements. To ensure you make the right choice:
- Assess the specific airflow needs of your home, identifying any problem areas that require additional ventilation.
- Determine the installation feasibility and any specific features you require, such as adjustable speed settings or humidity sensors.
- Research customer reviews and ratings to gain insight into the performance and reliability of different models.
- Consider seeking professional advice from HVAC specialists who can provide tailored recommendations based on your unique circumstances.
By carefully evaluating each of these factors, understanding the available types and models, and considering your specific requirements, you’ll be well on your way to selecting the right duct booster fan to improve your home’s airflow and comfort.
Preparing For Installation
Before you start installing a duct booster fan, it is crucial to take some preparatory steps to ensure a smooth and successful installation process. This section will guide you through the necessary safety measures, the tools and materials you will need, as well as cleaning and clearing the designated installation area. By following these steps, you can ensure that your duct booster fan will be installed properly.
Ensuring safety measures are in place
When it comes to any installation process, safety should always be the top priority. Before you get started, make sure you have taken the necessary safety measures to protect yourself and others. Here are a few important things to consider:
- Turn off the power: Before you begin any electrical work, make sure to turn off the power to the area where you will be installing the duct booster fan. This will help prevent any accidents or electric shocks.
- Wear protective gear: It is essential to wear appropriate protective gear, such as safety goggles and gloves, to minimize the risk of injuries.
- Secure your workspace: Clear the installation area of any potential hazards, such as clutter or sharp objects. This will provide you with a safe and organized workspace.
Gathering all necessary tools and materials
Before you begin the installation process, it is essential to ensure that you have all the tools and materials needed to complete the job. Gathering everything beforehand will save you time and frustration. Here is a list of the common tools and materials you will need:
| Tools | Materials |
|---|---|
| Screwdriver | Duct booster fan |
| Wire stripper | Duct tape |
| Wire connectors | Mounting brackets |
| Electrical tape | Screws |
| Drill | Electrical wire |
| Measuring tape |
Cleaning and clearing the designated installation area
Before installing the duct booster fan, it is important to clean and clear the designated installation area. This will help ensure optimal performance and prevent any obstructions or debris from interfering with the fan’s operation. Follow these steps to prepare the area:
- Clean the ductwork: Remove any dust, debris, or blockages from the ductwork where the booster fan will be installed. This will allow for better airflow and improved efficiency.
- Clear surrounding objects: Remove any objects or furniture near the installation area to provide enough space for maneuvering and ensure unobstructed access to the ductwork.
- Double-check measurements: Take accurate measurements of the installation area to ensure that the duct booster fan will fit properly. This will help prevent any installation issues or the need for adjustments later on.
By following these steps and ensuring safety measures, gathering all necessary tools and materials, and cleaning and clearing the designated installation area, you are now prepared to install your duct booster fan successfully.
Step 1: Turning Off Power And Accessing The Duct System
Step 1: Turning Off Power and Accessing the Duct System
Before beginning the installation process of a duct booster fan, it is crucial to turn off the power to your HVAC system. This step ensures your safety and prevents any accidents that may occur during the installation process. Here’s how you can do it:
Shutting off power to the HVAC system
1. Locate and make sure you have easy access to your HVAC system’s main power switch.
2. Flip the switch into the “Off” position. You should hear a click, and the power should be shut off.
Locating the main supply duct and access point for installation
Once you have safely turned off the power, the next step is to locate the main supply duct and find the access point where you will be installing the duct booster fan. Here’s how you can do it:
- First, identify the HVAC system’s main supply duct. This is the large duct that distributes conditioned air throughout your home.
- If you’re unsure about the location of the main supply duct, refer to your HVAC system’s manual or contact a professional for guidance.
- Once you’ve located the main supply duct, visually inspect it for any access panels or openings. These can usually be found near the furnace or air handler unit.
- If you’re unable to find an access point or if there isn’t one available, you may need to create one. Consult a professional to ensure this is done correctly.
By shutting off the power to your HVAC system and locating the main supply duct and access point, you’re now ready to move on to the next step of installing the duct booster fan. Stay tuned for Step 2: Checking the Ductwork and Planning the Installation!
Step 2: Installing The Duct Booster Fan
Now that you have gathered all the necessary tools and materials required for installing a duct booster fan, it’s time to move on to the next step: installing the fan itself. In this step, you will learn how to attach the booster fan to the designated location, secure it in place using appropriate mounting hardware, and ensure proper alignment and clearance for optimal airflow. Follow the instructions below to successfully install your duct booster fan.
Attaching the booster fan to the designated location
The first step in installing your duct booster fan is to identify the designated location where the fan needs to be installed. This location should be in an area of your ductwork where airflow is limited or requires a boost. Once you have determined the location, use the following steps to attach the booster fan:
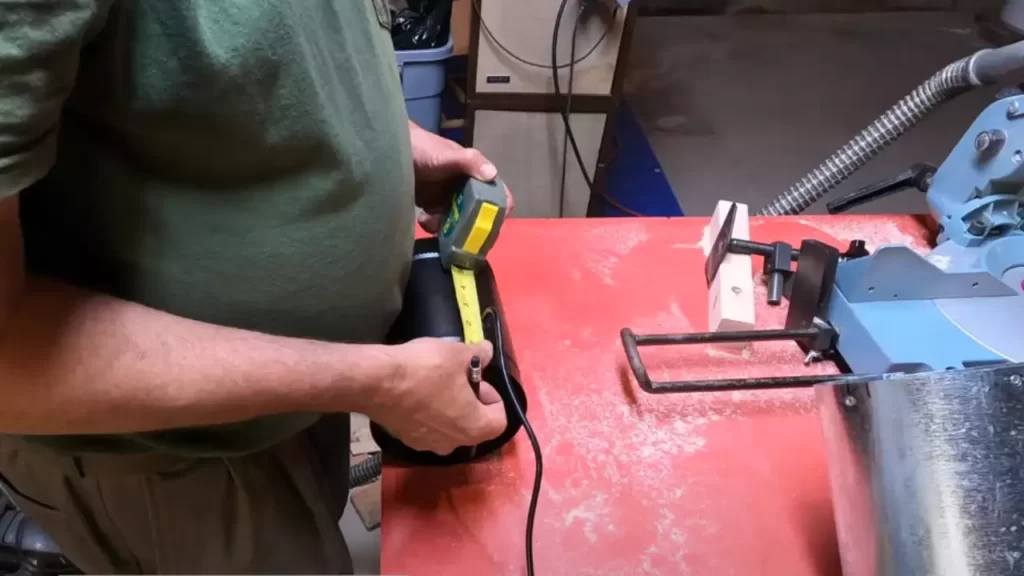
- Measure the dimensions of your booster fan, and mark the installation area on the ductwork using a pencil.
- Use a duct saw or appropriate cutting tool to create a hole in the ductwork that matches the dimensions of the booster fan. Be careful not to damage any internal components of the ductwork.
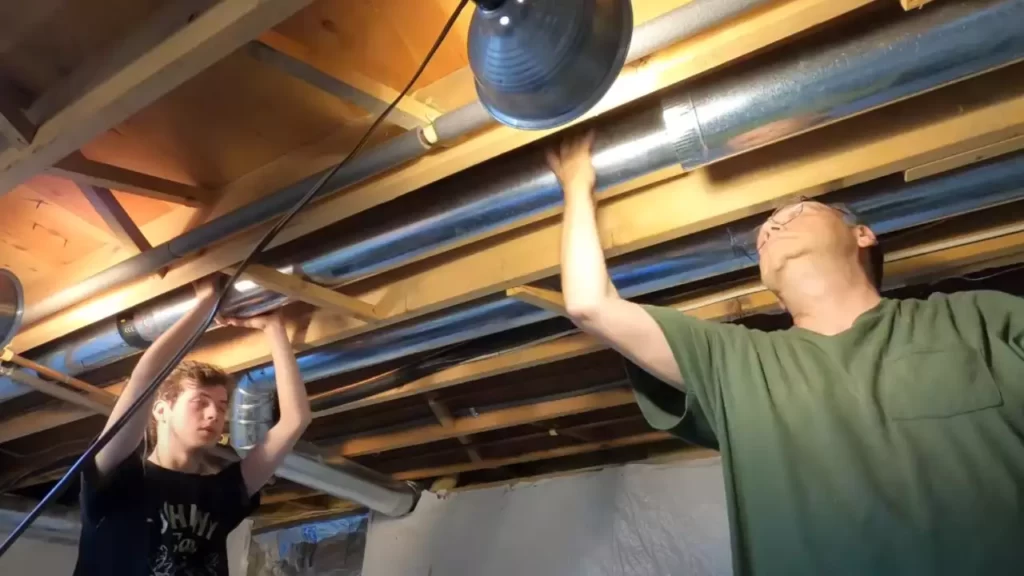
- Place the booster fan over the hole, ensuring it fits snugly. Align the screws and mounting holes on the fan with the corresponding holes on the ductwork.
- Secure the fan in place by inserting screws through the mounting holes on the fan and into the holes on the ductwork. Make sure the fan is securely attached and does not wobble.
Securing the fan in place using appropriate mounting hardware
Once you have attached the booster fan to the designated location, it’s important to secure it in place using the appropriate mounting hardware. Follow these steps to ensure the fan remains fixed:
- Check the manufacturer’s instructions for specific mounting hardware recommendations.
- Use the recommended screws, bolts, or brackets to firmly secure the fan to the ductwork.
- Tighten all screws or bolts until the fan is securely fastened. Avoid over-tightening, as this may damage the fan or ductwork.
- Double-check the stability of the fan by gently shaking it. If it moves or feels loose, tighten the mounting hardware further.
Ensuring proper alignment and clearance for optimal airflow
Proper alignment and clearance are crucial for ensuring optimal airflow through the ductwork. Follow these steps to guarantee the best performance from your duct booster fan:
- Inspect the alignment of the fan with the ductwork to ensure it is straight and level. Use a level tool if needed.
- Ensure there is sufficient clearance around the fan to allow unobstructed airflow. Remove any nearby debris, insulation, or other obstructions that may hinder the fan’s operation.
- If necessary, adjust the position of the fan or make modifications to the ductwork to achieve proper alignment and clearance.
- Once you have ensured proper alignment and clearance, turn on your HVAC system and test the performance of the duct booster fan.
By following these steps, you can successfully install a duct booster fan in your home or commercial space. Now that you have completed the installation process, it’s time to move on to the next step: Step 3 – Testing and troubleshooting the duct booster fan.
Step 3: Connecting The Wiring
To ensure proper functionality, it is important to correctly connect the wiring for your duct booster fan. This step-by-step guide will help you understand the electrical requirements for the fan and connect the wiring according to the manufacturer’s instructions.
Understanding the electrical requirements for the booster fan
Before you start connecting the wiring, it is essential to have a clear understanding of the electrical requirements for your duct booster fan. This will help you ensure that the fan operates safely and efficiently. Here are some key points to keep in mind:
- Power source: Identify the power source that will be used to supply electricity to the booster fan. Check the manufacturer’s instructions or the product label for the recommended voltage and amperage.
- Circuit breaker: Make sure the circuit breaker or fuse for the fan’s power supply is turned off before you begin working on the wiring.
- Grounding: For safety reasons, it is crucial to properly ground the booster fan. Consult the manufacturer’s instructions for specific grounding requirements.
- Wire size and type: Determine the appropriate wire size and type required for the installation. Refer to local electrical codes and guidelines or seek professional assistance if needed.
Connecting the wiring according to the manufacturer’s instructions
Now that you understand the electrical requirements, you can proceed with connecting the wiring for your duct booster fan. Follow these steps:
- Prepare the wires: Strip off the insulation at the ends of the wires, exposing about half an inch of bare copper.
- Identify the fan wires: Usually, the fan will have two wires – one black (hot) and one white (neutral). Refer to the manufacturer’s instructions to verify the wire colors.
- Connect the wires: Connect the black wire from the fan to the black wire from the power supply, and the white wire from the fan to the white wire from the power supply.
- Secure the connections: Use wire nuts or other suitable connectors to securely join the wires. Ensure there are no exposed wires or loose connections.
- Tighten any terminal screws: If your booster fan has terminal screws, tighten them to secure the connections. Be careful not to over-tighten and damage the wires.
Testing the fan to ensure proper functionality
Once the wiring is properly connected, it is crucial to test the duct booster fan to ensure it is functioning as expected. Follow these steps:
- Turn on the power: Turn on the circuit breaker or fuse for the fan’s power supply.
- Switch on the fan: Use the fan control switch or any other method specified by the manufacturer to turn on the booster fan.
- Observe the fan’s operation: Watch and listen for the fan spinning and running smoothly. Ensure there are no unusual noises or vibrations.
- Verify airflow: Feel the airflow through the ducts to confirm that the booster fan is effectively increasing the airflow as intended.
- Check for any issues: If you notice any problems or suspect a wiring issue, immediately turn off the power and double-check the connections before proceeding.
By following these steps and ensuring that the wiring is correctly connected, you can successfully install and test your duct booster fan. Remember to always prioritize safety and consult professional help if you are unsure or uncomfortable working with electrical wiring.
Step 4: Testing And Fine-Tuning The Booster Fan
Powering on the HVAC system and testing the booster fan’s operation
Once you have successfully installed the duct booster fan in your HVAC system, it’s time to power on the system and test the fan’s operation. This step is crucial to ensure that the fan is functioning correctly and effectively enhancing the airflow in your ducts.
To begin, locate the main power switch of your HVAC system and flip it on. This will energize the entire system, including the booster fan. Take a moment to listen carefully and feel the air coming out of the ducts to determine if the fan is running smoothly.
Listen for any unusual noises or vibrations that may indicate a problem with the fan’s operation. If you notice anything out of the ordinary, it’s best to turn off the power and check for any installation errors or mechanical issues.
Once you have confirmed that the booster fan is running smoothly, proceed to the next step to fine-tune its settings if necessary.
Adjusting the fan speed or settings if necessary
While the booster fan may start running optimally right after installation, it’s important to remember that every HVAC system is unique. Some systems may require adjustments to the fan speed or settings to achieve maximum airflow enhancement.
To make these adjustments, refer to the manufacturer’s instructions that came with your booster fan. They will provide specific guidance on how to access and modify the fan’s speed or settings.
Using the provided instructions, carefully adjust the fan’s speed incrementally, observing the impact on the airflow throughout your duct system. It’s recommended to start with a conservative setting and gradually increase the fan speed if necessary, ensuring you monitor the system’s performance throughout the process.
Take note of any changes in airflow and the overall functioning of your HVAC system after each adjustment. This will help you find the optimal fan speed that provides the desired airflow enhancement without putting excessive strain on the system.
Continue making adjustments until you are satisfied with the performance and airflow optimization of your duct booster fan.
Monitoring and optimizing the airflow in your duct system
Once you have installed and fine-tuned your duct booster fan, it’s important to continuously monitor and optimize the airflow in your duct system. This will ensure that each area of your home receives the appropriate amount of conditioned air, maximizing both comfort and energy efficiency.
Here are a few tips to help you monitor and optimize the airflow:
- Regularly check the airflow coming out of each register in your home. Ensure that there are no significant variations in airflow levels. If you notice any inconsistencies, consider adjusting the fan speed or settings accordingly.
- Observe the temperature distribution in different rooms. Ideally, there should not be drastic variations in temperature between different areas of your home. If you notice significant differences, it may indicate an airflow imbalance that can be addressed by adjusting the booster fan settings.
- Perform routine maintenance on your HVAC system, including cleaning or replacing air filters. This will help maintain optimal airflow and prevent any obstructions that could hinder the performance of your duct booster fan.
By monitoring and optimizing the airflow in your duct system, you can ensure that your duct booster fan continues to enhance the performance of your HVAC system and provide consistent comfort throughout your home.
Maintenance And Troubleshooting Tips
Maintenance and troubleshooting are crucial aspects of owning a duct booster fan. Regularly maintaining and identifying common issues with your booster fan can help ensure its optimal performance and longevity. In this section, we will look at some essential maintenance practices, troubleshooting tips, and when it might be necessary to seek professional help for more complex problems.
Regular maintenance practices to keep the booster fan in top condition
To maintain your duct booster fan in top condition, it is necessary to follow regular maintenance practices. Here are some key steps you can take:
- Regularly clean the fan blades and surrounding areas to remove dust and debris that can hinder airflow.
- Check and replace air filters as needed, ensuring proper airflow and preventing dust buildup.
- Inspect the wiring connections and tighten any loose connections to ensure proper electrical flow.
- Keep the surrounding area clean and free from obstructions to maintain optimum performance.
Troubleshooting common issues with the booster fan
Even with regular maintenance, you may encounter some common issues with your booster fan. Here are a few troubleshooting tips to help you resolve them:
- If the fan is not working at all, check the power source, circuit breaker, or fuse to ensure they are functioning correctly.
- If the fan is running but not producing enough airflow, check for obstructions in the ductwork or a dirty air filter that needs to be replaced.
- If you notice excessive noise coming from the fan, inspect the blades for damage or debris, and make sure they are properly aligned.
- In case of inconsistent or fluctuating airflow, check for leaky ducts, loose connections, or a malfunctioning motor.
- If the fan turns on and off at irregular intervals, it could be due to a faulty temperature control switch that needs to be replaced.
When to seek professional help for more complex problems
While regular maintenance and troubleshooting can address many issues, some problems with your duct booster fan may require professional assistance. Consider seeking help when encountering the following situations:
- If you are unsure about the proper maintenance procedures or troubleshooting techniques for your specific booster fan model.
- If you have identified a problem but lack the necessary tools or expertise to fix it safely.
- When facing complex wiring or electrical issues beyond your expertise.
- If the booster fan continues to exhibit the same problem despite attempted troubleshooting.
- In case of major damage, motor failure, or other technical issues that require specialized attention.
Frequently Asked Questions
Where Do You Install A Duct Booster Fan?
Install a duct booster fan in the section of the ventilation system where airflow is weak. Seek professional advice for optimal placement. Boosters can enhance airflow to problem areas, such as rooms far from the HVAC unit or with complex duct layouts.
Improved air circulation ensures better comfort.
Are Air Duct Booster Fans Worth It?
Yes, air duct booster fans can be worth it. They help improve airflow and regulate temperature in rooms that have weak airflow or are farther from the HVAC unit. By increasing airflow, booster fans can enhance comfort and energy efficiency.
However, you should consult a professional to ensure proper installation and avoid potential drawbacks.
How Much Does It Cost To Install A Duct Booster Fan?
The cost of installing a duct booster fan varies depending on factors such as the brand, size, and complexity of the installation. On average, you can expect to pay between $150 to $400 for the fan itself, plus additional costs for installation by a professional HVAC technician.
Do Inline Duct Booster Fans Work?
Yes, inline duct booster fans do work. They boost the airflow in your duct system to improve ventilation and increase air circulation in specific areas of your home or building. These fans are effective in improving the overall efficiency of your HVAC system.
Conclusion
Installing a duct booster fan is a simple and effective way to improve airflow in your home. By following the step-by-step guide in this blog post, you can easily enhance the efficiency of your HVAC system and achieve optimal air circulation.
Remember to choose the right size and location for your fan, and follow safety precautions during the installation process. With a duct booster fan, you can experience better airflow and a more comfortable living environment. Improve your home’s ventilation today!