To install a dryer vent hose, first, locate a suitable exit point on the exterior of your home. Next, connect the vent hood to the hose using duct tape or a clamp.
Place the other end of the hose over the dryer’s exhaust vent. Ensure a secure connection by tightening with a clamp. Finally, attach the vent hood to the exterior wall, ensuring it is securely fastened. A properly installed dryer vent hose will allow hot, moist air to escape from the dryer, preventing mold and mildew buildup while reducing the risk of fire hazards.
This step-by-step guide will help you install a dryer vent hose efficiently, ensuring efficient operation and safety.
Understanding The Importance Of Proper Dryer Vent Hose Installation
When it comes to installing a dryer vent hose, many people may not realize the importance of doing it correctly. Proper installation of the vent hose is crucial for maintaining the efficiency of your dryer as well as reducing the risk of fire hazards. In this blog post, we will discuss the significance of proper dryer vent hose installation and how it can ensure efficient airflow and minimize dangerous fire situations.
Ensuring Efficient Airflow for Your Dryer
One of the primary reasons why proper dryer vent hose installation is essential is to ensure efficient airflow. Proper airflow allows your dryer to function optimally, resulting in improved drying performance and reduced energy consumption. When the vent hose is improperly installed or obstructed, it can lead to restricted airflow, causing your dryer to take longer to dry clothes and potentially increasing your energy bills.
Reducing the Risk of Fire Hazards
A poorly installed dryer vent hose can pose significant fire hazards. Lint buildup, which is a common problem when the vent hose is not installed correctly, can become highly flammable. Without proper airflow, lint accumulates inside the hose and the dryer duct, creating a potential fire risk. This is particularly dangerous, as lint fires can spread rapidly and have devastating consequences for your home and family.
By ensuring proper dryer vent hose installation, you can minimize the risk of lint buildup and reduce the chances of a fire breakout. Proper installation allows for efficient airflow, which helps in preventing lint accumulation and removing any potential fire hazards. Investing time and effort into correctly installing your dryer vent hose can provide you with peace of mind and safeguard your home and loved ones from dangerous fire situations.
Choosing The Right Dryer Vent Hose
Installing a dryer vent hose is an essential step in ensuring proper ventilation for your dryer and preventing potential hazards in your home. One crucial aspect of this process is choosing the right dryer vent hose that suits your specific requirements. By assessing your specific dryer and venting needs, exploring different types of dryer vent hoses, and considering the material and size for optimal performance, you can make an informed decision that will ensure the effectiveness and safety of your dryer vent system.
Assessing Your Specific Dryer and Venting Requirements
The first step in choosing the right dryer vent hose is to assess the specific requirements of your dryer and venting system. Consider the following factors:
- The type of dryer you have: Whether you have a gas dryer or an electric dryer, the venting requirements may differ.
- The location of your dryer: Is your dryer located in a small, confined space or in a larger, well-ventilated area?
- The length of the venting run: Measure the distance between your dryer and the outside vent opening to determine the length of the venting run.
- The number of bends and turns: Take note of any bends or turns in the venting system, as they can affect airflow and require specific hose configurations.
By carefully assessing your specific dryer and venting requirements, you can narrow down the options and choose a dryer vent hose that will meet your needs effectively.
Exploring Different Types of Dryer Vent Hoses
When it comes to dryer vent hoses, there are several options available on the market. Each type has its own set of advantages and considerations. Here are a few commonly used types:
| Type | Description |
|---|---|
| Flexible Vinyl | Affordable and easy to install, but not suitable for long venting runs or high-heat dryers. |
| Flexible Aluminum | Provides better airflow and is more durable than vinyl, ideal for longer venting runs. |
| Semi-Rigid Aluminum | Offers even better airflow and is less likely to crush or kink compared to flexible hoses, perfect for tight spaces. |
| Rigid Metal | The most durable option, but requires professional installation and may be more expensive. |
Exploring the different types of dryer vent hoses will help you determine which one suits your specific needs, considering factors such as cost, durability, and length of the venting run.
Considering the Material and Size for Optimal Performance
Another important aspect to consider when choosing a dryer vent hose is the material and size. Optimal performance relies on selecting the right material and size for your venting system. Here are some points to keep in mind:
- Material: Choose a hose made of fire-resistant material to reduce the risk of fire hazards from dryer lint buildup.
- Size: Ensure that the diameter of the vent hose matches the vent opening of both your dryer and the outside vent. Using the correct size will promote proper airflow and prevent blockages.
By considering the material and size of the dryer vent hose, you can ensure optimal performance and minimize the chances of safety issues.
In conclusion, selecting the right dryer vent hose is crucial for efficient and safe operation of your dryer. By assessing your specific dryer and venting requirements, exploring different types of dryer vent hoses, and considering the material and size for optimal performance, you can make an informed choice that will keep your dryer running smoothly and minimize potential hazards in your home.
Preparing For Installation
Before you begin the installation process for your dryer vent hose, proper preparation is crucial. This includes gathering the necessary tools and materials, measuring and planning the route for the vent hose, and taking safety precautions. By following these steps, you can ensure a successful installation and optimal performance of your dryer.
Gathering the Necessary Tools and Materials
The first step in preparing for the installation of a dryer vent hose is to gather the necessary tools and materials. Having everything you need on hand will save you time and frustration during the installation process. Here is a list of the essential tools and materials you will need:
| Tools: | Materials: |
|
|
Measuring and Planning the Route for the Vent Hose
Once you have all the necessary tools and materials, it’s time to measure and plan the route for the vent hose. Proper measurements will ensure that the hose fits correctly and allows for efficient airflow. Follow these steps:
- Measure the distance between the back of the dryer and the outside wall. Add a few extra inches to allow for any necessary bends and twists in the hose.
- Locate the best path for the vent hose to reach the outside. Consider any obstacles such as furniture or walls that may be in the way.
- Ensure that the path you choose provides the shortest and most direct route for the vent hose.
- Avoid sharp turns or excessive bends in the hose, as this can restrict airflow and lead to lint build-up and potential fire hazards.
Taking Safety Precautions
Before you start the installation, it’s crucial to take safety precautions to protect yourself and your home. Here are some important safety measures to keep in mind:
- Turn off the power to the dryer and unplug it from the electrical outlet.
- Wear safety goggles and gloves to protect your eyes and hands during the installation process.
- Ensure that the area where you’ll be working is well-ventilated.
- Be cautious when using the drill and other power tools, following all safety guidelines provided by the manufacturer.
- Keep children and pets away from the work area to prevent accidents.
By gathering the necessary tools and materials, measuring and planning the route for the vent hose, and taking appropriate safety precautions, you are now ready to proceed with the installation process. In the next section, we will cover the step-by-step instructions for installing the dryer vent hose.
Step 1: Removing The Old Vent Hose
Before you can install a new dryer vent hose, you need to remove the old one. In this step, we will guide you through the process of disconnecting the dryer from power, detaching the existing vent hose, and inspecting and cleaning the vent area.
Disconnecting the Dryer from Power
The first thing you need to do to begin the process of removing the old vent hose is to disconnect the dryer from power. This is crucial for your safety and to avoid any electrical mishaps. Follow these steps:
- Turn off the dryer and unplug it from the power outlet.
- For added security, it’s recommended to turn off the breaker that powers the dryer.
Detaching the Existing Vent Hose
Once you have ensured the dryer is safely disconnected from power, it’s time to detach the existing vent hose. Here’s how you can do it:
- Locate the vent hose at the back of the dryer.
- Using a screwdriver or pliers, loosen the clamps that secure the hose to the dryer.
- Gently pull the vent hose away from the dryer.
- Inspect the removed vent hose for any damages or blockages that may need to be addressed before installing the new hose.
Inspecting and Cleaning the Vent Area
Now that the old vent hose has been detached, it’s essential to inspect and clean the vent area before installing the new hose. Here’s what you need to do:
- Use a flashlight to examine the inside of the vent opening to ensure there are no obstructions or debris.
- If you detect any buildup of lint or dust, carefully clean the area using a vacuum cleaner or a vent brush.
- Check the vent cover on the exterior of your house and remove any debris or bird nests that may have accumulated.
By following these steps, you have successfully completed the first part of the dryer vent hose installation process – removing the old vent hose. Now, you’re ready to move on to the next step: installing the new vent hose.

Step 2: Installing The New Vent Hose
Once you have removed the old vent hose, it’s time to install the new one. This step is crucial to ensure that your dryer functions properly and safely. In this section, we will walk you through the process of aligning the vent hose with the dryer outlet, securing it with clamps, and ensuring a tight seal to prevent leaks. Let’s get started!
Aligning the Vent Hose with the Dryer Outlet
To begin, carefully align the vent hose with the dryer outlet. Make sure the hose is cut to the appropriate length if needed. The vent hose should fit snugly onto the outlet, ensuring a proper connection between the dryer and the vent system. Keep in mind that a loose or misaligned hose can result in reduced airflow, leading to inefficient drying and potential fire hazards. So, make sure to take your time and align the vent hose correctly to avoid any issues down the road.
Securing the Vent Hose with Clamps
Once the vent hose is aligned with the dryer outlet, use clamps to secure it in place. Clamps play a vital role in keeping the vent hose firmly connected to the dryer. Choose high-quality metal clamps that are specifically designed for this purpose. Place a clamp over the end of the hose where it connects to the dryer outlet, and tighten it securely using a screwdriver or a wrench. Repeat this process on the other end of the hose, securing it to the vent duct or wall connection. Double-check that the clamps are tight enough to prevent any movement or detachment during the dryer’s operation.
Ensuring a Tight Seal to Prevent Leaks
To ensure optimal performance and safety, it is crucial to create a tight seal between the vent hose and the dryer outlet. Even the smallest gap or leak can cause lint buildup, reduce airflow, and potentially pose a fire hazard. To achieve a tight seal, inspect the connection points carefully. Look for any gaps or spaces where air may escape and fix them using foil tape. Wrap the foil tape around the joint, covering any openings to create an airtight seal. Make sure to press the tape firmly to ensure it adheres properly. Additionally, check the entire length of the vent hose for any signs of wear and tear or damage. Replace the hose immediately if you notice any issues.
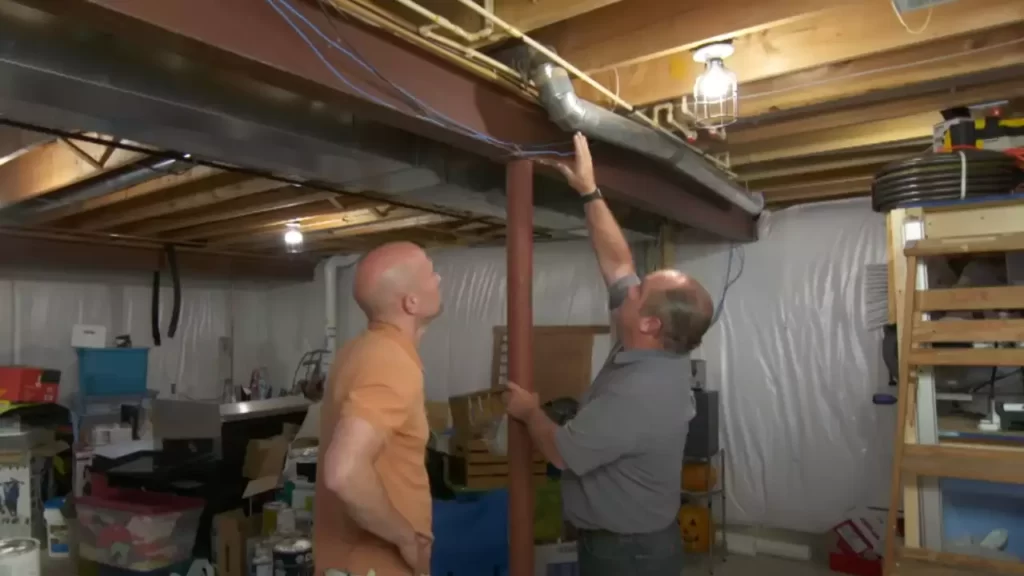
Step 3: Routing The Vent Hose To The Exterior
After determining the best route for the vent hose, the next step is to route it to the exterior of your home. This crucial step ensures that the hot, moist air from your dryer is properly vented outside, preventing potential safety hazards and damage to your property. Follow the steps below to correctly route the vent hose to the exterior.
Determining the Best Route for the Vent Hose
Before you start routing the vent hose, it is essential to determine the best path to ensure efficient air ventilation. Take into consideration the location of your dryer and the proximity of an exterior wall. Ideally, the shortest and straightest route will minimize bends and turns, optimizing airflow.
Additionally, ensure that the path you choose does not interfere with any electrical wiring, plumbing, or other obstacles in your home. Taking the time to carefully plan the routing will save you headaches and potential hazards in the long run.
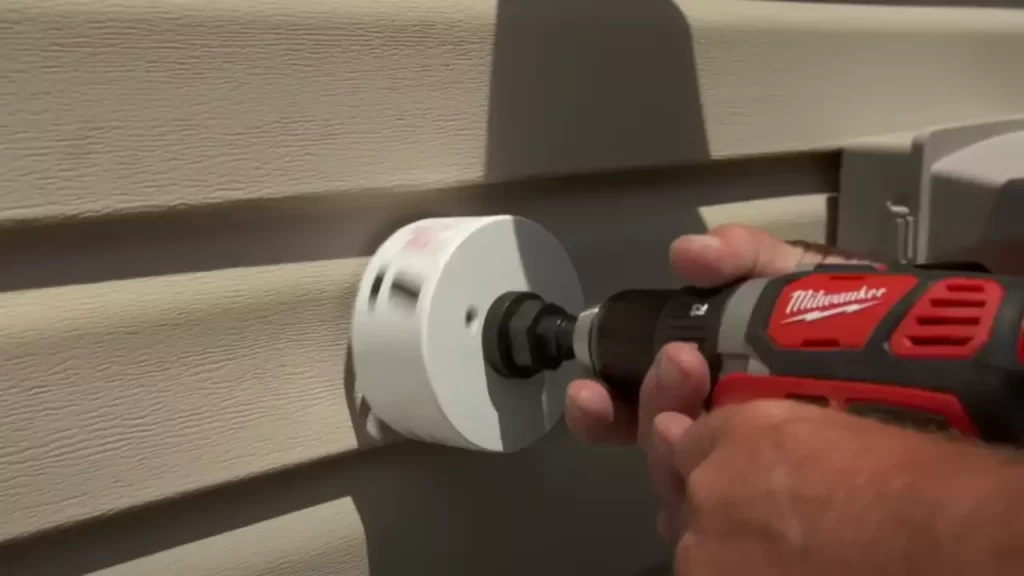
Cutting Ventilation Holes if Required
In some cases, you may need to create ventilation holes in your wall or ceiling to accommodate the vent hose. These holes should be slightly larger than the diameter of the hose to allow for easy installation. For safety reasons, always wear protective goggles and use appropriate tools when cutting into any surface.
Once the holes are cut, smooth the edges to ensure a clean and secure fit for the vent hose. A rough edge could potentially cause damage to the hose itself or impede the airflow, reducing the efficiency of your dryer.
Positioning the Vent Hose and Securing it in Place
Now that you have determined the best route and prepared any necessary ventilation holes, it’s time to position the vent hose and secure it in place. Begin by inserting one end of the vent hose into the opening at the back of the dryer. Ensure a tight fit to prevent any air leakage.
Next, guide the vent hose along the designated route, ensuring that it is not kinked or twisted. If necessary, use clamps or straps to secure the hose to the wall, ceiling, or floor, depending on your specific setup.
Ensure that the vent hose is securely fastened at both ends, connecting it to the opening you created in the exterior wall or ceiling. This ensures a proper seal and prevents any air from escaping indoors.
Once everything is in place, run a test cycle on your dryer to confirm that the airflow is unimpeded and the vent hose is effectively directing the hot, moist air outside. Periodically check the vent hose for any signs of blockage or damage to ensure its continued effectiveness.
By following these steps, you can safely and efficiently route your dryer vent hose to the exterior of your home. Taking the time to install it correctly will not only prevent potential safety hazards but also improve the overall performance and lifespan of your dryer.
Step 4: Connecting The Vent Hose To The Exterior Vent
Step 4: Connecting the Vent Hose to the Exterior Vent
Once you have successfully routed the dryer vent hose through the wall or floor, it’s time to connect it to the exterior vent opening. This crucial step ensures that the moist air from your dryer is properly expelled to the outside. Follow these guidelines and use the proper techniques to ensure a secure connection and seal any gaps or leaks.
Attaching the Vent Hose to the Exterior Vent Opening
Attaching the vent hose to the exterior vent opening requires precision and attention to detail. Here are the steps to follow:
- Locate the exterior exhaust vent, usually positioned on an exterior wall or through the roof.
- Remove any existing debris or obstructions that might hinder the airflow.
- Insert the end of the vent hose into the exterior vent opening, ensuring a snug fit.
- Secure the vent hose to the exterior vent opening using clamps or screws. This will prevent it from getting detached by wind or accidental pulls.
Using Proper Techniques to Ensure a Secure Connection
When connecting the vent hose to the exterior vent, it is crucial to use proper techniques to ensure a secure and reliable connection. Follow these tips:
- Use metal foil tape or high-quality duct tape to secure the connection between the vent hose and the exterior vent. This will provide a strong bond and prevent any air leaks.
- For added security, consider using metallic clamps to fasten the connection. These clamps provide a tight grip and minimize the risk of the hose slipping off.
- Ensure that the connection is tight and secure. Gently tug on the vent hose to check for any movement or looseness. If it moves, adjust and tighten the connection until it is stable and secure.
Sealing any Gaps or Leaks
To ensure optimal performance and prevent any air leaks, it is essential to seal any gaps or leaks in the connection between the vent hose and the exterior vent. Here’s how:
- Inspect the connection closely and identify any gaps or areas where air might escape.
- Apply a generous amount of foil tape or duct sealant around the connection to create a tight seal. Make sure to cover any openings or gaps thoroughly.
- Smooth out the tape or sealant to create a seamless and airtight barrier.
By following these steps and using proper techniques, you can effectively connect the vent hose to the exterior vent, ensuring a secure, leak-free, and efficient ventilation system for your dryer.
Step 5: Testing And Inspecting The Installed Vent Hose
Once you have successfully installed the dryer vent hose, it is crucial to test and inspect it to ensure optimal performance. This step will help you identify if there are any issues with the installation that need to be addressed. Follow these simple guidelines to complete the testing and inspecting process:
Reconnecting the Dryer to Power
Before conducting any tests, make sure to reconnect the dryer to the power supply. Plug the cord back into the outlet securely to ensure a proper connection. This step is important to ensure the dryer has the necessary power to operate during the functionality check.
Conducting a Functionality Check
Once the dryer is reconnected to power, it’s time to conduct a functionality check. Start by turning on the dryer and running a full cycle, observing its performance closely. Listen for any unusual noises or vibrations and monitor the overall functionality of the machine. Pay attention to the air circulation and temperature to ensure they meet your expectations.
During the functionality check, it is important to be mindful of any signs that the dryer vent hose may be obstructed or restricted. These signs may include:
- Poor drying performance, where clothes take longer than usual to dry
- An excessive amount of lint accumulating in the dryer
- Unpleasant odors coming from the dryer
- Abnormal heat buildup around the dryer
- Inconsistently hot or cold airflow
Checking for any Signs of Airflow Blockage or Leaks
As part of the inspection process, it is important to check for any signs of airflow blockage or leaks in the dryer vent hose. Inspect the hose for any visible damage, such as tears, holes, or loose fittings. Additionally, check that the hose is properly connected to both the dryer and the external vent. Any gaps or leaks in the connection can compromise the airflow and lead to inefficiency or even safety hazards.
To ensure a thorough inspection, consider using a flashlight to closely examine the entire length of the vent hose. Check for any lint or debris buildup as it can restrict airflow and increase the risk of a fire.
By completing a comprehensive functionality check and inspection, you can identify and address any issues with the installed vent hose promptly. Regularly repeating this testing and inspecting process will help ensure optimal performance, efficient drying, and overall safety.
Maintenance And Troubleshooting Tips
Proper maintenance and troubleshooting of your dryer vent hose are essential to keep it working efficiently and prevent any ventilation issues. By following these tips, you can ensure that your dryer vent hose remains clean and trouble-free for optimal performance.
Regular Cleaning and Maintenance of the Vent Hose
Regular cleaning and maintenance of your dryer vent hose are crucial to prevent lint buildup and reduce the risk of potential safety hazards. Here are some steps you can take to keep your vent hose in top condition:
- Remove and clean the lint screen after every load of laundry. This will prevent lint from accumulating in the vent hose.
- Inspect the vent hose periodically for any signs of damage or blockage. Look for tears, holes, or obstructions that could hinder proper airflow.
- Use a vacuum cleaner or a vent brush to remove any lint or debris that may have accumulated inside the vent hose. Pay special attention to the ends of the hose and the connection points.
- Ensure that the vent hose is properly connected to both the dryer and the vent outlet. Loose connections can restrict airflow and lead to ventilation issues.
Troubleshooting Common Ventilation Issues
Even with regular maintenance, you may encounter ventilation issues with your dryer vent hose. Here are some common problems and their possible solutions:
| Issue | Solution |
|---|---|
| Limited airflow | Check for any blockages or restrictions in the vent hose. Remove any accumulated lint and ensure that the hose is free from obstructions. |
| Excessive heat | Inspect the vent hose for kinks or bends that could restrict airflow. Straighten any bent sections and ensure a smooth and unrestricted path for hot air to escape. |
| Foul odor | Lint buildup and moisture can cause unpleasant odors. Clean the vent hose thoroughly and allow it to dry completely to eliminate any smells. |
Seeking Professional Help if Necessary
If you have tried troubleshooting and the ventilation issues persist, it may be time to seek professional help. A certified technician can diagnose the problem and provide the appropriate solutions. This could involve repairing or replacing the vent hose, or making adjustments to the ventilation system as needed.
Remember, maintaining a clean and properly functioning dryer vent hose is not only crucial for efficient drying but also for safety. By following these maintenance and troubleshooting tips, you can ensure that your dryer operates smoothly and effectively for years to come.
Final Thoughts On Dryer Vent Hose Installation
Prioritizing the correct installation of your dryer vent hose is crucial for the effective and safe operation of your dryer. A well-installed vent hose not only ensures proper ventilation but also prevents fire hazards and promotes the longevity and efficiency of your dryer. In this final section, we will discuss the importance of regularly inspecting and maintaining the ventilation system, the significance of ensuring safety and efficiency in drying clothes, and the necessary precautions to prevent fire hazards. By following these guidelines, you can optimize the performance of your dryer while minimizing the risk of accidents. Let’s explore these final thoughts on dryer vent hose installation in more detail.
Importance of Regularly Inspecting and Maintaining the Ventilation System
Regular inspection and maintenance of the ventilation system is vital to keep your dryer running smoothly. Over time, lint and debris can accumulate in the vent hose, obstructing airflow and reducing the efficiency of your dryer. This not only leads to longer drying times but also puts a strain on the dryer, potentially causing mechanical issues. By inspecting and cleaning the vent hose at least once a year, you can prevent blockages and ensure optimal performance. Additionally, regular maintenance helps identify any potential leaks or damage to the vent hose, allowing for timely repairs and preventing any hazards.
Ensuring Safety and Efficiency in Drying Clothes
Proper installation of the dryer vent hose plays a significant role in ensuring safety when drying clothes. A secure and correctly attached vent hose prevents lint and hot air from accumulating in the laundry area, reducing the risk of fire. It is essential to use appropriate materials and follow the manufacturer’s instructions to ensure the vent hose is tightly sealed and properly connected to both the dryer and the exterior vent. This not only keeps your home safe but also enhances the efficiency of your dryer, resulting in faster and more effective drying cycles.
Taking Proper Precautions to Prevent Fire Hazards
Fire hazards related to dryers are more common than you might think, with lint being a major contributor. Lint buildup in the vent hose and the dryer can ignite easily, leading to dangerous fires. To prevent such incidents, it is crucial to take proper precautions during the installation of the dryer vent hose. Make sure the vent hose is made of non-flammable materials and is the appropriate size for your dryer’s output. It should be kept as short and straight as possible, with no kinks or bends that could trap lint. Remember to clean the lint trap regularly to reduce lint accumulation and always have a functioning smoke detector near the laundry area.
Frequently Asked Questions
How Do I Choose The Right Size Dryer Vent Hose?
To choose the right size dryer vent hose, measure the distance from your dryer to the vent opening. Typically, a 4-inch diameter hose is suitable for most dryers. However, if the distance is longer than usual, you may need a larger size to ensure proper airflow and ventilation.
Can I Install A Dryer Vent Hose Myself?
Yes, you can install a dryer vent hose yourself. Start by disconnecting the old hose and cleaning the vent opening. Then, attach the new hose securely to the dryer and the vent opening. Make sure to use clamps or tape for a tight seal.
Remember to follow safety guidelines and consult the manufacturer’s instructions.
How Do I Prevent Dryer Vent Hose Lint Buildup?
To prevent lint buildup in your dryer vent hose, clean it regularly. Disconnect the hose and use a brush or vacuum cleaner to remove any lint or debris. Additionally, ensure the hose is straight and avoid using long or excessive bends, as they can trap lint.
Regular maintenance helps maintain proper airflow and reduces the risk of fire hazards.
Conclusion
Installing a dryer vent hose is a vital step to ensure optimal functioning of your dryer and to prevent potential hazards. By following the steps mentioned in this blog post, you can easily install a dryer vent hose and enhance the safety and efficiency of your dryer.
Remember to regularly clean and maintain the hose to maintain its effectiveness. Now, you are equipped with the knowledge to confidently install a dryer vent hose and enjoy the benefits of a properly ventilated dryer. Happy drying!