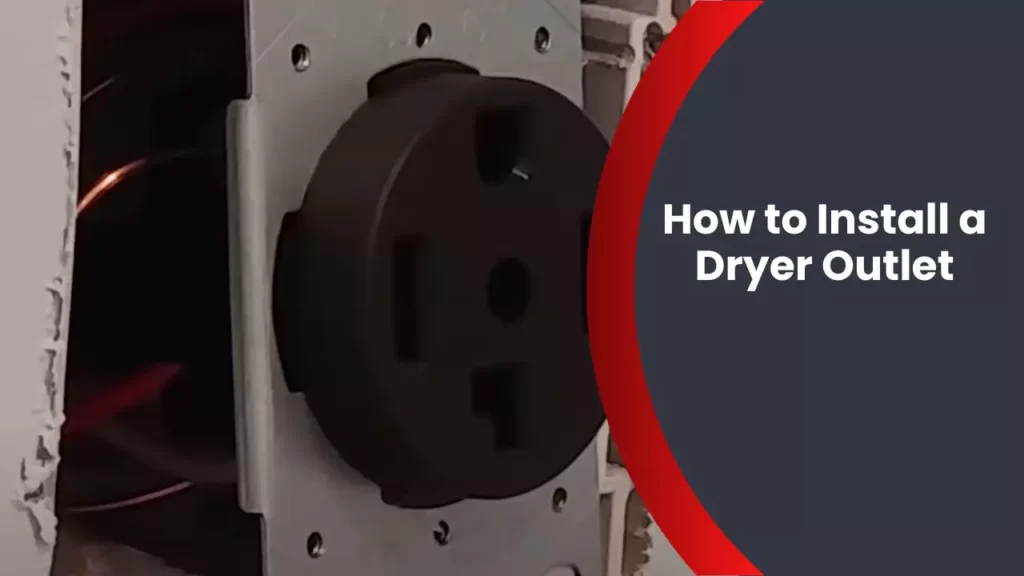
To install a dryer outlet, turn off the power, remove the cover plate, attach the wires to the appropriate terminals, and secure the outlet to the wall or floor. Installing a dryer outlet requires a few simple steps to ensure safe and proper functionality.
By following the guidelines provided, you can easily install a dryer outlet in your home. It is important to first turn off the power supply to avoid any electrical hazards. Next, remove the cover plate from the outlet box and attach the wires to their corresponding terminals, ensuring a secure connection.
Lastly, mount the outlet to the wall or floor using screws to ensure stability. Following these steps will allow you to successfully install a dryer outlet in your home.
Factors To Consider When Selecting The Location
When it comes to installing a dryer outlet, selecting the right location is crucial. There are several factors you need to consider before finalizing the placement. By carefully assessing these factors, you can ensure efficient installation and optimal functioning of your dryer outlet for years to come. In this article, we will explore three key considerations: distance from the panel box, accessibility for maintenance and repair, and ventilation requirements.
Distance from the Panel Box
One of the first factors to consider is the distance between the dryer outlet and the panel box. The panel box is typically located in the utility room or basement, and it is where the main electrical supply for your home is distributed. The closer the dryer outlet is to the panel box, the easier it will be to connect the wiring and ensure a steady supply of power. This will not only minimize potential electrical issues but also reduce the cost of wiring installation. Additionally, if the distance is too far, it may require a larger gauge wire to carry the electric current, which can be more expensive.
Accessibility for Maintenance and Repair
Another important consideration is the accessibility of the dryer outlet for maintenance and repair purposes. Dryers require regular cleaning and maintenance to ensure their efficient operation. Therefore, it’s essential to choose a location that provides easy access to the outlet as well as the entire dryer unit. This will make it convenient to clean the vent and lint trap, check for any loose connections, and perform routine maintenance tasks. Additionally, accessibility is crucial in case any repairs or troubleshooting is required. A well-placed outlet will save you time and effort when it comes to maintaining and repairing your dryer.
Ventilation Requirements
Proper ventilation is vital for the safe and effective operation of your dryer. When selecting the location for your dryer outlet, ensure that there is sufficient ventilation in the vicinity. Adequate airflow will prevent excessive heat buildup, reduce the risk of fire hazards, and help your clothes dry more efficiently. Avoid placing the outlet in small, confined spaces or near flammable materials. Instead, choose a location near an exterior wall or window, if possible. This will make it easier to install the required ductwork for proper ventilation, allowing the moist air to be vented outside. Proper ventilation will not only prolong the lifespan of your dryer but also contribute to a safer and healthier indoor environment.
By taking these factors into account when selecting the location for your dryer outlet, you can ensure a hassle-free installation process and optimize the performance of your dryer. Remember to consult a qualified electrician to ensure that all local electrical codes and regulations are met. With the right location and careful installation, you’ll be able to enjoy the convenience and efficiency of your dryer for years to come.
Tools Required For The Installation
Tools Required for the Installation
Installing a dryer outlet requires a few essential tools to ensure a smooth and successful process. Having the right tools on hand not only makes the job easier but also ensures your safety. Here are the must-have tools for installing a dryer outlet:
Screwdriver
A screwdriver is an essential tool for any electrical installation, including the installation of a dryer outlet. It is used to remove the cover plate and screws from the existing electrical box and attach the wires securely to the outlet. A Phillips or flat-head screwdriver, depending on the type of screws, will be required.
Wire stripper
A wire stripper is necessary to remove the insulation from the ends of the wires. This tool ensures that the copper wiring is exposed properly for a secure connection. Make sure to choose a wire stripper that is appropriate for the gauge of the wires you are working with.
Fish tape
A fish tape is a long, flexible tool used to guide wires through walls, ceilings, or conduits. It is particularly useful when installing a new dryer outlet in a location that requires wiring to be routed through obstacles. With a fish tape, you can easily thread the electrical cables from the electrical box to the desired location.
Voltage tester
Prior to working on any electrical installation, it is crucial to ensure the power is turned off and the wires are not live. A voltage tester is a device that helps you determine if an electrical circuit is energized. Use a voltage tester to verify that the power to the circuit you are working on has been completely shut off to avoid any potential hazards.
Having these necessary tools at your disposal will enable you to install a dryer outlet effectively and efficiently. Remember to exercise caution when working with electricity and follow all safety protocols. Now that you have your tools ready, let’s move on to the next step of the installation process!

Materials Needed For The Installation
Before you begin the installation process for a dryer outlet, it’s essential to gather all the necessary materials. Having these materials on hand will ensure a smooth and hassle-free installation. Here are the materials you will need:
Dryer outlet box
A dryer outlet box is a critical component of the installation process. It provides a safe and secure outlet for your dryer to connect to the electrical supply. Make sure to choose a high-quality outlet box that is compatible with your dryer model. This box will serve as the foundation for your dryer’s electrical connection, so ensure it meets all the necessary safety standards.
Electrical wire
The electrical wire is an essential part of the installation process, as it connects the dryer outlet box to the main electrical panel. When choosing the wire, ensure that it is of the appropriate gauge and type for your specific dryer model. In addition, make sure that the wire is rated for use in dryers and meets all electrical safety standards. Using the right wire will guarantee a reliable and safe electrical connection for your dryer.
Wire connectors
Wire connectors are used to join the electrical wire to the dryer outlet box and the main electrical panel. These connectors ensure a secure and reliable connection, minimizing the risk of electrical faults or accidents. It is crucial to choose wire connectors that are compatible with your specific wire gauge and type. Additionally, ensure that the connectors are made of high-quality materials to ensure long-lasting performance.
Electrical tape
Electrical tape is an important material for insulating and protecting electrical connections. It helps to secure and insulate wire connections, preventing any accidental contact or short circuits. When using electrical tape, make sure to wrap it tightly around the wire connections and cover any exposed wires adequately. This will provide an additional layer of safety and protection for your dryer’s electrical system.
Turning Off The Power Supply
Before you begin installing a dryer outlet, it is crucial to ensure your safety by turning off the power supply. Dealing with electrical components can be potentially dangerous, so taking the necessary precautions is essential.
Shutting off the main power to the house
The first step in turning off the power supply is shutting off the main power to your house. This ensures that no electricity is flowing through the wires and eliminates any risk of electrocution or accidental damage.
To shut off the main power:
- Locate your electrical panel, which is usually found in the basement or utility room.
- Open the panel door and identify the main circuit breaker. This is typically the largest breaker in the panel and may be labeled as “Main,” “Main Disconnect,” or something similar.
- Using caution and wearing protective gloves, firmly switch off the main circuit breaker by moving it to the “Off” position. This will completely cut off the power supply to your entire house.
- Once the main circuit breaker is off, verify that the power to your house is indeed disconnected by checking if any lights or appliances are still working. If everything is off, then you have successfully shut off the power.
Ensuring Power Supply Adherence
It is crucial to ensure that the power supply to your dryer outlet is completely shut off before proceeding with any installation or wiring work.
Double-check every step you took to turn off the power and make sure you have successfully shut off the main circuit breaker. Taking extra precautions will minimize the risk of electric shocks or accidents during the installation process.
By following these guidelines and diligently turning off the power supply, you can proceed with confidence to the next step of installing your dryer outlet.
Removing The Cover Plate
Before you can install a new dryer outlet, you’ll need to remove the cover plate of the existing outlet. This might seem like a daunting task, but with the right tools and a little know-how, it can be a quick and simple process. Here’s a step-by-step guide on how to unscrew the cover plate of the existing outlet:
Unscrewing the cover plate of the existing outlet
The first step in removing the cover plate is to locate the screws that are holding it in place. These screws are typically located above and below the cover plate, and sometimes on either side as well. You will need a screwdriver to unscrew these screws. Here’s what you need to do:
- Begin by turning off the power to the outlet. This step is essential to ensure your safety during the installation process.
- Next, take your screwdriver and insert it into one of the screws holding the cover plate in place.
- Turn the screwdriver counterclockwise to loosen the screw. Repeat this step for all the screws holding the cover plate in place.
- Once all the screws are loose, set them aside in a safe place so you won’t lose them.
- Once the screws are removed, gently pull the cover plate away from the outlet. Be careful not to damage the wiring or any other components inside the outlet.
And there you have it! You have successfully removed the cover plate of the existing outlet. Now you’re one step closer to installing your new dryer outlet. In the next section, we will guide you through the process of disconnecting the old outlet. Stay tuned!
Disconnecting The Wires
Before installing a dryer outlet, it is crucial to disconnect the wires from the old outlet safely. This process requires identifying the hot, neutral, and ground wires correctly. By following these steps, you can ensure a smooth disconnection process.
Identifying the hot, neutral, and ground wires
Before disconnecting the wires, it is essential to identify which wire is which. The hot wire carries the electrical current from the circuit breaker to the outlet, while the neutral wire carries the current back to the electrical panel. The ground wire, on the other hand, provides a pathway for electrical current to safely flow into the ground in case of any electrical faults.
To identify these wires correctly, you can refer to the wiring diagram provided by the manufacturer or use a voltage tester tool. The hot wire is usually black or red, the neutral wire is white, and the ground wire is green or bare copper. However, it is always recommended to verify the wiring colors with a voltage tester to ensure accuracy.
Disconnecting the wires from the old outlet
- Start by turning off the power to the circuit that supplies electricity to the outlet. This can be done by flipping off the corresponding circuit breaker in the electrical panel.
- Once the power is turned off, remove the outlet cover plate by unscrewing the screws that secure it to the wall.
- After removing the cover plate, you will see the wiring connections. Using a screwdriver, remove the screws that hold the wires in place, starting with the hot wire, followed by the neutral wire, and finally the ground wire.
- Gently pull the wires out of the old outlet, making sure not to damage the insulation.
Remember to wrap each disconnected wire with electrical tape to prevent accidental contact with other wires or metal surfaces. This will help ensure safety during the installation process.
Once all the wires are disconnected and secured with electrical tape, you have successfully completed the process of disconnecting the wires. You are now ready to proceed with the installation of your new dryer outlet.
Preparing The New Outlet Box
Before you can begin installing a dryer outlet, it’s crucial to prepare the new outlet box properly. This ensures that the installation process goes smoothly and that the outlet box functions effectively. Follow the steps below to prepare the new outlet box:
Mounting the new outlet box in the desired location
The first step in preparing the new outlet box is to mount it in the desired location. Choose a location that is easily accessible and allows for convenient connection to the dryer. Furthermore, ensure that the outlet box is mounted at a suitable height, typically around 12 to 18 inches above the floor.
To mount the outlet box, carefully measure the location where it will be installed. Use a level to ensure that the box is mounted straight. Once you’ve determined the proper position, mark the mounting holes on the wall using a pencil or marker.
Use appropriate screws or anchors, depending on the type of wall or surface, to secure the outlet box to the marked locations. Ensure that the screws or anchors are tightly secured to prevent any movement or damage to the outlet box.
Securing it to the wall or floor
Once the new outlet box is mounted in the desired location, it needs to be securely attached to the wall or floor. This step ensures that the outlet box remains stable and doesn’t pose any safety hazards.
If the outlet box is being installed on a wall, use screws and a screwdriver to secure it tightly. Ensure that the screws are long enough to securely hold the outlet box in place.
However, if you’re installing the outlet box on a concrete or tiled floor, you will need to use anchors or concrete screws to secure it. These specially designed hardware pieces provide a strong and durable attachment to prevent any movement.
Make sure to position the outlet box flush against the wall or floor and secure it tightly. Use a level again to ensure that the box is straight and properly aligned.
By properly mounting the new outlet box and securing it to the wall or floor, you can ensure that your dryer installation is safe, efficient, and hassle-free. Now that you’ve prepared the new outlet box, you’re ready to move on to the next steps of installing a dryer outlet.
Wiring The New Outlet
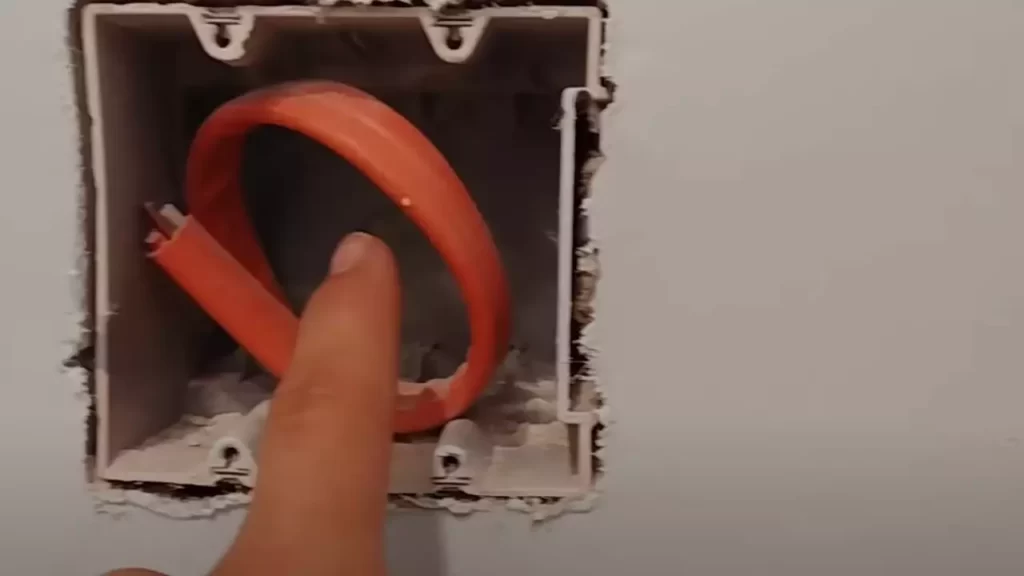
Now that you have prepared the electrical box and installed the appropriate conduit, it’s time to wire the new dryer outlet. This step involves connecting the hot, neutral, and ground wires to their corresponding terminals.
Stripping the insulation from the wires
Before making any connections, you’ll need to strip the insulation from the ends of all the wires. To do this, follow these steps:
- Start by using wire strippers to remove approximately half an inch of insulation from the ends of each wire. Ensure that no exposed wires are left.
- Next, gently twist the individual strands of each wire together to prevent any fraying.
- Repeat this process for the hot, neutral, and ground wires.
Once you have successfully stripped the insulation from all the wires, you are ready to connect them to the corresponding terminals on the new outlet.
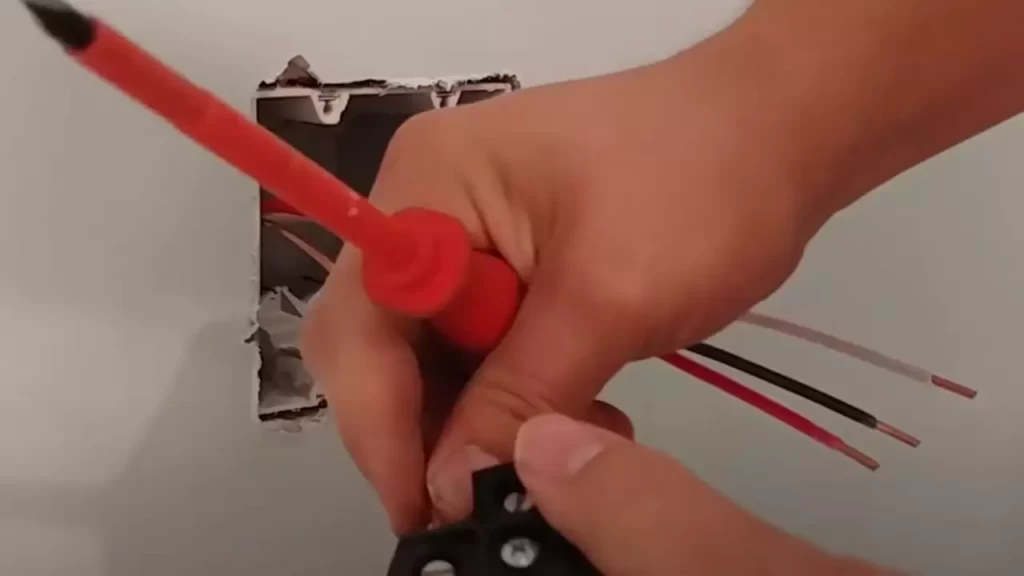
Connecting the hot, neutral, and ground wires to the corresponding terminals
To ensure a proper connection, carefully follow these steps:
- Locate the terminals on the new dryer outlet. The hot wire terminal is typically brass or gold-colored, the neutral wire terminal is silver-colored, and the ground wire terminal is green-colored.
- Starting with the hot wire, insert the stripped end into the brass or gold-colored terminal. Use a screwdriver to tighten the terminal screw securely, ensuring a firm connection.
- Repeat the process for the neutral wire, connecting it to the silver-colored terminal.
- Finally, connect the ground wire to the green-colored terminal, again tightening the screw to secure the connection.
Remember: It is crucial to ensure that each wire is securely connected to its corresponding terminal. Loose connections can lead to electrical arcing or overheating, which can be dangerous.
Once you have connected all the wires, double-check the connections to ensure they are tight and secure. Give a gentle tug on each wire to ensure it does not come loose. If any wires feel loose, tighten the associated terminal screws until the connection is secure.
With the wiring completed, your dryer outlet is now ready for use. However, it is essential to always follow safety guidelines and consult a professional electrician if you have any doubts or concerns during the installation process.
Securing The Outlet Box
Attaching the outlet box to the wall or floor is a crucial step in installing a dryer outlet. This ensures that the box remains secure and stable, providing a safe and reliable connection for your dryer. In this section, we will discuss the steps involved in securing the outlet box, ensuring a hassle-free installation process.
Attaching the Outlet Box to the Wall or Floor
Once you have determined the ideal location for your dryer outlet, it’s time to attach the outlet box to the wall or floor. Follow these steps to ensure a proper and secure attachment:
- First, gather the necessary tools and equipment, including a screwdriver, drill, screws, and wall anchors if required.
- Position the outlet box against the wall or floor, aligning it with the electrical wires that have already been installed.
- Using a screwdriver, remove the cover plate from the outlet box, exposing the mounting holes.
- Hold the outlet box firmly against the wall or floor, ensuring it is level and aligned with the electrical wires.
- With the outlet box in place, use a pencil or marker to mark the location of the mounting holes on the wall or floor.
- If drilling is required, carefully drill pilot holes at the marked locations to ensure smooth and precise screw insertion.
- Insert screws into the mounting holes of the outlet box, securing it to the wall or floor. If necessary, use wall anchors for added stability.
- Tighten the screws until the outlet box is firmly attached to the wall or floor.
By following these steps, you can ensure that your outlet box is securely attached, providing a sturdy foundation for your dryer connection. This will not only enhance the safety of your electrical setup but also provide a reliable and efficient power source for your dryer.
Testing The Outlet
Using a voltage tester to ensure that the outlet is properly wired
Testing the outlet is an essential step in the installation process of a dryer outlet. It ensures that the outlet is properly wired and can handle the electrical load of your dryer. One of the most effective tools for testing the outlet is a voltage tester.
A voltage tester is a simple and handy device that allows you to check the presence of electrical current in an outlet. By using a voltage tester, you can ensure that the outlet is wired correctly and that there are no potential electrical hazards.
Before you begin testing the outlet, it is important to take necessary safety precautions. Make sure to turn off the power supply to the outlet at the circuit breaker to avoid electric shock. Once you have done that, follow these steps to test the outlet:
Step 1: Preparing the voltage tester
- Obtain a voltage tester from your local hardware store.
- Read and understand the instructions provided with the voltage tester.
- Ensure that the voltage tester is functioning properly by testing it on a known live circuit.
Step 2: Testing the outlet
- Insert the voltage tester into the outlet slots.
- Take note of the reading or indication on the voltage tester.
- If the voltage tester indicates a live circuit, it means that the outlet is properly wired and is ready for use.
- If the voltage tester does not indicate a live circuit, it means that the outlet is not properly wired or is not receiving power. In such cases, it is important to consult a qualified electrician to address the issue.
Testing the outlet using a voltage tester gives you peace of mind knowing that your dryer outlet is safe and functional. If you are unsure about performing the test yourself, it is always recommended to seek professional help to ensure a safe and successful installation.
Outlet Not Receiving Power
In order to operate your dryer effectively, it is crucial to ensure that your dryer outlet is receiving power. If you find yourself in a situation where the dryer outlet is not working, there are a few steps you can take to troubleshoot and resolve this issue. This section will guide you on how to check the circuit breaker and verify the connections, which are common causes of an outlet not receiving power.
Checking the circuit breaker
The first step in troubleshooting an outlet not receiving power is to check the circuit breaker. The circuit breaker is a safety device that controls the flow of electricity to your dryer outlet. If the circuit breaker has tripped, it will disrupt the power supply to the outlet.
To check the circuit breaker, follow these steps:
- Locate your electrical panel. It is usually found in the basement, garage, or utility room.
- Open the panel door and find the circuit breaker labeled for the dryer.
- Inspect the circuit breaker to see if it is in the “off” position or positioned between “on” and “off”.
- If the circuit breaker is in the “off” position or not fully in the “on” position, switch it off and then back on.
- Observe if the circuit breaker stays in the “on” position or if it trips again. If it trips repeatedly, there may be an electrical issue that needs professional attention.
- Return to the dryer outlet and check if it is receiving power. If not, proceed to the next step.
Verifying the connections
If the circuit breaker is not the cause of the outlet not receiving power, the next step is to verify the connections. Loose or faulty connections can prevent the power from reaching the outlet.
To verify the connections, follow these steps:
- Turn off the power to the dryer outlet by switching off the circuit breaker.
- Unplug the dryer from the outlet.
- Inspect the outlet and check if the wires are securely connected. Look for any loose or disconnected wires.
- If you notice any loose wires, tighten them using a screwdriver. If any wires are disconnected, reconnect them according to the manufacturer’s instructions.
- Plug the dryer back into the outlet.
- Switch on the circuit breaker and check if the outlet is now receiving power.
By following these steps, you should be able to troubleshoot and fix the issue of an outlet not receiving power. If you’ve completed these steps and the problem persists, it is advisable to contact a professional electrician for further assistance.
Outlet Sparking Or Overheating
If you’ve noticed sparking or overheating at your dryer outlet, it’s crucial to take immediate action to prevent potential electrical hazards. Ignoring this issue can lead to serious consequences such as electrical fires or damage to your dryer. In this section, we will guide you through the necessary steps to inspect the wiring for any damage or loose connections, ensuring a safe and reliable dryer outlet.
Inspecting the wiring for any damage or loose connections
Regular inspections of the wiring are essential to identify any potential hazards before they escalate. Here’s how you can check for any damage or loose connections:
- Turn off the power: Before starting any inspection or repair work, ensure that the power supply to the dryer outlet is switched off. Safety should always be your top priority.
- Remove the outlet cover: Use a screwdriver to carefully remove the cover of the outlet.
- Inspect the wiring: Examine the wires connected to the outlet for any visible signs of damage such as fraying, cuts, or burn marks. Additionally, check for loose connections by gently tugging on each wire to ensure they are securely connected.
- Reconnect any loose wires: If you find any loose wires, reattach them firmly to the appropriate terminals of the outlet. Ensure you know the correct wiring configuration, as incorrect reconnection can lead to further issues.
- Replace damaged wiring: If you identify any damaged wiring, it is imperative to replace it promptly. Faulty wiring increases the risk of sparking and overheating. Consult a qualified electrician to assist you with the replacement.
- Check for proper grounding: To prevent electrical shocks and ensure the safe operation of the dryer, verify that the outlet has a solid grounding connection. This can be done using a multimeter to measure continuity between the ground wire and a known ground source.
By regularly inspecting the wiring for damage or loose connections, you can mitigate the risk of sparking or overheating at your dryer outlet. However, if you are unsure about performing any electrical tasks yourself, it is always recommended to seek professional assistance to ensure your safety.
Outlet Not Compatible With Dryer
Confirming the electrical requirements of the dryer
If you’ve recently purchased a new dryer and are experiencing issues with the outlet not being compatible, don’t worry – you’re not alone. Many homeowners encounter this problem, but luckily, it is easily solvable. The first step in installing a dryer outlet that is compatible with your dryer is to confirm the electrical requirements of your specific appliance.
Each dryer model has specific electrical requirements that must be met in order for it to function properly. To determine the electrical requirements of your dryer, refer to the manufacturer’s specifications or user manual. Look for information on the voltage, amperage, and plug type needed for your dryer.
Once you have all the necessary information, double-check that your current outlet matches the electrical requirements of your dryer. This will help you determine if you need to install a new outlet or make any modifications to your existing one.
Installing the appropriate outlet if needed
If your current outlet is not compatible with your dryer’s electrical requirements, it is essential to install the appropriate outlet. This will ensure the safe and efficient operation of your appliance.
To install a new outlet, you will need to follow these steps:
- Turn off the power: Before starting any electrical work, always turn off the power supply to the outlet. This will help prevent any accidents or electrical shocks.
- Remove the old outlet: If there is an existing outlet in place, carefully remove it from the wall using a screwdriver.
- Prepare the wiring: Check the manufacturer’s instructions to determine the correct wiring configuration for your new outlet. Prepare the wires by stripping the insulation from the ends.
- Connect the wires: Connect the wires to the appropriate terminals on the new outlet. Use wire nuts to secure the connections and ensure they are tight.
- Mount the new outlet: Attach the new outlet to the wall using screws or mounting brackets, following the manufacturer’s instructions.
- Test the outlet: Once the installation is complete, turn the power back on and test the outlet with a voltage tester to ensure it is functioning properly.
By following these steps, you can install a new outlet that is compatible with your dryer’s electrical requirements. This will prevent any further compatibility issues and allow your dryer to operate efficiently and safely.
Remember, if you are unsure about any aspect of the installation process, it is always best to consult a qualified electrician to ensure the job is done correctly and according to local electrical codes.
Frequently Asked Questions
How Do I Install A Dryer Outlet?
To install a dryer outlet, you’ll need to turn off the power, remove the old outlet, attach the wires to the new outlet, and secure it to the wall. Then, turn the power back on and ensure everything is working properly.
What Tools Do I Need To Install A Dryer Outlet?
To install a dryer outlet, you’ll need a voltage tester, screwdriver, wire stripper, wire cutter, needle-nose pliers, and a drill. These tools will help you safely and effectively complete the installation process.
Can I Install A Dryer Outlet Myself?
Yes, you can install a dryer outlet yourself if you have the necessary electrical knowledge and skills. However, it is recommended to consult a professional electrician to ensure the installation is done correctly and to avoid any potential hazards. They can also guide you through the process if you’re unsure.
Conclusion
To summarize, installing a dryer outlet is a straightforward process that can be done by following a few simple steps. By ensuring that you have the necessary tools and materials, understanding the electrical requirements, and taking safety precautions, you can successfully set up a dryer outlet in your home.
Remember to always consult a professional electrician if you are unsure or uncomfortable with any aspect of the installation. With the right knowledge and care, you’ll have a functional and safe dryer outlet ready to use. Happy drying!