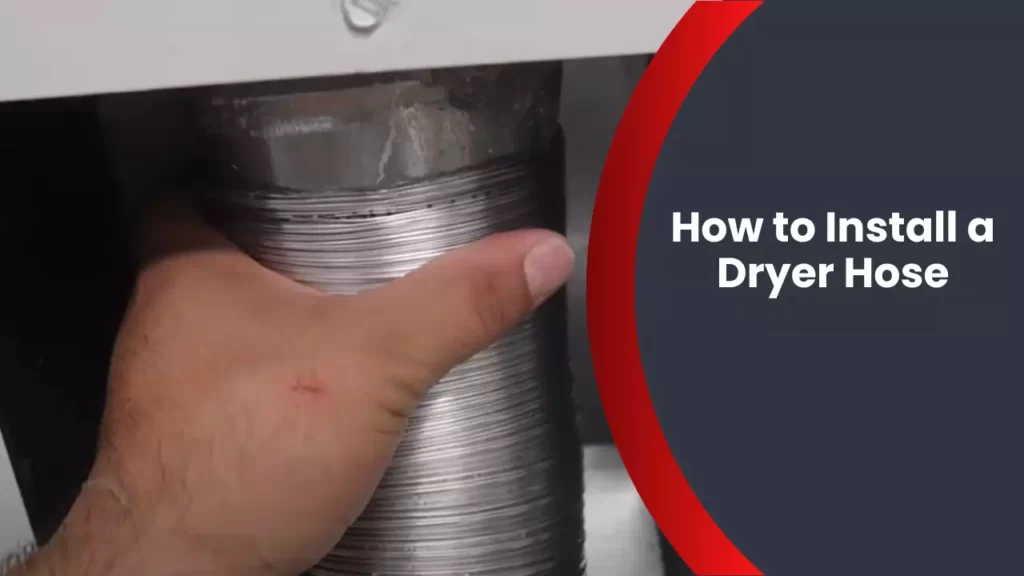
To install a dryer hose, first, ensure that the dryer is turned off and disconnected from the power supply. Then, connect one end of the hose to the dryer’s vent outlet and the other end to the vent opening on the outside wall or window.
Secure the connections using hose clamps and make sure there are no kinks or obstructions in the hose. Finally, plug the dryer back in and test for proper airflow by running a short cycle. [120 words] Installing a dryer hose is a crucial step in ensuring the efficient operation of your dryer.
By correctly setting up the hose, you can effectively vent out the hot, moist air produced during the drying process. This not only helps protect your home from potential damage caused by excess humidity, mold growth, and poor air quality but also ensures the optimal performance of your dryer. Although the process may seem daunting, it is relatively simple and can be done with a few easy steps. This article will guide you through the process of installing a dryer hose, helping you safeguard your home while maintaining the functionality of your dryer.
Understanding The Different Types Of Dryer Hoses:
When it comes to installing a dryer hose, it’s important to understand the different types available. While the primary function of all dryer hoses is to provide a pathway for hot air to escape from the dryer, the materials and construction of each type can vary. In this article, we will explore the most commonly used types of dryer hoses, including flexible aluminum hoses, semi-rigid metal hoses, foil transition ducts, and vinyl hoses. By understanding the characteristics of each type, you can make an informed decision when it’s time to install or replace your dryer hose.
Flexible Aluminum Hoses
Flexible aluminum hoses are a popular choice for many homeowners due to their flexibility and durability. These hoses are typically made of a multi-layered aluminum construction, making them resistant to kinks and crushing. Their flexibility allows for easy installation, especially in spaces where a straight path is not possible. However, it’s important to note that flexible aluminum hoses can be prone to lint buildup, so regular cleaning is necessary to maintain good airflow and prevent any potential fire hazards.
Semi-Rigid Metal Hoses
Semi-rigid metal hoses offer a balance between flexibility and rigidity. Made of aluminum or galvanized steel, these hoses are more rigid compared to their flexible counterparts. This rigidity helps maintain a smooth airflow and reduces the risk of lint buildup. Semi-rigid metal hoses are often a popular choice for longer dryer vent runs and installations where a more structured pathway is required. They are less likely to sag or collapse, ensuring efficient and safe airflow from your dryer.
Foil Transition Ducts
Foil transition ducts, also known as “foil hoses,” are made of laminated aluminum foil. These hoses are lightweight and highly flexible, making them easy to install in tight spaces. However, foil transition ducts should only be used as a temporary solution and never as a permanent dryer hose. They are more susceptible to tearing and are not as durable as other types of dryer hoses. Additionally, foil hoses are prone to crimping and trapping lint, which can hinder proper air circulation and increase the risk of dryer fires.
Vinyl Hoses
Vinyl hoses, often referred to as “plastic hoses,” are the most affordable option among the different types of dryer hoses. They are made of flexible plastic and are easy to install. However, it’s important to note that vinyl hoses are not as durable as other materials and can be prone to cracking or splitting over time. Additionally, vinyl hoses are more likely to trap lint and restrict airflow, which can pose a fire hazard. If you choose to use a vinyl hose, it’s crucial to regularly inspect and replace it to ensure safe and efficient airflow.
Remember, when selecting a dryer hose, it’s crucial to prioritize safety and airflow efficiency. Consider the specific requirements of your installation space and choose a hose that meets both the manufacturer’s recommendations and local building codes. Regularly inspect and clean your dryer hose to prevent lint buildup and reduce the risk of dryer fires. By understanding the different types of dryer hoses and their unique characteristics, you can make an informed decision and ensure optimal performance of your dryer.
Measuring The Length Of The Dryer Hose
Installing a dryer hose is a crucial step in ensuring proper ventilation and maximizing the efficiency of your dryer. The length of the dryer hose plays a vital role in this process. To ensure that you install the right length of dryer hose, follow these steps:
Using a Tape Measure
The first step in measuring the length of your dryer hose is to gather the necessary tools. One tool you will need is a tape measure. A tape measure is essential for accurately measuring the distance between the dryer vent and the external venting location. Make sure the tape measure is flexible and long enough to reach the required areas.
Considering the Required Length
Once you have your tape measure ready, it’s time to measure the required length of your dryer hose. Start by measuring the distance between the back of your dryer and the wall where the vent opening is located. Make sure to measure from the furthest point on the back of the dryer to the furthest point on the wall.
Next, measure the distance between the wall vent opening and the external vent outside your home. This measurement will determine the minimum length of the dryer hose needed to connect the dryer to the vent.
Accounting for Ventilation Space
In addition to the required length, it’s important to account for ventilation space when measuring the dryer hose. Ventilation space refers to the distance needed for the hose to bend and flex without any obstructions or sharp turns. This space allows for proper airflow and prevents the hose from kinking or getting damaged.
When measuring for ventilation space, consider the potential obstructions such as corners, cabinets, or tight spaces that the hose needs to navigate. Leave some extra length to ensure the hose can move freely and connect smoothly between the dryer and the vent.
Once you have measured the required length and accounted for ventilation space, you can proceed to cut the dryer hose to the appropriate size. Use a pair of strong scissors or a utility knife to make a precise cut. Ensure that the ends of the hose are clean and free from any loose debris or sharp edges before connecting them to the dryer and the vent.
By following these steps and accurately measuring the length of your dryer hose, you can ensure a secure and efficient installation. Proper ventilation will not only prevent potential fire hazards but also extend the lifespan of your dryer. Take the time to measure carefully and make any necessary adjustments to guarantee a successful installation.
Cutting The Dryer Hose
If you’re installing a dryer in your home, one of the crucial steps is cutting the dryer hose to the appropriate length. This ensures that the hose fits snugly between the dryer and the vent outlet, allowing for proper airflow. In this section, we’ll discuss the necessary tools, how to mark the hose for cutting, and the best technique for achieving a clean and straight cut.
Gathering the Required Tools
Before you begin cutting the dryer hose, it’s important to gather all the necessary tools. Ensuring you have everything on hand will save you time and frustration during the process. Here’s a list of the tools you’ll need:
| Tools | Description |
|---|---|
| Tape measure | Measuring tool to determine the correct length |
| Marker or pencil | For marking the hose for cutting |
| Hacksaw or utility knife | Appropriate tools for cutting the hose |
Marking the Hose for Cutting
Once you have your tools ready, the next step is to mark the dryer hose for cutting. Take the tape measure and measure the distance between the dryer and the vent outlet. Make sure to account for any bends or curves in the hose.
Using a marker or pencil, make a small mark on the hose at the measured distance. This mark will serve as your cutting guide, ensuring that you achieve the desired length for the hose.
Using the Appropriate Tool to Cut the Hose
Now that you have the hose properly marked, it’s time to cut it to the desired length. The choice of tool for cutting will depend on the type of dryer hose you have. If you have a metal hose, a hacksaw will be your best bet. For a flexible plastic or foil hose, a utility knife will work well.
Using a firm grip, gently guide the hacksaw or utility knife along the marked line. Take care not to apply excessive force, as this could result in an uneven or jagged cut. Slow and steady wins the race in this case.
Ensuring a Clean and Straight Cut
To achieve a clean and straight cut, it’s essential to keep the hose steady and secure during the cutting process. You can place the hose on a stable surface or use clamps to hold it in place. This will minimize any movement and help you maintain control over the cutting tool.
As you cut, be sure to follow the marked line. If you deviate from the line, it may lead to an uneven or incorrect cut length. Take your time and make small, controlled movements to ensure a precise cut.
Once you’ve completed the cut, double-check the length of the hose against your measurements. If it’s the correct length, you’re ready to proceed with attaching the hose to the dryer and vent outlet. If not, it may be necessary to repeat the cutting process.
Cutting the dryer hose doesn’t have to be a daunting task. By following these steps and using the appropriate tools, you’ll be able to achieve a clean and straight cut that ensures proper airflow in your dryer vent system. Stay tuned for the next section, where we’ll guide you through the installation process.
Preparing The Dryer
Before you can install a dryer hose, there are a few steps you need to take to prepare the dryer. These steps ensure the safety and efficiency of the installation process. In this section, we will go over the three essential steps: turning off and unplugging the dryer, moving the dryer away from the wall, and cleaning the dryer vent.
Turning off and Unplugging the Dryer
The first step in preparing the dryer is to turn it off and unplug it from the power source. This is crucial to prevent any accidents or electrical hazards. Here’s how you can do it:
- Locate the power switch on your dryer. It is usually located on the control panel or the back of the appliance.
- Turn the power switch to the “Off” position. This will shut off the electricity supply to the dryer.
- Next, unplug the dryer from the wall outlet. Carefully remove the plug from the socket, ensuring that you do not damage the cord or the outlet.
By turning off and unplugging the dryer, you are ensuring your safety and preventing any potential electrical accidents during the installation process.
Moving the Dryer Away from the Wall
After you have turned off and unplugged the dryer, the next step is to move it away from the wall. This will give you better access to the back of the appliance and allow for easier installation of the dryer hose. Follow these steps to move the dryer:
- Carefully pull the dryer away from the wall, using caution not to scratch the flooring or damage the appliance.
- If the dryer is connected to a gas line, make sure to shut off the gas supply before moving the appliance. Consult the manufacturer’s instructions or a professional if you are unsure how to safely disconnect the gas line.
- Once the dryer is in a suitable position away from the wall, check for any obstructions or obstacles that may hinder the installation of the dryer hose.
Moving the dryer away from the wall allows for easier access to the back of the appliance and ensures a smooth installation process for the dryer hose.
Cleaning the Dryer Vent
Before installing a new dryer hose, it is essential to clean the dryer vent. Over time, lint and debris can accumulate in the vent, causing blockages and reducing the efficiency of your dryer. Here’s how you can clean the dryer vent:
- Start by disconnecting the dryer hose from the back of the dryer. This will expose the vent opening.
- Using a vacuum cleaner or a lint brush, remove any lint or debris from the vent opening and the surrounding area.
- Next, carefully clean the inside of the dryer hose using the vacuum cleaner or lint brush. Pay special attention to any clogged areas or excessive lint buildup.
- Inspect the vent opening on the exterior of your home and remove any debris or blockages.
Cleaning the dryer vent ensures proper airflow, improves the efficiency of your dryer, and reduces the risk of fire caused by lint buildup. Regularly cleaning the dryer vent is important for the maintenance of your appliance.
By following these steps to prepare your dryer, you are setting the stage for a successful dryer hose installation. Take your time to ensure each step is completed thoroughly for optimal results.

Connecting The Dryer Hose To The Dryer
Connecting the Dryer Hose to the Dryer
When it comes to installing a dryer hose, connecting it to the dryer is a crucial step. This ensures that the hot air from the dryer is properly vented outside, preventing any potential hazards or damage to your home. In this section, we will be covering the necessary steps to connect the dryer hose to the dryer outlet. Let’s get started!
Determining the Correct End of the Hose
Before attaching the hose to the dryer outlet, it’s important to determine the correct end of the hose. One end of the hose will have a larger opening, while the other end will have a smaller opening. The smaller end of the hose should be connected to the dryer outlet, while the larger end will be attached to the external venting system.
To determine the correct end, you can check the instructions manual provided with your dryer. It will usually indicate which end should be connected to the dryer outlet. If you don’t have the manual, you can look for any markings or indicators on the hose itself that indicate the correct direction. Once you have determined the correct end, you can move on to attaching the hose to the dryer outlet.
Attaching the Hose to the Dryer Outlet
To attach the hose to the dryer outlet, follow these simple steps:
- Position the dryer in such a way that you have easy access to the rear panel.
- Locate the dryer outlet at the back of the dryer.
- Take the smaller end of the dryer hose and carefully insert it into the dryer outlet.
- Make sure the hose fits securely into the outlet, without any gaps or loose connections.
- Push the hose in until it reaches the point of resistance, ensuring a snug fit.
Once you have attached the hose to the dryer outlet, you can proceed to the final step of securing the hose with a clamp.
Securing the Hose with a Clamp
To ensure that the hose stays securely in place, it is recommended to use a hose clamp. Here’s how you can secure the hose with a clamp:
- Slide the clamp over the end of the dryer hose.
- Tighten the clamp using a screwdriver or a hose clamp tool.
- Make sure the clamp is tight enough to hold the hose in place, but not too tight to damage the hose or restrict airflow.
- Check the connection to ensure there are no leaks or loose fittings.
By following these steps, you can easily connect your dryer hose to the dryer outlet, ensuring proper ventilation and safety. Remember to regularly check the connection and clean the dryer hose to maintain optimal performance.
Connecting The Dryer Hose To The Vent
Once you have properly positioned your dryer and located the vent opening, it’s time to connect the dryer hose to the vent. This step is crucial for ensuring proper ventilation and preventing any potential hazards. We will guide you through the process of aligning and securing the hose to the vent with a clamp. Follow these steps to complete the installation:
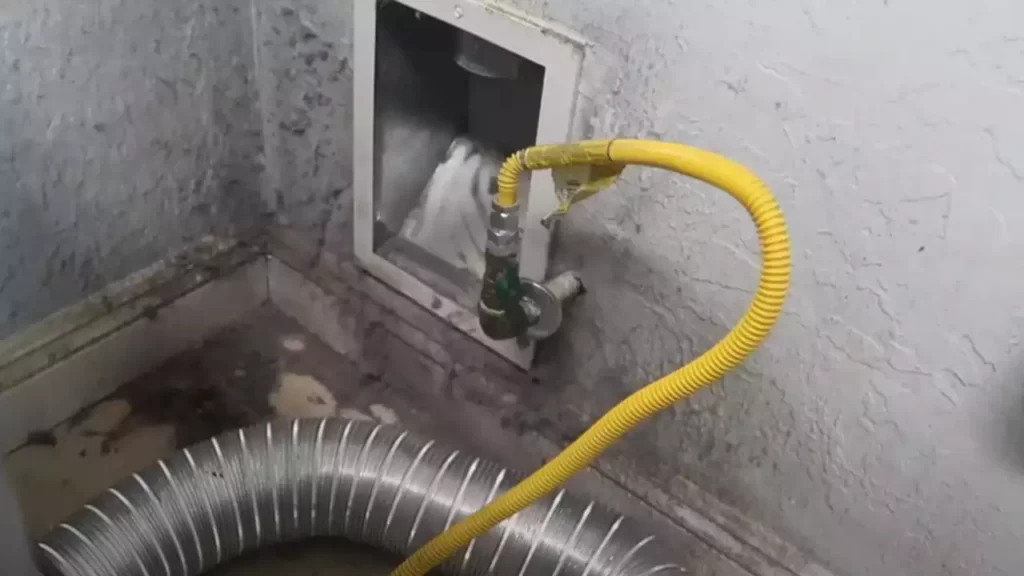
Locating the Vent Opening
Before connecting the dryer hose, it’s important to locate the vent opening. This opening is typically located on an exterior wall of your home, near where your dryer is placed. Look for a small metal or plastic cover with louvers or slits for ventilation. Ensure there are no obstructions blocking the vent opening, such as debris or vegetation. A clear vent opening allows for effective airflow, reducing the risk of lint buildup and potential fire hazards.
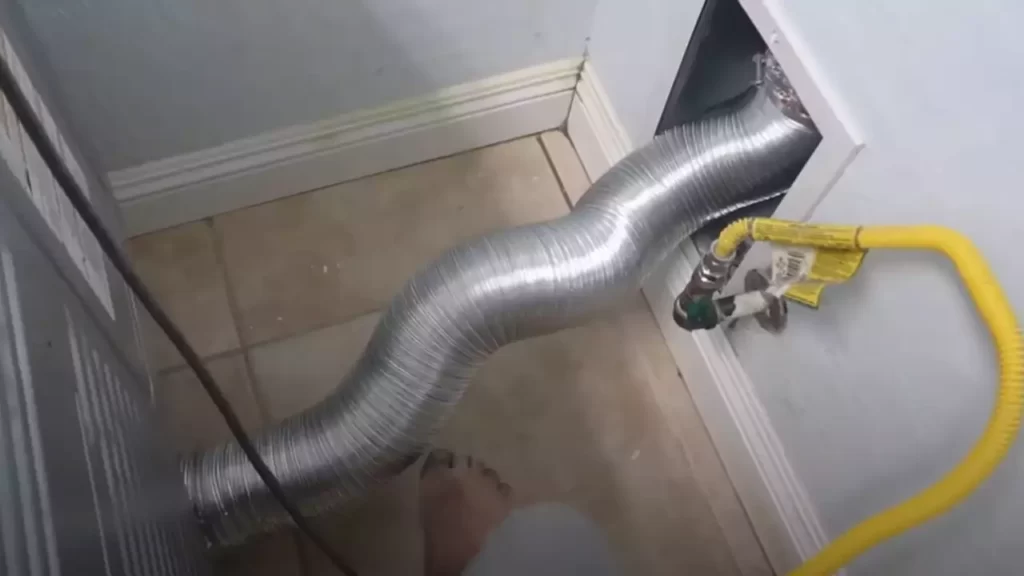
Aligning the Hose with the Vent Opening
Now that you have identified the vent opening, it’s time to align the dryer hose with it. Here’s how:
- Start by sliding one end of the hose onto the dryer vent outlet located at the back of your dryer. Make sure it fits snugly, but avoid forcing it as it may cause damage.
- Next, take the other end of the hose and position it over the vent opening. Align the hose with the vent opening, ensuring a proper connection that allows for optimal airflow. Double-check that the hose is not twisted or kinked, as it can hinder efficient drying performance.
Proper alignment of the dryer hose with the vent opening ensures that the hot air and moisture from your dryer are safely vented outside, reducing the risk of moisture buildup and potential mold growth.
Securing the Hose to the Vent with a Clamp
Securing the dryer hose to the vent opening is crucial to prevent any accidental disconnections or leaks. Here’s how to do it:
- Place a clamp over the hose and position it approximately one inch from the open end.
- Tighten the clamp using a screwdriver or pliers until it holds the hose securely in place. Ensure that the clamp is tightened enough to prevent any air leaks but be cautious not to overtighten, as it can damage the hose or vent.
- Once the hose is securely fastened with the clamp, give it a gentle tug to check if it’s firmly attached. If it moves or detaches easily, you may need to readjust the clamp for a tighter fit.
Securing the hose to the vent with a clamp helps maintain a steady airflow throughout the drying process, allowing your dryer to operate efficiently. Regularly check the clamp’s tightness to ensure it remains secure and make any necessary adjustments if needed.
By properly connecting the dryer hose to the vent opening and securing it with a clamp, you can ensure that your dryer operates safely and optimally. This installation step enables efficient ventilation, preventing any potential hazards and promoting effective drying performance.
Testing The Dryer Hose Installation
Connecting the Dryer to the Power Source
Now that you have successfully installed the dryer hose, it’s time to connect your dryer to the power source. Remember, safety should always be your top priority when dealing with electrical connections.
- Start by locating the power cord of your dryer. It should have a plug at one end and bare wires at the other. Make sure the dryer is unplugged before proceeding.
- Take a look at your electrical outlet and identify the type of plug required. Most dryers use a 3-prong or 4-prong plug, so ensure you have the appropriate power cord.
- Align the prongs of the power cord with the corresponding slots in the outlet and insert it firmly. If you have a 4-prong plug, don’t forget to connect the ground wire.
- In the back of your dryer, you will find a terminal block where the power cord needs to be connected. Loosen the screws on the block and attach the bare wires of the power cord accordingly – red to red, black to black, and white to white. If you have a 4-prong plug, connect the green wire to the grounding screw.
- Tighten the screws on the terminal block to ensure a secure connection. Double-check all the connections to make sure everything is properly attached.
Running the Dryer and Checking for Proper Ventilation
After connecting the dryer to the power source, it’s time to test its functionality and ensure it is properly ventilated. Here’s what you need to do:
- Make sure the dryer is empty and close the door securely.
- Turn the control knob to the desired drying setting and press the start button.
- Observe the operation of the dryer. Check if the drum spins smoothly and if there are any unusual noises or vibrations.
- While the dryer is running, go outside and inspect the vent hood. Verify that the air is freely flowing through the vent and that there are no obstructions such as lint build-up or debris.
- If you notice any blockage or poor airflow, it may be necessary to clean the vent or seek professional assistance to prevent potential hazards.
Verifying the Tightness of the Hose Connections
Lastly, you’ll want to ensure that all hose connections are tight and secure. Here’s what you need to do:
- Inspect the connection between the dryer and the dryer hose. Ensure that the hose is firmly attached and that there are no gaps or leaks.
- If you notice any loose connections, use a screwdriver or other appropriate tool to tighten them properly.
- Similarly, check the connection between the dryer hose and the vent duct. Tighten any loose connections to guarantee a snug fit.
- Once you have checked all the hose connections, run the dryer briefly and verify that there are no air leaks around the connections.
- If you detect any leaks or loose fittings, make necessary adjustments and retest until everything is sealed tightly.
Congratulations! You have successfully completed the installation of your dryer hose and conducted the necessary tests to ensure its functionality and safety. With proper ventilation and secure connections, you can now enjoy efficient drying cycles without any worries.
Identifying And Fixing Hose Leaks
A leaking dryer hose not only reduces the efficiency of your dryer but also poses a potential risk for water damage or even fire hazards. That’s why it’s crucial to identify and fix any leaks in your dryer hose. In this guide, we’ll provide you with steps to detect leaks during installation and show you how to use foil tape to seal them effectively.
Detecting Leaks during Installation
During the installation process, it’s important to keep a keen eye out for any leaks in your dryer hose. Here are some steps to help you detect leaks:
- Before installing your dryer hose, inspect it thoroughly for any visible damage or tears.
- Once the hose is connected to the dryer and the wall vent, run the dryer for a few minutes on a heat setting.
- During operation, carefully examine the entire length of the hose, including the connections, for any signs of air or moisture leakage.
- If you notice any leaks, mark them down for the next step.
By following these steps, you will be able to quickly spot any leaks and move on to fixing them.
Using Foil Tape to Seal Leaks
Foil tape is an excellent solution for sealing leaks in your dryer hose. Here’s how you can effectively use foil tape to fix leaks:
- Observe the locations where you identified leaks during the installation process.
- Cut a piece of foil tape that is long enough to cover the leaky area. Make sure to cut an extra margin of tape for better adhesion.
- Clean the area around the leak with a cloth or rag to ensure proper adhesion.
- Peel off the backing from the foil tape, exposing the adhesive side.
- Press the adhesive side firmly against the leaky area, starting from one end and working your way to the other.
- Smooth out the tape to ensure it adheres well to the hose and covers the entire leak.
- Repeat this process for any other leaks you have identified.
By using foil tape, you can seal leaks in your dryer hose effectively, preventing any air or moisture from escaping and ensuring optimal performance.
Regularly inspecting your dryer hose for leaks and promptly fixing them will not only extend the lifespan of your dryer but also help you maintain a safe and efficient drying process. Remember to follow these steps for detecting and fixing leaks during the installation, and make use of foil tape to seal any identified leaks. By taking these preventive measures, you can ensure your dryer operates at its best and enjoy peace of mind knowing you’ve minimized the risk of potential hazards.
Preventing Hose Crush And Collapse
Using Adequate Hose Length
When it comes to preventing hose crush and collapse, using an appropriate hose length is crucial. The hose should be long enough to allow the dryer to be positioned away from the wall, enabling proper airflow. A hose that is too short and pulled taut may restrict the airflow, resulting in decreased drying efficiency and potential overheating.
When installing a new dryer hose, measure the distance from the dryer outlet to the vent opening on the wall or ceiling. Add a few extra inches to account for any bends or curves. It’s better to have a slightly longer hose that can be conveniently looped or folded rather than a hose that is stretched to its limit.
Remember, an adequate hose length ensures smooth airflow, preventing unnecessary strain on your dryer and reducing the risk of hose damage or collapse, keeping both your dryer and laundry room safe.
Avoiding Sharp Bends and Kinks
In addition to using the right hose length, avoiding sharp bends and kinks is vital to maintaining optimal dryer performance and preventing hose crush or collapse. Sharp bends or kinks can disrupt the proper flow of air, leading to reduced drying efficiency and potential overheating.
When routing the hose, make sure to avoid any sharp turns or angles. The hose should be able to follow a gentle curve without any restrictions. If you encounter tight spaces or obstacles, consider using adjustable elbows or flexible sections to navigate around them smoothly.
Regularly inspect the hose for any signs of bending or kinking, and if identified, immediately rectify the issue. It’s better to address minor bends or kinks early on to prevent major problems down the line.
Using Support Brackets or Straps
Properly securing the dryer hose with support brackets or straps is another effective way to prevent hose crush and collapse. These accessories provide stability and hold the hose in place, ensuring it stays intact during operation.
Before installing the hose, identify the attachment points on both the dryer and the vent opening. These attachment points will serve as the anchors for the support brackets or straps. Place them approximately every 4 to 5 feet along the length of the hose, or as per the manufacturer’s recommendations.
Securely fasten the brackets or straps around the hose and anchor them to the designated attachment points. This will help distribute the weight of the hose and prevent it from sagging, reducing the risk of crush or collapse.
Regularly check the support brackets or straps for any signs of damage or loosening and replace them if necessary. Proper maintenance and reinforcement of the hose will help ensure smooth airflow and safe dryer operation.
Ensuring Proper Ventilation
Proper ventilation is essential for safe and efficient operation of your dryer. A dryer hose is responsible for carrying hot air and moisture away from the appliance and out of your home. In this section, we will dive into the importance of ensuring proper ventilation and how you can achieve it.
Regularly Cleaning the Dryer Hose and Vent
Regular cleaning of your dryer hose and vent is crucial to maintain proper airflow and prevent potential hazards. Over time, lint and debris can build up in the hose and vent, causing blockages that restrict the flow of air. This not only reduces the dryer’s efficiency but also poses a fire risk. Therefore, it’s imperative to include cleaning the dryer hose and vent as part of your regular maintenance routine.
Inspecting and Replacing Damaged Hoses
Inspecting your dryer hose for any signs of damage is essential in ensuring proper ventilation. Over time, hoses can become brittle or develop cracks, which can lead to leaks or even complete disconnections. Regularly check the hose for any wear and tear, paying close attention to areas near bends or connections. If you notice any damage, it’s crucial to replace the hose promptly. This ensures that air is properly channeled out of the dryer, preventing potential hazards and maintaining optimal performance.
Avoiding Vent Blockages
Keeping the dryer vent free from blockages is crucial for proper ventilation. One way to achieve this is by avoiding the use of flexible or corrugated hoses, as they are more prone to causing blockages. Instead, opt for rigid metal or semi-rigid aluminum hoses, which promote better airflow. Additionally, ensure that the vent opening on the exterior of your house is clear from obstructions such as bird nests or debris. By preventing vent blockages, you can maintain optimal ventilation, reduce the risk of fires, and extend the lifespan of your dryer.
Frequently Asked Questions
What Is The Easiest Dryer Vent Hose To Install?
The easiest dryer vent hose to install is a flexible, expandable aluminum duct. It is easy to maneuver and connect to the dryer and vent outlet, making installation a breeze. This type of hose provides efficient airflow and is compatible with most dryers.
How Do You Keep A Dryer Vent Hose Attached?
Ensure the dryer vent hose stays attached by following these steps: 1) Firmly connect the hose to the dryer with clamps or screws. 2) Use duct tape or foil tape to seal any gaps or leaks. 3) Avoid bending or kinking the hose to maintain its connection.
4) Regularly check and clean the vent to prevent blockages. 5) Consider using a vent clamp or hose clamp for extra security.
Does A Dryer Hose Have To Be Straight?
Yes, a dryer hose should be straight for optimal performance. A straight hose allows for proper airflow, minimizing the risk of lint buildup and reducing the chances of fire hazards. It also ensures efficient drying and reduces energy consumption.
Does The Dryer Hose Have To Go Outside?
Yes, the dryer hose should go outside to properly vent the hot air and moisture. This helps prevent damage to your home’s interior and reduces the risk of fire.
Conclusion
To sum up, installing a dryer hose is a relatively simple task that anyone can accomplish with a few basic tools. By following the step-by-step instructions outlined in this blog post, you can ensure a safe and efficient setup for your dryer.
Remember to measure carefully, secure all connections, and regularly maintain and clean your hose for optimal performance. With these tips in mind, you’ll be ready to enjoy the convenience of a properly installed dryer hose in no time.