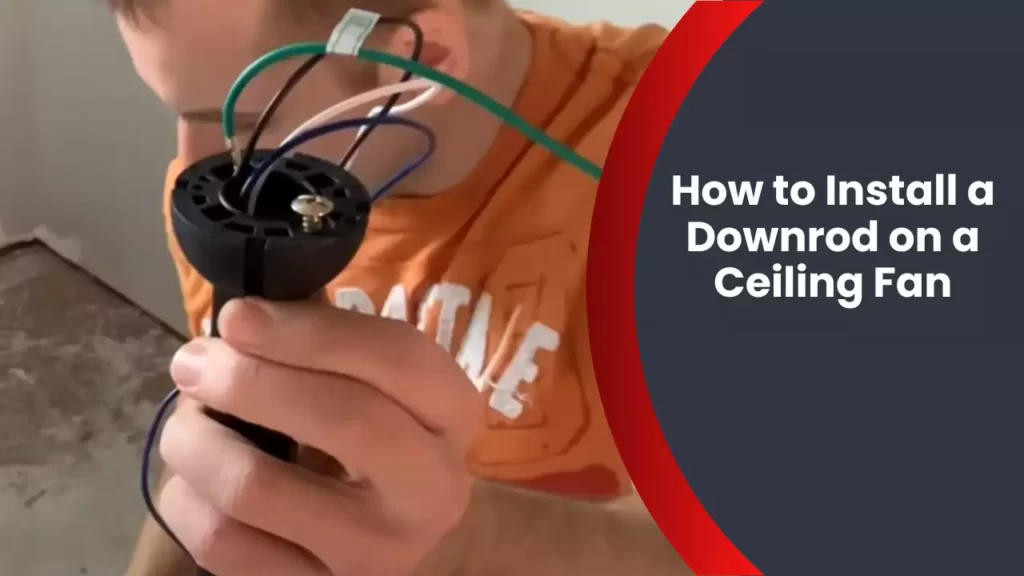
To install a downrod on a ceiling fan, first, turn off the power and remove the fan canopy, then attach the downrod and secure it with the provided hardware. Finally, reattach the canopy and restore power to the fan.
Ceiling fans are not only functional, but they can also add a touch of style to any room. When installing a ceiling fan, understanding how to properly attach a downrod is essential for optimal performance. A downrod is a metal rod that extends the fan’s distance from the ceiling, allowing for better air circulation.
This guide will provide step-by-step instructions on how to install a downrod on a ceiling fan. By following these simple steps, you’ll be able to enhance the functionality and aesthetic appeal of your ceiling fan in no time. So, let’s get started!
Understanding The Importance Of A Downrod
The purpose of a downrod in a ceiling fan
Understanding the importance of a downrod is essential when it comes to installing a ceiling fan. A downrod is a crucial component that connects the fan to the ceiling mount. This metal rod plays a significant role in ensuring proper airflow and maximizing the fan’s performance. Its purpose is multi-fold:
- Elevation: The primary function of a downrod is to elevate the ceiling fan away from the ceiling. By doing so, it allows for better air circulation in the room, preventing the fan from being too close to the ceiling and hindering the airflow.
- Aesthetic appeal: Another essential aspect of a downrod is its contribution to the overall look and feel of the ceiling fan. It adds an elegant touch, allowing the fan to hang at the right height, giving the room a stylish and balanced appearance.
- Noise reduction: Additionally, a well-installed downrod can help minimize any potential noise that may arise from the fan’s motor. The distance created between the ceiling and the fan motor reduces the chances of vibrations or rattling noises, resulting in a more peaceful and enjoyable environment.
Why choosing the right downrod is crucial for proper installation
When it comes to installing a ceiling fan, choosing the right downrod is of utmost importance. This decision can significantly impact the fan’s performance, efficiency, and overall effectiveness. Here’s why:
- Proper air circulation: Selecting the correct downrod length ensures that the fan blades are at an optimal distance from the ceiling. If the downrod is too short, it can restrict the airflow, limiting the fan’s ability to cool the room effectively. On the other hand, a downrod that is too long can disrupt the balance of the fan and compromise its efficiency.
- Safe operation: Installing the appropriate downrod ensures the ceiling fan operates safely. Using the wrong size can lead to stability issues and increase the risk of accidents or damage. It is crucial to refer to the manufacturer’s guidelines and specifications to determine the correct downrod length for your specific ceiling height.
- Enhanced aesthetics: The right downrod not only promotes proper functionality but also contributes to the overall aesthetics of the room. A well-chosen downrod complements the ceiling fan design and the room’s decor, creating a visually pleasing and cohesive atmosphere.
By understanding the purpose of a downrod and the importance of selecting the right one, you’ll ensure a successful ceiling fan installation that enhances both the comfort and aesthetics of your space.
Measuring The Ceiling Height
Determining the height of your ceiling
Before you begin the installation process of a downrod on your ceiling fan, it is crucial to accurately measure the height of your ceiling. This step is essential to ensure that you choose the appropriate downrod length for your specific space. Here are the steps to determine the height of your ceiling:
- Locate a sturdy ladder or step stool that can safely support your weight.
- Climb up to the highest point of your ceiling where the fan will be installed.
- Hold the measuring tape or ruler vertically against the ceiling, starting from the floor.
- Extend the measuring tape until you reach the highest point of the ceiling.
- Take note of the measurement in feet.
By accurately determining the height of your ceiling, you will have the necessary information to proceed with choosing the right downrod length for your ceiling fan installation.
Understanding the recommended downrod length based on ceiling height
Once you have measured the height of your ceiling, it is essential to understand the recommended downrod length based on that measurement. The downrod’s purpose is to ensure that your ceiling fan is positioned at an optimal distance from the floor for proper air circulation. Here’s a breakdown of the recommended downrod lengths based on ceiling height:
| Ceiling Height | Downrod Length |
|---|---|
| 9 feet or less | Flush mount – no downrod needed |
| 9 to 10 feet | 6-inch downrod |
| 10 to 12 feet | 12-inch downrod |
| 12 to 14 feet | 18-inch downrod |
| Above 14 feet | 24-inch or longer downrod |
Choosing the correct downrod length ensures that your ceiling fan will be positioned at an optimal height, allowing for efficient air circulation without any safety concerns.
Considering any restrictions or limitations in your space
While the recommended downrod lengths provide a general guideline, it’s essential to consider any restrictions or limitations that your space may have. These factors can affect the ideal downrod length for your ceiling fan installation. Consider the following points:
- If your space has low-hanging fixtures, such as chandeliers or pendant lights, make sure to include their height in your measurements. This will help you determine the appropriate downrod length that allows sufficient clearance.
- If there are any architectural elements, such as beams or sloped ceilings, take them into account when selecting a downrod length. These elements may require additional adjustments to ensure proper installation and functionality.
- Ensure that the chosen downrod length will not interfere with any doors or windows in the room. This step prevents any potential obstructions when opening or closing these features.
By considering these restrictions and limitations, you can ensure that the downrod length you select is suitable for your specific space, providing optimal function and aesthetics for your ceiling fan installation.
Checking The Fan Specifications
Installing a downrod on your ceiling fan can be a simple and satisfying DIY project. Before you begin, it’s crucial to check the fan specifications to ensure that the downrod is compatible with your ceiling fan model. This will help ensure proper installation and optimal performance.
1. Reviewing the manufacturer’s instructions for downrod compatibility
First and foremost, you should refer to the manufacturer’s instructions that came with your ceiling fan. These instructions will provide valuable information about the compatibility of downrods with your specific fan model. Look for any specific guidelines or recommendations regarding the length and type of downrod that can be used.
By following the manufacturer’s guidelines, you can ensure that you choose the right downrod and avoid any potential issues that may arise from using an incompatible one. Remember, different ceiling fan models may have different requirements, so it’s essential to refer to the specific instructions for your fan.
2. Understanding the weight limit and support requirements
Another important consideration when installing a downrod is the weight limit and support requirements of your ceiling fan. The downrod needs to be able to support the weight of the fan, as well as any additional accessories you may have attached, such as light fixtures or remote controls.
Refer to the manufacturer’s instructions or specifications to determine the maximum weight capacity of your fan. Ensure that the downrod you choose can support this weight without compromising safety or stability. Using a downrod that is too short or not designed to handle the weight of your fan can result in wobbling or even damage to the fan.
3. Ensuring the downrod is compatible with your ceiling fan model
Finally, it’s vital to ensure that the downrod you select is compatible with your specific ceiling fan model. Some fans have unique mounting systems or require specific adapters for the downrod installation. You don’t want to go through the trouble of purchasing a downrod only to find out it’s not compatible with your fan.
Double-check the specifications of your ceiling fan and compare them with the downrod you intend to install. Pay attention to the diameter and threading of the downrod to ensure a proper fit. Using a downrod that doesn’t match your fan’s requirements can lead to a faulty installation or even damage to the fan.
In conclusion, when installing a downrod on your ceiling fan, it’s essential to carefully review the manufacturer’s instructions for downrod compatibility, understand the weight limit and support requirements of your fan, and ensure the downrod is compatible with your specific ceiling fan model. By following these guidelines, you can ensure a successful installation that will provide optimal performance and longevity for your ceiling fan.

Tools Required For The Installation
List of necessary tools for installing a downrod on a ceiling fan
When it comes to installing a downrod on a ceiling fan, having the right tools at your disposal is essential. These tools will not only make the installation process smoother but also ensure that you achieve a secure and professional-looking result. Before you begin the installation, make sure you have the following tools on hand:
- Wrench
- Screwdriver (both flathead and Phillips)
- Wire cutters/strippers
- Pliers
- Ladder or step stool
- Electrical tape
- Voltage tester
Common household tools that may be needed
In addition to the specialized tools mentioned above, you may also need some common household tools to help with the installation process. These tools can come in handy for tasks such as removing existing hardware or making minor adjustments. Here are some common household tools that you may need:
- Hammer
- Utility knife
- Measuring tape
- Stud finder
- Wire nuts
- Zip ties
- Bucket or tray to hold screws and small parts
By having these tools readily available, you’ll be well-prepared to tackle the installation of a downrod on your ceiling fan. Remember, safety should always be a priority when working with electrical components, so make sure to follow the manufacturer’s instructions and take necessary precautions. With the right tools and a little patience, you’ll be able to enjoy the benefits of a properly installed ceiling fan in no time.
Materials Needed
To successfully install a downrod on your ceiling fan, you will need a few materials. These essential items will ensure a safe and secure installation process. In this section, we will cover the specific materials required, including the downrod length, additional hardware or accessories recommended by the manufacturer, and safety equipment.
The specific downrod length required for your ceiling fan
Choosing the right downrod length is crucial for proper installation and optimal performance of your ceiling fan. The specific downrod length you will need depends on the height of your ceiling. To determine the correct length, you can refer to the manufacturer’s instructions or follow this simple guide:
- Measure the distance from the ceiling to the floor using a measuring tape. Make sure to account for any additional height, such as sloped ceilings.
- Subtract the preferred height for the fan from the total ceiling height measurement. This will give you the required downrod length.
- Refer to the manufacturer’s recommendations or consult the fan’s manual to confirm the appropriate downrod length for your specific model.
It is important to note that using a downrod that is too short or too long can impact the fan’s performance and potentially pose a safety risk.
Any additional hardware or accessories recommended by the manufacturer
Manufacturers often provide specific recommendations for additional hardware or accessories that can enhance the installation process and ensure the longevity of your ceiling fan. These may include:
- Mounting brackets or adapters for special ceiling types
- Wire connector caps or wire nuts for secure electrical connections
- Lock washers or locknuts to prevent loosening over time
- Anti-vibration pads to minimize noise and vibrations
- Remote control or wall switch kit for convenient operation
Before starting the installation, carefully review the manufacturer’s instructions or consult the fan’s manual to determine if any additional hardware or accessories are recommended for your specific model.
Safety equipment such as gloves and goggles
While installing a downrod on a ceiling fan may seem like a straightforward task, it is important to prioritize safety throughout the process. To protect yourself from any potential accidents or injuries, the following safety equipment is recommended:
- Gloves: Thick, non-slip gloves will provide a firm grip while handling the downrod and other installation components.
- Goggles: Safety goggles or glasses will protect your eyes from any debris or particles that may be released during the installation.
Wearing the appropriate safety equipment will help ensure a safe and successful installation of your ceiling fan’s downrod.
Turning Off The Power
Importance of turning off the electricity to avoid accidents
Before you begin installing a downrod on your ceiling fan, it is absolutely crucial to turn off the power to prevent any potential accidents or electrical mishaps. By cutting off the electricity, you ensure your safety and minimize the risk of electric shocks or fires.
Locating and switching off the correct circuit breaker
To turn off the power before installing a downrod on your ceiling fan, you need to locate and switch off the correct circuit breaker. Follow these steps:
- Begin by identifying your electrical panel or fuse box. Usually, it is located in a basement, utility room, or garage.
- Open the electrical panel door and look for the circuit breaker labeled for your ceiling fan or the specific area where you’re planning to install the downrod.
- Once you locate the correct circuit breaker, firmly switch it to the off position. You should hear a distinctive click, indicating that the power is now disconnected.
- Double-check that the power is truly off by testing the fan switch or any other electrical device in the area. If everything remains inactive, you can proceed with the installation.
Staying safe throughout the process
While turning off the power is an essential step, it’s important to note that accidents can still happen if proper precautions are not taken. Follow these safety tips:
- Wear protective gloves to avoid any electrical contact.
- Use insulated tools specifically designed for electrical work.
- Avoid working on wet surfaces to minimize the risk of electrical conductivity.
- If you are unsure or uncomfortable with any step of the installation process, it is always recommended to seek professional assistance.
By adhering to these safety guidelines and diligently turning off the power before installing a downrod on your ceiling fan, you ensure a smooth and accident-free experience. Your safety should always be the top priority when it comes to electrical work.
Removing The Existing Ceiling Fan
Steps to Safely Remove the Existing Ceiling Fan
Before you can install a new downrod on your ceiling fan, you’ll need to remove the existing one. This process requires some careful steps to ensure both your safety and the integrity of the fan. Let’s walk through the process step by step:
Disconnecting the Electrical Connections
The first step in removing the existing ceiling fan is to disconnect the electrical connections. This ensures that you can work safely without the risk of electric shocks or accidents.
To disconnect the electrical connections, follow these simple steps:
- Locate the circuit breaker or fuse box for your ceiling fan.
- Turn off the power supply to the fan by switching off the corresponding breaker or removing the fuse.
- Using a voltage tester, double-check that the power is indeed off before proceeding. Safety should always be your top priority.
- Next, remove the canopy or ceiling cover that hides the electrical connections. Depending on the fan model, you may need to unscrew or unclip the canopy.
- Once the canopy is removed, expose the electrical wires and carefully disconnect them. If you’re unsure about the wiring connections, it’s best to take photos or label the wires to ensure correct reinstallation later.
Removing the Fan Blades and Attaching a Temporary Hook
With the electrical connections safely disconnected, you can now proceed to remove the fan blades and attach a temporary hook. This step allows you to easily work on the fan without it hanging from the ceiling.
Follow these instructions to remove the fan blades:
- Locate the screws that attach the fan blades to the motor. Depending on the fan model, you may find these screws directly on the blades or within the blade brackets.
- Using a screwdriver, carefully unscrew the blades one by one, ensuring not to drop them. It’s a good idea to place the screws in a small container or bag for safekeeping.
- Once all the blades are removed, you can attach a temporary hook to the motor housing. This hook will support the fan while you work on installing the downrod.
- Hang the temporary hook securely from a stable structure, such as a ceiling joist or beam. Ensure that the hook is strong enough to hold the weight of the fan.
- Gently lift the fan and hang it on the temporary hook, taking care not to damage the electrical wires or motor housing.
Following these steps will allow you to safely remove the existing ceiling fan and prepare the space for installing a new downrod. Remember to work carefully and attentively to minimize any risks and ensure a smooth installation process.
Attaching The Downrod To The Fan Motor
Aligning the Downrod with the Fan Motor Housing
Before attaching the downrod to the fan motor, it’s important to ensure proper alignment between the two components. Here’s a step-by-step guide to help you with this process:
- Start by examining the downrod and locating the side with a hole or opening. This side will align with the fan motor housing.
- Gently hold the downrod near the hole, making sure it is parallel to the fan motor housing.
- Take a moment to confirm that the downrod is in the correct orientation. This means the side with the hole should be facing the fan motor while the opposite end will eventually attach to the ceiling canopy.
- Ensure that the wiring inside the fan motor housing is not obstructing the path of the downrod. It should be tucked away neatly to allow for a smooth installation.
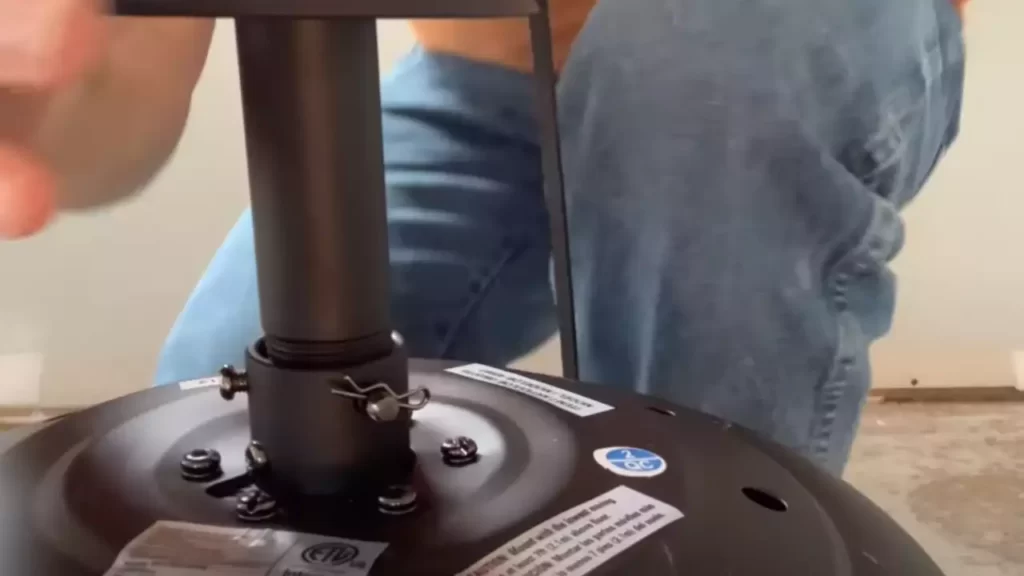
Securing the Downrod using the Provided Screws
Once you have aligned the downrod with the fan motor housing, it’s time to secure it in place using the provided screws. Follow these simple steps:
- Take one of the screws and insert it through the hole in the downrod, aligning it with the pre-drilled hole in the fan motor housing.
- Using a screwdriver or a suitable tool, tighten the screw securely but be careful not to overtighten it as this may cause damage to the downrod or the fan motor housing.
- Repeat the process for the remaining screws, making sure each one is placed in its corresponding hole on the downrod and fan motor housing.
- Once all the screws are securely tightened, double-check the alignment of the downrod to ensure it is parallel to the fan motor housing.
Following these steps will ensure proper attachment of the downrod to the fan motor housing. Remember to refer to the manufacturer’s instructions for specific guidelines related to your ceiling fan model.
Mounting The Ceiling Plate
Once you have assembled the downrod and attached it to the motor housing of your ceiling fan, the next step is to mount the ceiling plate. The ceiling plate is an essential component that not only provides stability to the fan but also covers the electrical box on your ceiling. Follow the step-by-step instructions below to securely mount the ceiling plate:
Securing the ceiling plate to the electrical box
- Start by locating the electrical box on your ceiling. The electrical box should be securely installed and able to support the weight of the ceiling fan.
- Hold the ceiling plate against the electrical box, ensuring that the screw holes align with the holes in the box.
- Using the provided screws, attach the ceiling plate to the electrical box. Make sure to tighten the screws firmly, but be careful not to overtighten as this can strip the threads or damage the electrical box.
Making sure the plate is level and flush with the ceiling
After securing the ceiling plate to the electrical box, it is important to ensure that the plate is level and flush with the ceiling. This not only enhances the aesthetic appeal of the ceiling fan but also ensures proper operation. Follow these steps to ensure your ceiling plate is level and flush:
- Use a level to check if the ceiling plate is horizontally level. This can be done by placing the level on top of the plate and adjusting as necessary.
- Once the plate is level, check if it is flush with the ceiling. You can run your hand along the edges to feel for any gaps between the plate and the ceiling.
- If the plate is not flush with the ceiling, loosen the screws slightly and adjust the position of the plate until it is flush.
- Once the plate is level and flush, tighten the screws securely to ensure a stable installation.
By following these instructions, you can confidently mount the ceiling plate of your ceiling fan. Remember to always adhere to safety precautions and consult a professional if you are unsure about any aspect of the installation process.
Connecting The Wiring
Connecting the wiring is an essential step when installing a downrod on a ceiling fan. In this section, we will guide you through the process of matching the wires based on color and connector type, as well as using wire connectors to secure the electrical connections. Properly connecting the wiring ensures the fan operates safely and efficiently. Let’s get started!
Matching the wires based on color and connector type
When connecting the wiring for your ceiling fan, it’s important to match the wires based on their color and connector type. This helps to ensure that the correct electrical connections are made, preventing any potential hazards or malfunctions.
The standard color-coding for electrical wires in most ceiling fans is as follows:
- Black – This wire is typically the hot wire responsible for powering the fan’s motor.
- White – This wire is the neutral wire, which completes the electrical circuit.
- Blue – This wire is often found in fans with light fixtures and controls the power supply for the lights.
- Green or Bare Copper – This wire is the grounding wire, which protects against electrical shock.
To ensure a proper match, simply connect wires of the same color together. For instance, connect the black wire from the fan to the black wire from the ceiling, the white wire to the white wire, and so on. Make sure to strip a small portion of insulation from the end of each wire before making the connection.
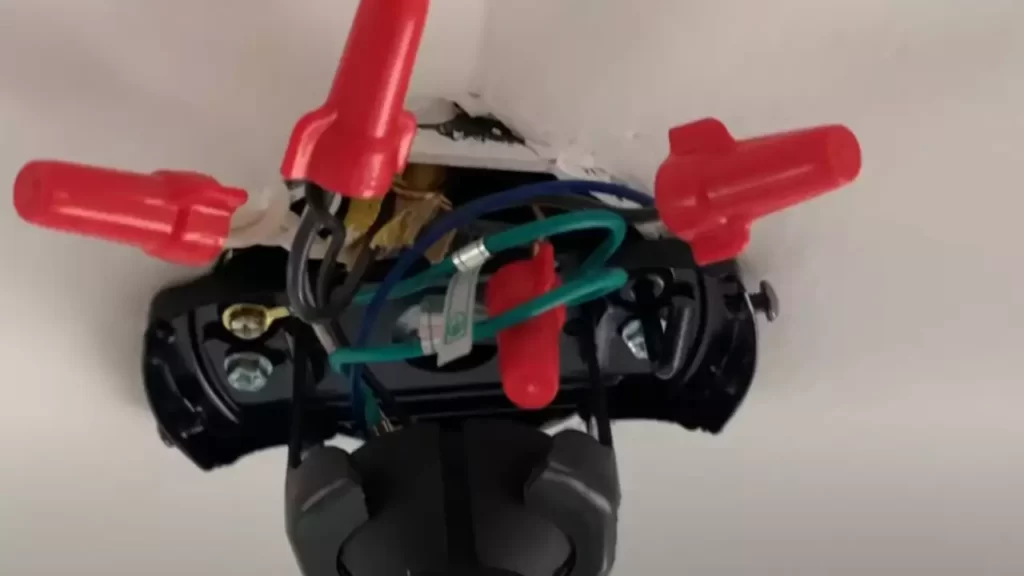
Using wire connectors to secure the electrical connections
Once you have matched the wires based on color and connector type, it’s time to secure the electrical connections using wire connectors. Wire connectors (also known as wire nuts) are small caps that twist on to join two or more wires together.
To properly secure the connections, follow these steps:
- Twist together the stripped ends of the wires you are connecting. For example, twist the black wire from the fan with the black wire from the ceiling.
- Insert the twisted wires into an appropriately sized wire connector.
- Twist the wire connector clockwise until it is firmly secured onto the wires. This ensures a tight and safe connection.
- Repeat this process for each set of wires that need to be connected.
After securing the electrical connections with wire connectors, gently tug on the wires to make sure they are secure. If any of the connections feel loose, repeat the steps above to ensure a tight fit.
By matching the wires based on color and connector type and using wire connectors to secure the electrical connections, you can confidently complete the wiring process of installing a downrod on your ceiling fan. Proper wiring not only ensures the safe operation of your fan but also helps to extend its lifespan.
Hanging The Fan Assembly
Lifting the fan assembly onto the downrod
Lifting the fan assembly onto the downrod is a crucial step in the installation process, as it sets the foundation for a secure and stable ceiling fan. Follow these simple steps to ensure a smooth and successful installation.
- Start by getting a helping hand. Ceiling fans can be heavy and difficult to maneuver on your own. Have a friend or family member assist you in lifting and holding the fan assembly.
- Using a sturdy ladder or step stool, position yourself at a comfortable height so you can easily access the ceiling. Make sure the power to the fan is turned off before attempting any installation.
- With one person holding the fan assembly, align the holes in the fan canopy with the holes in the mounting bracket. Ensure that the wires are properly threaded through the center of the downrod.
- Taking extra care, lift the fan assembly and position it over the downrod. Align the holes in the downrod with the holes in the fan assembly, making sure they are properly lined up.
- Insert the provided screws through the holes and tighten them securely, ensuring that the fan assembly is firmly attached to the downrod. Use a screwdriver or drill with the appropriate attachment to fasten the screws securely.
- Double-check that all the screws are tightened and there is no wobbling or looseness in the fan assembly. A secure attachment is essential for safe and efficient operation.
Ensuring the fan is securely fastened to the downrod
After hanging the fan assembly, it is crucial to ensure that the fan is securely fastened to the downrod. This step ensures stability and reduces the risk of any accidents or damage. Follow these guidelines to ensure a secure attachment.
- Check each screw used to attach the fan assembly to the downrod. Make sure all screws are properly tightened to prevent any movement or instability.
- Ensure that the wires are not tangled or pinched between the fan assembly and the downrod. Proper alignment and positioning of the wires are essential for safe operation.
- Give the fan assembly a gentle shake to test the stability. If you notice any wobbling or shaking, double-check the screws and tighten them as necessary. A properly fastened fan should be sturdy and secure.
- Inspect the downrod and mounting bracket for any signs of damage or weakness. If any issues are detected, contact the manufacturer or a professional for assistance. It’s important to address any structural problems before continuing with the installation.
By carefully following these steps, you can ensure that your ceiling fan is properly installed and securely fastened to the downrod. Taking the time to hang the fan assembly correctly will result in a safe and efficient ceiling fan that provides comfort and airflow throughout your space.
Installing The Fan Blades
Attaching the fan blades to the motor housing
Once you have successfully installed the downrod and suspended your ceiling fan, it’s time to move on to attaching the fan blades to the motor housing. The fan blades are a crucial component that determines the performance and airflow of your ceiling fan. Follow these steps to ensure a secure and properly aligned installation:
- Begin by unpacking the fan blades and identifying the corresponding mounting brackets on the motor housing.
- Take one fan blade and align it with the appropriate mounting bracket. The blade should rest flush against the motor housing.
- Using the provided screws, insert them through the pre-drilled holes on the blade and into the corresponding holes on the mounting bracket.
- Make sure the screws are tightened securely, but be cautious not to over-tighten and damage the blade or bracket.
- Repeat this process for each fan blade, making certain to attach them evenly around the motor housing for balance and stability.
Aligning and tightening the screws to hold the blades in place
Proper alignment and tightening of the screws are vital to securely hold the fan blades in place. Follow these steps to ensure a stable and efficient fan installation:
- Check that all of the fan blades are aligned appropriately and not obstructing each other or the motor housing.
- Starting with the first blade, check each screw to ensure it is snugly tightened. Repeat this process for each blade.
- If any screws are loose, use a screwdriver to carefully tighten them until they are secure.
- Once all screws are tightened, give each blade a gentle tug to ensure they are firmly attached to the motor housing.
- Periodically inspect the fan blades to ensure they remain securely fastened over time.
Following these steps will ensure that your fan blades are properly installed and securely held in place. A well-installed set of blades will contribute to the smooth operation and airflow of your ceiling fan, providing both comfort and style to your space.
Testing And Adjustments
Once you have successfully installed the downrod on your ceiling fan, it’s important to test and make any necessary adjustments to ensure its optimal functionality. In this section, we will discuss the steps involved in testing the fan’s functionality, checking for any unusual noises or vibrations, and making adjustments to balance the fan.
Turning on the power to test the fan’s functionality
Before proceeding with any further adjustments, it’s crucial to turn on the power and test the fan to ensure that it is working properly. Here’s how to do it:
- Make sure the power is switched off at the breaker to avoid any electrical accidents.
- Turn on the power at the breaker once you have ensured the proper connection of the ceiling fan to the electrical supply.
- Use the fan’s remote control or wall switch to turn on the fan. Observe its operation and make sure it spins in the desired direction.
- Check that all the fan’s functions, such as the speed settings and the light (if applicable), are working correctly.
- If the fan fails to function or any of its features are not working, double-check the electrical connections and consult the manufacturer’s instructions for troubleshooting tips.
Checking for any unusual noises or vibrations
Once you have confirmed that the fan is functioning properly, the next step is to check for any unusual noises or vibrations that may indicate an issue with the installation. Here’s what you need to do:
- Switch the fan to different speeds and observe if there are any strange noises, such as grinding, scraping, or rattling sounds.
- Pay attention to any vibrations coming from the fan. Excessive vibrations may suggest that the fan is not properly balanced.
- If you notice any unusual noises or vibrations, it is advisable to switch off the fan immediately to prevent further damage.
Making any necessary adjustments to balance the fan
It is crucial to balance the ceiling fan properly to avoid unnecessary noise and excessive wear on both the fan and its components. Here are some steps to help you balance the fan:
- Ensure that all the fan blades are properly aligned and not bent or warped.
- Use a balancing kit, typically provided by the manufacturer, to balance the fan. These kits usually include adhesive weights that can be attached to the blades.
- Start by attaching a weight to one of the blades and turn the fan on. If the vibrations reduce, it indicates that particular blade needs more weight. Repeat this process for each blade until the vibrations are minimized.
- If the vibrations persist or become worse after attempting to balance the fan, it is advisable to consult a professional for further assistance.
By following these testing and adjustment steps, you can ensure that your ceiling fan operates smoothly and efficiently, providing a cool and comfortable environment in your living space.
Frequently Asked Questions
Can You Add A Downrod To Any Ceiling Fan?
Yes, you can add a downrod to any ceiling fan.
Does A Downrod Increase Airflow?
Yes, a downrod helps increase airflow in a room. By lowering the fan closer to the floor, it improves the circulation of air.
How Long Of A Downrod Do I Need For A 20 Foot Ceiling?
For a 20 foot ceiling, you will need a downrod that is around 12 to 18 inches long. This will allow for proper air circulation and ensure that the fan is at the right height for optimal performance.
How Do You Install A Ceiling Fan Without A Downrod?
To install a ceiling fan without a downrod, first, ensure the ceiling can support the weight. Next, mount the ceiling bracket onto the electrical box. Connect the wires from the fan to the corresponding wires in the ceiling bracket. Lastly, attach the fan blades, turn on the power, and enjoy the cool breeze!
Conclusion
To wrap it up, installing a downrod on a ceiling fan may seem daunting at first, but with the right knowledge and tools, it becomes a simple task. By following the step-by-step instructions outlined in this blog post, you’ll be able to enjoy the benefits of a properly installed ceiling fan that enhances air circulation in your home.
Remember to prioritize safety and consult the manufacturer’s instructions if needed. Happy installing!