To install a double wall oven, carefully measure the space, ensure proper wiring and ventilation, position the oven, level it, and secure it with screws. Once the oven is securely in place, connect the power supply and test the functionality.
A double wall oven is a convenient and space-saving appliance that allows for more efficient cooking. Whether you’re a professional chef or a home cook, installing a double wall oven can enhance your cooking experience and provide versatility in your kitchen.
Before installing a double wall oven, there are a few important steps to follow to ensure a successful installation. This guide will walk you through the process of installing a double wall oven in your kitchen.
Choosing The Right Double Wall Oven
Installing a double wall oven can be a game-changer for your kitchen, providing you with additional cooking space and flexibility. However, with so many options on the market, choosing the right double wall oven can be overwhelming. In this post, we will walk you through the key factors to consider when purchasing a double wall oven, help you understand the different types available, and guide you on measuring the available space for installation. By the end, you’ll be well-equipped to choose a double wall oven that meets your cooking needs and fits perfectly into your kitchen.
Factors to Consider when Purchasing a Double Wall Oven
Before diving into the various types of double wall ovens, it’s important to consider a few factors that will influence your buying decision. Taking the time to think about these factors will help you narrow down your options and ensure that you choose a double wall oven that suits your specific needs.
- Size: Measure the space available in your kitchen and ensure that the double wall oven you select fits perfectly into that space. Remember to consider both the height and width of the oven.
- Cooking Style: Think about the type of cooking you enjoy and the features that will enhance your cooking experience. Are you an avid baker who requires precise temperature control? Do you often cook large meals and need a spacious oven with multiple racks? Consider your cooking style and choose a double wall oven that matches it.
- Energy Efficiency: With sustainability becoming increasingly important, it’s worth considering the energy efficiency of the double wall oven you’re planning to purchase. Look for models with high energy-efficiency ratings to help reduce your environmental footprint.
- Budget: Determine your budget before starting your search for a double wall oven. This will help you narrow down your options and ensure that you don’t overspend.
Understanding the Different Types of Double Wall Ovens
Now that you have a clear understanding of the key factors to consider, let’s explore the different types of double wall ovens that are available:
| Type | Description |
|---|---|
| Convection Ovens | Convection ovens use a fan to circulate hot air evenly throughout the oven, resulting in faster and more even cooking. They are ideal for baking and roasting, producing crispy and perfectly cooked dishes. |
| Standard thermal ovens | Standard thermal ovens rely on traditional heating elements at the bottom and top of the oven. They offer reliable heating performance and are great for everyday cooking tasks. |
| Steam Ovens | Steam ovens use steam to cook food, allowing you to retain moisture and flavors. They are perfect for healthy cooking and reheating leftovers. |
| Speed Ovens | Speed ovens combine the functionality of a microwave with a convection oven. They offer fast cooking times while maintaining the desired texture and flavor of your dishes. |
Measuring the Available Space for Installation
Before finalizing your purchase, you need to ensure that the double wall oven will fit seamlessly into your kitchen. Here’s how to measure the available space:
- Measure the height, width, and depth of the space where the oven will be installed.
- Compare these measurements to the specifications provided by the manufacturer of the double wall oven you are considering.
- Make sure to account for any additional clearance required for proper ventilation and safe installation.
By following these simple steps, you can avoid any potential headaches and ensure that your new double wall oven fits perfectly into your kitchen.
Now that you have a solid understanding of how to choose the right double wall oven, it’s time to start exploring the different brands and models available on the market. With your requirements in mind, you’ll be able to make an informed decision and find a double wall oven that will take your cooking skills to the next level.
Preparing For Installation
When it comes to installing a double wall oven, proper preparation is essential to ensure a smooth and successful installation. This article will guide you through the necessary steps to prepare for the installation of your new double wall oven. From gathering the necessary tools and equipment, to removing the existing oven, and ensuring proper electrical and gas connections, we’ve got you covered.
Gathering the Necessary Tools and Equipment
Before you begin the installation process, it’s important to gather all the necessary tools and equipment. Having everything you need at hand will save you time and frustration during the installation process. Here’s a list of tools and equipment you’ll likely need:
| Tool or Equipment | Quantity |
| Measuring tape | 1 |
| Screwdriver set | 1 |
| Adjustable wrench | 1 |
| Wire strippers | 1 |
| Level | 1 |
| Drill | 1 |
| Extension cord | 1 |
Removing the Existing Oven
Before installing your new double wall oven, you’ll need to remove the existing oven. Follow these steps:
- Turn off the power supply to the oven by switching off the circuit breaker.
- Unplug the oven from the wall socket.
- Remove any racks or accessories from inside the oven.
- Locate and remove the screws or brackets securing the oven to the cabinet or wall.
- Carefully slide the oven out of its place, making sure not to damage any surrounding structures.
- Set aside the old oven in a safe location for disposal or recycling.
Ensuring Proper Electrical and Gas Connections
Next, you’ll need to ensure proper electrical and gas connections for your new double wall oven. Follow these steps:
- Locate the electrical and gas supply connections behind the installation area.
- Check if the electrical outlet and gas supply are compatible with the specifications of your new oven.
- If necessary, hire a qualified electrician or gas technician to make any required modifications.
- Carefully read and follow the manufacturer’s instructions for connecting the electrical and gas supply to your oven.
- Double-check all connections to ensure they are secure and properly tightened.
By following these steps, you’ll be well-prepared for the installation of your new double wall oven. Make sure to read the manufacturer’s instructions specific to your oven model, as installation steps may vary. With the right tools, proper removal of the existing oven, and secure electrical and gas connections, your new double wall oven will be ready to use in no time.
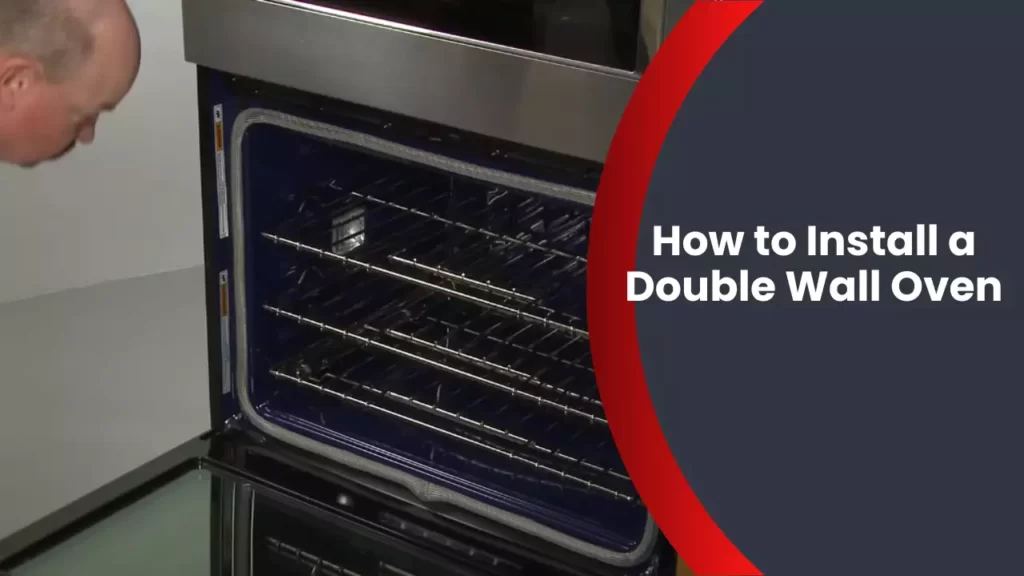
Installing The Double Wall Oven
Installing the Double Wall Oven
If you’re a passionate home cook or simply love hosting dinner parties, you’ll understand the importance of having a functional and efficient kitchen. One essential appliance that can greatly improve both the aesthetics and functionality of your kitchen is a double wall oven. Not only do these ovens provide extra cooking space, but they also have a sleek and modern look that can complement any kitchen design.
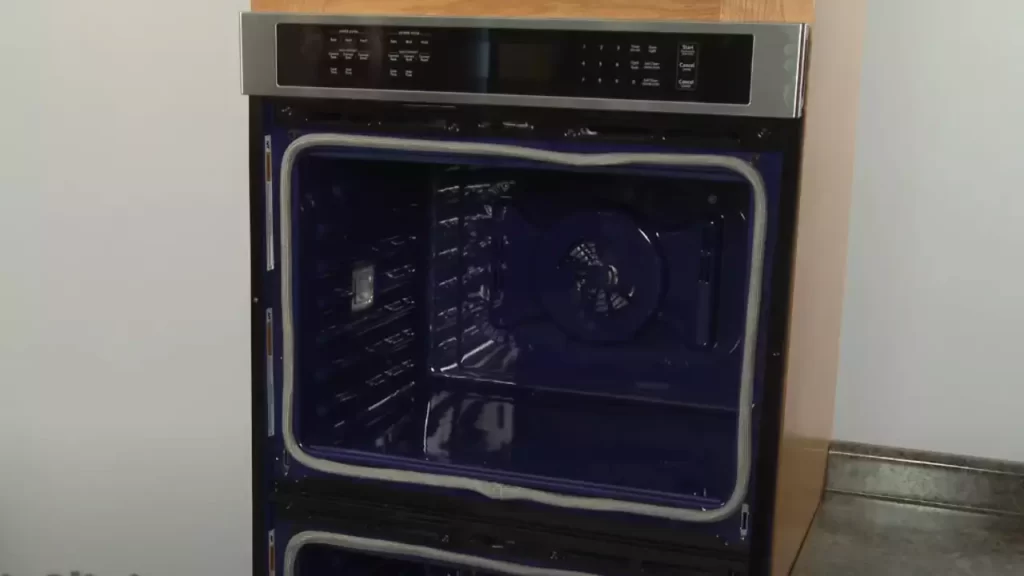
Positioning and Leveling the Oven
Before you begin the installation process, ensure that you have measured the space accurately and chosen the perfect spot for your double wall oven. Make sure there is enough clearance on all sides to ensure proper ventilation and access. Once you have selected the ideal location, it’s time to get started with positioning and leveling.
- Start by placing a dropcloth or cardboard on the kitchen floor to protect it from any potential damage during the installation process. This will also provide a soft surface to help ease the oven into position.
- Carefully place the oven into the designated space, ensuring that it is level both horizontally and vertically. If needed, use a level and shims to adjust the oven’s position until it is perfectly level. This will ensure optimal performance and prevent any kitchen mishaps.
- Once the oven is level, secure it in place by attaching it to the cabinetry. Consult the manufacturer’s instructions for the specific mounting process, as it may vary based on the oven model.
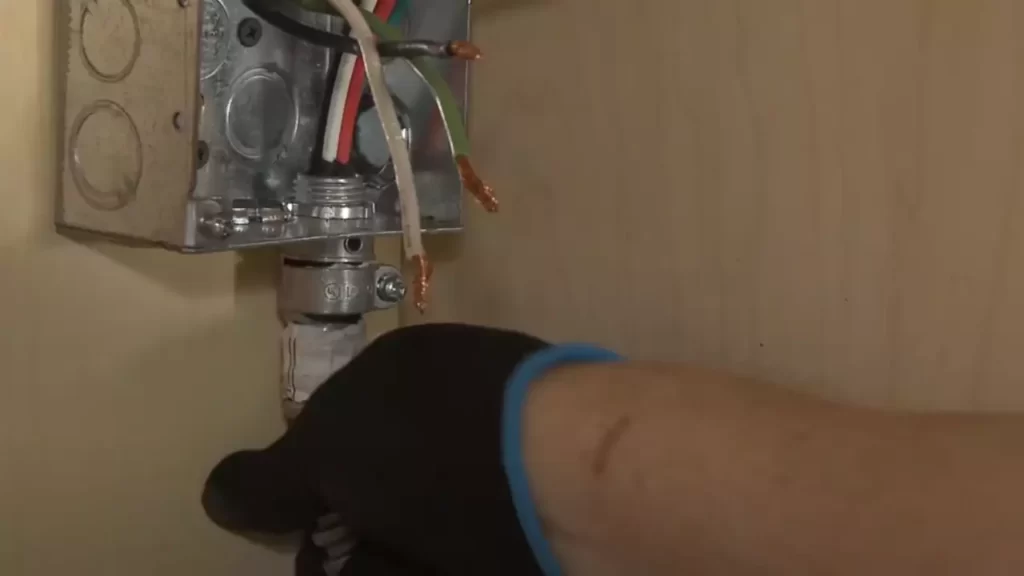
Connecting the Electrical Wiring
Now that the oven is securely positioned, it’s time to connect the electrical wiring. This step is crucial for ensuring the safe and efficient operation of your double wall oven. Follow these steps to connect the electrical wiring:
- Turn off the power supply to the kitchen’s electrical circuit at the main breaker box to avoid any electrical shocks during the installation process.
- Locate the electrical junction box in the wall behind the double wall oven. Carefully remove the cover plate to reveal the electrical connections.
- Connect the wires from the oven to the corresponding wires in the junction box, following the manufacturer’s instructions and any local electrical codes. Use wire nuts to securely fasten the connections.
- Once the connections are made, gently push the excess wires back into the junction box and reattach the cover plate.
- Restore the power supply by turning the circuit breaker back on.
Securing the Oven in Place
After positioning and connecting the electrical wiring, the final step is to secure the oven in place. This will prevent any movement or accidents that could occur during regular usage. Follow these steps to ensure the oven is properly secured:
| Step | Instructions |
|---|---|
| 1 | Using screws provided by the manufacturer, attach any mounting brackets or clips to the oven and the surrounding cabinetry. Secure them tightly to ensure stability. |
| 2 | Double-check that the oven is level and plumb. Make any necessary adjustments using shims or tightening the brackets. |
| 3 | Once you are satisfied with the oven’s position and security, confirm that the doors open and close smoothly without any obstructions. This step is essential for convenient access and efficient cooking. |
By following these steps and adhering to the manufacturer’s instructions, you can confidently install a double wall oven in your kitchen and elevate your culinary experiences to new heights. Enjoy the benefits of increased cooking space and the sleek sophistication that a double wall oven brings to your kitchen.
Testing And Finalizing The Installation
Once you have successfully installed your double wall oven, it is crucial to conduct thorough testing and finalize the installation. This step is paramount to ensure that the oven is functioning properly and ready to be used for your cooking needs.
Checking the Oven Functions
Before you start using your double wall oven, it is important to check all of its functions to ensure that they are working as intended. Here are a few essential steps to follow:
- Turn on the oven by following the manufacturer’s instructions.
- Ensure that the oven light turns on when the door is opened and off when the door is closed.
- Test the oven’s heating elements by setting the temperature to a moderate level and allowing the oven to preheat.
- Check if both the upper and lower heating elements are functioning and heating up evenly.
- Activate the oven’s convection feature, if applicable, and observe whether the fan is running smoothly.
- Test the oven’s self-cleaning option, if available, and ensure that it operates without any issues.
- Verify that all the control buttons and knobs are working properly and responding promptly to your input.
Calibrating the Oven Temperature
One common concern with newly installed ovens is inaccurate temperature readings. To address this issue, follow these steps to calibrate your double wall oven’s temperature:
- Purchase an oven thermometer from a reputable retailer or online.
- Preheat the oven to a specific temperature according to the thermometer’s instructions.
- Once the oven reaches the desired temperature, check the thermometer reading. If it differs from the set temperature, you will need to adjust the calibration of the oven.
- Refer to the oven’s manual or the manufacturer’s website for specific instructions on how to calibrate the oven temperature.
- Follow the given instructions to make the necessary adjustments to the oven’s temperature settings for accurate cooking.
- After calibrating, repeat the temperature test with the oven thermometer to ensure that the adjustments were successful.
Cleaning and Maintaining the Oven
Proper cleaning and maintenance are vital to prolong the lifespan of your double wall oven and ensure optimal performance. Here are some essential steps for cleaning and maintaining your oven:
- Regularly remove any spills or food debris from the oven’s interior using a damp cloth or sponge.
- For stubborn stains, use a non-abrasive cleanser recommended by the oven’s manufacturer.
- Wipe down the exterior of the oven, including the control panel, with a mild household cleaner.
- Ensure that the oven’s ventilation system is free from any blockages or obstructions.
- Inspect and clean the oven’s door gasket regularly to ensure a proper seal and prevent heat loss.
- Refer to the oven’s manual for any specific cleaning and maintenance instructions provided by the manufacturer.
By following these steps for testing, calibrating, cleaning, and maintaining your double wall oven, you can ensure that it operates efficiently and reliably for years to come.
Frequently Asked Questions
Q: How Much Does It Cost To Install A Double Wall Oven?
A: The cost of installing a double wall oven typically ranges from $500 to $1,000, depending on various factors such as electrical work, ventilation requirements, and any necessary modifications to cabinetry. It is recommended to consult with a professional installer to get an accurate estimate for your specific installation.
Q: What Are The Benefits Of A Double Wall Oven?
A: Double wall ovens offer numerous benefits, including increased cooking capacity, the ability to cook multiple dishes at different temperatures simultaneously, and flexibility in cooking large meals or hosting dinner parties. They also save space by eliminating the need for a separate cooktop and oven, providing a sleek and integrated look in your kitchen.
Q: How Long Does It Take To Install A Double Wall Oven?
A: The time it takes to install a double wall oven can vary depending on the complexity of the installation and any necessary modifications. On average, a professional installer can complete the installation in 2 to 4 hours. However, it is important to consider additional time for any electrical or carpentry work that may be required.
Q: Can I Install A Double Wall Oven Myself?
A: While it is possible to install a double wall oven yourself, it is highly recommended to hire a professional installer. Installing a double wall oven involves electrical work, ensuring proper ventilation, and making any necessary modifications to cabinetry. A professional will have the expertise to ensure safe and proper installation.
Conclusion
Installing a double wall oven may seem like a daunting task, but with the right tools and knowledge, it can be a rewarding DIY project. By following the step-by-step instructions in this guide, you can successfully install a double wall oven and enhance the functionality and aesthetic appeal of your kitchen.
Remember to always prioritize safety and consult a professional if needed. Happy cooking!