To install a dimmer switch with 5 wires, follow the manufacturer’s instructions carefully, ensuring all wires are connected correctly and securely. Installing a dimmer switch with 5 wires can give you greater control over your lighting, allowing you to adjust the brightness levels as desired.
However, it’s important to follow the proper installation process to ensure functionality and safety. In this guide, we will provide step-by-step instructions on how to install a dimmer switch with 5 wires, ensuring a successful installation. By following these instructions, you can enjoy the benefits of a dimmer switch and create the perfect ambiance for any room.
So, let’s get started and upgrade your lighting with a dimmer switch.
Understanding The Functionality Of A Dimmer Switch
Introduction to Dimmer Switches
A dimmer switch is a type of light switch that allows you to adjust the brightness of a light fixture. Unlike a conventional on/off switch, a dimmer switch gives you the ability to create the perfect ambiance in any room by controlling the intensity of the light. Whether you want to create a cozy atmosphere for a romantic dinner or brighten up a workspace for better productivity, a dimmer switch is a versatile tool that can transform your lighting experience.
Why Choose a Dimmer Switch with 5 Wires
When it comes to installing a dimmer switch, you may encounter various options with different wire configurations. One popular choice is a dimmer switch with 5 wires. This type of switch offers enhanced functionality and compatibility, making it an excellent choice for those who want more control over their lighting.
With 5 wires, this dimmer switch allows you to adjust not only the brightness but also the speed at which the light fades on or off. This feature, known as “fade-on” and “fade-off,” provides a smooth transition that adds elegance to your lighting effects. Additionally, a dimmer switch with 5 wires often includes a built-in LED indicator that allows you to locate the switch easily in the dark. This added convenience ensures that you’ll never have to fumble for the right switch again.
Advantages of Installing a Dimmer Switch
Installing a dimmer switch in your home or office offers several advantages that can enhance your lighting experience and provide numerous benefits:
- Flexibility: By being able to adjust the brightness level, you have the flexibility to customize the lighting according to your needs and preferences. Whether you want a soft, romantic glow or a bright, energetic ambiance, a dimmer switch allows you to create the perfect lighting atmosphere.
- Energy Efficiency: With a dimmer switch, you can reduce the amount of energy consumed by your light fixtures. By lowering the brightness, you can save money on your electricity bills and contribute to a more sustainable environment.
- Extended Bulb Lifespan: By reducing the voltage supplied to the bulbs, a dimmer switch can extend the lifespan of your light bulbs. This means fewer bulb replacements and additional cost savings in the long run.
- Mood Enhancement: Dimming the lights can have a significant impact on the mood and ambiance of a room. Whether you want to create a relaxing atmosphere for a movie night or a vibrant ambiance for a social gathering, a dimmer switch allows you to set the mood precisely as you desire.
- Increased Comfort: Bright lights can sometimes be harsh on the eyes, especially during late-night hours. With a dimmer switch, you can easily adjust the lighting to a more comfortable level, making it easier to relax and unwind at the end of a long day.
By understanding the functionality of a dimmer switch and its advantages, you can make an informed decision when choosing one for your home or office. Whether you opt for a dimmer switch with 5 wires or another variant, the ability to control the brightness and ambiance of your lighting can greatly enhance the overall atmosphere of any space.
Preparing For Installation
Before installing a dimmer switch with 5 wires, it is important to properly prepare for the installation process. This involves gathering the necessary tools and materials, taking safety precautions, and identifying the existing wiring setup. By following these steps, you can ensure a smooth and successful installation of your dimmer switch.
Gathering the necessary tools and materials
Before getting started, make sure you have the following tools and materials on hand:
| Tools | Materials |
|---|---|
|
|
Safety precautions to consider
Safety should always be a top priority when working with electrical wiring. Take the following precautions to ensure your safety and the safety of others:
- Turn off the power to the circuit you will be working on at the electrical panel.
- Use a voltage tester to double-check that the power is off before touching any wires.
- Wear insulated gloves to protect yourself from any electrical shocks.
- Never touch the bare metal parts of the wires with your bare hands.
- Avoid working in wet or damp conditions to prevent electrical accidents.
Identifying the existing wiring setup
Before removing the old switch, it’s important to identify the existing wiring setup. This will help you understand how to properly connect the new dimmer switch’s wires. Follow these steps:
- Remove the switch cover plate by unscrewing the mounting screws.
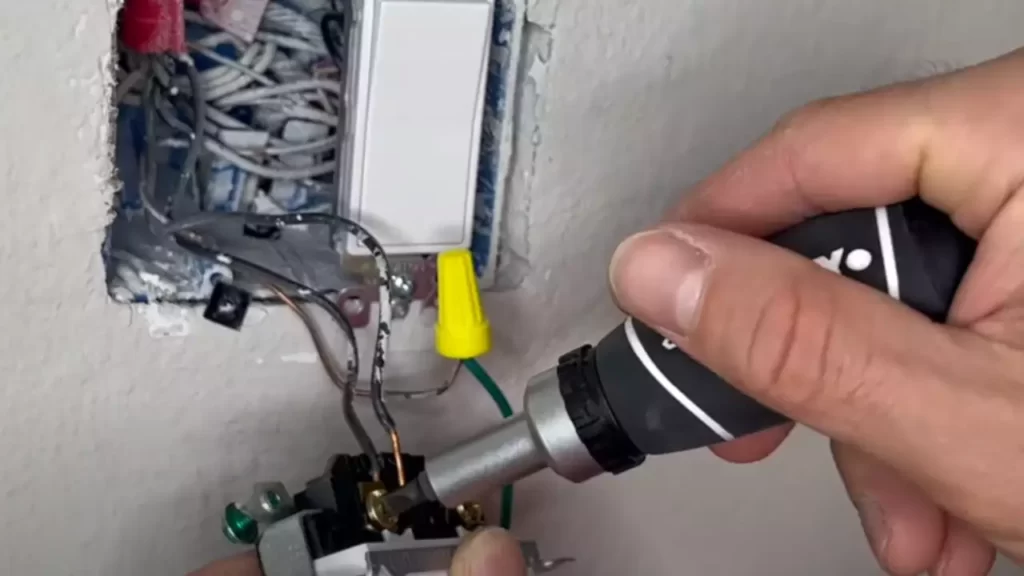
- Using a voltage tester, ensure that there is no power running to the switch.
- Carefully pull out the switch from the electrical box, exposing the wires.
- Note the color and location of each wire: typically, there are two black wires (hot), one green or copper wire (ground), and two white wires (neutral).
- Using a wire stripper, strip about 1/2 inch of insulation from the end of each wire.
- Securely cap the exposed ends of the wires with wire nuts to prevent any accidental contact.
By following these steps and properly preparing for the installation, you can ensure a safe and successful installation of your dimmer switch with 5 wires. Remember, if you are unsure about any step of the process, it is always best to consult a professional electrician.

Step-By-Step Installation Guide For A Dimmer Switch With 5 Wires
If you’re looking to enhance the lighting in your home or create the perfect ambiance, installing a dimmer switch can be a great solution. Dimmer switches allow you to adjust the brightness of your lights, giving you full control over the atmosphere of any room. In this step-by-step guide, we will walk you through the installation process for a dimmer switch with 5 wires. Let’s get started!
1. Turning off the power supply
The first and most important step is to turn off the power supply to ensure your safety. Locate the circuit breaker or fuse box and turn off the switch or remove the fuse corresponding to the area where you will be working.
2. Removing the old switch
Once the power supply is off, you need to remove the old switch. Start by removing the faceplate by unscrewing the screws that hold it in place. Next, use a flathead screwdriver to unscrew the screws securing the old switch to the electrical box. Gently pull the switch out, exposing the wires behind it.
3. Identifying the five wires
Now, it’s time to identify the five wires. The wires you will typically find behind the switch are the following:
| Wire Color | Wire Function |
|---|---|
| Black | Hot wire (power supply) |
| Green or Bare Copper | Ground wire |
| White | Neutral wire |
| Red, Blue, or Yellow | Traveler wires (usually three) |
| Black or Red | Load wire (leads to the light fixture) |
4. Connecting the dimmer switch
Once you have identified the wires, it’s time to connect the dimmer switch. Start by connecting the hot wire to the black wire on the dimmer switch. Use a wire nut to securely fasten them together. Follow the manufacturer’s instructions if they suggest any additional steps or specific wiring methods.
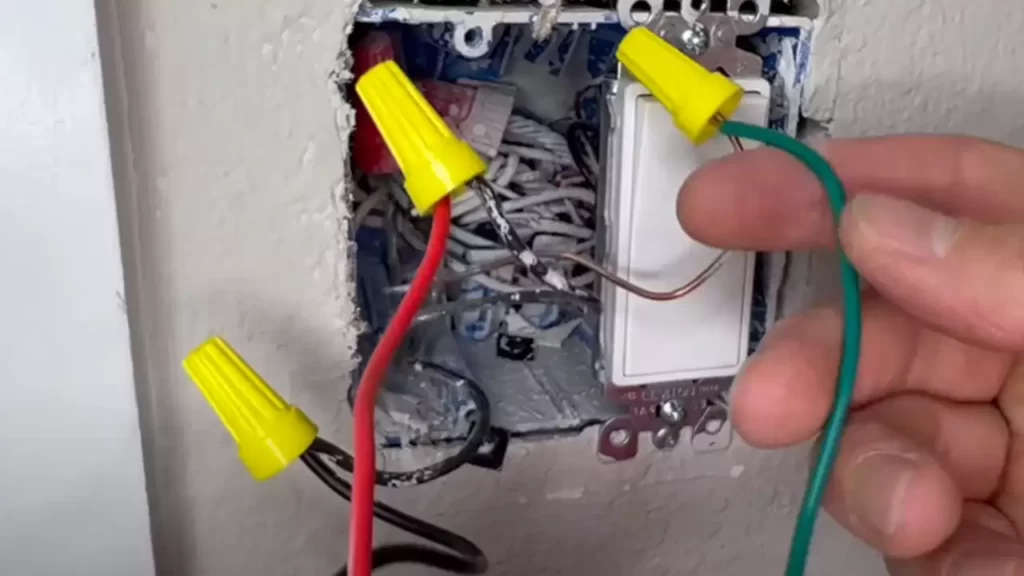
5. Connecting the ground wire
Next, connect the ground wire from the electrical box to the green or bare copper wire on the dimmer switch. Ensure the connection is secure by using a wire nut.
6. Connecting the neutral wire
Now, connect the neutral wire from the electrical box to the white wire on the dimmer switch. As before, use a wire nut to ensure a secure connection.
7. Connecting the traveler wires
If your dimmer switch has three traveler wires, connect each traveler wire from the electrical box to the corresponding wire on the dimmer switch. Again, securely fasten these connections using wire nuts.
8. Connecting the load wire
Finally, connect the load wire, which leads to the light fixture, from the electrical box to the black or red wire on the dimmer switch. Make sure to tighten the wire nut to create a secure connection.
9. Securing the connections
After connecting all the wires, gently push them back into the electrical box. Ensure that there is enough room for the dimmer switch to fit without any wire crimping or pinching. Replace the switch plate and screw it back into place using the screws provided.
10. Mounting the dimmer switch
To complete the installation, mount the dimmer switch onto the electrical box. Follow the manufacturer’s instructions for the specific dimmer switch you are installing.
11. Restoring the power supply
Now that all the wiring is complete and the dimmer switch is securely mounted, it’s time to restore the power supply. Return to the circuit breaker or fuse box and turn the power back on, ensuring that the dimmer switch is functioning correctly.
And there you have it! By following these step-by-step instructions, you should now have successfully installed a dimmer switch with 5 wires. Enjoy the flexibility and control this upgrade brings to your lighting!
Troubleshooting And Common Issues
Installing a dimmer switch with 5 wires can enhance the ambiance of any room and provide you with versatile control over your lighting. However, like any electrical installation, it may encounter some issues that require troubleshooting. In this section, we will discuss the common problems that may arise during the installation process and provide tips for troubleshooting specific issues.
Testing the dimmer switch functionality
Before delving into common problems, it is essential to test the functionality of the newly installed dimmer switch. This step allows you to identify any issues upfront and ensure everything is working correctly. Follow these steps to test the functionality of your dimmer switch:
- Make sure the power to the switch is turned off.
- Remove the switch cover plate to expose the wires.
- With a voltage tester, confirm that no electricity is flowing through the wires.
- Turn the power back on.
- Gently adjust the dimmer switch to different brightness levels to determine if the lights respond accordingly.
- If the lights do not respond or flicker, there might be an issue that requires troubleshooting.
Common problems and how to troubleshoot them
While installing and using a dimmer switch, you may encounter several common problems. Let’s take a look at these issues and explore troubleshooting techniques:
| Problem | Troubleshooting Technique |
|---|---|
| The lights do not turn on |
|
| The lights flicker |
|
| The dimmer switch gets hot |
|
Tips for troubleshooting specific issues
While troubleshooting these common problems, it can be helpful to keep the following tips in mind:
- Always refer to the manufacturer’s instructions for specific troubleshooting guidance.
- Use caution and turn off the power before inspecting or making any adjustments.
- If unsure about any step or encountering difficulty, consult a professional electrician for assistance.
- Make sure to purchase high-quality, compatible dimmer switches to minimize potential issues.
- Regularly inspect and maintain your dimmer switch to prevent future problems.
By following these troubleshooting tips and techniques, you can resolve common issues and ensure your dimmer switch installation functions smoothly, providing you with the desired lighting control.
Best Practices For Dimmer Switch Installation
Installing a dimmer switch with 5 wires requires careful attention to detail and adherence to best practices. By following these guidelines, you can ensure a safe and efficient installation that will enhance the ambiance of your space. Here are some key considerations for a successful dimmer switch installation:
Proper positioning of the dimmer switch
When installing a dimmer switch, it is crucial to position it correctly. The switch should be easily accessible, ideally at a height of around 48 inches from the floor. This allows for easy operation without straining or stretching. Additionally, ensure that the dimmer switch is not placed near any heat sources or areas prone to moisture, as this can affect its performance and longevity.
Using wire connectors for secure connections
Secure connections are essential to ensure the proper functioning of your dimmer switch. When working with the 5 wires, it is recommended to use wire connectors to join the wires together. These connectors provide a safe and reliable connection, preventing any loose or exposed wires that could pose a potential hazard. Always follow the manufacturer’s instructions for properly connecting the wires and use the appropriate connectors for the wire gauge.
Avoiding overloading the dimmer switch
Dimmer switches have a maximum wattage capacity, and it is crucial to respect this limit to avoid overloading the switch. Before installing the dimmer switch, calculate the total wattage of the light bulbs or fixtures that will be connected to it. Ensure that the combined wattage does not exceed the maximum wattage specified by the dimmer switch manufacturer. Overloading the dimmer switch can lead to overheating, flickering lights, or even damage to the switch itself.
Considerations for compatibility with different types of lighting fixtures
Compatibility is key when installing a dimmer switch, especially when dealing with different types of lighting fixtures. Some dimmer switches are designed to work with specific types of lighting, such as incandescent, LED, or CFL bulbs. It is important to choose a dimmer switch that is compatible with the type of lighting fixtures you plan to use. Carefully check the manufacturer’s specifications and recommendations to ensure a proper match. This will allow for smooth dimming and prevent any compatibility issues that could affect the performance of your lighting.
By implementing these best practices, you can ensure a successful installation of your dimmer switch with 5 wires. Remember to always consult the manufacturer’s instructions and follow local electrical codes to ensure a safe and efficient installation that brings enhanced lighting control to your space.
Additional Tips And Recommendations
Additional Tips and Recommendations
When it comes to installing a dimmer switch with 5 wires, there are a few additional tips and recommendations to keep in mind. These tips will help ensure a smooth and successful installation process, as well as enhance the functionality and ambiance of your space. From choosing the right dimmer switch for your specific needs to taking advantage of the energy-saving benefits, here are some valuable insights to consider:
Choosing the right dimmer switch for your specific needs
When selecting a dimmer switch for your installation, it is crucial to choose the right switch that suits your specific needs. Not all dimmers are created equal, so it’s important to consider factors such as the type of lighting you have, the wattage capacity of the dimmer, and any special features you may require. Here are some essential considerations:
- Check the compatibility of the dimmer with the type of lighting you have. Different types of lighting, such as incandescent, LED, or CFL, may require specific dimmers. Be sure to choose a dimmer that is compatible with your lighting type.
- Consider the wattage capacity of the dimmer. You’ll want to ensure that the dimmer can handle the total wattage of the lights you are controlling. Some dimmers have a maximum wattage rating, so be sure to check the specifications and choose one that can handle your specific lighting setup.
- Think about any additional features you may want. Dimmer switches come with various features like remote controls, programmable settings, or presets. Determine if any of these features are essential for your needs and select a dimmer switch that provides them.
How to enhance the ambiance with a dimmer switch
One of the remarkable advantages of installing a dimmer switch is the ability to control and enhance the ambiance of a room. By adjusting the light intensity, you can create different moods and atmospheres to suit your preference. Here are some effective tips to enhance the ambiance with a dimmer switch:
- Experiment with different light levels. Try setting the dimmer switch to different positions to achieve the desired atmosphere, whether it’s a soft and cozy glow or a brighter, more energizing light.
- Consider layering lighting. Use a combination of overhead lights, floor lamps, and table lamps with dimmers to create depth and dimension in the room. This allows you to tailor the lighting to different activities and occasions.
- Set the mood for specific occasions. Dimmers are especially useful for setting the perfect mood during dinner parties, movie nights, or romantic evenings. Adjust the lighting to create a warm and inviting atmosphere that complements the event.
Energy-saving benefits of using dimmer switches
In addition to the enhanced ambiance, dimmer switches also offer remarkable energy-saving benefits. By reducing the brightness of your lights, you can conserve energy and reduce your utility bills. Here are a few ways dimmer switches contribute to energy efficiency:
- Dimmers allow you to use only the amount of light needed for a particular task or activity, preventing wastage of energy.
- By decreasing the light output, dimmers help prolong the lifespan of your bulbs, reducing the frequency of bulb replacements.
- Dimmers give you the flexibility to customize the light levels throughout the day, taking advantage of natural daylight and minimizing the need for artificial lighting.
- Consistently using dimmer switches to lower your light levels can result in significant energy savings over time, benefiting both the environment and your wallet.
By carefully choosing the right dimmer switch, enhancing the ambiance, and harnessing the energy-saving advantages, you can make the most of your dimmer switch installation. Enjoy the perfect lighting for any occasion while saving energy and creating a cozy atmosphere in your space.
Frequently Asked Questions
Why Does A Light Switch Have 5 Wires?
A light switch has 5 wires because it requires different connections to control the flow of electricity. These wires include a hot wire, which supplies power, a neutral wire, which completes the circuit, and three traveler wires, which allow multiple switches to control the same light.
How Many Wires Does A Dimmer Need?
A dimmer requires at least 2 wires, a line wire that carries electricity to the dimmer and a load wire that connects to the light fixture.
What Is A 5 Way Light Switch?
A 5-way light switch is a type of electrical switch that allows you to control up to five different light fixtures. With this switch, you can easily turn on or off multiple lights in a room or area. It’s a convenient option for homes or commercial spaces with multiple lighting sources.
Can You Wire A Dimmer Without A Neutral?
Yes, it is possible to wire a dimmer without a neutral wire. Some dimmers are designed to work without a neutral, using alternative wiring methods such as a capacitor or electronic circuitry. However, it is important to follow the manufacturer’s instructions and consult a licensed electrician to ensure safe installation.
Conclusion
Installing a dimmer switch with 5 wires may seem daunting, but with the right instructions and a bit of patience, it can be easily accomplished. By following the step-by-step guide in this blog post, you can enhance your home’s lighting controls and create the perfect ambiance for any occasion.
So, take the time to learn and master this process, and you’ll soon be enjoying the benefits of a dimmer switch in your home. Happy installing!