To install a dimmer switch with 4 wires, follow these steps: turn off the power, remove the existing switch, connect the wires correctly, and attach the dimmer switch to the wall. In this guide, we will explore these steps in detail to help you successfully install your dimmer switch and adjust the lighting in your home to your preferred level.
By understanding the process, you can confidently complete the installation and enjoy the benefits of a dimmer switch in your living space. So let’s get started with the installation process and ensure a successful outcome.
Understanding The Basics Of Dimmer Switches
Understanding the Basics of Dimmer Switches
What is a dimmer switch and how does it work?
A dimmer switch is an electrical device that allows you to adjust the voltage and brightness of your lights. It replaces a standard on/off light switch and provides a range of lighting options. With a dimmer switch, you have control to set the lighting to your desired level, whether it’s a bright light for reading or a soft glow for a cozy ambiance.
Dimmer switches work by regulating the amount of electricity flowing to the light fixture. They use a process called pulse width modulation (PWM) to achieve this. Essentially, the switch turns the light on and off rapidly, creating a series of pulses. By varying the width of these pulses, the switch controls the amount of power delivered to the light, thus adjusting the brightness.
Benefits of using a dimmer switch for lighting control.
Using a dimmer switch for lighting control offers several benefits:
- Energy savings: With a dimmer switch, you can adjust the brightness of your lights according to your needs. Lowering the brightness can reduce energy consumption and save you money on your utility bills.
- Extended bulb life: Dimming the lights can extend the lifespan of your light bulbs. When bulbs operate at a lower intensity, they generate less heat, which can significantly increase their longevity.
- Enhanced ambiance: Dimmer switches allow you to create the perfect atmosphere in any room. Whether you’re looking for a romantic setting or a cozy ambiance, dimmed lights can set the mood and create a warm, inviting space.
- Flexible lighting options: With a dimmer switch, you have the flexibility to adjust the lighting throughout the day. From bright lighting for tasks to soft illumination for relaxation, you can customize the light levels to suit your preferences.
- Ease of use: Operating a dimmer switch is simple and intuitive. The switch usually has a slider or rotary knob that allows you to adjust the brightness level with ease.
In conclusion, understanding the basics of dimmer switches is essential when it comes to installing and using them effectively. Dimmer switches provide control, energy savings, and the ability to create the perfect ambiance in any room. By adjusting the lighting level to your liking, you can enjoy comfortable and versatile lighting options throughout your home.
Identifying The Wires In The Electrical Box
Before you begin installing a dimmer switch with 4 wires, it is essential to identify the different wires in the electrical box. This step is crucial to ensure a safe and successful installation.
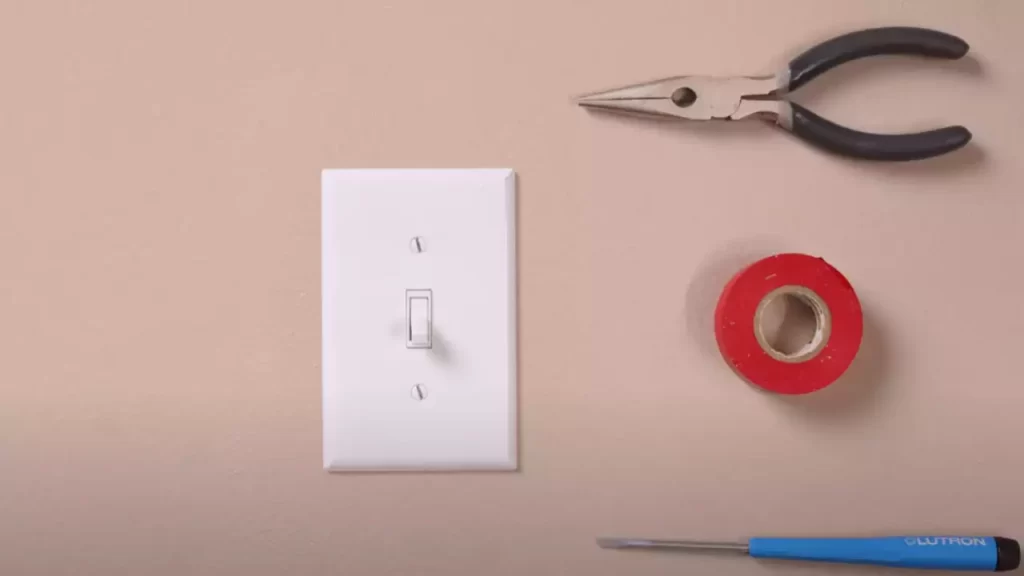
Tools and equipment needed for the installation
Before starting the process, gather the following tools and equipment:
- Screwdriver
- Wire stripper
- Electrical tester or voltage meter
- Insulated gloves
Safety precautions before working with electrical wires
Working with electrical wires requires caution and adherence to safety measures. Before starting, make sure to:
- Turn off the power supply to the electrical box
- Wear insulated gloves to avoid electric shock
- Use a voltage meter to check if there is any remaining electrical current
- Ensure the dimmer switch is specifically designed for the load you will be using it with
- Disconnect the power supply to the entire house if you are unsure about the electrical box’s circuits
How to turn off the power supply to the electrical box
Turning off the power supply is crucial to ensure your safety and avoid any electrical accidents. Follow these steps to turn off the power supply to the electrical box:
- Locate the main electrical panel in your house
- Identify the circuit breaker corresponding to the electrical box you will be working on
- Flip the switch of the identified circuit breaker to the “off” position
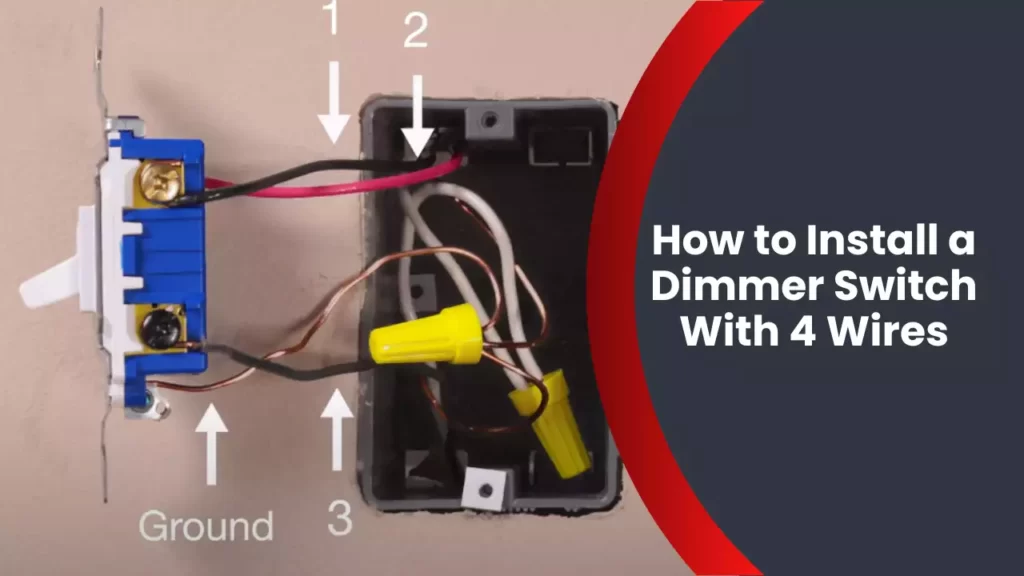
Identifying the different wires in the electrical box (live, neutral, load, ground)
Understanding the different wires in the electrical box is essential to connect the dimmer switch correctly. Here’s a breakdown of the wires you might encounter:
| Wire Color | Purpose |
|---|---|
| Black or Red | Live/Line wire that carries the electrical current |
| White or Gray | Neutral wire that completes the circuit |
| Black or Blue | Load wire that connects to the light fixture |
| Bare Copper, Green, or Yellow and Green | Ground wire that provides safety by grounding the electrical system |
By identifying these different wires in the electrical box, you will be able to connect your dimmer switch correctly and ensure a safe and efficient installation.
Wiring The Dimmer Switch
Step-by-step instructions for wiring the dimmer switch
Wiring the dimmer switch may seem like a daunting task, especially if you’re not familiar with electrical work. However, with the right instructions and a little bit of caution, you can successfully install a dimmer switch with 4 wires. In this section, we’ll walk you through the step-by-step process of wiring the dimmer switch.
- Step 1: Turn off the power
- Step 2: Identify the wires
- Step 3: Connect the live wire
- Step 4: Connect the neutral wire
- Step 5: Connect the load wire
- Step 6: Connect the ground wire
- Step 7: Secure the connections
- Step 8: Turn on the power and test
The first and most crucial step is to turn off the power to the circuit you will be working on. This ensures your safety and prevents any electrical accidents. Locate the breaker switch in your electrical panel and flip it to the “off” position.
Once the power is off, you can start identifying the wires. In a typical dimmer switch setup, you’ll have four wires: live, neutral, load, and ground. The live wire is usually black, the neutral wire is white, the load wire can be any color, and the ground wire is bare copper or green.
Using a wire nut, connect the live wire from the wall to the live wire of the dimmer switch. Twist the stripped ends of the wires together and secure them with a wire nut. Make sure the connection is tight and secure.
Repeat the same process for the neutral wire. Connect the neutral wire from the wall to the neutral wire of the dimmer switch using a wire nut. Ensure a tight and secure connection.
The load wire is responsible for carrying the power to the light fixture. Connect the load wire from the wall to the load wire of the dimmer switch using a wire nut. Again, ensure a secure connection.
The ground wire provides a safe pathway for electrical currents to be safely discharged in case of a fault. Connect the ground wire from the wall to the ground wire of the dimmer switch using a wire nut. As with the other connections, make sure it’s secure.
Now that all the wires are connected, it’s important to secure the connections to prevent any potential hazards. Wrap electrical tape around each wire nut to provide extra insulation and hold the wires in place. This will ensure that the connections remain secure and protected.
Once everything is connected and secured, it’s time to turn the power back on. Go to your electrical panel and flip the breaker switch to the “on” position. After doing so, test the dimmer switch to make sure it’s functioning properly. Adjust the dimmer and see if the light dims accordingly.
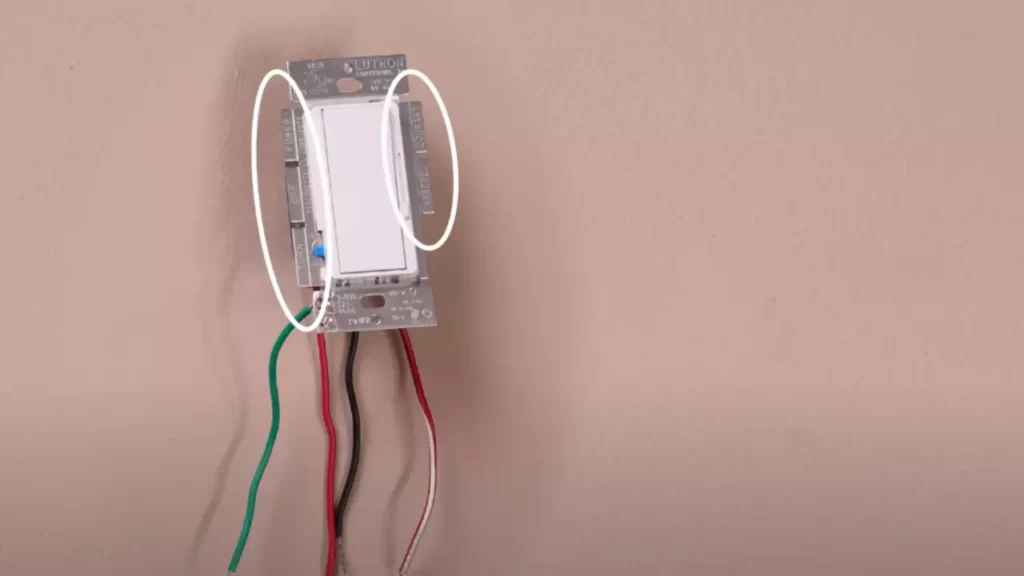
Properly connecting the live, neutral, load, and ground wires
When wiring a dimmer switch, it’s crucial to properly connect the live, neutral, load, and ground wires to ensure the switch functions correctly and safely. Here’s how each wire should be connected:
| Wire | Connection |
|---|---|
| Live wire | Connect the live wire from the wall to the live wire of the dimmer switch using a wire nut. |
| Neutral wire | Connect the neutral wire from the wall to the neutral wire of the dimmer switch using a wire nut. |
| Load wire | Connect the load wire from the wall to the load wire of the dimmer switch using a wire nut. |
| Ground wire | Connect the ground wire from the wall to the ground wire of the dimmer switch using a wire nut. |
By following these proper connections, you’ll ensure that the power flows correctly and the dimmer switch operates safely.
Using wire nuts and electrical tape for secure connections
Wire nuts and electrical tape play a crucial role in securing the connections of your dimmer switch. Here’s why they are important and how to use them:
- Wire nuts: Wire nuts are small plastic caps designed to connect and insulate wires. They provide a secure connection by twisting the stripped ends of wires together and encasing them in the cap. Make sure to twist the wires tightly before securing them with a wire nut.
- Electrical tape: Electrical tape adds an extra layer of insulation and protection to your connections. After securing the wires with wire nuts, wrap electrical tape around each wire nut to hold them in place and provide additional insulation. This will prevent any accidental touching of wires and reduce the risk of electrical shocks or short circuits.
Remember, properly using wire nuts and electrical tape will ensure your dimmer switch connections remain secure and safe, minimizing the risk of electrical hazards.
Testing And Installing The Dimmer Switch
Installing a dimmer switch can transform the ambiance of any room, allowing you to adjust the lighting to suit your mood or needs. However, it’s crucial to follow the proper steps to ensure a safe installation. In this guide, we’ll walk you through the process of testing and installing a dimmer switch with 4 wires.
How to use a voltage tester to confirm the power is off
Before you begin the installation process, it’s essential to verify that the power to the circuit is turned off. This is crucial to prevent any accidents or electrical mishaps. Follow the step-by-step instructions below to confirm the power is off using a voltage tester:
- Ensure all light fixtures connected to the circuit are turned off.
- Choose a voltage tester suitable for your circuit type (AC or DC) and make sure it is functioning correctly.
- Insert the voltage tester’s probes into the circuit’s hot wire connectors, making sure not to touch any exposed wires.
- If the voltage tester lights up or makes a sound, this indicates that the power is still flowing through the circuit. In this case, turn off the correct breaker in your main electrical panel and retest until the tester no longer detects any voltage.
Step-by-step instructions for installing the dimmer switch into the electrical box
Once you have confirmed that the power is off, follow the step-by-step instructions below to install the dimmer switch into the electrical box:
- First, examine the existing wiring in the electrical box to identify the four wires: the two black wires, the green or bare copper grounding wire, and the red or white wire. Ensure these wires are in good condition and not frayed or damaged.
- With the circuit’s power still turned off, detach the old switch by unscrewing the screws that hold it in place. Gently pull the switch out, being careful not to touch any exposed wires.
- Take the new dimmer switch and connect the two black wires from the electrical box to the two black wires on the switch. Typically, this is achieved by twisting the wires together clockwise and securing them with wire nuts.
- Next, attach the green or bare copper grounding wire from the electrical box to the green grounding screw on the dimmer switch. Make sure the connection is secure.
- Lastly, connect the red or white wire from the electrical box to the remaining wire on the dimmer switch. Again, secure the connection with a wire nut.
- Carefully push the connected wires back into the electrical box, ensuring they are neatly arranged and not crammed together.
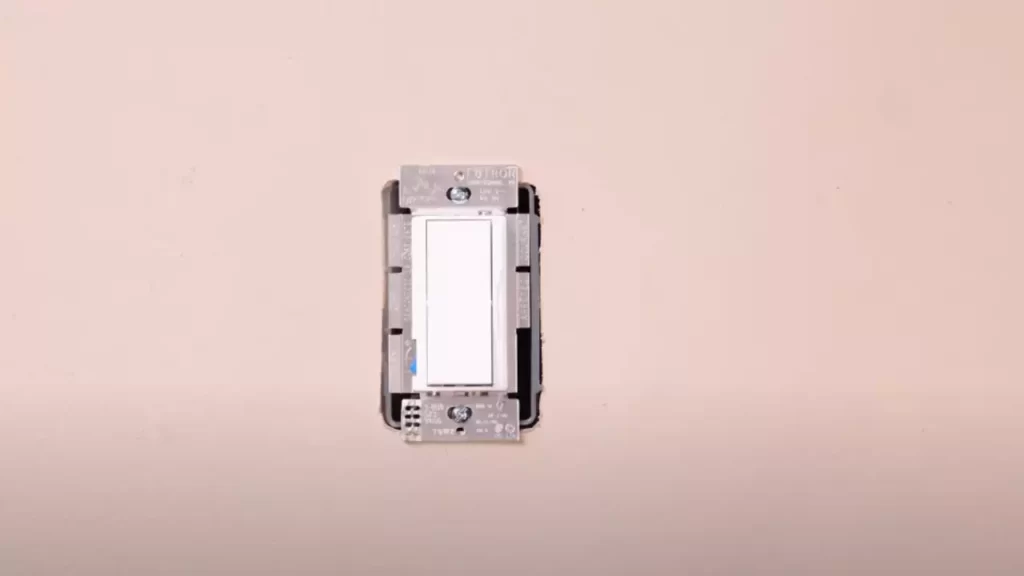
- Screw the dimmer switch onto the electrical box using the provided screws, making sure it is securely in place.
Reconnecting power and testing the switch for functionality
With the dimmer switch installed, it’s time to reconnect the power and test its functionality. Following these steps will help ensure a successful installation:
- Double-check that all the wires are securely connected and no exposed wires are visible outside the electrical box.
- Turn the circuit’s breaker back on in your main electrical panel.
- In a well-lit room, turn on the dimmer switch and adjust the slider or knob to different positions to confirm the lights respond accordingly.
- If the lights flicker or behave erratically, turn off the power again and recheck your connections.
- If everything is working correctly, you can now enjoy the benefits of your new dimmer switch!
Remember, if you’re uncertain about any step of the installation process, it’s always advisable to consult a qualified electrician for assistance. By following these guidelines, you can install a dimmer switch with 4 wires and create the perfect lighting atmosphere in your space.
Troubleshooting Common Issues
Installing a new dimmer switch can be a great way to enhance the ambiance of a room and save energy. However, you may encounter some common issues during the installation process. This section will provide you with troubleshooting tips for problems such as flickering lights, buzzing sounds, or non-responsive switches. Following these tips will help you complete the installation successfully and ensure a smooth dimming experience in your space.
Potential problems that may arise during the installation process.
When installing a dimmer switch with four wires, you may come across a few potential problems. Here are some issues you might encounter:
- Incorrect wire connections
- Loose or faulty connections
- Compatibility issues with the existing wiring system
It’s essential to address these problems before proceeding with the installation to avoid any safety hazards or damage to your electrical system. Let’s now move on to troubleshooting tips to tackle specific issues you may face.
Troubleshooting tips for issues like flickering lights, buzzing sounds, or non-responsive switches.
If you notice flickering lights, buzzing sounds, or your dimmer switch not responding as expected, try the following troubleshooting tips:
Flickering lights:
- Ensure that the dimmer switch is compatible with the type of bulbs you are using.
- Tighten the wire connections to eliminate any loose connections.
- Replace any worn-out bulbs as they may cause flickering.
- Check for any loose or damaged wires in the electrical circuit.
Buzzing sounds:
- Confirm that the dimmer switch is specifically designed to work with your type of lighting fixture.
- Ensure the dimmer switch is properly grounded.
- Inspect the wiring connections for any loose or faulty connections.
- Consider using a dimmer switch with noise-reducing features.
Non-responsive switches:
- Check if the dimmer switch is compatible with the voltage of your electrical system.
- Ensure that the wiring connections are correctly secured and not loose.
- Verify that you have connected the wires to the correct terminals on the dimmer switch.
- Consider resetting the dimmer switch by turning it off, waiting for a few minutes, and then turning it on again.
When to seek professional help for complex electrical problems.
While troubleshooting common issues during the installation process can be manageable, some situations may require the expertise of a professional electrician. Seek professional help if you encounter any of the following:
- Complicated or unfamiliar wiring configurations
- Excessive heat emitted from the dimmer switch or wiring
- Repeated issues even after attempting troubleshooting steps
- Any doubts or concerns regarding the safety of your electrical system
Remember, it’s crucial to prioritize your safety and the well-being of your home when dealing with electrical installations. When in doubt or facing complex problems, consulting a professional ensures a secure and optimal outcome.
Safety Precautions And Best Practices
When it comes to installing a dimmer switch with 4 wires, it’s essential to prioritize the safety of yourself and your home. Handling electrical wires requires caution and adherence to certain best practices. In this section, we will cover some important safety precautions, the proper disposal of old switches and electrical materials, as well as the best practices for maintaining and cleaning dimmer switches.
Important safety precautions to follow when working with electrical wires
Working with electrical wires can be hazardous if proper safety precautions are not taken. Here are some important steps to follow to ensure your safety:
- Before starting any work, shut off the power supply to the area where you will be installing the dimmer switch. This can be done by flipping the corresponding circuit breaker in your electrical panel.
- Wear safety goggles and insulated gloves to protect yourself from electrical shocks or debris that may be present.
- Ensure that all tools used are in good condition and rated for electrical work.
- Avoid touching exposed wires or metal parts of the switch with bare hands to reduce the risk of electric shock.
- If you encounter any frayed or damaged wires, do not proceed with the installation. Instead, consult a professional electrician.
Proper disposal of old switches and electrical materials
When replacing an old dimmer switch, it’s important to dispose of the old switch and any other electrical materials in a safe and responsible manner. Here are some best practices for proper disposal:
- Turn off the power supply before removing the old switch.
- Safely disconnect the old switch from the electrical wires.
- Wrap the old switch in insulating material, such as electrical tape, to prevent any accidental contact with live wires.
- Check local guidelines and regulations for disposing of electronic waste. Some areas may have specific recycling centers or collection points for such materials.
- Do not dispose of old switches or electrical materials in regular household trash or recycling bins.
Best practices for maintaining and cleaning dimmer switches
Maintaining and cleaning your dimmer switches regularly can help ensure their longevity and optimal performance. Here are some best practices you can follow:
- Regularly inspect the dimmer switch for any signs of wear, damage, or loose connections. If any issues are found, it is recommended to consult a professional electrician.
- Use a soft, dry cloth to clean the surface of the dimmer switch. Avoid using harsh chemicals or abrasive materials that can damage the switch.
- Ensure that the switch is not exposed to excessive heat, moisture, or direct sunlight, as these factors can affect its functionality.
- Test the switch periodically to ensure it is working properly. If you notice any flickering lights or inconsistent dimming, it may indicate a problem with the switch.
Frequently Asked Questions
Why Does My Dimmer Switch Have Four Wires?
A dimmer switch usually has four wires because it needs connections for power, load, and two additional wires for communication with other dimmers or controllers.
Can You Put A Dimmer Switch On A 4 Way Switch?
Yes, you can put a dimmer switch on a 4-way switch. It allows you to adjust the brightness of the lights connected to the switch.
How Many Wires Do You Need For A Dimmer Switch?
“A dimmer switch typically requires three wires: a hot wire, a neutral wire, and a ground wire. “
Does It Matter Which Way You Wire A Dimmer Switch?
It does matter which way you wire a dimmer switch. Incorrect wiring can cause malfunctions or even damage the switch. Follow the manufacturer’s instructions to ensure proper installation and operation.
Conclusion
Installing a dimmer switch with four wires may seem daunting, but it can be a straightforward process. By following these step-by-step instructions, you can easily upgrade your lighting system and enjoy the benefits of adjustable brightness. Remember to turn off the power before starting and use caution throughout the process.
With the right tools and a little patience, you’ll have your dimmer switch installed and ready to use in no time. Happy DIYing!