To install a dimmer switch with three wires, follow these steps: turn off the power, remove the old switch, connect the new dimmer switch, and secure it in place.
Understanding Dimmer Switch Wiring
When it comes to installing a dimmer switch with 3 wires, understanding the wiring is essential for a successful and safe installation. Dimmer switches are a practical and stylish solution for controlling the brightness of your lights, allowing you to create the perfect ambiance in any room. However, the three-wire setup of a dimmer switch requires careful attention to ensure proper functionality. In this post, we’ll explore the different types of dimmer switches, explain the three wire setup, and highlight the importance of proper wiring for dimmer switches.
Different types of dimmer switches
Before we dive into the specifics of wiring a dimmer switch with 3 wires, it’s important to understand the different types of dimmer switches available. Dimmer switches come in various styles and configurations, allowing you to choose the one that best suits your needs. Here are some common types:
- Single pole dimmer switch: This is the most common type of dimmer switch used in residential settings. It replaces a standard toggle or rocker switch and allows you to control the brightness of a single light or a group of lights.
- 3-way dimmer switch: A 3-way dimmer switch is used in situations where you have two switches controlling the same set of lights. It offers the convenience of dimming the lights from multiple locations.
- Multi-location dimmer switch: Similar to a 3-way dimmer switch, a multi-location dimmer switch allows you to control the lights from several switches. It is often used in larger rooms where multiple access points are needed.
Explaining the three wire setup
Now, let’s delve into the wiring setup of a dimmer switch with 3 wires. The three wires typically found in this setup are:
- Live wire (typically black or red): This wire carries the current from the electrical panel to the switch and powers the dimmer switch.
- Load wire (typically black): This wire connects the dimmer switch to the light fixture. It carries the current from the switch to the lights.
- Ground wire (typically green or bare): This wire provides a path for electric current to safely discharge in case of a fault. It helps protect against electric shock.
Understanding the function of each wire is crucial for a successful installation as improper wiring can lead to malfunctioning switches or even electrical hazards.
Importance of proper wiring for dimmer switches
Proper wiring is of utmost importance when installing a dimmer switch. The correct wiring ensures the switch functions reliably and safely, providing you with the desired level of light control. Here’s why proper wiring is crucial:
- Preventing electrical hazards: By following the correct wiring procedures, you reduce the risk of electrical shocks or fires. Properly grounded and insulated connections are essential for safety.
- Ensuring dimmer switch functionality: Proper wiring guarantees that the dimmer switch functions as intended. It allows you to smoothly adjust the light levels without flickering or buzzing.
- Protecting the longevity of your dimmer switch: By wiring the dimmer switch correctly, you extend its lifespan. Incorrect wiring can cause undue stress on the switch, leading to premature failure.
As you can see, proper wiring is vital for the safety and performance of your dimmer switch. If you are unsure about the wiring process, it’s always recommended to consult a licensed electrician to ensure a safe and efficient installation.
Preparing For Installation
Before you begin the installation of a dimmer switch with 3 wires, it’s essential to prepare yourself with the necessary tools and materials. Additionally, you need to ensure that the power is completely turned off to avoid any electrical accidents. This section will guide you through the process step-by-step, so you can successfully install your dimmer switch without any hassle.
Gathering necessary tools and materials
Before you dive into the installation process, make sure you have all the tools and materials required. Here’s a brief checklist:
In terms of tools, you’ll need:
- A screwdriver (Phillips or flat-head, depending on the screws of your existing switch)
- A voltage tester (to check if the power is off)
- A wire stripper/cutter
- A utility knife
As for materials, make sure you have:
- A new dimmer switch (make sure it’s compatible with your existing wiring)
- Wire connectors (may come with the dimmer switch or purchase separately)
- Electrical tape (for securing and insulating the wires)
Ensuring power is turned off
Before you begin any work on the electrical switch, it is crucial to ensure that the power is turned off. This will prevent any accidental electrical shock or damage. Follow these steps to make sure the power is off:
- Locate your electrical panel or circuit breaker.
- Identify the circuit breaker that controls the power to the switch you’re working on.
- Using caution, switch off the breaker by flipping it to the “off” position.
- For extra safety, use a voltage tester to confirm that there is no power flowing to the switch. Test the wires connected to the switch to verify that they are not live.
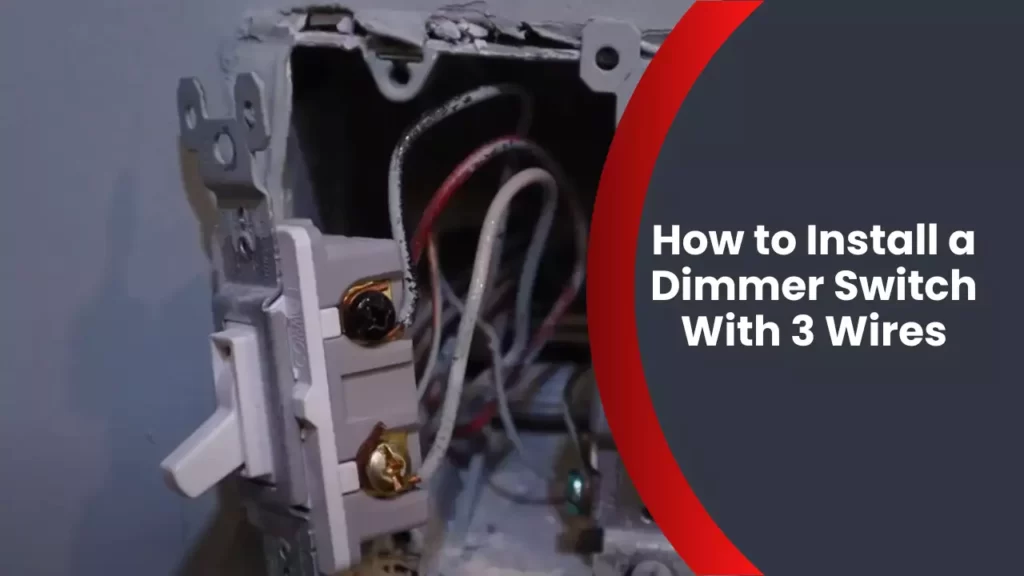
Removing the existing switch cover
Now that you have ensured the power is turned off, you can proceed to remove the existing switch cover. Follow these steps:
- Take your screwdriver and carefully unscrew the screws that hold the switch cover in place. Make sure to keep these screws in a safe place.
- Gently pull the switch cover away from the wall, exposing the wires and the switch itself.
- If necessary, use a utility knife to score around the edges of the switch cover to release any paint or adhesive.
Once the switch cover is removed, you are now ready to move on to the next step of the installation process. Remember to handle everything with care and attention to detail, and always prioritize your safety.
Identifying The Wires
Understanding the colors of the wires
When it comes to installing a dimmer switch with 3 wires, it’s crucial to start by identifying the wires correctly. These wires are typically color-coded to indicate their specific functions. Understanding the colors associated with each wire will help you navigate the installation process smoothly.
Here’s a breakdown of the common wire colors you might encounter:
- Black wire: This wire is typically the “hot” wire, carrying the electrical current from the power source to the switch or outlet. It’s important to exercise caution when working with this wire, as it carries potentially dangerous voltage.
- White wire: The white wire is usually designated as the “neutral” wire. It acts as a return path for the electrical current and is typically connected to the neutral terminal of the switch or outlet.
- Green or bare copper wire: This wire serves as the “ground” wire and is responsible for safely dissipating any electrical charges. It’s crucial to ensure proper grounding to protect against electrical hazards.
Differentiating between hot, neutral, and ground wires
Differentiating between the hot, neutral, and ground wires is essential for a successful installation. To identify the wires correctly, follow these simple steps:
- Turn off the power: Before proceeding, always turn off the power to the circuit at the breaker box. This step is vital for your safety.
- Inspect the wires: Take a close look at the wires protruding from the wall box. Pay attention to their color and make sure they match the standard color coding.
- Find the hot wire: Typically, the hot wire will be black. You can use a voltage tester to confirm its identity by touching one probe to the wire and the other to a ground source. If the tester lights up, you’ve found the hot wire.
- Locate the neutral wire: The neutral wire is usually white or gray. It should be connected to the silver terminal of the dimmer switch.
- Identify the ground wire: The ground wire is typically green or bare copper. It needs to be securely connected to the green or bare copper grounding screw on the dimmer switch.
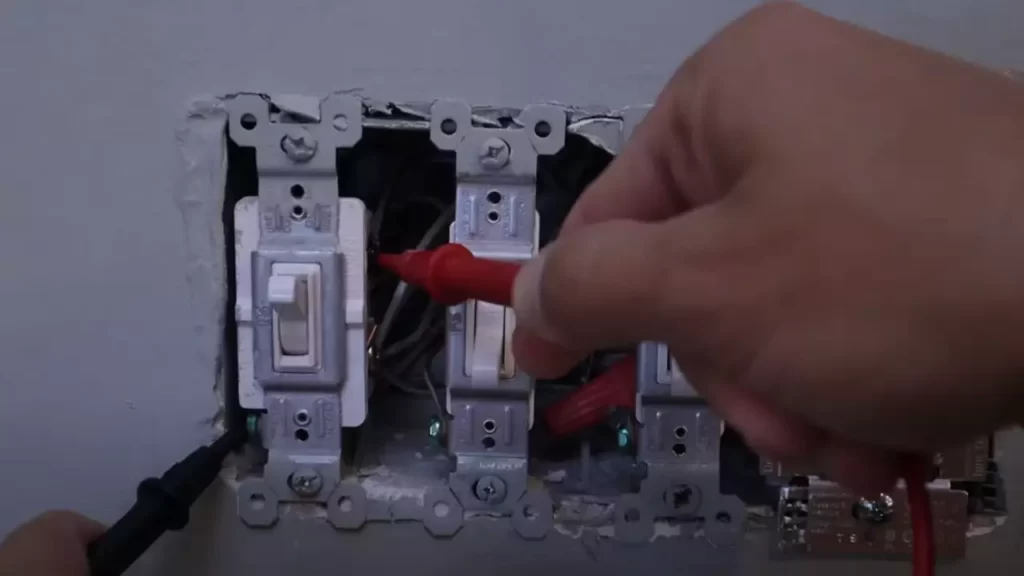
Using a voltage tester for safety
Safety should always be a priority when working with electrical installations. Using a voltage tester is an essential step to ensure that there is no live current flowing through the wires. Follow these steps to safely use a voltage tester:
- Choose a non-contact voltage tester: Opt for a non-contact voltage tester that will detect voltage without the need for contact with the wires.
- Turn on the tester: Activate the voltage tester according to the manufacturer’s instructions. Typically, this involves either pressing a button or switching it on.
- Test the wires: Hold the voltage tester close to each wire without making contact. If the tester beeps or lights up, it means there’s voltage present. In that case, turn off the power at the breaker box and retest to be sure.
By following these steps and correctly identifying the wires, you’ll be on your way to successfully installing a dimmer switch with 3 wires. Remember to prioritize safety at all times and consult a professional if you have any doubts or concerns.
Connecting The Dimmer Switch
Connecting the ground wire
Before starting the process of installing a dimmer switch with three wires, it’s crucial to ensure your safety by connecting the ground wire. The ground wire is typically bare copper or green in color and provides a safe path for electrical current in case of a fault.
To connect the ground wire:
- Locate the green or copper ground wire coming from the wall.
- Strip off about half an inch of insulation from the end of the ground wire.
- Wrap the exposed end of the ground wire around the green screw located on the dimmer switch.
- Tighten the screw securely using a screwdriver to ensure a solid connection.
Attaching the hot wire to the new switch
The hot wire, often colored black or red, carries the current from the power source to the dimmer switch. Properly attaching the hot wire is essential for the dimmer switch to function correctly.
To attach the hot wire:
- Locate the black or red wire coming from the wall.
- Strip off about half an inch of insulation from the end of the hot wire.
- Insert the stripped end of the hot wire into the wire connector on the dimmer switch.
- Twist the wire connector clockwise until it is tightly secured.
Connecting the neutral wire
The neutral wire, usually colored white or gray, completes the electrical circuit and allows the current to return to the power source.
To connect the neutral wire:
- Locate the white or gray wire coming from the wall.
- Strip off about half an inch of insulation from the end of the neutral wire.
- Insert the stripped end of the neutral wire into the wire connector on the dimmer switch.
- Twist the wire connector clockwise until it is securely fastened.
Make sure all connections are tight and secure before proceeding.
Once you have connected the ground, hot, and neutral wires, you can safely proceed to install the dimmer switch into the wall box and secure it in place. Remember to turn off the power at the breaker panel before starting any electrical work and consult a professional if you are unsure about any step in the process.

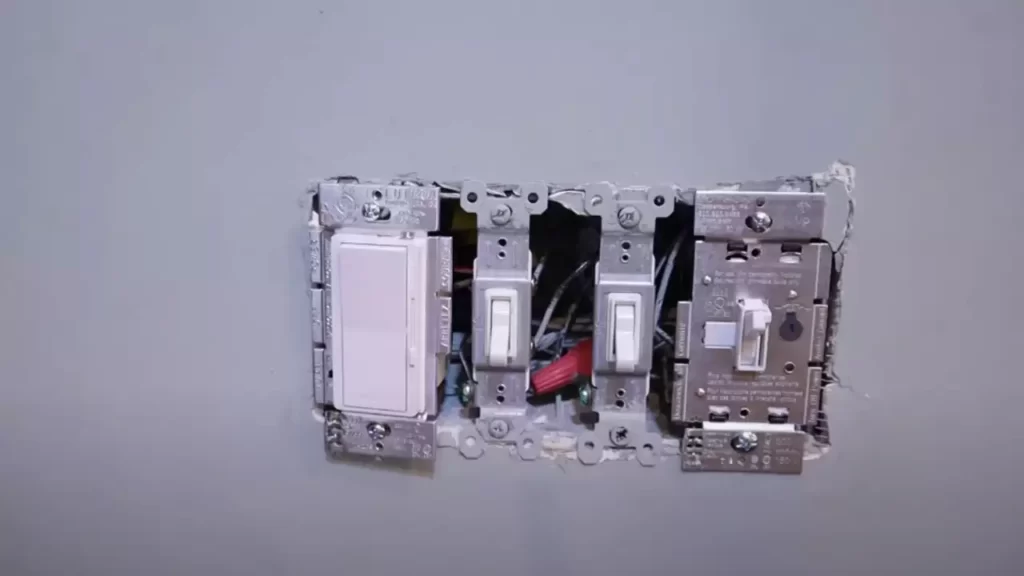
Mounting The Dimmer Switch
One of the essential steps in installing a dimmer switch with 3 wires is securely mounting it to the electrical box. This ensures that the switch remains in place and functions properly. In this section, we will walk you through the process of securing the dimmer switch, adjusting its position for ideal accessibility, and double-checking the wiring connections.
Securing the dimmer switch to the electrical box
Before mounting the dimmer switch, it is crucial to ensure that the power supply is turned off. This eliminates any risk of electric shock during the installation process. Once you have verified the power is off, follow these steps to secure the dimmer switch:
- Remove the existing switch plate cover by unscrewing the screws holding it in place.
- Detach the old switch from the electrical box by removing the mounting screws.
- Align the new dimmer switch with the holes in the electrical box.
- Insert the provided mounting screws through the screw holes in the switch and into the electrical box.
- Tighten the screws with a screwdriver until the dimmer switch is firmly secured.
By following these steps, you will ensure that the dimmer switch is tightly fastened to the electrical box, providing stability for its operation.
Adjusting the position for ideal accessibility
After securing the dimmer switch, it’s important to adjust its position for optimal accessibility. By placing the switch in a convenient location, you can easily control the lighting in your room. Consider the following points when adjusting the position of the dimmer switch:
- Ensure the switch is at a comfortable height and within easy reach.
- Avoid placing the switch behind furniture or in hard-to-reach areas.
- Position the switch where it is easily visible in the room.
- Take into account the wiring and other components inside the electrical box when determining the ideal position.
By taking the time to adjust the position of the dimmer switch, you can enhance its usability and convenience in your day-to-day lighting control.
Double-checking the wiring connections
Before proceeding further, it is crucial to double-check the wiring connections to ensure everything is secure and properly connected. Faulty or loose wiring can result in malfunctions or electrical hazards. Follow these steps to verify the wiring connections:
- Inspect each wire connected to the dimmer switch, making sure they are securely attached.
- Check for any frayed or damaged wires that may require replacement.
- Ensure that the wire colors match the appropriate terminals on the dimmer switch (typically black to black, green to green, and red or yellow to the remaining terminal).
- Tighten any loose wire connections using a screwdriver, ensuring they are snugly secured.
By meticulously examining the wiring connections, you can guarantee the safe and proper functioning of your dimmer switch.
Testing The Dimmer Switch
Restoring power to the circuit
Before testing the functionality of the dimmer switch, it is essential to restore power to the circuit. This step ensures that the switch receives the necessary electrical current to properly function. To restore power, locate the main electrical panel in your home and identify the circuit breaker that corresponds to the area where you will be installing the dimmer switch.
Flip the corresponding circuit breaker to the “on” position, and double-check that power has been restored by testing the existing light switch or fixture in the same area. Once you have verified that power is flowing, you can proceed with testing the dimmer switch.
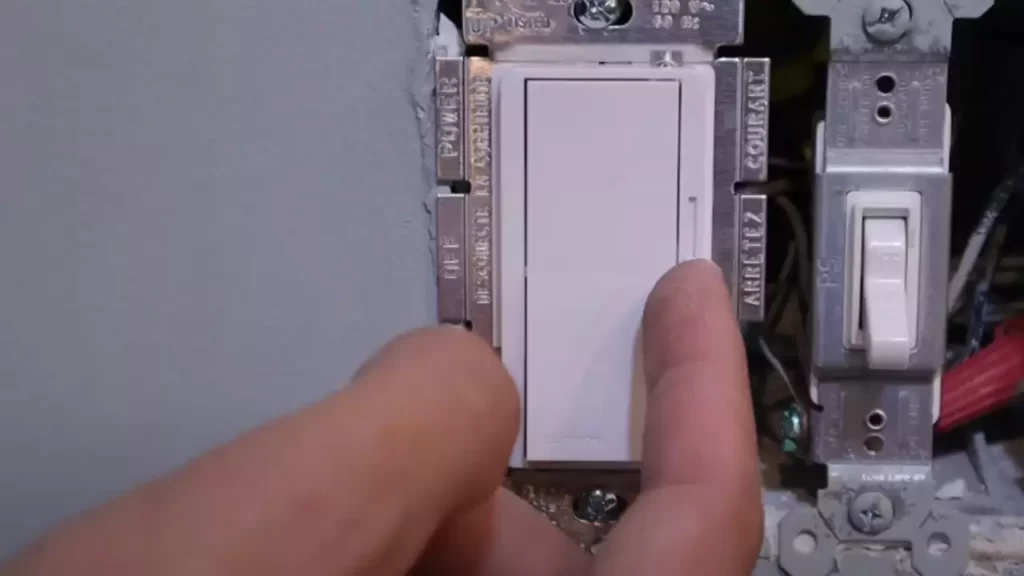
Testing the dimmer switch functionality
To ensure that the installed dimmer switch works correctly, you need to perform a quick functionality test. This test will help you identify any potential issues or defects with the switch and ensure that it is compatible with the type of light fixture being controlled. Follow these simple steps to test the dimmer switch:
- Step 1: Turn on the circuit breaker to supply power to the dimmer switch.
- Step 2: Gently toggle the dimmer switch from its lowest setting to its highest setting. Observe the behavior of the light. It should smoothly transition from dim to bright as you adjust the switch.
- Step 3: Pay close attention to any flickering, buzzing, or unusual behavior from the light fixture while adjusting the dimmer switch. These issues may indicate a faulty connection or an incompatible bulb.
- Step 4: Test the dimmer switch with different light settings to ensure its versatility. Dim the lights to your preferred ambiance and brighten them to maximum brightness.
If you notice any problems during the testing process, it may indicate the need for adjustments or troubleshooting.
Making adjustments if needed
If you encounter any issues while testing the dimmer switch, it is essential to make necessary adjustments to ensure its proper functionality. Here are some common adjustments you can try:
- Check the wiring: Verify that all the wires are securely connected to the dimmer switch and the corresponding wires in the electrical box.
- Inspect the bulb: If there is flickering or buzzing, try using a different type or brand of bulb that is compatible with dimmer switches.
- Consider the load: Make sure that the dimmer switch is rated for the total wattage of the light fixture. If the wattage exceeds the recommended range, you may need to switch to a higher-rated dimmer switch.
Remember, safety is of utmost importance when working with electrical components. If you are unsure about any aspect of installing or testing the dimmer switch, it is highly recommended to consult a qualified electrician.
Tips For Troubleshooting
In this section, we will provide you with some valuable tips for troubleshooting while installing a dimmer switch with 3 wires. Sometimes, even with careful installation, problems may arise that require some additional troubleshooting. Here are some common issues to look out for, as well as steps you can take to resolve them:
Identifying common installation issues
During the installation process, you may encounter common issues that could affect the functioning of your dimmer switch. It’s important to be aware of these problems so that you can address them promptly and ensure a successful installation. Here are a few common installation issues to keep an eye out for:
| Issue | Description | Solution |
| Incorrect wiring connections | If you have connected the wires in the wrong order, it can cause the dimmer switch to malfunction. | Double-check the manufacturer’s instructions and reconfirm the correct wire connections. |
| Insufficiently tightened connections | If the wire connections are loose, they can disrupt the electrical flow and result in dimmer switch issues. | Ensure all wire connections are securely tightened to prevent any loose connections. |
| Compatibility issues | Not all dimmer switches are compatible with every type of light bulb or fixture. | Refer to the switch manufacturer’s guidelines to ensure compatibility with your specific light bulbs or fixtures. |
Checking for loose connections or faulty wiring
Loose connections or faulty wiring can negatively impact the performance of your dimmer switch. Here is a step-by-step guide on how to check for these issues:
- Ensure the power to the circuit is turned off before inspecting any connections.
- Inspect each wire connection to make sure they are tightly secured. If you find any loose connections, tighten them carefully using a screwdriver.
- If the issue persists, carefully examine the wiring for any signs of damage or wear. If you identify faulty wiring, it is crucial to replace it with new wiring to avoid potential safety hazards.
Seeking professional help if necessary
If you have followed the troubleshooting steps mentioned above and are still experiencing issues with your dimmer switch installation, it may be time to seek professional assistance. Electricians have the expertise necessary to handle complex wiring problems and ensure the safe functioning of your dimmer switch. Remember, when it comes to electrical work, your safety should always be the top priority.
By identifying common installation issues, checking for loose connections or faulty wiring, and seeking professional help if necessary, you are well-equipped to troubleshoot any problems that may arise during the installation of a dimmer switch with 3 wires. Ensuring a proper installation will facilitate the smooth operation and longevity of your dimmer switch.
Frequently Asked Questions
Why Does My Dimmer Switch Have 3 Wires?
A dimmer switch has 3 wires because it requires a live wire, a neutral wire, and a ground wire for proper functioning. The live wire provides power, the neutral wire completes the circuit, and the ground wire ensures safety by diverting excess electrical current.
How Many Wires Does A Dimmer Need?
A dimmer typically requires three wires for installation.
What Is The Difference Between 2 Wire And 3-Wire Dimmer?
A 2-wire dimmer works with just hot and load wires, while a 3-wire dimmer requires a neutral wire in addition to the hot and load wires for better performance. The neutral wire provides power to the dimmer and prevents flickering or buzzing.
Does It Matter Which Way You Wire A Dimmer Switch?
The way you wire a dimmer switch does matter. It is important to follow the specific wiring instructions provided by the manufacturer to ensure proper function and avoid any potential electrical hazards. Improperly wiring a dimmer switch can cause it to not work correctly or even damage the switch and other electrical components.
Conclusion
To sum up, installing a dimmer switch with three wires doesn’t have to be a complicated task. By carefully following the steps outlined in this blog post, you can easily upgrade your lighting system and enjoy the benefits of adjustable lighting.
Remember to turn off the power, identify the wires correctly, and connect them properly to ensure a safe and functional installation. With the right tools and a little patience, you’ll be able to create the perfect ambiance in your space.