To install a dimmer switch with 2 wires, turn off the power, remove the existing switch, connect the wires to the dimmer, and reinstall the switch. Dimmer switches allow you to control the brightness of your lights and can create the perfect ambiance in any room.
Installing a dimmer switch is a straightforward process that can be completed in a few simple steps. In this guide, we will show you how to install a dimmer switch with 2 wires. So, let’s get started!
What Is A Dimmer Switch?
Definition and purpose of a dimmer switch
A dimmer switch is an electrical device that allows you to control the brightness of a light fixture. It replaces a regular on/off switch and provides the added functionality of adjusting the intensity of the light output. The main purpose of a dimmer switch is to create the desired ambiance in a room by allowing you to set the lighting level according to your preference and needs.
Benefits of using a dimmer switch
Using a dimmer switch offers several benefits that can enhance your lighting experience and improve energy efficiency. Here are some advantages of installing a dimmer switch:
1. Customizable lighting: With a dimmer switch, you have the ability to adjust the brightness of your lights to create the perfect atmosphere for any occasion. Whether you want bright lighting for an energetic and productive environment or a softer, more subdued glow for relaxation, a dimmer switch allows you to easily achieve your desired lighting preference.
2. Energy savings: One of the key advantages of using a dimmer switch is reduced energy consumption. By lowering the brightness of your lights, you can conserve electricity and extend the lifespan of your bulbs. A dimmer switch helps you save money on your energy bills while also being eco-friendly.
3. Extended bulb life: Traditional on/off switches often result in sudden power surges when the lights are turned on, which can lead to a shorter lifespan for your bulbs. Dimmer switches eliminate this issue by gradually adjusting the voltage, resulting in a smoother transition and longer-lasting bulbs.
4. Mood setting: Whether you’re hosting a dinner party, watching a movie, or simply unwinding after a long day, dimming the lights can create a cozy and inviting atmosphere. With a dimmer switch, you have control over the brightness level, allowing you to set the mood that suits your activities and preferences.
5. Increased comfort and flexibility: A dimmer switch provides you with the flexibility to adapt your lighting to different situations. From bright task lighting for focused work to soft ambient lighting for relaxation, a dimmer switch allows you to easily adjust the lighting level to accommodate your changing needs throughout the day.
By installing a dimmer switch with 2 wires, you can enjoy all these benefits and more while adding a touch of sophistication and convenience to your home lighting system.
Basic Wiring Requirements
Overview of Electrical Wiring
Before diving into the process of installing a dimmer switch with two wires, it is essential to have a clear understanding of electrical wiring. Electrical wiring refers to the system of conductors and devices used to transport electricity from the main power source to outlets, switches, and appliances throughout your home. This network of wiring is crucial for the operation of electrical devices and ensuring a safe distribution of power.
Importance of Safety Precautions
When working with electrical wiring, safety precautions should always be your top priority. Taking the necessary measures will protect you from potential accidents and electrical hazards. Here are a few key safety precautions to keep in mind:
- Turn off the power: Before embarking on any electrical project, shut off the power supply at the circuit breaker to prevent the risk of electric shock.
- Wear protective gear: Always wear appropriate safety gear such as gloves and safety glasses to protect yourself from any potential electrical sparks or debris.
- Test the wires: Use a voltage tester to ensure that the power is indeed off before proceeding with any work.
- Follow instructions: Read and follow the manufacturer’s instructions carefully. Each dimmer switch may have specific guidelines that need to be adhered to for a successful installation.
- Consult a professional: If you are uncertain about any aspect of the installation, it is recommended to consult a licensed electrician to ensure everything is done correctly and safely.
Types of Electrical Wires Used in Dimmer Switch Installation
When it comes to installing a dimmer switch with two wires, understanding the types of electrical wires used is crucial. Here are the two common wire types that you may encounter during the installation:
| Wire Type | Description |
|---|---|
| Hot Wire (Black or Red) | The hot wire is responsible for carrying the electrical current from the power source to the switch or device. |
| Neutral Wire (White) | The neutral wire completes the electrical circuit and provides a return path for the current. It is essential for the safe operation of the switch or device. |
During the installation process, it is important to identify and properly connect these wires to ensure the dimmer switch functions correctly. Pay close attention to the color-coding of the wires and consult the manufacturer’s instructions for specific guidance on connecting the wires.
By understanding the basics of electrical wiring, prioritizing safety precautions, and familiarizing yourself with the types of wires involved in dimmer switch installation, you are well-equipped to tackle this project. Remember, if you have any doubts or concerns, it is always best to consult a professional electrician for assistance.
Preparing For Installation
Before installing a dimmer switch with 2 wires, it’s essential to prepare yourself and gather the necessary tools and materials. This preparation will ensure a smooth installation process and help you avoid any electrical hazards. Let’s take a closer look at what you need to do in this crucial step.
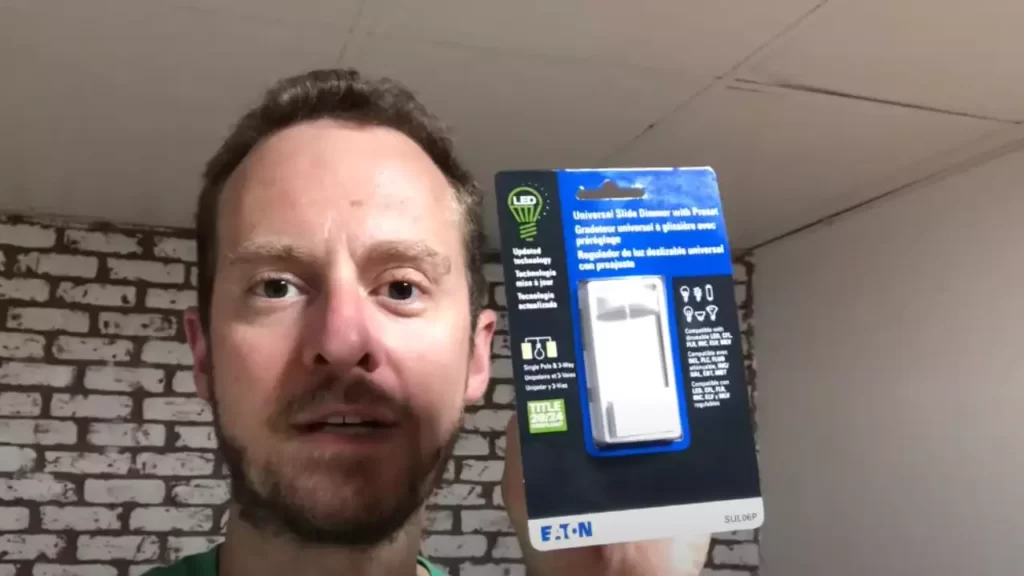
Gathering necessary tools and materials
To begin, make sure you have all the required tools and materials within your reach. This will save you time and frustration later on. Here’s a list of what you’ll need:
| Tools | Materials |
|---|---|
|
|
Once you have these tools and materials ready, you can proceed to the next step.
Turning off the power supply
Before working with any electrical components, it’s important to ensure your safety by turning off the power supply. This will prevent any potential accidents or electric shocks. Follow these steps to turn off the power:
- Locate your electrical panel or circuit breaker box.
- Identify the circuit breaker that controls the power to the switch you’ll be working on.
- Switch off the corresponding circuit breaker by flipping it to the “off” position.
- Verify that the power is indeed off by testing the switch you’re about to replace with a voltage tester.
Once you’ve confirmed that no electricity is flowing to the switch, you can move on to removing the old switch.
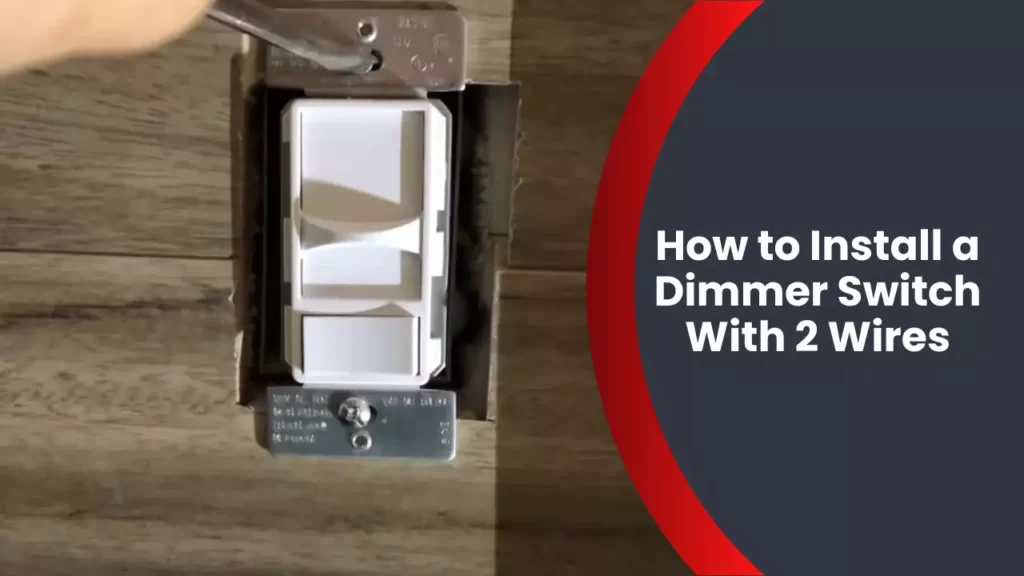
Removing the old switch
To install a dimmer switch, you first need to remove the existing switch. Follow these steps carefully:
- Use a screwdriver to unscrew the mounting screws that secure the switch’s cover plate to the wall.
- Gently pull the cover plate away to expose the switch.
- Again, using the screwdriver, unscrew the mounting screws that secure the switch to the electrical box.
- Once the screws are removed, carefully pull the switch out of the electrical box.
- Take note of the wiring connections on the old switch before disconnecting them. This will help you during the installation of the new dimmer switch.
- Using needle-nose pliers or a wire stripper if necessary, loosen the wire connectors that hold the wires to the switch.
- Remove the wires from the old switch, ensuring that none of them touch or come into contact with one another.
With the old switch removed and the wires safely disconnected, you are now ready to install the new dimmer switch. Stay tuned for the next section of our blog post, where we will guide you through the installation process step by step.
Installing The Dimmer Switch
Installing a dimmer switch can enhance the ambiance and functionality of your lighting. Whether you want to create a cozy atmosphere or simply have more control over the brightness of your lights, a dimmer switch is a great addition to any room. In this guide, we will walk you through the step-by-step process of installing a dimmer switch with 2 wires.
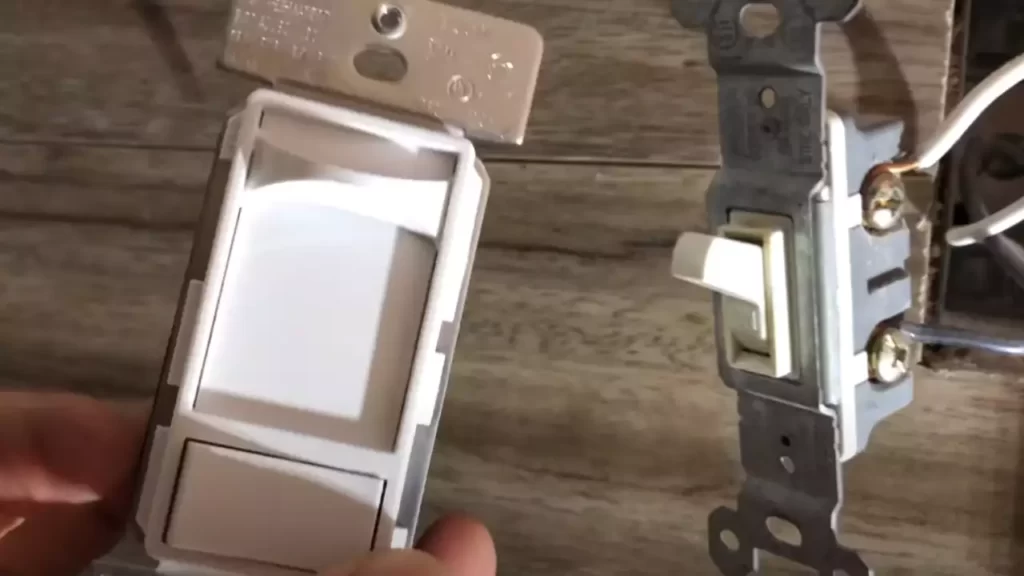
Identifying the two wires
Before you begin the installation process, it’s important to identify the two wires that you will be working with. In most cases, these wires will be a black wire (commonly known as the “hot” wire) and a white wire (known as the “neutral” wire). However, it’s always best to confirm the wiring in your specific installation by using a voltage tester. Here’s what you need to do:
1. Turn off the power: Locate the circuit breaker that controls the power to the light switch you are replacing. Switch it off to ensure your safety throughout the installation process.
2. Remove the existing switch cover: Use a screwdriver to remove the screws holding the switch cover in place. Carefully detach the cover and set it aside.
3. Examine the wires: Gently pull out the existing switch from the wall box. You will notice two wires connected to the switch – a black wire and a white wire. These are the wires you will be working with.
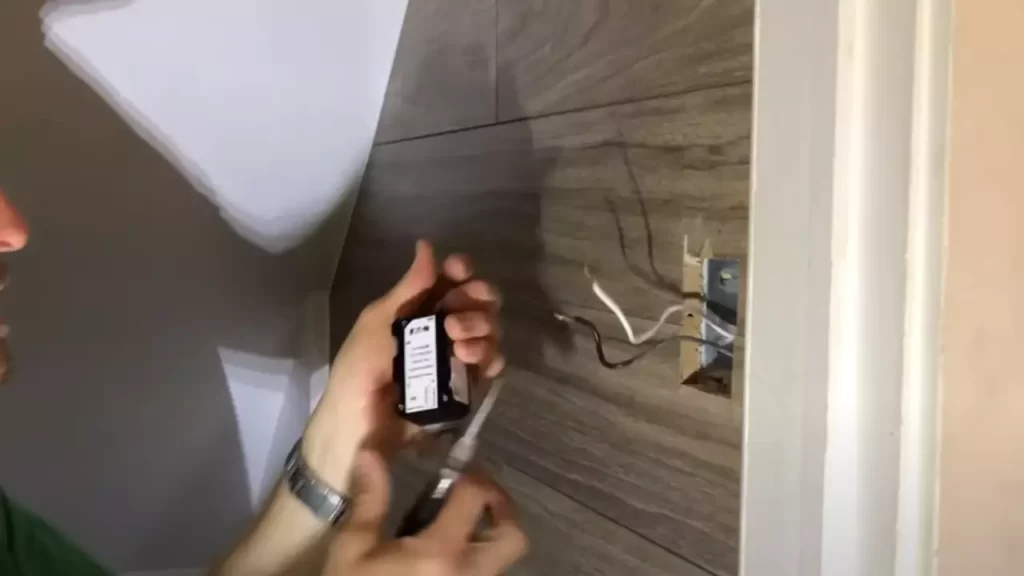
Connecting the switch wires to the corresponding wires in the wall box
Now that you have identified the two wires, it’s time to connect them to the corresponding wires in the wall box. Here’s how you can do it:
1. Strip the wires: Use a wire stripper to remove about 1/2 inch of insulation from the ends of the wires, both from the switch and the wall box.
2. Connect the wires: Take the black wire from the dimmer switch and connect it to the black wire in the wall box. You can do this by twisting the exposed ends of the wires together and securing them with a wire nut. Repeat the same process with the white wires, connecting the dimmer switch’s white wire to the white wire in the wall box.
3. Inspect the connections: Once the wires are connected, gently tug on each wire to ensure they are securely attached. Make sure there are no loose or exposed wires.
Securing the switch to the wall box
Now that the wires are connected, it’s time to secure the dimmer switch to the wall box. Follow these steps:
1. Push the wires back into the wall box, making sure they are neatly tucked inside.
2. Attach the dimmer switch: Align the screw holes on the dimmer switch with the holes in the wall box. Use a screwdriver to tighten the screws and secure the switch in place.
Testing the switch functionality
After securing the dimmer switch, it’s crucial to test its functionality before finishing up the installation process. Here’s what you should do:
1. Turn on the power: Return to the circuit breaker and switch it on. The power to the light switch should now be restored.
2. Test the dimming feature: Turn the dimmer switch to different positions to adjust the brightness of the lights. Ensure that the lights respond accordingly, dimming or brightening as you rotate the switch.
3. Check for any issues: Pay attention to any flickering, buzzing, or other unusual behavior from the lights. If you notice any problems, turn off the power immediately and double-check your connections.
That’s it! You have successfully installed a dimmer switch with 2 wires. Enjoy the flexibility and control over your lighting that this simple addition provides.
Troubleshooting Common Issues
Identifying and resolving wiring errors
When installing a dimmer switch with 2 wires, it’s important to correctly identify and resolve any wiring errors that may occur. Wiring errors can lead to malfunctions and even pose safety hazards. To troubleshoot wiring errors, follow these steps:
- Double-check the wiring connections: Ensure that the black wire from the switch is connected to the hot wire and the white wire is connected to the neutral wire.
- Inspect for loose or damaged wires: Carefully examine the wiring connections for any loose or frayed wires. If you find any, reattach or replace them as necessary.
- Use a voltage tester: To confirm if the wiring is done correctly, use a voltage tester to check if there is power running through the circuit. This will help identify any potential issues.
- Consult an electrician: If you’re uncertain about the wiring or unable to troubleshoot the issue yourself, it’s always recommended to seek assistance from a qualified electrician. They will be able to diagnose and resolve any wiring errors properly.
Fixing flickering or buzzing lights
If you experience flickering or buzzing lights after installing a dimmer switch, there are a few steps you can take to address these common issues:
- Check the wattage compatibility: Ensure that the total wattage of the lights connected to the dimmer switch is within the specified range. Exceeding the maximum wattage can cause flickering or buzzing.
- Replace the bulbs: In some cases, the bulbs themselves may be the cause of the issue. Consider replacing the bulbs with dimmable ones that are compatible with the type of dimmer switch you have installed.
- Adjust the minimum load setting: Some dimmer switches have a minimum load adjustment, which allows you to optimize the dimming range. Check the manufacturer’s instructions to see if this feature is available and make the necessary adjustments.
- Check for loose connections: Ensure that all wiring connections, including the ground wire, are secure and properly tightened. Loose connections can cause flickering or buzzing.
Addressing dimmer switch compatibility issues
Dimmer switch compatibility issues can arise if the switch is not designed to work with certain types of lights or bulbs. Here are a few steps you can take to address compatibility issues:
- Check the dimmer switch specifications: Verify that the dimmer switch you have installed is compatible with the specific type of lighting you are using. Some dimmer switches are designed specifically for LED, incandescent, or fluorescent lights.
- Replace the dimmer switch: If the compatibility issue persists, it may be necessary to replace the dimmer switch with one that is specifically designed for the type of lighting you have. Consult the manufacturer’s instructions or a lighting professional for guidance.
- Test with different bulbs: Occasionally, certain bulbs may not work well with a particular dimmer switch. Try using different bulbs to see if the compatibility issue is resolved.
- Seek professional advice: If you’re unsure about the compatibility issue or unable to resolve it on your own, it’s best to consult a qualified electrician or lighting professional. They will have the expertise to provide the necessary guidance and recommendations.
Finalizing The Installation
Now that you have successfully connected your dimmer switch to the electrical wiring, it’s time to finalize the installation. This involves securing the switch plate, restoring power to the circuit, and testing the dimmer switch with the lights.
Securing the switch plate
Once you have made the necessary wire connections, you need to secure the switch plate onto the wall. Start by positioning the switch plate over the electrical box, ensuring that it aligns properly with the switch. Next, use the screws provided with the dimmer switch to attach the switch plate onto the wall. Make sure the switch plate is snug and firmly in place, as this will prevent any accidental movement or damage to the wiring inside.
Restoring power
After securing the switch plate, it’s time to restore power to the circuit. Head to your home’s electrical panel or breaker box and locate the breaker that controls the circuit where you installed the dimmer switch. Flip the breaker back into the “on” position to restore power. It’s essential to double-check that power is indeed restored by testing another light or appliance on the same circuit. If everything is functioning correctly, you can proceed to the final step.
Testing the dimmer switch with the lights
With power restored, it’s time to test the dimmer switch and ensure it is working correctly. Turn on the lights connected to the dimmer switch and adjust the dimming level using the switch’s controls. The lights should respond accordingly, smoothly transitioning from brighter to dimmer or vice versa. Test the full range of the dimming capabilities to ensure the switch is working as intended. If you encounter any issues, such as flickering lights or inconsistent dimming, double-check your wiring connections and consult the manufacturer’s instructions.
Congratulations! You have successfully installed and tested your dimmer switch. Enjoy the flexibility and ambiance-control that a dimmer switch can bring to your home.
Frequently Asked Questions
Why Do Dimmer Switches Have Two Black Wires?
Dimmer switches have two black wires because one wire connects to the power source, while the other wire connects to the light fixture. Both wires are needed to control the brightness of the light.
How Many Wires Do You Need For A Dimmer Switch?
A dimmer switch typically requires two wires – a hot wire and a switch leg wire – for installation.
What Is 2-Wire Dimming?
2-wire dimming is a lighting control system that uses only two wires for power and control signals. It is a simple and cost-effective solution for dimming lights without the need for extra wiring. The dimming level is adjusted by varying the amount of current flowing through the wires.
Does It Matter Which Way You Wire A Dimmer Switch?
It does matter how you wire a dimmer switch. Correct wiring is essential for the proper functioning of the switch. It ensures that the dimming function works correctly and avoids any potential electrical hazards. Follow the manufacturer’s instructions carefully for the best results.
Conclusion
Installing a dimmer switch with just two wires is a straightforward process that can enhance the ambiance and functionality of any space. By following the step-by-step instructions and ensuring proper safety precautions, you can easily enjoy the benefits of dimmable lighting.
Remember to switch off the power, connect the wires correctly, and test the dimmer switch before finalizing the installation. With these simple guidelines, you’ll be able to create the perfect lighting atmosphere in your home effortlessly.