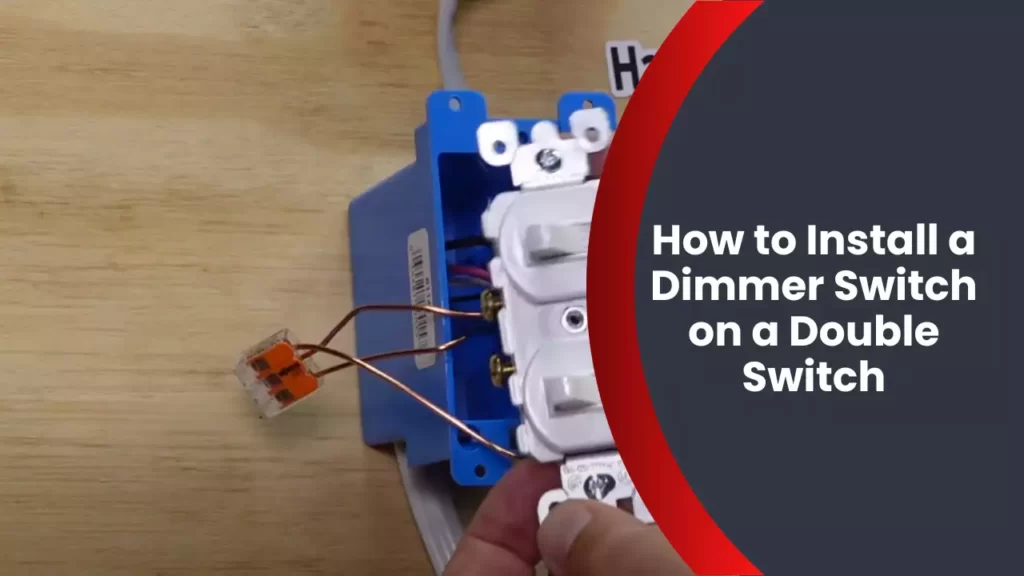
To install a dimmer switch on a double switch, follow these steps carefully. First, turn off the power to the circuit at the breaker panel.
Then, remove the cover plate and disconnect the existing switch. Attach the dimmer switch by connecting the wires to the corresponding terminals, following the manufacturer’s instructions. Finally, reattach the cover plate and restore power to the circuit at the breaker panel.
With these simple steps, you can easily install a dimmer switch on a double switch and enjoy the benefits of adjustable lighting in your home. Adjustable lighting can create a more ambient and comfortable atmosphere in your home. Installing a dimmer switch on a double switch allows you to control the brightness of the lights, offering greater flexibility in setting the desired mood.
Whether you’re looking to relax in a cozy dimmed light or need brighter lighting for specific tasks, installing a dimmer switch can provide a simple solution. We will guide you through the process of installing a dimmer switch on a double switch, allowing you to easily upgrade your lighting system. By following the steps outlined below, you can quickly and safely complete the installation and enjoy the benefits of adjustable lighting in your home.
Understanding The Basics Of Dimmer Switches
Installing a dimmer switch can enhance the lighting ambiance in any room, allowing you to adjust the brightness level according to your preference. Whether you want to create a cozy atmosphere in the living room or set the right mood for a romantic dinner, a dimmer switch offers you the flexibility to control the lighting intensity.
What is a dimmer switch?
A dimmer switch is an electrical device that replaces a standard light switch and enables you to regulate the brightness of your lights. Rather than simply turning your lights on or off, a dimmer switch provides the added functionality of adjusting the light output, allowing you to create a more versatile and comfortable environment.
Benefits of using a dimmer switch
Using a dimmer switch offers several advantages for both your home and your pocket. Here are some of the key benefits:
- Energy savings: A dimmer switch allows you to reduce the overall energy consumption of your lighting system. By lowering the brightness levels, you can reduce electricity usage and subsequently lower your energy bills.
- Extended bulb life: Dimming your lights can significantly extend the life of your bulbs. Operating your lights at a lower output level reduces the strain on the filaments or electronic components, resulting in increased bulb longevity.
- Enhanced ambiance: With a dimmer switch, you have the power to set the perfect ambiance in any room. Whether you want a bright and energizing atmosphere or a soft and relaxing glow, adjusting the dimmer switch allows you to create the desired mood.
- Increased control: Dimmer switches provide precise control over your lighting, giving you the ability to fine-tune the brightness levels to suit different activities and occasions. Whether you need brighter lights for reading or dimmer lights for movie nights, a dimmer switch offers you the flexibility to adapt your lighting to your needs.
Common types of dimmer switches
Different types of dimmer switches are available to cater to various lighting systems and preferences. Here are a few common types:
| Type | Features |
|---|---|
| Rotary dimmer switch | Simple and easy-to-use, with a dial or knob for adjusting light levels. |
| Slide dimmer switch | Uses a slider to control brightness, offering a sleek and modern design. |
| Touch dimmer switch | All adjustments are made through touch-sensitive buttons or panels, providing a more futuristic and elegant look. |
| Smart dimmer switch | Compatible with home automation systems and can be controlled remotely via smartphone apps or voice commands. |
Understanding the basics of dimmer switches empowers you to make an informed decision when it comes to choosing the right dimmer switch for your double switch installation. By assessing your lighting needs and considering the benefits and features of each type, you can find the perfect dimmer switch to enhance your home’s lighting experience.
Preparing For The Installation
Gathering the Necessary Tools and Materials
Before installing a dimmer switch on a double switch, it’s important to gather all the necessary tools and materials to ensure a smooth and efficient installation process. By having everything ready to go, you can minimize interruptions and complete the job without any issues.
Here’s a list of tools and materials you will need:
- Flathead screwdriver
- Philips screwdriver
- Wire cutter/stripper
- Electrical tape
- Dimmer switch (compatible with double switch)
- Wire nuts
- Marker or labels
- Electrical tester (non-contact voltage tester)
Ensuring Safety Precautions
Safety should always be a top priority when working with electricity. Before you begin the installation process, make sure to follow these safety precautions:
- Always shut off the power to the area where you’ll be working. This will prevent any accidental shocks or circuit overloads.
- Wear insulated gloves to protect yourself from potential electrical hazards.
- Never touch exposed wires or terminals with your bare hands.
- Avoid working in wet conditions or standing on wet surfaces while handling electrical components.
- If you’re unsure about any electrical work, consult a professional electrician.
Shutting Off Power to the Area
Before starting the installation, it’s crucial to shut off the power to the area where you’ll be working. This will ensure your safety and prevent any electrical mishaps. Follow the steps below to shut off the power:
- Locate the circuit breaker box in your home.
- Identify the breaker that controls the power to the area where you’ll be installing the dimmer switch.
- Flip the switch for that breaker to the “off” position.
- Use a non-contact voltage tester to verify that the power is indeed off before proceeding.
- Once you’ve confirmed the power is off, you can proceed with the installation process.
Removing The Existing Double Switch
When it comes to installing a dimmer switch on a double switch, the first step is to remove the existing switch. This process involves identifying the existing switch, turning off the circuit breaker, and removing the switch cover plate. Let’s dive into each of these steps in detail.
Identifying the existing switch
To begin, you need to identify the existing switch that you want to replace with a dimmer switch. Double switches are commonly used when you want to control two separate lighting fixtures or electrical devices from the same location. Take a close look at the switches on the wall and locate the double switch that you want to work on. Make sure you have a clear understanding of which switch controls which device.
Turning off the circuit breaker
Before removing the existing switch, it is crucial to turn off the circuit breaker that supplies power to the switch. This ensures your safety and prevents any electrical accidents. Locate your home’s circuit breaker panel, which is typically found in the garage, basement, or utility room. Look for the breaker that corresponds to the room or area where the double switch is installed. Flip the switch to the “off” position to cut off power to the switch.
Removing the switch cover plate
Once the power is turned off, you can proceed to remove the switch cover plate. This plate protects the wiring and the switch itself. Use a flathead screwdriver or a suitable tool to remove the screws holding the switch cover plate in place. Set the screws aside in a safe place to avoid misplacing them. Gently pull the switch cover plate away from the wall, exposing the wiring and the existing switch.
Now that you have successfully removed the existing switch cover plate, you are ready to move on to the next step: installing the dimmer switch. Stay tuned for our upcoming blog post on how to install a dimmer switch on a double switch.
Disconnecting The Wires From The Double Switch
When it comes to installing a dimmer switch on a double switch, one of the first steps you’ll need to take is disconnecting the wires from the existing switch. This ensures that you can properly replace it with the dimmer switch without any complications. To help you navigate this process smoothly, we’ve broken down the steps into three key aspects: identifying the different wires, carefully removing the wire nuts, and detaching the wires from the switch terminals.
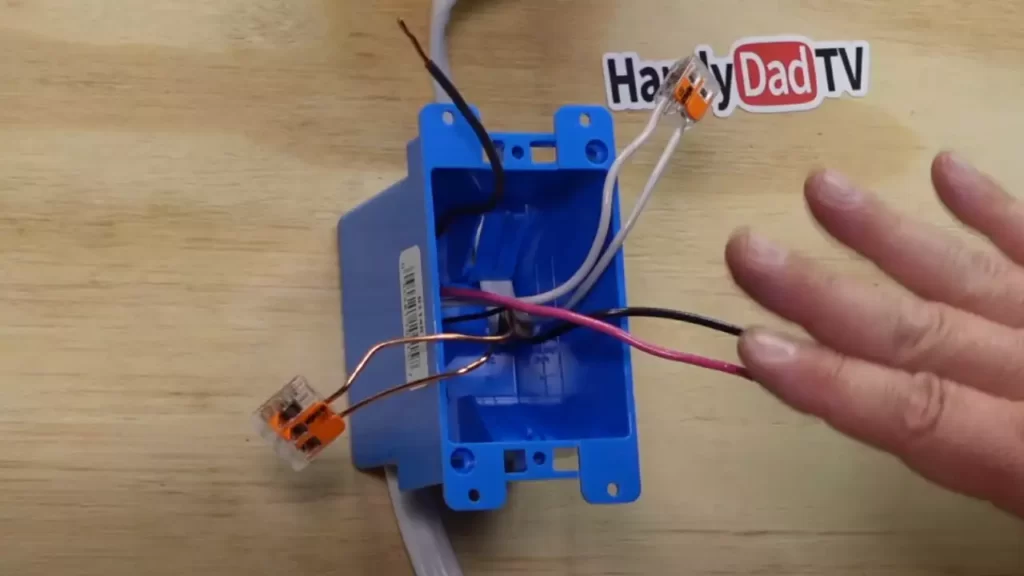
Identifying the different wires
To begin, you’ll need to identify the different wires connected to the double switch. These wires typically include a ground wire, a live wire, two load wires, and sometimes a neutral wire. It’s important to take note of the colors and positions of these wires as you’ll need this information later on. Refer to the table below for a better understanding:
| Wire | Color |
|---|---|
| Ground | Green or bare copper |
| Live | Black or red |
| Load | Black or red |
| Neutral (optional) | White |
Carefully removing the wire nuts
Once you’ve identified the different wires, it’s time to carefully remove the wire nuts that are securing the wires together. Gently use a pair of pliers to twist and loosen the wire nuts counterclockwise. As you remove the wire nuts, be sure to hold onto the wires to prevent them from accidentally falling back into the electrical box. Take extra caution as you handle the live wires to avoid any risk of electrical shock.
Detaching the wires from the switch terminals
After removing the wire nuts, you’ll find that each wire is connected to a switch terminal. To detach the wires from the switch terminals, you’ll need to use a screwdriver to loosen the screws holding the wires in place. Carefully unscrew the screws in a counterclockwise direction to free the wires. Once the screws are fully loosened, gently pull the wires away from the switch terminals. Take note of which wire is connected to each terminal to ensure proper reconnection later on.
By following these steps to disconnect the wires from the double switch, you’re one step closer to successfully installing a dimmer switch for your lighting setup. Remember to stay attentive and cautious throughout the process for a safe and successful installation.
Installing The Dimmer Switch
Installing the Dimmer Switch
Installing a dimmer switch is a great way to enhance the lighting in your home. Not only does it allow you to adjust the brightness levels, but it also adds a touch of elegance and ambiance to any room. In this section, we will guide you through the process of installing a dimmer switch on a double switch. By following these simple steps, you can have a professional-looking installation in no time.
Choosing the right dimmer switch
The first step in installing a dimmer switch is choosing the right one for your specific needs. There are a few factors to consider when selecting a dimmer switch:
- Wattage compatibility: Ensure that the dimmer switch is compatible with the wattage of your light fixtures. Exceeding the maximum wattage can cause the switch to overheat.
- Dimming method: Decide whether you prefer a rotary, slide, or touch-sensitive dimmer switch. Consider which type would best suit your needs and personal preference.
- LED compatibility: If you have LED lights, make sure the dimmer switch is designed to work with them. Not all dimmer switches are compatible with LED bulbs.
Once you have chosen the right dimmer switch, you are ready to begin the installation process.
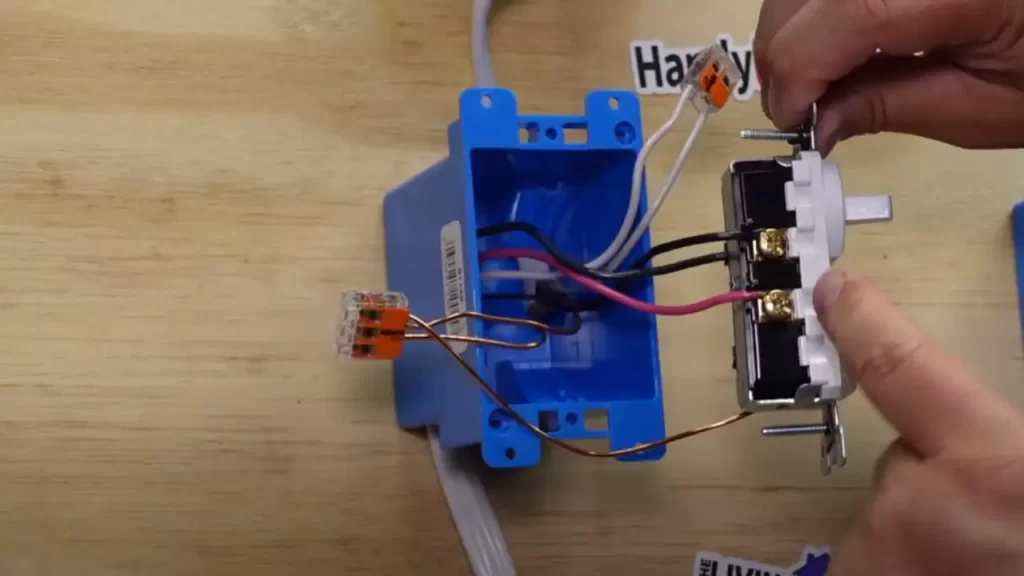
Connecting the dimmer switch to the wires
Before starting any electrical work, always turn off the power at the circuit breaker to ensure your safety. Once the power is turned off, follow these steps to connect the dimmer switch to the wires:
- Remove the cover plate and the screws holding the old switch in place.
- Carefully remove the old switch from the electrical box.
- Note the wiring configuration of the old switch. Take a picture or make a diagram to reference later if needed.
- Disconnect the wires from the old switch by unscrewing the wire nuts or removing the screws.
- Connect the dimmer switch to the wires according to the manufacturer’s instructions. Typically, you will connect the black wires (hot) together and the green or bare copper ground wire to the grounding screw.
- Secure the connection by tightening the wire nuts or screws.
Note: If you are unsure about any wiring connections, consult a qualified electrician to avoid any potential dangers.
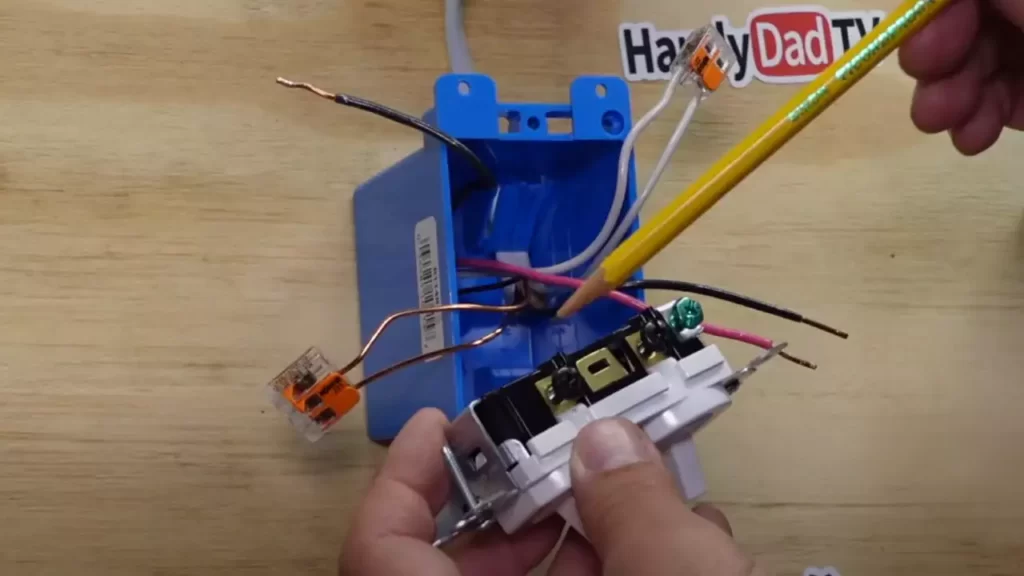
Attaching the dimmer switch to the electrical box
Once the wiring is complete, it is time to attach the dimmer switch to the electrical box:
- Carefully fold the wires into the electrical box, making sure not to pinch or damage them.
- Align the dimmer switch with the screw holes on the electrical box.
- Insert the mounting screws through the dimmer switch and into the screw holes.
- Tighten the screws with a screwdriver until the dimmer switch is securely attached to the electrical box.
After completing these steps, you can now turn the power back on and enjoy the benefits of your newly installed dimmer switch. Remember to test the dimmer switch by adjusting the brightness levels and ensure that it is functioning correctly.
Installing a dimmer switch on a double switch may seem intimidating at first, but by following these step-by-step instructions, you can achieve professional results. With the right dimmer switch selected, proper wiring connections, and secure attachment to the electrical box, you can enhance the lighting and create a more comfortable atmosphere in your home. Enjoy the newfound flexibility and control over your lighting with a dimmer switch installation!
Testing And Finishing Up
Turning the Power Back On
Now that you have installed the dimmer switch on your double switch, it’s time to turn the power back on. Locate the breaker panel in your home, and flip the switch that corresponds to the circuit you were working on. Once the power is restored, you can move on to testing the dimmer switch’s functionality.
Testing the Dimmer Switch Functionality
Before securing the dimmer switch and replacing the cover plate, it’s important to ensure that the switch is functioning correctly. Follow these steps to test the dimmer switch:
- Turn the switch to the on position and observe the lights connected to the dimmer switch. They should gradually brighten or dim depending on the position of the switch.
- If the lights do not respond or flicker, double-check the wiring connections to make sure they are properly secured. If everything appears to be connected correctly, the dimmer switch may be defective and should be replaced.
- If the dimmer switch is functioning properly, turn it off and proceed to the next step.
Securing the Dimmer Switch and Replacing the Cover Plate
Once you have confirmed that the dimmer switch is working as expected, it’s time to secure the switch and replace the cover plate. Follow these steps:
- Take a screwdriver and tighten the mounting screws on the dimmer switch, ensuring that it is securely attached to the electrical box.
- Next, place the cover plate over the switch and align it with the screw holes on the electrical box.
- Insert the provided screws into the holes and use the screwdriver to tighten them until the cover plate is firmly in place.
With the dimmer switch securely attached and the cover plate replaced, you have successfully installed and tested a dimmer switch on a double switch. Enjoy the ability to adjust the lighting in your space to create the perfect ambiance for any occasion.
Troubleshooting Common Issues
While installing a dimmer switch on a double switch can help you control the lighting in a room with ease, sometimes you may encounter certain issues. Understanding and addressing these common problems will ensure that your dimmer switch operates smoothly and effectively. In this section, we will discuss some troubleshooting techniques for two common issues: dimmer switch not working properly and dimmer switch causing flickering lights.
Dimmer switch not working properly
If your dimmer switch is not working as expected, there could be a few reasons behind it. By following the steps below, you can troubleshoot and identify the cause:
- Double-check the wiring: Make sure that the wires are properly connected to the dimmer switch. Loose or improperly connected wires can prevent the switch from functioning correctly.
- Check the wattage compatibility: Ensure that the wattage of the dimmer switch is compatible with the total wattage of the lights it is controlling. If the wattage exceeds the switch’s capacity, it may not operate properly.
- Inspect the dimmer switch type: Different types of dimmer switches are available for various light sources, such as incandescent, LED, or CFL lights. Verify that you are using the correct dimmer switch for your lighting fixtures.
- Verify the presence of a neutral wire: Some dimmer switches require a neutral wire for proper operation. Check if a neutral wire is present and connected as required by the switch’s instructions.
- Test the dimmer switch with a different light source: To eliminate the possibility of a faulty lightbulb causing the issue, try using a different light source or bulb with the dimmer switch.
Dimmer switch causing flickering lights
Flickering lights can be a common problem when using a dimmer switch. Follow these steps to troubleshoot and resolve the issue:
- Ensure a compatible dimmer switch: Confirm that the dimmer switch you installed is specifically designed to work with the type of lights you have. Not all dimmer switches are compatible with every type of lighting, which can lead to flickering.
- Replace old or incompatible bulbs: Older or incompatible light bulbs may not work well with a dimmer switch, leading to flickering. Consider replacing them with dimmable bulbs that are compatible with your dimmer switch.
- Check the dimmer load: Dimmer switches are designed to work within specific load ranges. If the combined wattage of your lights is too low or too high, it can cause flickering. Adjust the load according to the manufacturer’s specifications.
- Address loose connections: Loose connections between the dimmer switch and the wiring can cause flickering. Ensure that all connections are secure and tight.
- Minimize electrical interference: Other nearby electrical devices or appliances may introduce interference that leads to flickering lights. Try relocating the dimmer switch or eliminating any potential sources of interference.
consult a professional if needed
If you have carefully followed the troubleshooting steps above and are still experiencing issues with your dimmer switch, it is advisable to consult a professional electrician. They possess the expertise and knowledge necessary to diagnose and resolve complex electrical problems safely and efficiently.
Remember, safety should always be a top priority when dealing with electrical installations. If you are unsure about any aspect of installing or troubleshooting a dimmer switch, it’s best to seek professional assistance to avoid any potential risks.
Frequently Asked Questions
Can You Put A Dimmer Switch On A Double Switch?
Yes, you can install a dimmer switch on a double switch. It allows you to control the brightness of the light, providing flexibility in adjusting the lighting levels of the connected fixtures. Ensure the load capacity of the dimmer switch matches the combined wattage of the lights.
Can You Put A Dimmer On Both Sides Of A 3 Way Switch?
Yes, you can install a dimmer on both ends of a three-way switch. This allows you to control the light from two locations. However, it is important to ensure that the dimmers are compatible with each other and the lighting system.
How Do You Wire A 3 Wire Dimmer Switch?
To wire a 3 wire dimmer switch, first turn off the power. Next, connect the black wire from the wall to the common terminal on the switch. Then, connect the two remaining wires from the wall to the remaining terminals on the switch.
Finally, secure all connections and turn the power back on.
Can Dimmers Be 2 Way?
Yes, dimmers can be 2-way. They can be controlled from multiple locations, allowing you to adjust the lighting level from different switches or dimmer controls. This provides convenience and flexibility in managing the lighting ambiance of a room or area.
Conclusion
Upgrading your home lighting system by installing a dimmer switch on a double switch can greatly enhance your ambience and energy efficiency. By following the straightforward steps outlined in this guide, you can easily accomplish this task. Remember to turn off the power, consult the manufacturer’s instructions, and take safety precautions when working with electrical components.
With a new dimmer switch in place, you’ll have the flexibility to set the perfect lighting levels for any occasion. So go ahead and get started on this simple DIY project today!