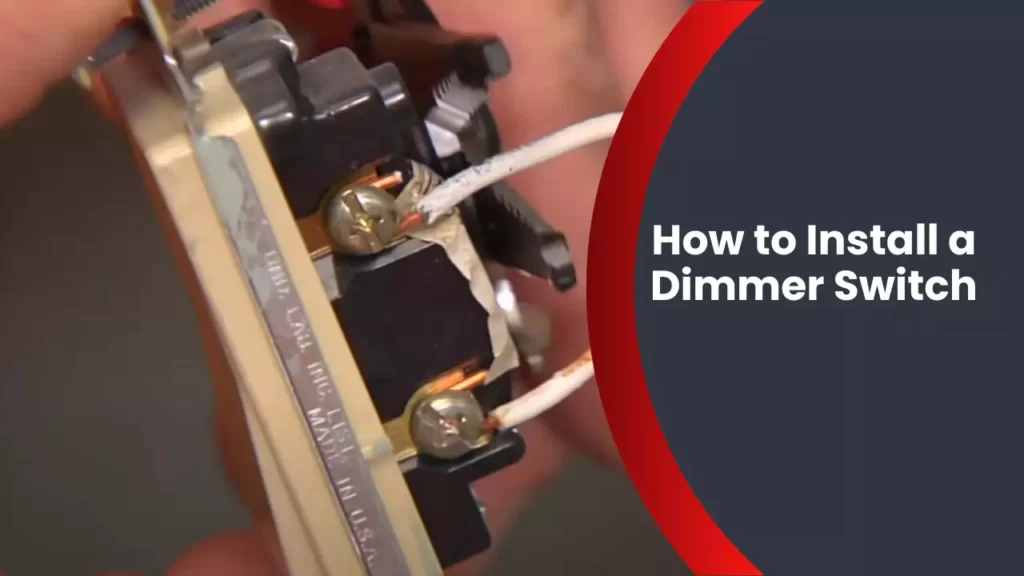
To install a dimmer switch, first, turn off the power to the circuit at the breaker box. Then, remove the existing switch and connect the dimmer switch wires to the corresponding wires in the electrical box.
Additionally, attach the ground wire to the switch, replace the cover plate, and restore power to the circuit at the breaker box. Installing a dimmer switch is a simple and effective way to control the lighting levels in a room to create the desired ambiance.
With just a few steps, you can enjoy the convenience of adjusting the brightness of your lights to suit your needs and preferences. Whether you want to create a cozy atmosphere for a romantic evening or brighten up the space for tasks that require more visibility, a dimmer switch can provide you with greater control and flexibility.
Understanding Dimmer Switches
Dimmer switches are an excellent addition to any home, providing both functionality and ambiance. Whether you want to create a cozy atmosphere in your living room or have a soft, calming light in your bedroom, a dimmer switch can help you achieve the perfect lighting level. In this section, we will dive deeper into the concept of dimmer switches and explore their benefits.
What is a Dimmer Switch?
A dimmer switch is a type of light switch that allows you to control the brightness of a light fixture. Unlike standard switches that only offer an on and off function, a dimmer switch provides a range of lighting options. With a dimmer switch, you have the flexibility to adjust the intensity of the light according to your preference or specific needs.
Benefits of Installing a Dimmer Switch
Installing a dimmer switch offers several advantages that can enhance your lighting experience. Here are some of the key benefits:
- Control over Lighting Intensity: By installing a dimmer switch, you have the power to set the perfect lighting level for any occasion. Whether you want bright, vibrant lighting for a gathering or a softer glow for a relaxed evening at home, a dimmer switch allows you to easily adjust the brightness.
- Energy Efficiency: Dimmer switches can help you save energy and reduce your electricity bills. By lowering the intensity of the light, you consume less energy, leading to cost savings in the long run.
- Extended Bulb Life: When you dim the lights, you not only save energy but also extend the lifespan of your light bulbs. By reducing the wattage, you decrease the heat produced, which can help bulbs last longer.
- Mood Enhancement: The ability to control the ambiance of a room through dimmed lighting can significantly contribute to the mood. Whether you want a romantic setting or a cozy atmosphere, dimmer switches allow you to effortlessly create the desired mood.
- Flexibility: Dimmer switches offer the flexibility to easily adjust the lighting according to different activities or times of the day. From reading a book to watching a movie, you can customize the lighting environment to suit your needs.
Difference between a Standard Switch and a Dimmer Switch
While a standard switch functions as a simple on/off mechanism, a dimmer switch takes control to a whole new level. Here are the key differences between the two:
| Standard Switch | Dimmer Switch |
|---|---|
| Provides a fixed level of brightness | Offers a range of brightness options |
| No control over lighting intensity | Allows precise control over lighting intensity |
| Does not contribute to energy savings | Enables energy efficiency by reducing power consumption |
| No impact on bulb lifespan | Can extend bulb life by reducing heat and energy usage |
Now that you have a clearer understanding of dimmer switches, their benefits, and how they differ from standard switches, you are ready to embark on the installation process. In the next section, we will delve into the step-by-step process of installing a dimmer switch in your home.
Preparing For Installation
Before you begin the installation process of a dimmer switch, it is essential to adequately prepare to ensure a smooth and safe experience. This section will guide you through the necessary steps to gather the tools and materials required, check the electrical compatibility, and turn off the power supply.
Gathering the necessary tools and materials
When it comes to installing a dimmer switch, it is important to have the right tools and materials on hand. Here is a list of items you will need:
- Dimmer switch
- Screwdriver (flathead and Phillips)
- Wire strippers
- Wire connectors
- Electrical tape
- Wire nuts
- Voltage tester
- Faceplate
Checking electrical compatibility
Before proceeding with the installation, it is essential to check the electrical compatibility of your current setup. Follow these steps:
- Turn off the power supply at the breaker box to ensure safety.
- Remove the existing switch plate to expose the wiring connections.
- Use a voltage tester to confirm that the power is off.
- Inspect the existing switch and wiring for any signs of damage. If you notice any issues, it is recommended to consult a professional electrician.
- Ensure that the wiring is compatible with a dimmer switch. Most standard switches can be replaced with a dimmer switch, but it’s always best to verify.
Turning off the power supply
Before starting the installation process, it is imperative to turn off the power supply to avoid any risk of electric shock. Follow these steps carefully:
- Locate the breaker box in your home.
- Identify the circuit breaker that controls the area where you will be installing the dimmer switch. It is recommended to label the breaker for future reference.
- Switch off the breaker by flipping it to the “off” position.
- Test the power to ensure it is turned off by using a voltage tester on the switch you’re about to replace.
By following these steps to gather the necessary tools and materials, checking electrical compatibility, and turning off the power supply, you are well-prepared to safely proceed with the installation process of a dimmer switch.
Installing A Dimmer Switch
Installing a dimmer switch is a great way to enhance the ambiance and functionality of any room. Not only does it provide the flexibility to adjust the brightness to your preferred level, but it can also help save energy and extend the lifespan of your light bulbs. If you’re looking to upgrade your traditional light switch to a dimmer switch, follow these step-by-step instructions to get started.
Removing the old switch
The first step in installing a dimmer switch is to remove the old switch from the wall. Before doing this, it’s important to turn off power to the circuit at the breaker box to avoid any electrical accidents.
- Start by removing the faceplate of the switch.
- Next, unscrew the screws holding the switch in place.
- Gently pull the switch out of the electrical box, exposing the wires.
- Use a voltage tester to ensure that there is no electricity running to the wires before proceeding to disconnect them.
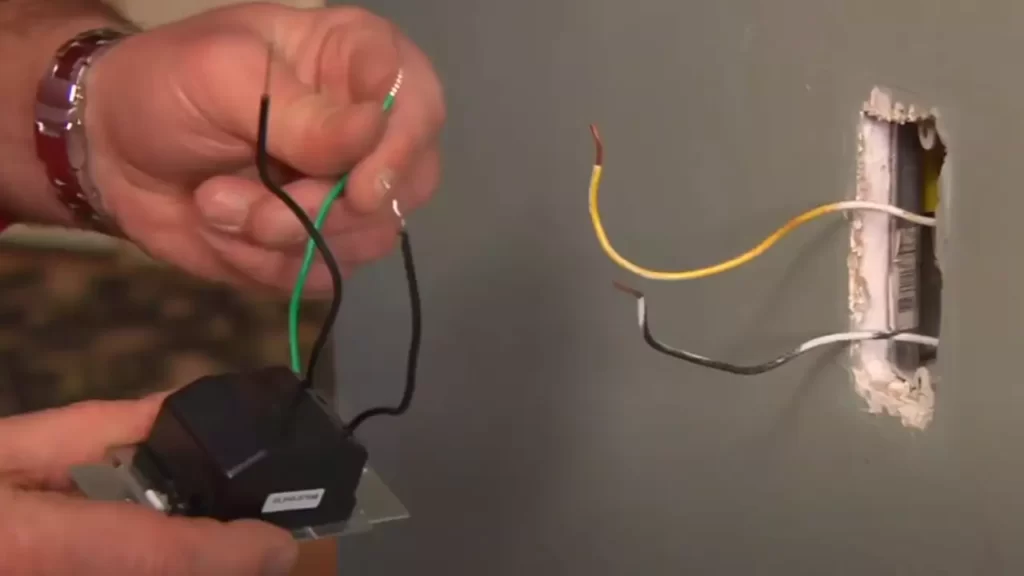
Identifying and connecting the wires
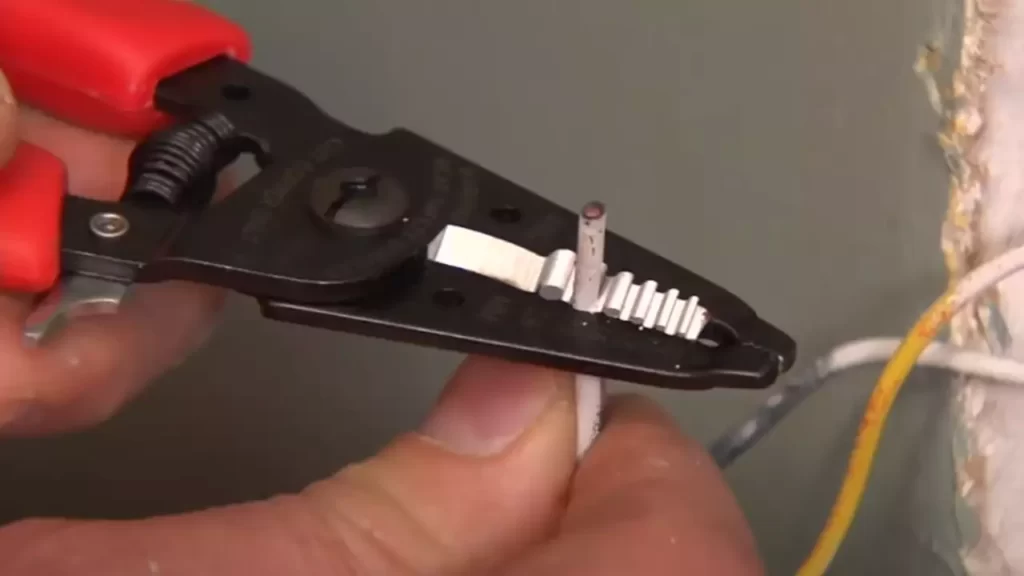
Once the old switch is removed, you need to identify the wires and properly connect them to the dimmer switch. This step is crucial for the safe and effective operation of your new dimmer.
- Carefully examine the existing wires. You should see two or three wires, including a ground wire, a black (hot) wire, and possibly a red or white neutral wire.
- If there’s a third wire, it is usually for three-way switches, which allow control from multiple locations. Consult the dimmer switch’s instructions to determine the appropriate way to connect this wire.
- Start by connecting the ground wire to the green or copper grounding screw on the dimmer switch.
- Next, connect the black wire to the black screw, which may be labeled as the common or hot wire.
- If you have a white neutral wire, connect it to the silver or white screw. Make sure to tape the end of the wire with electrical tape to indicate that it is not being used as a neutral wire.
- Follow the specific instructions provided with your dimmer switch to properly connect any additional wires if necessary.
Attaching the new dimmer switch
Once the wires are connected, you’re ready to attach the new dimmer switch to the electrical box.
- Carefully push the wires back into the electrical box, making sure they are not tangled or touching the sides.
- Align the dimmer switch with the screw holes on the electrical box, ensuring that the switch is level and straight.
- Screw the dimmer switch into the electrical box using the provided screws. Make sure it is securely in place.
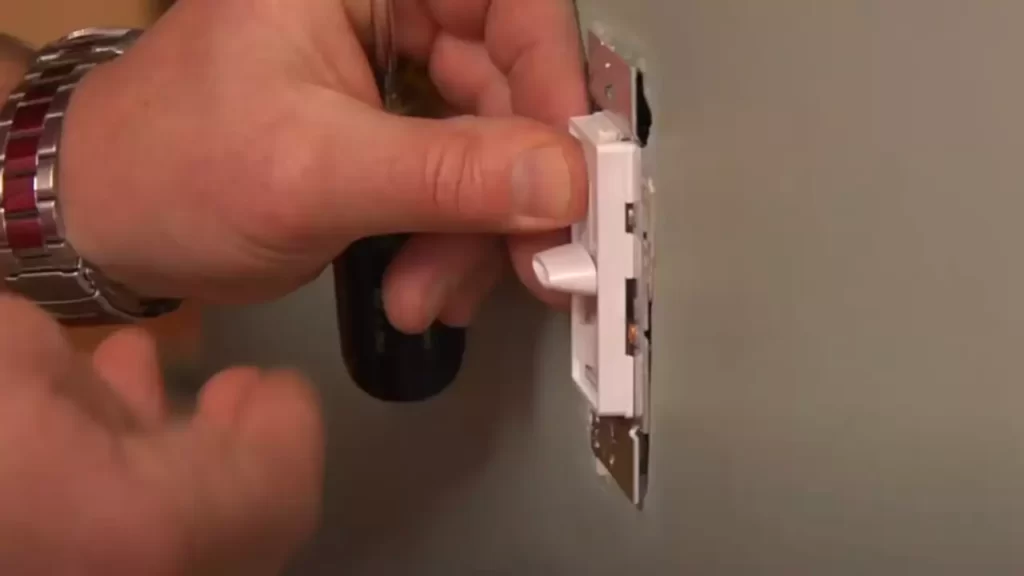
Securing the switch in place
After attaching the dimmer switch, it’s important to secure it in place to avoid any accidents or potential damage.
- Double-check that all wires are securely connected and properly positioned within the electrical box.
- Ensure that there are no exposed wires or loose connections.
- Screw the faceplate onto the dimmer switch.
- Finally, turn the power back on at the breaker box to test the functionality of your newly installed dimmer switch.
Congratulations! You have successfully installed a dimmer switch. Enjoy the added convenience and versatility it brings to your lighting experience.
Testing And Troubleshooting
Turning on the power supply
Before beginning any testing or troubleshooting, it’s essential to ensure that the power supply is turned on. This may seem obvious, but it’s a crucial step that can sometimes be overlooked. Make sure to switch on the circuit breaker or, if applicable, the wall switch to provide power to the dimmer switch.
Testing the dimmer switch functionality
Once the power supply is on, it’s time to test the dimmer switch functionality. This step is crucial to determine if the switch is installed correctly and working properly. Follow these steps to perform the test:
- Turn the dimmer switch to its highest setting by rotating the dial or sliding the switch all the way up.
- If the dimmer switch has an indicator light, it should illuminate once the switch is in the highest position. Some indicators may show a green light, while others use a different color.
- Next, try dimming the lights by gradually lowering the switch. The lights should dim smoothly without flickering or buzzing noises. If there are any issues, proceed to the troubleshooting section for possible solutions.
Adjusting the dimmer switch settings
After testing the functionality, you may want to customize the dimmer switch settings to suit your preferences. Different switches offer various options for adjusting the brightness and control of the lights. Follow these steps to adjust the settings:
- Refer to the manufacturer’s instructions for your specific dimmer switch model. They will provide detailed guidelines on how to customize the settings.
- Some dimmer switches may have additional buttons or switches to adjust specific features, like fade rates or minimum brightness levels. Carefully follow the instructions to make the desired adjustments.
- Experiment with different settings to find the perfect level of lighting control for your space.
Common troubleshooting tips
Occasionally, you may encounter issues while installing or using a dimmer switch. Here are some common troubleshooting tips to help resolve these problems:
- Check the wiring connections to ensure they are secure and properly aligned. Loose or incorrect connections can lead to malfunctioning switches.
- If the lights still flicker or make buzzing noises after installation, it could indicate compatibility issues between the dimmer switch and the bulbs. Verify that the dimmer switch is compatible with the type of bulbs being used.
- Make sure the dimmer switch is not overloaded by too many lights. Each switch has a maximum wattage rating, which should not be exceeded. If necessary, remove some lights or install a higher-rated dimmer switch.
- If the dimmer switch becomes hot during operation, it may be overloaded or improperly installed. Double-check the wattage rating and consult the manufacturer’s instructions for proper installation.
- If all else fails, consider seeking the assistance of a professional electrician who can diagnose and resolve any complex issues you may encounter.
By following these testing and troubleshooting steps, you can ensure that your dimmer switch is functioning correctly and enjoy the benefits of customized lighting control in your space.
Safety Measures
Importance of Safety Precautions
When it comes to electrical installations, safety should always be the top priority. Whether you are an experienced electrician or a novice DIY enthusiast, taking proper safety measures is crucial to prevent accidents and ensure a successful installation. Before you start installing a dimmer switch, make sure to understand the importance of safety precautions.
Proper Handling of Electrical Components
Handling electrical components properly is essential to avoid any harm or damage. Here are a few guidelines to follow:
- Before starting the installation process, turn off the power to the circuit you’ll be working on. This can be done by switching off the corresponding circuit breaker in your electrical panel.
- Always use insulated tools when handling electrical components to minimize the risk of electric shock.
- If you’re dealing with live wires, make sure to wear protective gloves to protect yourself from any potential electrical hazards.
- Double-check that the wires are not live by using a non-contact voltage tester before touching them.
Tips for Ensuring a Safe Installation Process
To ensure a safe installation process, keep the following tips in mind:
- Read and follow the manufacturer’s instructions carefully. Different dimmer switches may have specific installation requirements.
- Avoid overloading the dimmer switch circuit by calculating the total wattage of the light fixtures it will control. Ensure the dimmer switch is rated to handle the load.
- Ensure all connections are secure and tight. Loose connections can lead to electrical arcing, heat buildup, and potential malfunctions.
- After installing the dimmer switch, carefully test it by turning on the power and adjusting the dimming levels. Observe the switch and the connected light fixture for any signs of abnormal behavior or overheating.
- If you encounter any difficulties or are unsure of any step during the installation process, consult a qualified electrician for assistance.
By following these safety measures and tips, you can confidently install a dimmer switch while minimizing potential risks and ensuring a safe electrical installation. Remember, electrical work can be hazardous, and it’s always better to prioritize safety rather than take unnecessary risks.
Additional Considerations
When it comes to installing a dimmer switch, there are several additional considerations that you should keep in mind. These considerations will help you ensure that the installation process goes smoothly and that you have the right dimmer switch for your needs. In this section, we will explore dimming compatibility with different types of bulbs, how to choose the right dimmer switch, and potential issues that you may encounter and how to address them.
Dimming Compatibility with Different Types of Bulbs
Before you proceed with installing a dimmer switch, it’s important to consider the compatibility of the switch with the type of bulbs you plan to use. While many dimmer switches are designed to work with a wide range of bulbs, not all types are compatible.
Here is a table outlining the compatibility of common bulb types with dimmer switches:
| Bulb Type | Dimming Compatibility |
|---|---|
| Incandescent | Compatible with most dimmer switches |
| Halogen | Compatible with most dimmer switches |
| LED | Requires a dimmer switch specifically designed for LED bulbs |
| CFL | Requires a dimmer switch specifically designed for CFL bulbs |
Make sure to check the packaging or specifications of both the dimmer switch and the bulbs to ensure compatibility. Using an incompatible dimmer switch with certain bulb types can result in flickering, buzzing, or even damage to both the switch and the bulbs.
Choosing the Right Dimmer Switch for Your Needs
When choosing a dimmer switch, you need to consider your specific needs and the features that are important to you. Here are a few factors to consider:
- Wattage compatibility: Ensure that the dimmer switch can handle the total wattage of the bulbs it will be controlling. Exceeding the maximum wattage can cause the switch to overheat.
- Single-pole or multi-location: Determine whether you need a single-pole dimmer switch for controlling a single light fixture or a multi-location dimmer switch for controlling multiple lights from different switches.
- Level of dimming control: Some dimmer switches offer more precise control over the brightness levels, allowing you to set the perfect ambiance in your space. Consider whether you prefer a switch with simple low, medium, and high settings or one with a smooth sliding scale.
By considering these factors, you can ensure that you choose a dimmer switch that meets your specific needs and preferences.
Potential Dimmer Switch Issues and How to Address Them
Although installing a dimmer switch is generally a straightforward process, you may encounter some issues along the way. Here are a few potential problems you might encounter and how to address them:
- Flickering or buzzing: This is often caused by using an incompatible dimmer switch or using incompatible bulbs. Ensure that both your switch and bulbs are compatible, and consider exchanging them for ones that work together correctly.
- Overheating: If your dimmer switch becomes excessively hot, it may be due to the total wattage of your bulbs exceeding the switch’s maximum capacity. To address this, switch to lower-wattage bulbs or consider using a higher-capacity dimmer switch.
- Inconsistent dimming levels: If your dimmer switch doesn’t provide consistent dimming levels across different brightness settings, it may be due to compatibility issues or poor installation. Double-check the compatibility and ensure a proper installation.
By being aware of these potential issues and knowing how to address them, you can troubleshoot any problems that may arise during or after the installation process.
Frequently Asked Questions
Can You Install Your Own Dimmer Switch?
Yes, you can install your own dimmer switch. It is a simple process that involves turning off the power, removing the old switch, connecting the wires to the new dimmer switch, and then securing it in place. Make sure to follow the instructions and use caution when working with electricity.
Do You Need An Electrician To Install A Dimmer Switch?
No, you don’t need an electrician to install a dimmer switch. It’s a simple and straightforward process that you can do yourself. Turn off the power, remove the old switch, connect the wires to the new switch, and secure it in place.
Always follow the instructions for safety.
Can You Put A Dimmer Switch On Any Circuit?
Yes, you can install a dimmer switch on any circuit. However, it is important to ensure that the dimmer switch is compatible with the type of bulbs you have and the wattage of the circuit. Additionally, it is recommended to hire a professional electrician for the installation to ensure safety and proper functioning.
Can You Install A Dimmer Switch With An Led Light Fixture?
Yes, you can install a dimmer switch with an LED light fixture. It helps to control the brightness of the LED lights, creating a cozy atmosphere. Just make sure to choose a dimmer switch specifically designed for LED lights to avoid any compatibility issues.
Conclusion
To wrap up, installing a dimmer switch can be a simple and effective way to enhance the ambience and functionality of your space. By following the step-by-step guide provided, you can confidently tackle this electrical project on your own. Remember to prioritize safety and consult a professional if needed.
Enjoy the flexibility and control that a dimmer switch can bring to your lighting setup.