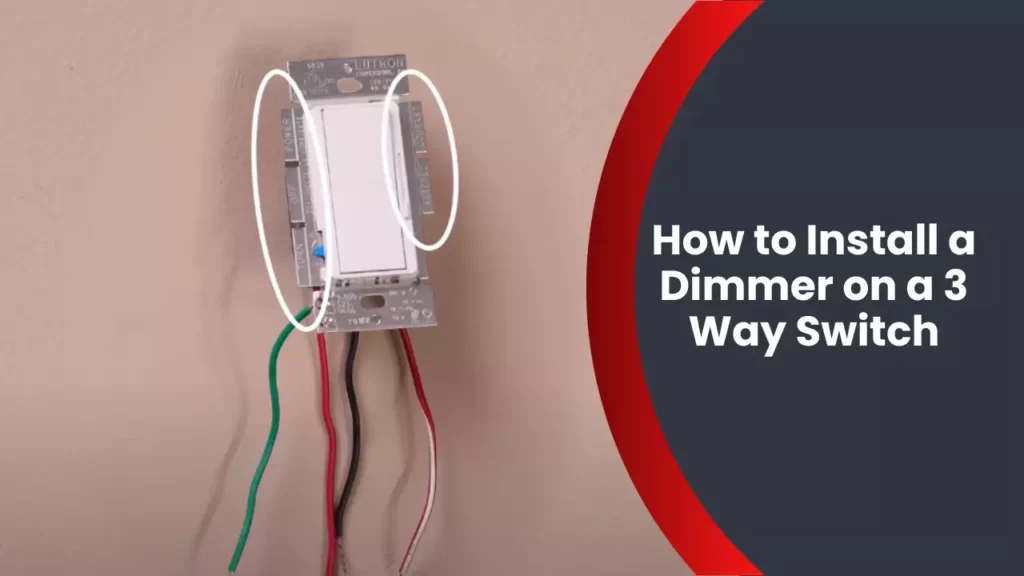
To install a dimmer on a 3-way switch, you need to first turn off the power to the circuit, remove the existing switch, connect the dimmer wires to the switch wires, and then attach the dimmer to the wall. Once done, turn the power back on and test the dimmer.
Installing a dimmer on a 3-way switch is a simple process that can enhance the ambiance of any room by allowing you to control the brightness of the lights. We will guide you through the step-by-step process of installing a dimmer on a 3-way switch.
By following these instructions, you can easily upgrade your lighting and create the perfect mood in your home.
Understanding The Functionality Of A 3 Way Switch
What is a 3 Way Switch and How Does It Work?
A 3 way switch is a type of electrical switch commonly used to control lights from multiple locations in a room or hallway. Unlike a standard single pole switch, which only has two positions (on or off), a 3 way switch has three positions: off, on, and on from a different location. This allows you to turn the lights on or off from either switch, regardless of their current state.
Understanding the functionality of a 3 way switch is essential if you’re planning to install a dimmer on such a switch. Let’s take a closer look at how a 3 way switch works and differentiate it from a single pole switch.
Differentiating Between a Single Pole Switch and a 3 Way Switch
Before diving into the installation process of a dimmer on a 3 way switch, it’s important to differentiate between a single pole switch and a 3 way switch. While both types of switches allow you to control a light fixture, they operate differently.
A single pole switch, also known as a toggle switch, is the most common type of switch used in residential and commercial applications. It controls power flow to a light fixture from a single location. When you flip the switch up, the circuit is closed, and the light turns on. Flipping the switch down opens the circuit, turning the light off. A single pole switch can only be used in a configuration where there’s one switch controlling one light fixture.
On the other hand, a 3 way switch is designed to control a light fixture from two or more separate locations. This allows you to conveniently turn the lights on or off from different ends of a room or hallway. The differentiating factor here is the additional traveler wire used in a 3 way switch configuration, which enables the communication and synchronization between switches.
With a better understanding of the differences between a single pole switch and a 3 way switch, the next step is to proceed with installing a dimmer on your 3 way switch. It’s a straightforward process that will add versatility and control to your lighting setup.
Gathering The Necessary Materials And Tools
Before embarking on the installation of a dimmer on a 3-way switch, it is important to gather all the necessary materials and tools. Having everything ready beforehand will help streamline the process and ensure a smooth installation. In this section, we will outline the list of materials required as well as the essential tools needed to successfully complete the task.
List of materials required for installing a dimmer on a 3-way switch:
Here is a comprehensive list of materials you will need for installing a dimmer on a 3-way switch:
- Dimmer switch: Choose a dimmer switch that is compatible with 3-way wiring. It is recommended to opt for a dimmer specifically designed for use with LED or CFL bulbs if you have those types of lights.
- Two three-way switches: Ensure you have two standard three-way switches readily available for the installation process.
- Wire connectors: Have a variety of wire connectors on hand to secure the electrical connections efficiently.
- Electrical tape: Use electrical tape to insulate and protect any exposed wire connections.
- Screwdriver: A screwdriver will be required to remove and attach the switch plates.
- Wire stripper: Use a wire stripper to safely remove the insulation from the wires.
- Wire cutter: A wire cutter will come in handy to trim any excess wire length.
- Voltage tester: Ensure you have a voltage tester to confirm that there is no power running to the switches before starting the installation.
- Marker or tape: Use a marker or tape to label the wires and make it easier to reconnect them correctly.
Essential tools for the installation process:
To successfully install a dimmer on a 3-way switch, you will need the following essential tools:
- Flathead screwdriver: A flathead screwdriver will be required to loosen and tighten the screws on the switches and dimmer.
- Needle-nose pliers: Needle-nose pliers can be used to manipulate and bend wires, making it easier to connect them securely.
- Wire cutter/stripper: It is essential to have a wire cutter/stripper to prepare the wires for connection by removing the insulation and trimming them to the required length.
- Electrical tape: Electrical tape is necessary to insulate and protect any exposed wire connections, ensuring safety and preventing electrical issues.
- Voltage tester: A voltage tester is vital to confirm that the power has been switched off before starting the installation process, preventing any potential electrical accidents.
With the list of materials required and essential tools ready, you are now prepared to install a dimmer on a 3-way switch. Let’s move on to the next step – understanding the wiring configuration.
Preparing For Installation
Before you begin the installation process, it is crucial to take the necessary safety measures to ensure a smooth and secure installation of a dimmer on a 3-way switch. By following these safety guidelines, you can avoid any potential accidents and safely complete the installation. Let’s dive into the important safety measures you need to consider:
Safety Measures to Take Before Starting the Installation Process
To ensure your safety throughout the installation, it is essential to follow these safety measures:
- Turn off the power supply
- Identify the correct circuit breaker
Turning Off the Power Supply
The first step in the installation process is to turn off the power supply to the switch. This will prevent any electrical shocks or accidents during the installation. To turn off the power supply:
- Locate your electrical panel or circuit breaker box.
- Identify and find the corresponding circuit breaker for the 3-way switch you’ll be working on.
- Switch the circuit breaker to the OFF position by flipping it firmly.
By turning off the power supply, you eliminate the risk of electric shock while working on the dimmer installation.
Identifying the Correct Circuit Breaker
Knowing which circuit breaker controls the specific 3-way switch you’re working on is crucial for your safety. Follow these steps to identify the correct circuit breaker:
- Look for labels or identification marks on the electrical panel that indicate which breaker controls the switch.
- If there are no labels, you can identify the correct breaker by a trial-and-error method. Start by turning off one breaker at a time and noting which switches have lost power.
- Once you’ve identified the correct circuit breaker, double-check that the power is off by flipping the switch on and off. Confirm that the lights connected to the 3-way switch are not turning on or functioning.
Identifying the correct circuit breaker is crucial as it ensures that you’re working on the right switch and further minimizes the risk of accidents or damage.
By taking these safety measures, you’re setting the foundation for a secure installation process. Now that you’ve turned off the power supply and identified the correct circuit breaker, you’re ready to move on to the next steps in installing a dimmer on a 3-way switch.
Removing The Existing Switches
Before you can install a dimmer on a 3-way switch, you’ll need to remove the existing switches. This process may seem daunting at first, but with our step-by-step instructions, it’ll be a breeze! Follow the guide below to safely and efficiently remove your old switches.
Step-by-step instructions on how to remove the old switches
- Start by turning off the power to the circuit at the main electrical panel. This is crucial to ensure your safety throughout the installation process.
- Once the power is off, use a screwdriver to remove the screws holding the switch cover plates in place. Carefully set the cover plates aside, ensuring not to misplace them.
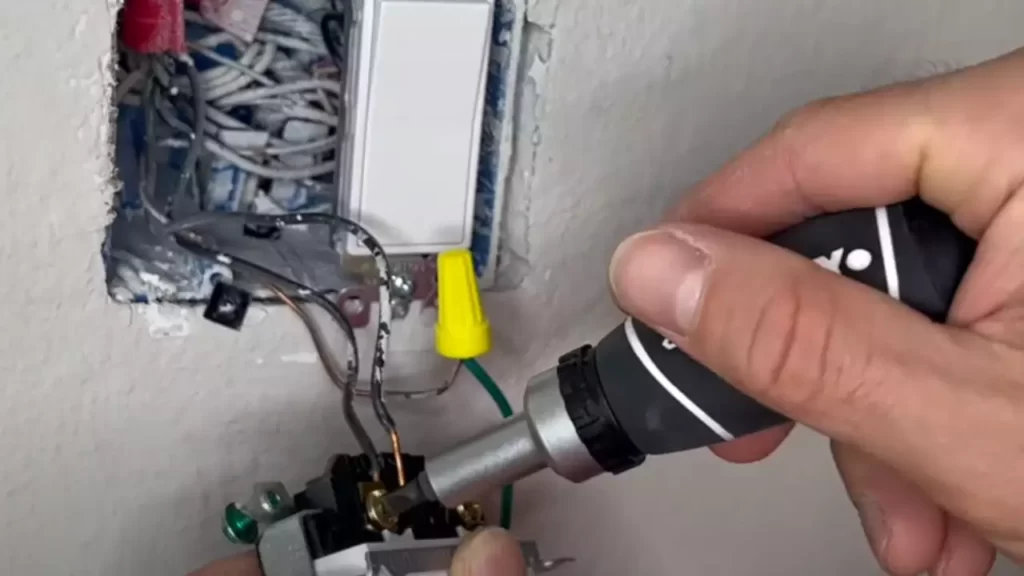
- Next, remove the screws that secure the switches to the electrical boxes. Gently pull the switches out of the boxes, exposing the wiring behind them.
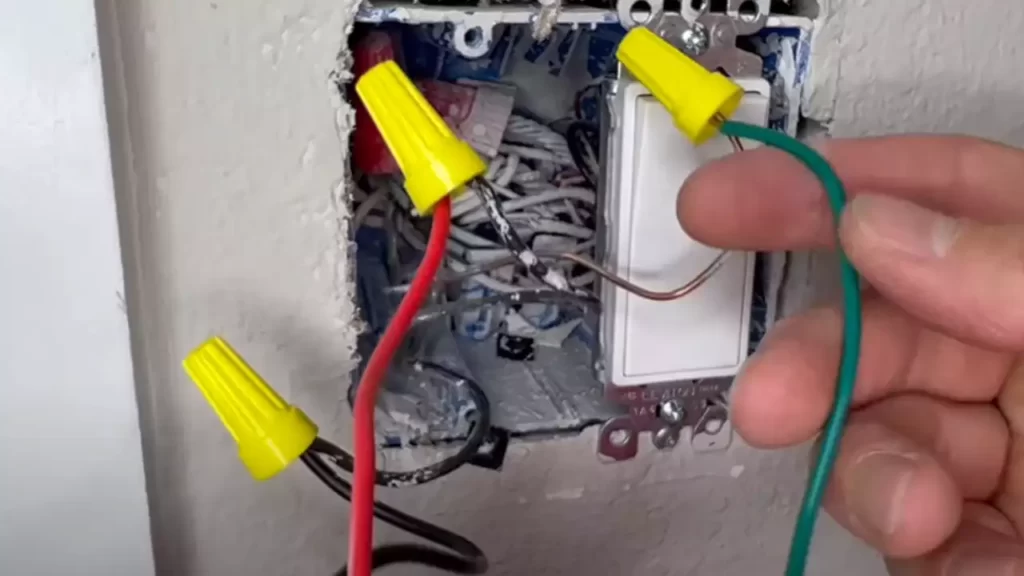
- Take a moment to locate the grounding wire, typically bare or green in color, and disconnect it from the existing switches. This wire may be connected with a screw or a wire nut, depending on your setup.
- Proceed to disconnect the black “hot” wire from each switch. These wires carry the electrical current and are typically connected with screws or wire nuts as well.
- Lastly, disconnect the two remaining wires, usually red or white in color, attached to each switch. These wires, known as the “travelers,” are responsible for transmitting the electrical signal between the switches. Similar to the previous wires, they can be disconnected using screws or wire nuts.
- Once all the wires are safely disconnected, you can remove the old switches from the electrical boxes, freeing up space for the new dimmer installation.
Identifying the wires connected to the existing switches
Now that the old switches are removed, it’s important to identify the wires connected to them. This will help you properly install the dimmer later on. Here’s how:
Take a close look at the wires you disconnected from the old switches. Each wire should be labeled or color-coded, indicating its purpose within the electrical circuit. The black wire is typically the “hot” wire, while the red and white wires are the “travelers.”
If your wires are not labeled or color-coded, don’t worry! You can use a digital multimeter or a voltage tester to determine which wire is which. Simply touch the probes of the tool to the wires while the power is still off and observe the readings. The wire showing voltage is the “hot” wire, while the others are the “travelers.”
By identifying the different wires, you’ll have a clear understanding of their functions and be ready for the next steps in installing your dimmer on a 3-way switch.
Wiring The Dimmer Switch
Understanding the Wiring Diagram and Color Codes
When it comes to installing a dimmer switch on a 3-way switch, it’s essential to have a clear understanding of the wiring diagram and color codes. These diagrams provide a visual representation of how the wires should be connected and ensure the proper functioning of the dimmer switch.
The first step is to identify the wires in your existing 3-way switch setup. There are typically three wires involved: a common wire (also known as the traveler wire), a hot wire (which supplies power), and a switched wire (which controls the light fixture).
Before moving forward, it’s crucial to cut off the power supply to the switch at the breaker box to ensure safety. Once the power is off, remove the existing switch and locate the three wires mentioned earlier.
To make the wiring process easier, it’s helpful to use a green grounding screw for the ground wire, a black screw for the common wire, and two brass screws for the traveler and switched wires.
Connecting the Wires to the Appropriate Terminals on the Dimmer Switch
Now that you understand the wiring diagram and color codes, it’s time to connect the wires to the appropriate terminals on the dimmer switch. Follow these steps to ensure a successful installation:
1. Begin by connecting the ground wire to the green grounding screw on the dimmer switch. This grounding wire protects against electrical shocks and should be securely fastened.
2. Next, attach the common wire (usually black) to the black screw on the dimmer switch. This wire carries the power supply to the switch and is essential for proper functionality.
3. Now, connect the traveler wire (typically red) to one of the brass screws on the dimmer switch. The traveler wire allows for communication between the two switches in a 3-way switch system.
4. Finally, attach the switched wire (usually another black wire) to the remaining brass screw on the dimmer switch. This wire controls the light fixture and determines whether it is on or off.
Ensure that all connections are tight and secure, as loose connections can lead to electrical issues or a malfunctioning dimmer switch.
Remember to consult the manufacturer’s instructions or an electrician if you have any doubts about the specific wiring diagram or color codes for your dimmer switch setup. Safety should always be a top priority when working with electrical wiring.
By following the wiring diagram and connecting the wires to the appropriate terminals on the dimmer switch, you’ll be well on your way to enjoying the benefits of adjustable lighting in your home.
Installing The Dimmer Switch
Now that you have gathered all the necessary tools and materials, it’s time to dive into the installation process of the dimmer switch on your 3-way switch. This step-by-step guide will walk you through the process, ensuring a smooth and successful installation. To ensure proper alignment and a secure fit, follow the steps outlined below.
Mounting the dimmer switch onto the electrical box
1. Begin by turning off the power to the circuit at the main electrical panel. This safety precaution is crucial to prevent any accidents or electrical shocks during the installation process.
2. Remove the switch plate cover from the existing 3-way switch by unscrewing and pulling it away from the wall. Set it aside for reinstallation later.
3. Using a screwdriver, unscrew the mounting screws holding the existing switch to the electrical box. Gently pull the switch out, exposing the electrical wires connected to it.
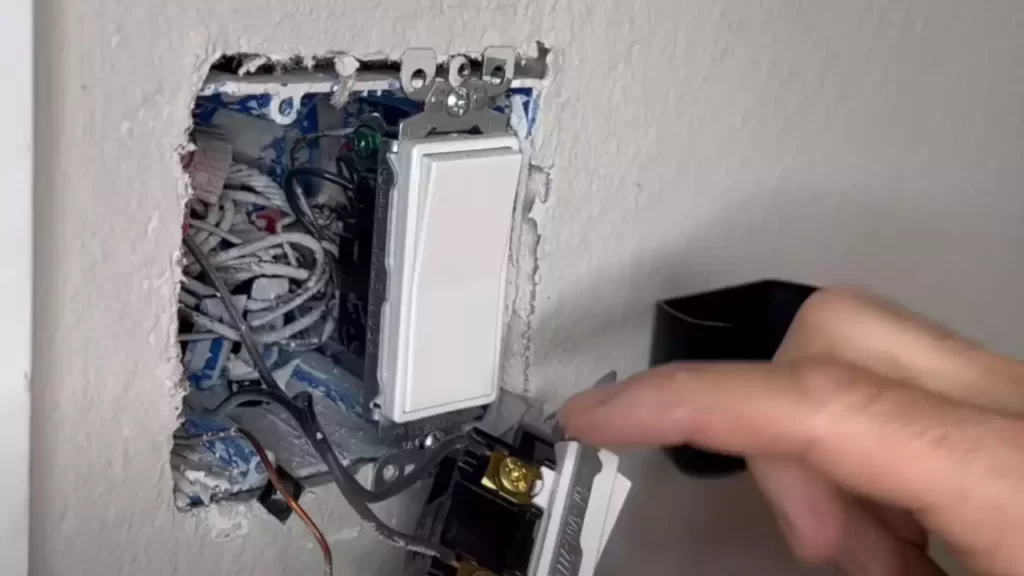
4. Take the dimmer switch and carefully position it onto the electrical box, ensuring that it aligns correctly with the screw holes.
5. Insert the mounting screws through the dimmer switch’s screw holes and into the electrical box. Use a screwdriver to tighten the screws, securing the switch in place. Be cautious not to overtighten the screws, as it may damage the switch or the electrical box.
Ensuring proper alignment and securing the switch in place
1. Once mounted, check the alignment of the dimmer switch. It should fit flush against the wall, with no gaps or misalignment. Adjust the position if necessary by loosening the screws slightly and repositioning the switch.
2. After ensuring proper alignment, tighten the screws firmly to secure the switch in place. This step is essential to prevent any movement or instability during use.
3. Carefully tuck the electrical wires back into the electrical box, ensuring that they do not interfere with the switch’s operation. If necessary, trim any excess wire length with wire cutters, leaving enough for easy connection.
4. Finally, attach the switch plate cover back onto the electrical box by aligning it with the screws and tightening them with a screwdriver. Ensure that the cover fits snugly against the wall.
Congratulations! You have successfully installed the dimmer switch on your 3-way switch. Now, you can enjoy the convenience and ambiance that dimmable lighting brings to your space. Remember to turn the power back on at the main electrical panel and test the dimmer switch to ensure it is functioning correctly before fully utilizing it.
Testing And Troubleshooting
Testing and troubleshooting are essential steps when installing a dimmer on a 3-way switch. Verifying the connections and conducting a functionality test will help ensure that everything is properly installed and functioning as expected. Troubleshooting common issues and resolving them will further ensure that your dimmer switch is working efficiently. Let’s dive into these steps in detail.
Verifying the connections and conducting a functionality test
Before moving forward, it’s crucial to verify that all the connections are properly made. Any loose or incorrect wiring can lead to malfunctions or even safety hazards. Here’s how to verify the connections:
1. Turn off the power: Start by turning off the power supply to the circuit you’ll be working on. This is crucial for your safety as well as preventing any damage to the electrical components.
2. Inspect the wiring: Carefully examine the connections made during the installation. Ensure that all the wires are securely fastened and properly connected. Check for any loose or frayed wires that may need attention.
3. Double-check the switch: Confirm that both the existing 3-way switch and the new dimmer switch are wired correctly. The installation instructions provided with the dimmer switch will help you identify the appropriate wiring configuration. Make sure the wires are connected to the correct terminals on both switches.
4. Ensure proper grounding: Grounding is essential for safety. Check that all the grounding wires are correctly connected and securely fastened to the appropriate terminals. This helps protect against electrical shocks and ensures the proper functioning of the dimmer switch.
Once you have verified the connections, it’s time to conduct a functionality test to ensure everything is working as intended. Here’s how to do it:
1. Restore power: Turn the power back on once you are confident that the connections are secure and properly made. Use the circuit breaker to restore power to the circuit and the dimmer switch.
2. Activate the dimmer: Gradually slide or rotate the dimmer control to adjust the brightness of the lights connected to the 3-way switches. Take note of any flickering or unusual behavior and make sure the dimming function works smoothly without any disruptions.
3. Check the switches: Test the functionality of both the new dimmer switch and the existing 3-way switch. Ensure that the lights can be turned on and off from both switches without any issues. If there are any problems, consider checking the wiring again or consulting an electrician for assistance.
Troubleshooting common issues and resolving them
Even with careful installation, occasionally some issues may arise. Knowing how to troubleshoot common problems can save you time and frustration. Here are a few troubleshooting tips to help you with any problems you might encounter:
1. Flickering lights: If the lights connected to the dimmer switch flicker, check for loose connections or faulty wiring. Double-check all the connections and tighten them if necessary. If the problem persists, you might need to replace the dimmer switch.
2. Inconsistent dimming: If the dimming function is not working smoothly or is inconsistent, ensure that the dimmer switch is compatible with the type of bulbs you are using. Some dimmer switches are designed specifically for certain bulb types. If the issue continues, consider replacing the bulbs with ones recommended by the dimmer manufacturer.
3. Short circuits or tripping breakers: If the dimmer switch causes a short circuit or repeatedly trips the circuit breaker, there may be an overload of electrical current. Ensure that the total wattage of all the connected lights does not exceed the maximum rating of the dimmer switch. If necessary, reduce the number of lights or upgrade to a higher-rated dimmer switch.
Remember, if you are unsure about any electrical tasks or encounter complex issues, it’s always recommended to seek professional assistance. Proper installation and troubleshooting ensure that your dimmer switch operates safely and efficiently, enhancing the ambiance and functionality of your lighting setup.
Safety Tips And Best Practices
Guidelines for Safe Installation and Usage of Dimmer Switches
Installing a dimmer switch on a 3-way switch can greatly enhance the lighting in your home, allowing you to adjust the brightness to your preference. However, it’s essential to follow safety guidelines and best practices to ensure the proper functioning of the dimmer switch and prevent any electrical hazards. Whether you’re a novice or an experienced DIYer, these guidelines will help you install and use dimmer switches safely.
Best Practices for Preventing Electrical Hazards and Ensuring Longevity of the Dimmer Switch
To make sure your dimmer switch installation goes smoothly and your switch lasts for years to come, it’s important to implement these best practices for preventing electrical hazards and ensuring the longevity of the dimmer switch:
1. Turn off the Power
Before starting any electrical work, the first and most crucial step is to turn off the power. Locate the circuit breaker or fuse box for the area where you’ll be installing the dimmer switch and turn off the corresponding breaker or remove the fuse. Make sure to use a voltage tester to confirm that the power is indeed off before you begin working.
2. Use the Right Tools and Equipment
Having the proper tools and equipment for the job is essential for a safe and successful installation. Ensure you have the following tools on hand:
- Flathead and Phillips screwdrivers
- Wire cutters/strippers
- Voltage tester
- Wire nuts
- Tape measure
3. Follow Manufacturer Instructions
Different dimmer switches may have specific installation instructions provided by the manufacturer. Always refer to the manufacturer’s instructions to ensure you’re following the correct process. These instructions will guide you through the wiring setup and any additional steps specific to the dimmer switch you’ve chosen.
4. Connect Wires Properly
When connecting the wires, it’s crucial to do it correctly to prevent any electrical hazards. Follow these general guidelines:
- Disconnect the power source
- Remove the existing switch
- Identify the load wire, traveler wires, and ground wire
- Connect the load wire (usually black or red) to the common terminal on the dimmer switch
- Attach the traveler wires (usually black) to the two remaining terminals on the switch
- Connect the ground wire to the green grounding screw on the switch
5. Test the Dimmer Switch
Once you’ve connected all the wires, restore power and test the dimmer switch. Gradually raise and lower the brightness to ensure it’s working correctly. If the switch doesn’t function as expected or there are any flickering lights or unusual sounds, turn off the power and double-check your wiring connections.
Following these guidelines and best practices will help you install a dimmer switch safely and ensure its longevity. Remember, if you’re unsure about any aspect of the installation, it’s always best to consult a professional electrician to prevent any potential electrical accidents or damage to your home. Stay safe and enjoy the benefits of adjustable lighting with your newly installed dimmer switch!
Final Thoughts
Recap of the Installation Process
Installing a dimmer on a 3-way switch is a straightforward process that can bring a whole new level of functionality and ambiance to your home lighting. To recap, here are the steps involved:
- Turn off the power: Before starting any electrical work, always make sure to turn off the power to the circuit at the breaker box.
- Remove the old switch: Unscrew the faceplate and carefully remove the old switch, taking note of the wire connections.
- Identify the common wire: In a 3-way switch setup, there is a common wire that connects to both switches. This wire is typically colored differently or marked with a label.
- Connect the dimmer: Connect the common wire to the black or dark-colored screw terminal on the dimmer switch. Connect the remaining wires to the other screw terminals, following the manufacturer’s instructions.
- Secure the dimmer: Gently push the dimmer switch back into the electrical box and screw it in place, ensuring it is flush with the wall.
- Restore power: Once everything is properly connected and secured, restore power to the circuit at the breaker box.
Key Takeaways
As you venture into installing a dimmer on a 3-way switch, keep these key takeaways in mind:
- Always prioritize safety by turning off the power before working on any electrical components.
- Identify the common wire in your 3-way switch setup to ensure proper connection to the dimmer switch.
- Follow the manufacturer’s instructions for wiring the dimmer switch correctly.
- Secure the dimmer switch properly in the electrical box for a neat and hassle-free installation.
Enjoy the Benefits of a Dimmer Switch in a 3 Way Setup
Now that you’ve successfully installed a dimmer on your 3-way switch, it’s time to enjoy the numerous benefits it brings to your home lighting. With a dimmer switch, you have full control over the level of brightness in any room, allowing you to create the perfect atmosphere for any occasion. Imagine being able to dim the lights for a cozy movie night or brighten them up for a lively gathering.
Apart from the ambiance, a dimmer switch also offers energy-saving advantages. By reducing the output of your lights, you can lower your electricity consumption and extend the lifespan of your bulbs. This not only helps the environment but also saves you money on your energy bills in the long run.
So go ahead and embrace the versatility and cost-saving benefits of a dimmer switch. It’s a small upgrade that can make a big difference in your home’s lighting experience.
Frequently Asked Questions
How To Install A 3-Way Dimmer Switch Lutron?
To install a 3-way dimmer switch by Lutron: 1. Turn off power at the circuit breaker. 2. Remove the existing switch. 3. Connect the wires to the new dimmer switch with wire connectors. 4. Attach the dimmer switch to the wall and restore power.
5. Test the dimmer switch to ensure it’s working correctly.
How Do I Install A Dimmer On A 3-Way Switch?
To install a dimmer on a 3-way switch, first, turn off the power supply. Then, remove the existing switch and identify the common wire. Connect the common wire to the common terminal of the dimmer. Finally, connect the remaining wires to the dimmer’s other terminals and secure the dimmer in place.
Can I Install A Dimmer Switch On Any 3-Way Switch?
Yes, you can install a dimmer switch on any 3-way switch as long as it is compatible with the type of dimmer you have and the electrical wiring in your home. Make sure to follow the manufacturer’s instructions and consult a licensed electrician if you are unsure or need assistance.
What Is A 3-Way Switch And How Does It Work With A Dimmer?
A 3-way switch is used to control a light fixture from two different locations. It allows you to turn the light on or off from either switch. When connected to a dimmer, it enables you to adjust the brightness level of the light from either location, giving you more control over the lighting in your space.
Conclusion
Installing a dimmer on a 3-way switch is a simple and cost-effective way to enhance the lighting control in your home. By following the step-by-step guide provided in this blog post, you can easily upgrade your switches and enjoy the flexibility and convenience that a dimmer switch offers.
Remember to turn off the power before starting any electrical work and consult a professional if needed. With a few basic tools and a little patience, you’ll have a dimmer switch installed in no time. Enjoy the ambiance and energy savings that come with dimming your lights!