To install a crush washer, first, remove the old washer, clean the surface, then slide the new crush washer into place. Installing a crush washer is a crucial step in many applications, such as plumbing, automotive, or firearm maintenance.
The crush washer creates a tight seal between two connecting surfaces to prevent leaks and ensure proper functioning. This simple yet effective part is typically made of soft metal, like copper or aluminum, and gets compressed under pressure to form the seal.
It’s important to follow the correct installation process to ensure a secure fit. We will guide you through the steps to properly install a crush washer, providing you with the confidence and knowledge to tackle this task efficiently.
Understanding The Importance Of A Crush Washer
The crush washer is a small but important component in many installation processes, especially when it comes to sealing connections that involve fluids or gases.
What is a crush washer?
A crush washer, also known as a compression washer or sealing washer, is a thin, flat ring made of a soft metal material like aluminum or copper. Its purpose is to create a tight, leak-proof seal between two mating surfaces.
Why is a crush washer necessary for certain installations?
A crush washer is necessary for installations where a secure and reliable seal is essential. In situations where components are subjected to high pressure or temperature variations, a crush washer helps to maintain the integrity of the seal over time.
The role of a crush washer in preventing leaks and ensuring proper sealing
The primary role of a crush washer is to prevent leaks by providing a crushable barrier between two surfaces that are being joined. When the fastening nut or bolt is tightened, the crush washer is compressed, creating a tight seal that prevents fluid or gas from escaping. It evenly distributes the load and maintains constant pressure to ensure a leak-free connection.
Furthermore, a crush washer plays a crucial role in ensuring proper sealing by compensating for surface irregularities and imperfections. Even if the mating surfaces are not perfectly flat or smooth, the crush washer molds itself to create a seal that conforms to those imperfections, filling any gaps and promoting a tight seal.
The crush washer is designed to be a single-use component. Once it has been compressed and the connection is made, it should not be reused as it may not provide an effective seal, increasing the risk of leaks.
Overall, understanding the importance of a crush washer is crucial for achieving secure and leak-free connections. Whether you are installing a oil filter, brake caliper, or any other component that requires a tight seal, using a crush washer is a simple yet effective solution to ensure proper sealing and prevent leaks.
Tools And Materials Needed
When it comes to installing a crush washer, having the right tools and materials on hand is essential. The installation process can be straightforward if you are properly equipped. In this section, we will cover the necessary tools and materials needed to complete the installation successfully.
List of essential tools needed for installing a crush washer
Before you begin the installation process, make sure you have the following tools ready:
- Wrench or socket set: This tool will be used to loosen and tighten the fasteners.
- Crush washer: This special type of washer is designed to create a tight seal between two surfaces.
- Torque wrench: This tool is essential to ensure that the crush washer is tightened to the manufacturer’s recommended torque specification.
- Oil filter wrench: If you are installing a crush washer on an oil filter, an oil filter wrench will be needed to remove and replace the filter.
- Thread sealant: This material is used to prevent leaks and provide additional sealing properties.
Required materials for the installation process
In addition to the tools mentioned above, you will also need the following materials:
- Crush washer: As mentioned earlier, this washer is crucial for creating a tight seal.
- New fasteners: If the original fasteners are worn or damaged, it is recommended to replace them with new ones.
- Thread locker: This material helps to prevent the fasteners from loosening over time.
- Clean rag or towel: Having a clean rag or towel on hand will allow you to wipe away any debris or excess oil during the installation process.
- Thread tape: This tape can be used to ensure a watertight seal on threaded connections.
By having the necessary tools and materials readily available, you can ensure a smooth and successful installation of a crush washer. Next, we will explore the step-by-step process of installing the crush washer, so stay tuned!

Step 1: Preparing The Surface
Before installing a crush washer, it is crucial to properly prepare the surface. This ensures a secure and leak-free fit for your firearm or plumbing project. The process involves two key steps: ensuring the surface is clean and free of debris, and properly removing any old crush washer or gasket.
Ensuring the surface is clean and free of debris
Before installing a new crush washer, it’s important to make sure the surface is clean and free from any dirt, grime, or residue. A contaminated surface can compromise the effectiveness of the crush washer and lead to leaks.
To clean the surface, follow these steps:
- Wipe down the area surrounding the crush washer with a clean rag or towel to remove any loose debris.
- Mix a mild soapy solution in a bucket of water.
- Dip a clean rag or sponge into the soapy water and gently scrub the surface where the crush washer will be installed.
- Rinse the area thoroughly with clean water to remove any soap residue.
- Pat the surface dry with a clean towel.
By taking the time to clean the surface properly, you can ensure a tight seal and prevent any potential issues down the line.
Properly removing any old crush washer or gasket
If there is an old crush washer or gasket in place, it is essential to remove it before installing a new one. Failing to do so can result in an improper fit and potential leaks.
To remove the old crush washer or gasket, follow these steps:
- Inspect the area around the crush washer or gasket. Look for any visible signs of damage or wear.
- Using a suitable tool, such as pliers or a wrench, gently loosen the old crush washer or gasket.
- Carefully remove the old crush washer or gasket from the surface.
- Inspect the surface to ensure it is clean and free of any remaining debris or residue from the old crush washer or gasket.
- If necessary, repeat the surface cleaning steps mentioned earlier to ensure the area is clean and ready for the new crush washer.
By properly removing any old crush washer or gasket, you can ensure a proper fit and avoid any potential issues during installation.

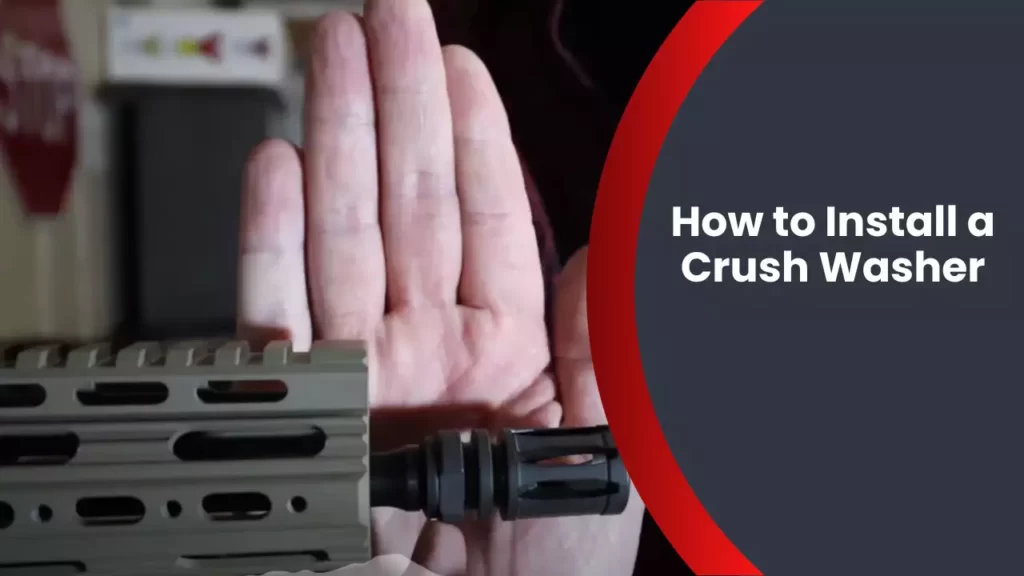
Step 2: Placing The Crush Washer
Locating the Correct Position for the Crush Washer
Before you proceed with placing the crush washer, it’s essential to locate the correct position on your firearm. The crush washer is a crucial component in your muzzle device installation as it helps maintain a tight seal and prevents gas leakage. To ensure optimal performance, take the time to understand the manufacturer’s guidelines or consult your firearm manual.
In most cases, you’ll find a designated area, usually the muzzle threads, where the crush washer needs to be placed. This area will be clearly marked or identified in your firearm specifications. Make sure to clean the area thoroughly before proceeding with the installation to remove any debris or leftover residues.
Placing the Crush Washer onto the Designated Area
Now that you have located the correct position for the crush washer, it’s time to proceed with its installation. Follow these steps to ensure a proper fit:
- Hold the crush washer firmly between your thumb and fingers, ensuring it is properly aligned.
- Gently slide the crush washer onto the designated area, ensuring that it fits snugly.
- Rotate the crush washer clockwise until it reaches the desired position. This step may require some force, so be careful not to over-tighten or strip the threads.
It is important to note that the crush washer should be positioned in a way that allows for proper alignment of your muzzle device. This will ensure that the gas escapes in the desired direction and minimizes recoil or gas blowback.
Once the crush washer is in place, visually inspect it to ensure it is sitting flush and evenly distributed around the muzzle threads. A mismatched or misaligned crush washer can result in an improper seal and potential gas leakage.
Remember, the proper installation of a crush washer is crucial in achieving optimal performance and safety. Taking the time to locate the correct position and ensuring a snug fit will contribute to a successful muzzle device installation on your firearm.
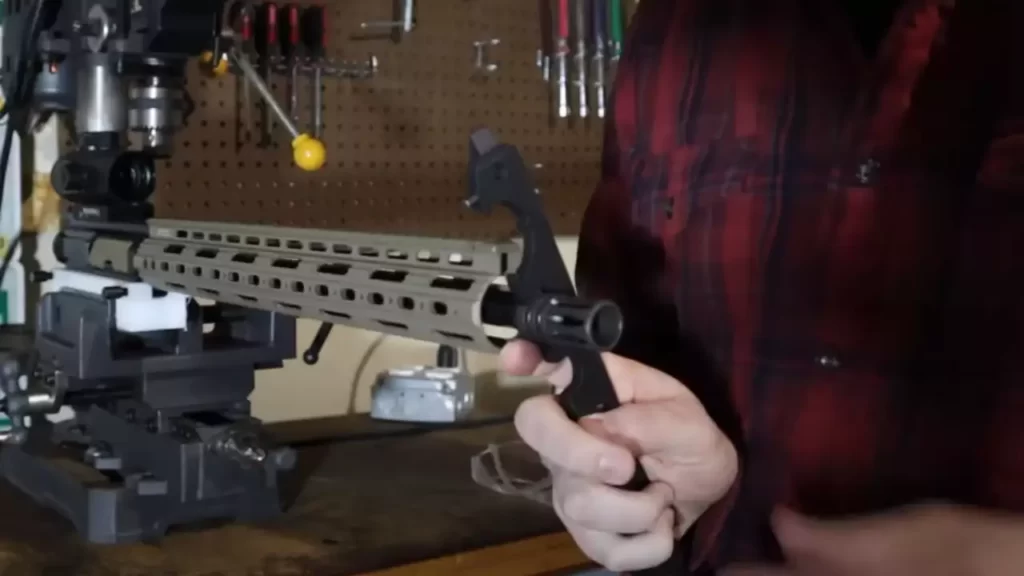
Step 3: Tightening And Torquing
After properly positioning the crush washer on your firearm, the next crucial step in the installation process is tightening and torquing. This step ensures a secure and leak-free connection between the barrel and muzzle device. Accurately achieving the correct torque is essential to prevent any thread damage, gas leaks, or misalignment issues. Let’s explore the importance of proper torque, understand torque specifications for different applications, and the role of torque wrenches in achieving accurate tightening.
The importance of achieving the correct torque
When it comes to installing a crush washer, achieving the correct torque is crucial for a variety of reasons. By tightening the muzzle device to the proper torque specification, you ensure a solid and secure attachment, preventing any potential loosening or movement. Additionally, proper torque helps create a reliable seal, preventing any gas leakage and enhancing the overall performance of your firearm.
Understanding the torque specifications for different applications
Each firearm and muzzle device combination may have specific torque specifications provided by the manufacturer. These torque specifications are crucial as they dictate the amount of force required to achieve the desired level of tightness. It’s important to note that different applications may require different torque settings, so it’s essential to consult the owner’s manual or the manufacturer’s guidelines for the specific firearm and muzzle device you are working with.
For example, a muzzle device on a rifle might require higher torque settings compared to a pistol. Understanding and adhering to the recommended torque specifications for different applications ensure that you do not overtighten, risking damage, or undertighten, risking loose connections.
The role of torque wrenches in achieving accurate tightening
To accurately achieve the recommended torque, it is highly recommended to use a torque wrench. A torque wrench allows you to apply the specific amount of force needed, ensuring an accurate and consistent tightening across all the muzzle device’s threads.
Using a torque wrench helps prevent any potential damage to the threads or the crush washer due to over-tightening. It provides a controlled application of force, reducing the risk of misalignment and maintaining the integrity of the connection between the barrel and muzzle device.
Before using a torque wrench, it’s essential to ensure that it is properly calibrated and set to the correct torque specification provided by the manufacturer. Regular maintenance and calibration of your torque wrench guarantee accurate and reliable tightening measurements throughout its use.
In conclusion, achieving the correct torque is vital when installing a crush washer. It ensures a secure attachment, prevents leaks, and enhances the overall performance of your firearm. Understanding torque specifications for different applications and utilizing a torque wrench help achieve accurate tightening, providing peace of mind and confidence in your installation process.
Step 4: Checking For Proper Installation
Once you have successfully installed the crush washer, it is crucial to ensure that it is properly installed to prevent any leaks or gaps. This step is essential for the overall effectiveness and safety of the installation. In this section, we will guide you on how to inspect for any leaks or gaps and how to verify if the crush washer is installed correctly.
Inspecting for any leaks or gaps
Before proceeding to verify the correct installation of the crush washer, it is essential to inspect for any signs of leaks or gaps. These could indicate that the washer was not installed properly, which can lead to potential issues in the future. Here’s what you need to do:
- Start by visually checking around the area where the crush washer is installed.
- Look for any traces of oil or fluid which might be an indication of a leak.
- Inspect the surrounding connections and fittings for any signs of gaps or loose parts.
- Use a clean rag or paper towel to wipe away any existing oil or fluid and examine if there are any fresh leaks.
How to verify if the crush washer is installed correctly
Verifying the correct installation of the crush washer is crucial to ensure a tight seal and prevent any leakage. Follow these steps to ensure that the crush washer is properly installed:
- Check the tightness of the connection by gently trying to move or wiggle it. It should be firmly in place and not easily adjustable.
- Inspect the alignment of the crush washer. It should be centered between the two connecting surfaces.
- Ensure that the crush washer is snugly compressed between the surfaces without any gaps.
- If you have access to a torque wrench, you can use it to ensure that the crush washer is tightened to the recommended torque specifications.
- Perform a visual inspection once more to confirm that there are no leaks or gaps.
By following these steps and thoroughly inspecting for leaks or gaps, you can ensure that the crush washer is installed correctly. Proper installation is essential for maintaining the integrity of the connection and preventing any potential issues down the line.
Troubleshooting Common Issues
Addressing common problems during the installation process
Installing a crush washer may seem like a simple task, but it can sometimes present a few challenges. Understanding common issues that may arise during the process can help you troubleshoot and overcome them with ease. Let’s take a look at some of these problems and how to address them:
Tips and tricks to overcome challenges
1. Crush washer not seating properly
One common issue you may encounter is the crush washer not seating properly. This can result in leaks or an inadequate seal. To overcome this challenge, follow these steps:
- Ensure that the threaded surface of the muzzle device or barrel is clean and free from any debris.
- Inspect the crush washer for any damage or deformity. If necessary, replace it with a new one.
- Apply a small amount of threadlocker to the muzzle device or barrel threads to ensure a secure fit.
- Torque the muzzle device properly to compress the crush washer and achieve the desired alignment.
- Check for leaks after installation and make any adjustments if necessary.
2. Difficulties in tightening the crush washer
Tightening the crush washer can sometimes be a challenge, especially if it feels like it’s not turning or you’re having trouble getting it to the desired torque. Here are some tips to help you overcome this issue:
- Use a proper crush washer wrench or tool to ensure a secure grip.
- If the crush washer is stubborn and not turning, apply some penetrating oil or a heat gun to the area to loosen it.
- Make sure you’re applying even pressure while tightening the crush washer to prevent any damage.
- If you’re still having difficulty, consider seeking professional assistance to avoid any potential damage to the firearm.
3. Crush washer not aligning correctly
Another common problem is the crush washer not aligning correctly with the barrel or muzzle device. This can lead to an improper fit and potential issues down the line. Here’s how you can address this challenge:
- Closely examine the crush washer to ensure it is in good condition and not warped or damaged.
- Try rotating the crush washer slightly to achieve proper alignment. Be mindful not to overtighten or loosen it too much.
- If the alignment issue persists, consider using shims or peel washers to fine-tune the positioning and achieve the desired result.
- After installation, visually inspect the alignment and test for any leaks or movement.
By being aware of these common problems and following the tips and tricks outlined above, you can ensure a successful crush washer installation. Remember to take your time, use the right tools, and seek professional help if needed. Happy shooting!
Frequently Asked Questions
Q: What is a crush washer and why is it important?
A crush washer is a soft metal or rubber washer that is used to create a seal between two surfaces, preventing leakage and ensuring a tight connection. It is commonly used in plumbing, automotive, and firearm applications. When tightened, the washer deforms under pressure, creating a secure seal.
Q: Where is a crush washer typically used?
A crush washer is commonly used in applications where a tight seal is required, such as:
- Oil drain plugs
- Muzzle devices on firearms
- Spark plugs
- Hydraulic fittings
Q: How do I install a crush washer?
Installing a crush washer is a straightforward process. Follow these steps:
- Ensure that the surfaces are clean and free from debris.
- Place the crush washer on the appropriate threaded connection.
- Tighten the connection until it is snug, ensuring not to overtighten.
- Check for any leaks by inspecting the seal and the connection area.
Q: Can I reuse a crush washer?
In general, it is not recommended to reuse a crush washer. Since the washer deforms under pressure during the initial installation, its sealing ability may be compromised if reused. It is best to use a new crush washer for each installation to ensure a proper seal.
Q: What are some common mistakes to avoid when installing a crush washer?
When installing a crush washer, there are a few common mistakes to avoid:
- Overtightening the connection, which can damage the washer and the surfaces it seals
- Using an incorrect size or type of crush washer for the application
- Not properly aligning the crush washer before tightening the connection
- Reusing a crush washer, which can compromise its sealing ability
By being mindful of these mistakes, you can ensure a successful and leak-free installation when using a crush washer.
Which Way Does The Crush Washer Go?
The crush washer should be positioned with the flat side facing the surface it is being used on. Make sure it is properly seated to ensure a tight seal.
How Tight Should A Crush Washer Be?
A crush washer should be tightened until it is snug. It should not be over-tightened as it can damage the washer or the surrounding components. It is important to use the appropriate torque specifications provided by the manufacturer to avoid any issues.
How Do You Install A Copper Crush Washer?
To install a copper crush washer, follow these steps: 1. Ensure the surface is clean and free of debris. 2. Place the washer on the bolt or fitting. 3. Tighten the bolt or fitting to the specified torque. 4. Inspect for any leaks.
5. If needed, re-torque the bolt or fitting.
Is A Crush Washer Necessary For Muzzle Device?
Yes, a crush washer is necessary for a muzzle device. It helps to properly align and secure the device, ensuring a tight fit and preventing gas leaks during firearm use.
Conclusion
To sum it up, installing a crush washer is a crucial step when it comes to ensuring a proper seal in various applications. By following the steps outlined in this guide, you can confidently install a crush washer without any hassle.
Remember to choose the right size and material for the job, and always tighten it to the manufacturer’s specifications. With this knowledge, you can tackle this task with ease and prevent future leaks or damage. Happy wrenching!