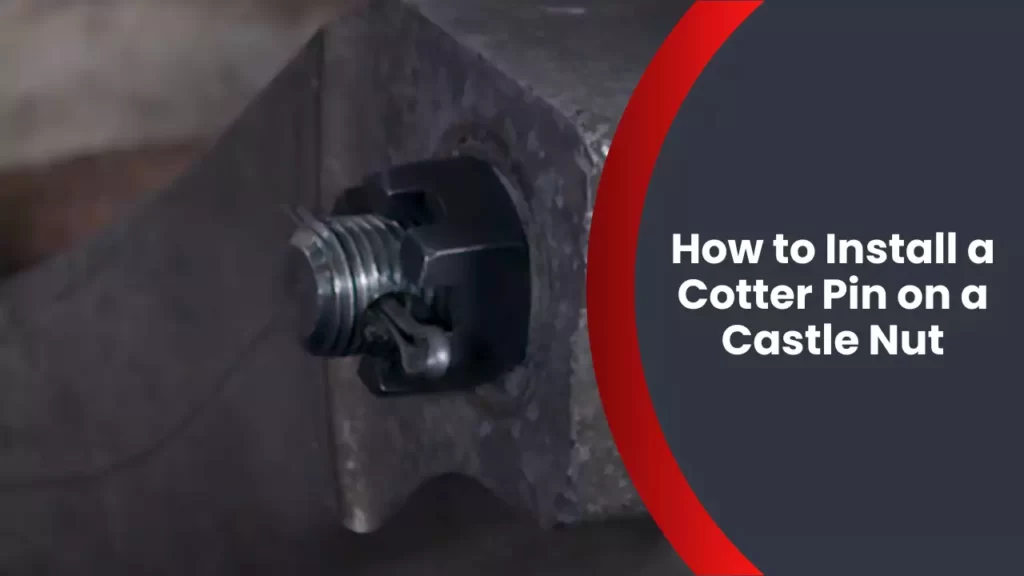
To install a cotter pin on a castle nut, insert the pin through the hole and bend the free ends. A cotter pin is a fastener used to secure a castle nut onto a bolt or threaded shaft.
It is a simple yet effective way to prevent the nut from loosening due to vibration or movement. Installing a cotter pin on a castle nut is a straightforward process that requires attention to detail. We will provide step-by-step instructions on how to correctly install a cotter pin on a castle nut to ensure the nut remains securely in place.
Follow these instructions carefully to complete the installation accurately and effectively.
Understanding The Importance Of Cotter Pins And Castle Nuts
Understanding the Importance of Cotter Pins and Castle Nuts
When it comes to securing components in various mechanical systems, cotter pins and castle nuts play a vital role. These small yet crucial elements ensure that different parts remain firmly in place, preventing any unwanted movement or disconnection. In this blog post, we will delve into the significance of cotter pins and castle nuts and how they work together to provide a reliable and secure connection.
What are cotter pins and castle nuts?
Let’s start by understanding what cotter pins and castle nuts actually are. A cotter pin, also known as a split pin, is a metal fastener that features two prongs and a looped head. It is typically inserted through a hole on a bolt or a shaft and then bent to secure it in place. Castle nuts, on the other hand, are specially designed nuts that feature slots or castellations along their perimeter. These slots are intended to accommodate the prongs of the cotter pin, effectively preventing the nut from loosening under various conditions.
The role of cotter pins and castle nuts in securing components
The main purpose of cotter pins and castle nuts is to secure components and prevent them from slipping, spinning, or coming apart during operation. They serve as an additional safety measure to ensure that critical connections remain intact, especially in applications where high vibration, heavy loads, or constant movement are involved.
When a castle nut is tightened onto a bolt or a shaft, the slots on the nut align with the hole through which the cotter pin is inserted. Once the cotter pin is inserted and bent into place, it effectively locks the nut down, making it nearly impossible for the nut to rotate or loosen unintentionally. This unique combination of cotter pins and castle nuts provides a reliable means of securing components and maintaining the integrity of mechanical systems.
Why proper installation is crucial
Proper installation of cotter pins and castle nuts is essential to ensure their effectiveness. Improper installation can compromise the stability and security of the connection, leading to potential failures or accidents. It is crucial to adhere to the correct installation techniques to maximize the performance and reliability of these fastening components.
To install a cotter pin on a castle nut correctly, begin by aligning the slots on the castle nut with the hole through which the cotter pin will be inserted. Then, fully tighten the nut onto the bolt or shaft. Once tightened, insert the cotter pin through the aligned slots and bend the prongs securely against the nut. Ensure that the cotter pin is tight enough to prevent any movement or rotation of the nut but not so tight that it causes excessive pressure or damage to the components involved.
By following the proper installation procedures and techniques, you can ensure that cotter pins and castle nuts fulfill their intended purpose of providing a secure and reliable connection. This attention to detail not only enhances the overall safety of mechanical systems but also contributes to their longevity and optimal performance.
In conclusion, cotter pins and castle nuts are critical elements in securing components and preventing unwanted movement or disconnection in mechanical systems. Their unique design and installation ensure a reliable connection, especially in high-stress or high-vibration applications. Proper installation techniques must be followed to maximize the effectiveness of these fastening components. By understanding the importance of cotter pins and castle nuts, we can enhance the safety and reliability of various mechanical systems.
Step 1: Gather The Necessary Tools And Materials
When it comes to installing a cotter pin on a castle nut, one of the most important steps is gathering all the necessary tools and materials beforehand. By doing this, you can ensure a smooth and efficient installation process. In this article, we will guide you through Step 1 of the installation process, which involves gathering the essential tools and materials you’ll need.
List of Tools and Materials needed for the installation process
To successfully install a cotter pin on a castle nut, you will need the following tools and materials:
Tools
- Adjustable wrench
- Needle-nose pliers
- Cotter pin installation tool
- Hammer
Materials
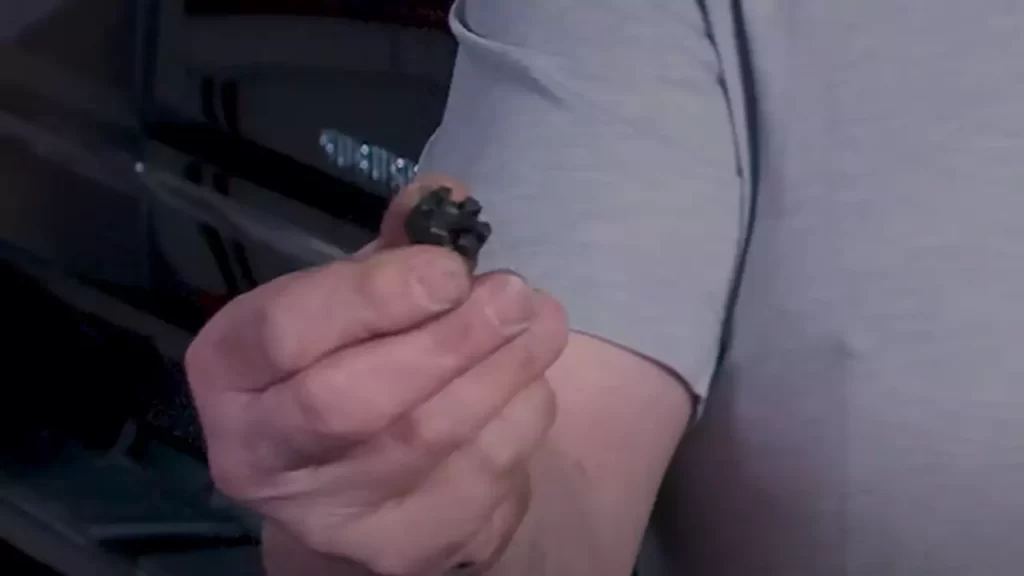
- Castle nut
- Cotter pin
- Grease or lubricant
Having these tools and materials readily available before starting the installation will save you time and prevent any unnecessary interruptions during the process. Let’s take a closer look at each tool and material:
1. Adjustable wrench
An adjustable wrench is essential for tightening and loosening nuts and bolts. Make sure you have the correct size of wrench for the castle nut you are working with. This tool will help you secure the nut in place.
2. Needle-nose pliers
Needle-nose pliers are useful for various tasks, including manipulating and positioning small objects. They are particularly handy when it comes to bending the cotter pin to secure it in place.
3. Cotter pin installation tool
A cotter pin installation tool is a specialized tool designed to make the installation process easier. It helps you guide the cotter pin through the castle nut and keeps it securely in place.
4. Hammer
A hammer is used to tap and secure the cotter pin completely in place. Make sure to use a hammer with a size appropriate for the cotter pin to avoid any damage.
Now that you have a comprehensive list of tools and materials needed for installing a cotter pin on a castle nut, you are well-prepared to tackle the first step of the installation process. Having these items within easy reach will ensure a smoother and more efficient installation, saving you time and frustration.
Step 2: Preparing The Components
Before installing a cotter pin on a castle nut, it is crucial to properly inspect and prepare the components. This step ensures the smooth functioning and long-term durability of the fastening mechanism. In this section, we will discuss how to inspect the castle nut and cotter pin for any damage or defects, as well as how to clean and lubricate them if necessary.
Inspecting the castle nut and cotter pin for any damage or defects
When it comes to installing a cotter pin on a castle nut, inspecting the components for any damage or defects is of utmost importance. Even the slightest issues can compromise the overall effectiveness of the fastening system. Here’s how you can ensure that the castle nut and cotter pin are in proper condition:
- Examine the castle nut visually for any external damage such as cracks, dents, or deformities. If you spot any irregularities, it is recommended to replace the castle nut.
- Check for any signs of corrosion or rust on the surface of the castle nut. Corrosion can weaken the nut, making it more prone to breakage. In such cases, it is advisable to use a new castle nut.
- Inspect the cotter pin for any signs of bending, twisting, or stretching. A damaged cotter pin should never be used, as it may not secure the castle nut effectively.
- Ensure that the cotter pin holes in the castle nut are clear and free from any debris or obstructions. If needed, clean out the holes using a small brush or compressed air.
Cleaning and lubricating the components, if necessary
Cleaning and lubricating the components can contribute to a smoother installation process and improved longevity of the fastening system. Here’s how you can clean and lubricate the castle nut and cotter pin:
- Thoroughly clean the castle nut and cotter pin with a suitable solvent to remove any dirt, grease, or residue.
- Inspect the threads of the castle nut and apply a thin layer of lubricant, such as anti-seize compound or thread-locking adhesive, if necessary. This will help prevent the nut from seizing or loosening over time.
- Similarly, apply a small amount of lubricant to the cotter pin to reduce friction during installation.
Remember, cleaning and lubricating the castle nut and cotter pin is essential for their optimal performance. By taking these steps, you can ensure a secure and long-lasting installation of the cotter pin on the castle nut.
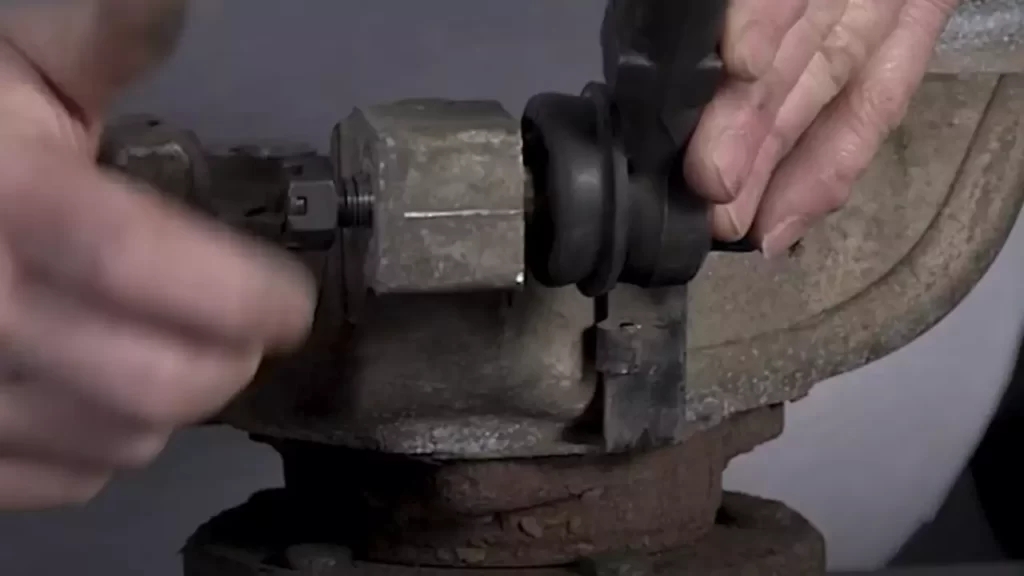
Step 3: Positioning The Castle Nut
Once you have completed the previous step of tightening the castle nut, the next step is to position it correctly on the threaded shaft. This is a crucial part of the installation process, as it directly affects the functionality and safety of the cotter pin. Follow these guidelines to ensure the castle nut is placed correctly:
Placing the castle nut in the correct position on the threaded shaft
1. Start by identifying the end of the threaded shaft, where the cotter pin will be inserted. This end usually has a small hole or slot to accommodate the pin.
2. Carefully slide the castle nut onto the threaded shaft, ensuring that it is aligned with the hole or slot for the cotter pin. Make sure the threads of the nut match those of the shaft, allowing for a secure fit.
3. Once the nut is in place, rotate it clockwise with your fingers until it reaches the desired position. The exact positioning may vary depending on the specific application and the manufacturer’s instructions. Refer to the equipment or machinery’s manual if necessary.
4. Do not overtighten the castle nut at this stage, as it needs to remain loose enough to allow for the insertion of the cotter pin.
Ensuring the castle nut is tightened appropriately
1. Once the nut is in position, use a wrench or socket tool to tighten it firmly. This step helps to ensure that the nut remains secure and prevents any unintentional loosening due to vibrations or movement.
2. Check for any noticeable play or movement in the nut after tightening. It should feel secure and stable, without any wobbling or shifting.
3. Avoid overtightening the castle nut, which could potentially damage the threads or the surrounding components. Over-tightening can also lead to excessive friction, causing premature wear and tear.
4. If you are unsure of the appropriate torque specification, refer to the equipment’s manual or consult a professional for guidance.
By following these steps, you will position the castle nut correctly on the threaded shaft and ensure that it is tightened appropriately. A properly installed cotter pin, secured by a correctly positioned and tightened castle nut, will provide stability and safety in various mechanical applications.
Step 4: Inserting The Cotter Pin
Now that you have successfully tightened the castle nut onto the shaft, it’s time to secure it in place by inserting a cotter pin. This small but crucial component acts as a safety device, preventing the nut from loosening and potentially causing damage or accidents. In this step-by-step guide, we will discuss how to choose the proper size of cotter pin for the castle nut and shaft and how to correctly insert it, ensuring a secure and reliable fit.
Choosing the Proper Size of Cotter Pin for the Castle Nut and Shaft
Before inserting the cotter pin, it is essential to select the correct size for your specific castle nut and shaft combination. Using an incorrect size could result in an insecure fit, rendering the cotter pin ineffective. To determine the appropriate size, follow these simple steps:
- Measure the diameter of the hole in the castle nut where the cotter pin will be inserted.
- Measure the diameter of the shaft where the castle nut is installed.
- Ensure the cotter pin you choose matches both the castle nut hole diameter and the shaft diameter.
It’s crucial to emphasize the importance of precise measurements when selecting a cotter pin. Taking the time to ensure a proper fit will provide maximum effectiveness and peace of mind.
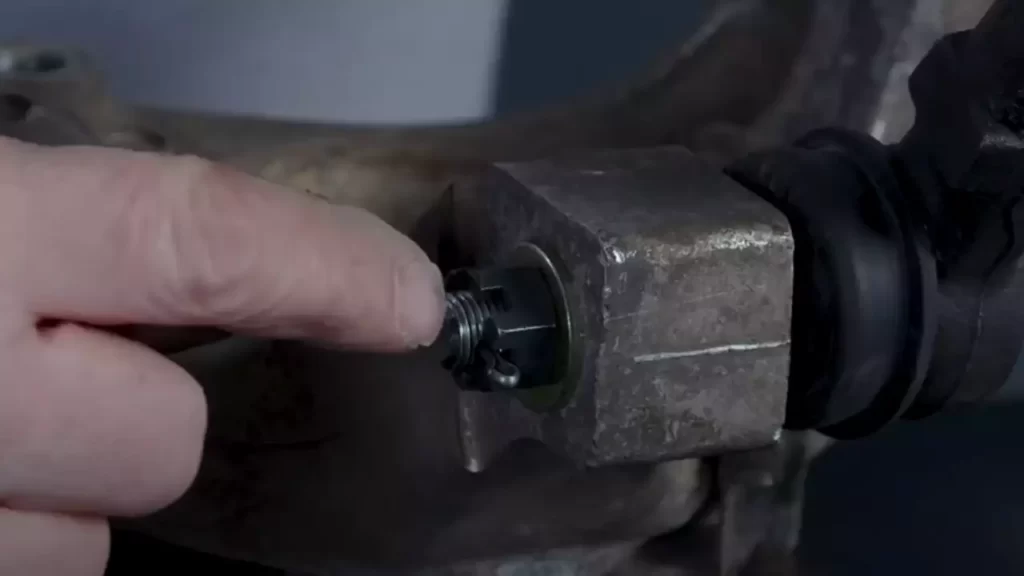
Inserting the Cotter Pin through the Castle Nut and Shaft
Now that the correct size of cotter pin has been obtained, follow these steps to insert it properly:
- Align the hole on the castle nut with the hole on the shaft.
- Insert one end of the cotter pin into the hole of the castle nut.
- Guide the cotter pin through the castle nut hole until it reaches the hole on the shaft.
- Align the hole on the shaft with the next cotter pin hole available.
- Continue inserting the cotter pin until it fully passes through both the castle nut and the shaft.
Always ensure that the cotter pin is fully inserted through both components, as this guarantees a secure fit. Additionally, make sure the cotter pin is not bent or twisted during installation, as this may compromise its effectiveness.
By correctly inserting the cotter pin, you have ensured the castle nut’s stability, preventing any unwanted loosening or potential accidents. This small yet essential step completes the installation process, leaving you with confidence in the reliability of your assembly.
Step 5: Securing The Cotter Pin
Step 5: Securing the Cotter Pin
After inserting the cotter pin through the castle nut and the drilled hole in the bolt or axle, it’s crucial to secure the pin properly. This step ensures that the nut stays in place and prevents any unwanted movement or loosening. To accomplish this, you’ll need to bend the cotter pin and align it correctly. Here’s what you need to do:
Bending the cotter pin to prevent it from coming loose
While installing a cotter pin, it’s essential to bend it in a specific way to prevent it from coming loose. This bending technique provides a secure hold and keeps the nut securely fastened. Follow these steps:
- Using pliers, grasp the extended end of the cotter pin firmly.
- Gently bend the end of the cotter pin at a 90-degree angle.
- Ensure the bent part of the pin is parallel to the nut and bolt or axle, providing a snug fit.
- If necessary, use pliers to make any additional adjustments to the bent portion for a secure fit.
By bending the cotter pin properly, you minimize the risk of it dislodging or loosening over time. This step adds an extra layer of safety and reliability to your installation.
Ensuring the cotter pin is secure and properly aligned
Proper alignment and secure attachment of the cotter pin are critical for ensuring the castle nut stays firmly in place. Follow these guidelines for a well-aligned cotter pin:
- Check that the cotter pin is centered and aligned with the drilled hole in the bolt or axle.
- Verify that both ends of the cotter pin extend beyond the castle nut, providing enough length for bending and securing.
Confirming the cotter pin’s alignment and security ensures that it serves its intended purpose effectively. This step helps maintain the reliability and stability of the fastened components.
Once you have bend the cotter pin properly and ensured its secure alignment, you can be confident that your castle nut installation is solid and reliable. The cotter pin acts as an essential safety feature, preventing the nut from loosening or shifting. By following these steps carefully, you’ll be able to complete the installation accurately and ensure the long-lasting performance of your assembly.
Step 6: Double-Checking The Installation
Verifying that the castle nut is secure and cannot be easily loosened
After successfully inserting the cotter pin into the castle nut and bending the ends to secure it in place, it is crucial to double-check the installation to ensure that the assembly is secure and will not come loose.
To verify that the castle nut is secure, give it a firm tug. If there is any movement or if it feels loose, additional tightening may be required. Unscrew the castle nut slightly and then retighten it, making sure to maintain alignment with the cotter pin holes.
Once the castle nut is properly tightened, visually inspect it to ensure that the cotter pin is positioned correctly and that it is aligned with the cotter pin holes. The cotter pin should fully engage with the castle nut and prevent any rotation or movement.
Testing the cotter pin to ensure it is properly seated and prevents movement
Next, test the cotter pin to ensure it is properly seated and prevents any movement of the castle nut. Gently try to rotate the castle nut by hand; if there is any movement or rotation, the cotter pin may not be seated correctly.
If you encounter this issue, remove the cotter pin and re-insert it, ensuring that it passes completely through the castle nut and the axle or stud. Be careful not to force the cotter pin, as it should slide in smoothly. Once reinserted, bend the ends of the cotter pin to secure it in place.
Lastly, visually inspect the cotter pin to ensure that it is fully inserted, with both ends bent securely. The bent ends should extend beyond the castle nut, preventing any accidental removal or sliding out due to vibrations or other external factors.
By following these double-checking steps, you can ensure that the castle nut and cotter pin installation is secure, providing peace of mind and reliable performance for your machinery or equipment.
Tips For Successful Installation
When it comes to installing a cotter pin on a castle nut, there are a few tips and tricks that can help ensure a successful and secure installation. Whether you are a DIY enthusiast or a professional mechanic, following these guidelines will help you avoid common mistakes and achieve a tight and reliable fit.
Common Mistakes to Avoid When Installing Cotter Pins on Castle Nuts
Proper installation of a cotter pin requires attention to detail and accuracy. Avoiding common mistakes will help prevent issues down the line. Here are some errors to steer clear of:
- Incorrect Cotter Pin Size: Using the wrong size of cotter pin is a recipe for disaster. Always check the specifications provided by the manufacturer to ensure a proper fit. The cotter pin should be large enough to fill the hole completely but not too large to cause unnecessary friction.
- Improper Alignment: It is crucial to align the holes of the castle nut and the shaft correctly. Misalignment can result in difficulties in inserting the cotter pin or even compromising its function.
- Insufficient Installation: One common error is not inserting the cotter pin completely through the castle nut. This can lead to a loose fit and potential failure. Ensure that the cotter pin is snug and securely fastened.
- Reusing Old Cotter Pins: Reusing cotter pins is not recommended as they may have weakened or stretched due to previous use. It is best practice to use new cotter pins for each installation to ensure maximum stability and safety.
- Failure to Securely Bend the Legs: After installing the cotter pin, bending the legs securely is essential to prevent the pin from becoming dislodged. If the legs are not bent tightly, vibrations or movement can cause the cotter pin to loosen or fall out.
Additional Tips and Best Practices for a Secure Installation
Alongside avoiding common mistakes, implementing additional tips and following best practices will ensure an even more secure installation. Keep the following suggestions in mind:
- Regular Inspection: Make it a habit to inspect cotter pins regularly for any signs of wear, damage, or loosening. Prompt replacement is crucial to prevent potential accidents or failure.
- Proper Torque: It’s important to apply the right amount of torque when tightening the castle nut. Consult the manufacturer’s instructions or a torque table to ensure the nut is secured adequately without over-tightening.
- Consider Locking Devices: In critical applications where extra security is required, consider using additional locking devices, such as lock washers or locking nuts, in conjunction with cotter pins.
- Follow Industry Standards: Familiarize yourself with industry standards and guidelines for cotter pin installation. These standards provide valuable information and recommendations for achieving optimal results.
- Use the Right Tools: Using appropriate tools, such as pliers or wire cutters, will make installation easier and help prevent damage to the cotter pin during the bending process.
Following these tips and avoiding common mistakes will greatly contribute to a successful cotter pin installation on a castle nut. Ensuring proper installation is essential for the safety and reliability of any assembly.
Troubleshooting And Faqs
When it comes to installing a cotter pin on a castle nut, there can sometimes be various issues that arise during the installation process. In this section, we will address some common problems encountered and answer frequently asked questions to help ensure a successful and hassle-free installation.
Common Issues Encountered During the Installation Process
Installing a cotter pin on a castle nut may seem simple, but there are a few challenges that can arise. Let’s explore some common issues you may face and how to troubleshoot them:
1. Castle nut not staying in place
If you’re having trouble keeping the castle nut in place while installing the cotter pin, make sure you have tightened the nut adequately. A loose nut can cause the cotter pin to slip out of position. Use an appropriate tool, such as a wrench or pliers, to tighten the nut securely.
2. Difficulty aligning the holes
Aligning the holes in the castle nut and the bolt or axle can be tricky at times. If you’re struggling with alignment, try using a small punch or screwdriver to help guide the holes into position. Applying gentle pressure while aligning the holes can make the process easier.
3. Cotter pin bending or breaking
In some cases, the cotter pin may bend or break during installation, leaving you unable to secure the castle nut properly. This can happen if excessive force is applied or if the pin is made of low-quality material. To prevent this, use a cotter pin that meets the required strength specifications for your application and ensure you apply the appropriate amount of force during installation.
Answering Frequently Asked Questions about Installing Cotter Pins on Castle Nuts
Let’s address some common questions that often arise when it comes to installing cotter pins on castle nuts:
1. How tight should the castle nut be before installing the cotter pin?
The castle nut should be tightened to the manufacturer’s specified torque value before installing the cotter pin. It should be snug but not excessively tight.
2. Can I reuse a cotter pin?
No, it is recommended to always use a new cotter pin during installation. Reusing a cotter pin can compromise its strength and integrity, increasing the risk of failure.
3. Are there different sizes of cotter pins available?
Yes, cotter pins come in various sizes to accommodate different castle nuts and applications. It’s essential to choose the correct size and type of cotter pin that matches the dimensions of your castle nut and meets the strength requirements of your application.
4. Can I install a cotter pin without a castle nut?
No, cotter pins are specifically designed to secure castle nuts. Installing a cotter pin without a castle nut can result in inadequate fastening and potential safety hazards. Always ensure you have the correct components and follow the manufacturer’s instructions for proper installation.
5. What is the purpose of a cotter pin?
A cotter pin is a safety device used to secure fasteners such as castle nuts. It prevents the nut from loosening or falling off, ensuring the stability and integrity of the assembly. The cotter pin’s design allows for easy visual inspection, making it ideal for critical applications where safety is paramount.
By addressing these common issues and answering frequently asked questions, you should now have a better understanding of the installation process for cotter pins on castle nuts. Remember to always follow industry best practices and consult the manufacturer’s guidelines for specific instructions regarding your particular application.
Frequently Asked Questions
Do Castle Nuts Need Cotter Pins?
Castle nuts do require cotter pins. Cotter pins provide extra security by preventing the nut from loosening or falling off. They are inserted through the slots in the castle nut and then bent to secure it in place.
How Do You Put A Cotter Pin In An Axle Nut?
To install a cotter pin in an axle nut, follow these steps: first, tighten the nut using a wrench or socket. Then, insert the cotter pin through the hole in the spindle or axle shaft. Finally, bend the ends of the cotter pin to secure it in place.
When Installing A Castle Nut And The Nut Castellation Does Not Align With The Cotter Pin Hole?
If the castellation of the castle nut does not align with the cotter pin hole during installation, it is crucial to not force the alignment. Instead, reposition the nut without over-tightening until the cotter pin hole lines up properly.
What Is The Castle Nut And Cotter Pin Used For?
The castle nut and cotter pin are used to secure fasteners in mechanical assemblies. The castle nut is a slotted nut that allows for easy adjustment and locking with a cotter pin. The cotter pin prevents the nut from loosening by inserting through the slots in the nut and a drilled hole in the fastener.
Conclusion
To recap, installing a cotter pin on a castle nut is a simple yet important task that ensures the nut stays securely in place. By following the steps outlined in this guide, you can easily complete this task and prevent any potential hazards.
Remember, safety should always be a priority when working with any type of fastener, so take your time and double-check your work. Now you have the knowledge and confidence to complete this task successfully. Happy installing!