To install a corbel, first, ensure that you have the necessary tools and materials. Then, measure and mark the desired position on the wall, making sure it is level.
Finally, attach the corbel securely using screws or adhesive, following the manufacturer’s instructions. [120 words] Corbels are decorative and functional architectural elements that can enhance the aesthetics of a room. They are typically used to support shelves, countertops, mantels, or other heavy structures.
Installing a corbel may seem challenging, but with the right tools and techniques, it can be a straightforward process. This article provides step-by-step instructions on how to install a corbel, ensuring a secure and visually pleasing result. Whether you are a DIY enthusiast or a professional contractor, this guide will equip you with the knowledge needed to successfully complete this project. Follow these simple instructions, and you will have your corbel securely installed in no time.
Before You Begin
Before you begin installing a corbel, it’s important to make sure you have all the necessary tools and equipment to complete the task. Additionally, taking the right safety precautions is crucial to ensure a smooth and accident-free installation process. In this section, we will cover the tools and equipment needed as well as the safety precautions to take before getting started.
Tools and equipment needed
To install a corbel effectively, you will need a few essential tools and equipment. Here is a list of the items you should have on hand:
- Power drill with drill bits
- Screwdriver
- Tape measure
- Pencil or marker
- Level
- Stud finder
- Corbel(s)
- Mounting hardware (screws or brackets)
- Protective gloves
- Safety goggles
Having these tools and equipment ready before you begin the installation will save you both time and effort.
Safety precautions to take
It is important to prioritize safety when installing a corbel. Here are a few precautions you should take to ensure a safe installation:
- Wear protective gloves and safety goggles throughout the installation process.
- Ensure the area where you will be working is well-ventilated.
- Use a sturdy ladder or step stool to reach high areas, ensuring it is stable and secure.
- Before drilling, make sure to locate any electrical wires or plumbing pipes behind the wall using a stud finder.
- When drilling into the wall, ensure you are using the correct drill bit size for the type of wall material (e.g., drywall, wood, or concrete).
- Use caution when handling corbels, as they can be heavy and may cause injury if dropped.
- Always follow the manufacturer’s instructions for installing the corbel and use any recommended safety precautions.
By following these safety precautions, you can reduce the risk of accidents or injuries during the corbel installation process. Remember, safety should always come first.
In conclusion, gathering the necessary tools and equipment and taking the proper safety precautions are crucial steps to take before installing a corbel. By being well-prepared and prioritizing safety, you can ensure a successful and hassle-free installation experience.

Choosing The Right Corbel
Finding the Perfect Corbel for Your Home
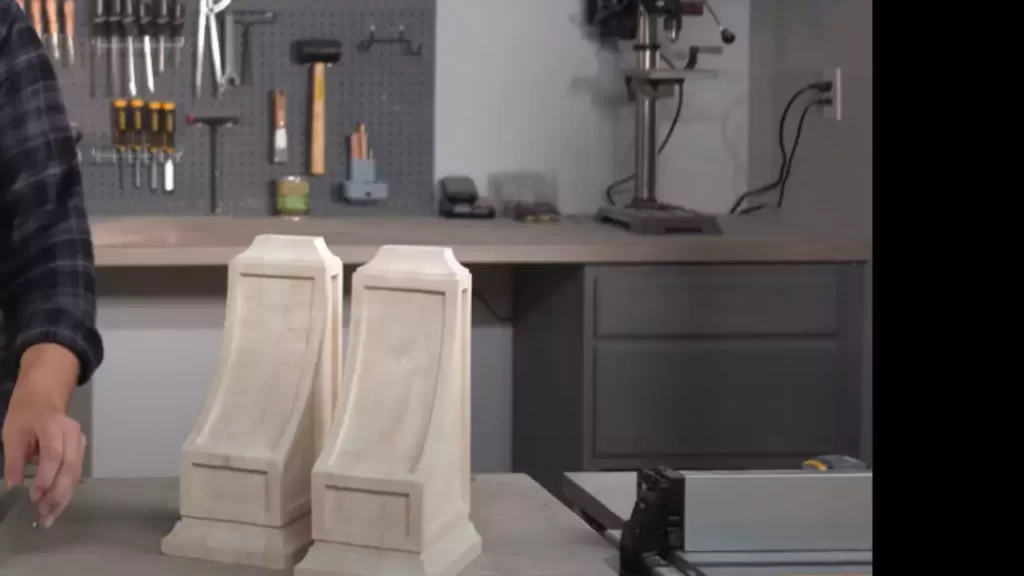
Choosing the right corbel is an essential step when it comes to enhancing the beauty and functionality of your home. These decorative brackets not only add architectural interest but also provide support for shelves, countertops, and other structures. With a wide variety of corbel types and styles available, finding the perfect option that complements your home decor can be a delightful adventure. In this section, we will explore the factors to consider when selecting a corbel, the different types of corbels available, and how to match the corbel style with your home decor.
Factors to Consider when Selecting a Corbel
When it comes to choosing the right corbel for your home, several factors should be taken into consideration to ensure the perfect fit. Here’s a look at some key factors you should keep in mind:
- Size: Measure the space where you intend to install the corbel to determine the appropriate size. It’s important to select a corbel that not only fits your space but also provides adequate support for the intended load.
- Material: Corbels come in a variety of materials including wood, metal, and polyurethane. Consider the material’s durability, maintenance requirements, and how well it complements your existing decor.
- Design: The design of the corbel should harmonize with the overall aesthetic of your home. Whether you prefer simple and sleek lines or intricate and ornate detailing, choose a corbel that reflects your personal style.
- Budget: Set a budget for your corbel purchase to help narrow down your options. Corbels range in price depending on the material, size, and design. Consider investing in a high-quality corbel that will stand the test of time.
Types of Corbels Available
Corbels are available in a range of shapes, sizes, and styles, allowing you to find the perfect match for your home decor. Here are some common types of corbels you can choose from:
| Corbel Type | Description |
|---|---|
| Wooden Corbels | These corbels offer a classic and warm aesthetic, making them suitable for traditional and rustic home styles. They can be carved or left with a natural finish to showcase the wood’s beauty. |
| Metal Corbels | If you’re looking for a contemporary or industrial look, metal corbels can be an excellent choice. Available in various metals such as iron and stainless steel, they offer durability and sleekness. |
| Polyurethane Corbels | Polyurethane corbels are lightweight, affordable, and resistant to moisture and insects. They can mimic the appearance of wood or stone, making them a versatile option for various home styles. |
| Architectural Corbels | Architectural corbels often feature intricate designs and can be used to create a striking focal point in your home. They are commonly used in larger architectural applications such as doorways and exterior facades. |
Matching the Corbel Style with Your Home Decor
Your chosen corbel should seamlessly blend with your home decor to create a cohesive and visually appealing space. Here are a few tips to help you match the corbel style with your home decor:
- Consider the architectural style: Take inspiration from your home’s architectural style. For instance, if you have a Victorian-style house, ornate and detailed corbels would be a suitable choice.
- Coordinate with existing elements: Look at the color palette, texture, and materials used in your home. Choose a corbel that complements the existing elements such as cabinetry, flooring, or furniture.
- Create a contrast: Sometimes, contrasting corbels can make a statement and add visual interest to your space. For example, pairing a sleek, modern corbel with a more traditional kitchen design can create a captivating juxtaposition.
By taking into account these factors, exploring the different types of corbels available, and matching the corbel style with your home decor, you can confidently choose the perfect corbel that adds both beauty and functionality to your living space.
Preparing The Installation Area
Before you begin the installation process for your corbel, it is crucial to properly prepare the installation area. This step ensures a secure and long-lasting installation, as well as a flawless final appearance. In this section, we will guide you through the essential steps to prepare the installation area.
Measuring and marking the placement of the corbel
The first step in preparing the installation area is to measure and mark the precise placement of the corbel. You want to ensure that the corbel is aligned perfectly and provides the desired support. Here’s how you can do it:
- Start by measuring the height at which you want to mount the corbel. This measurement will determine the positioning of the corbel on the wall or surface.
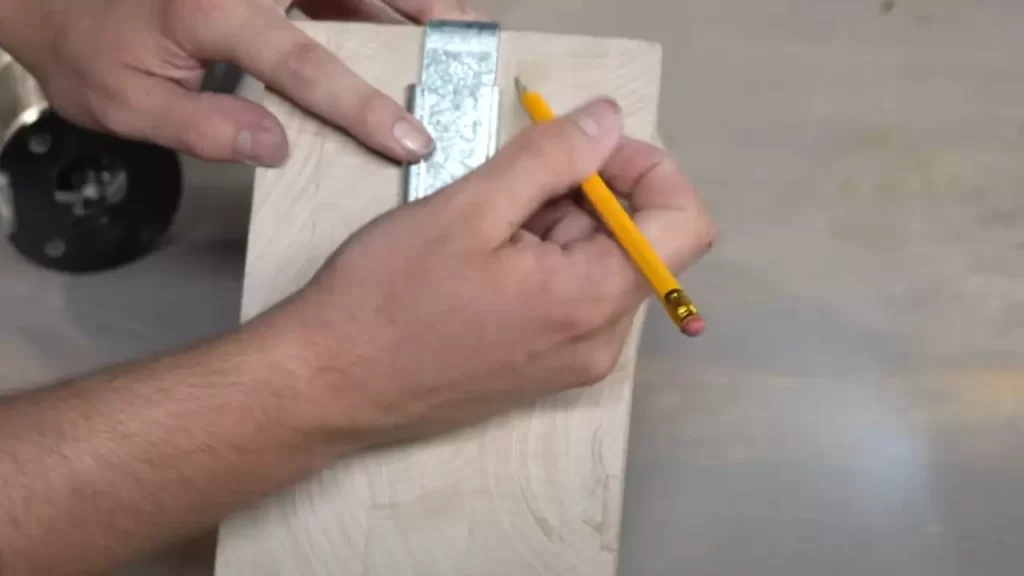
- Using a tape measure and a pencil, mark the desired height on the installation surface. Make sure to measure and mark the same height on both sides of the installation area if you are installing multiple corbels.
- Next, determine the lateral position of the corbel. Measure the distance from the corner or edge of the installation surface to ensure precise placement.
- Mark the lateral position on the surface using a pencil. Again, repeat this step for each corbel if installing multiple ones.
Following these measurements and markings will help you achieve accurate and symmetrical placement of the corbels, enhancing both the aesthetics and functionality of your installation.
Assessing the structural integrity of the installation surface
After measuring and marking the placement of the corbels, it is essential to assess the structural integrity of the installation surface. This step ensures that the surface can support the weight of the corbel and any additional load it may bear. Here’s what you need to do:
- Inspect the installation surface for any visible damage, cracks, or weaknesses. Any such issues may compromise the stability and durability of the corbel installation.
- If you encounter any concerns, it is advisable to consult with a professional, such as a contractor or engineer, to address and reinforce the structural integrity of the installation surface.
- Additionally, ensure that the surface is clean and free from dust, debris, and any previous adhesive or paint residue. A clean surface will allow for better adhesion and ensure a strong bond between the corbel and the installation surface.
By thoroughly assessing the structural integrity of the installation surface, you are proactively taking steps to avoid any potential issues or failures, and guaranteeing a secure installation.
Preparing the surface for installation
Now that you have measured, marked, and assessed the structural integrity of the installation surface, it is time to prepare the surface for the corbel installation. Proper surface preparation is key to ensure a smooth and successful installation. Follow these steps:
- Start by cleaning the installation surface using a mild detergent and water solution. By removing dirt and grease, you create an ideal surface for adhesion.
- If the surface has any imperfections or irregularities, fill them in with an appropriate wall filler or caulk. Smooth out any excess material and make sure the surface is level.
- Once the surface is clean and even, lightly sand it to create a slightly rough texture. This roughness helps the adhesive bond securely to the surface and prevents any potential slipping or detachment.
These preparation steps ensure that the installation surface is ready to receive the corbel and provides a solid foundation for a sturdy and long-lasting installation.
Installing The Corbel
Attaching the corbel to the wall or support structure
Once you have chosen the perfect corbel to enhance the beauty and functionality of your space, it’s time to install it securely. Attaching the corbel to the wall or support structure correctly is crucial to ensure its stability and longevity. Here are the steps to follow for a successful installation.
- Identify the ideal location for your corbel. Consider both the aesthetic appeal and the structural purpose that the corbel will serve. Mark the spot on the wall or support structure where the corbel will be attached.
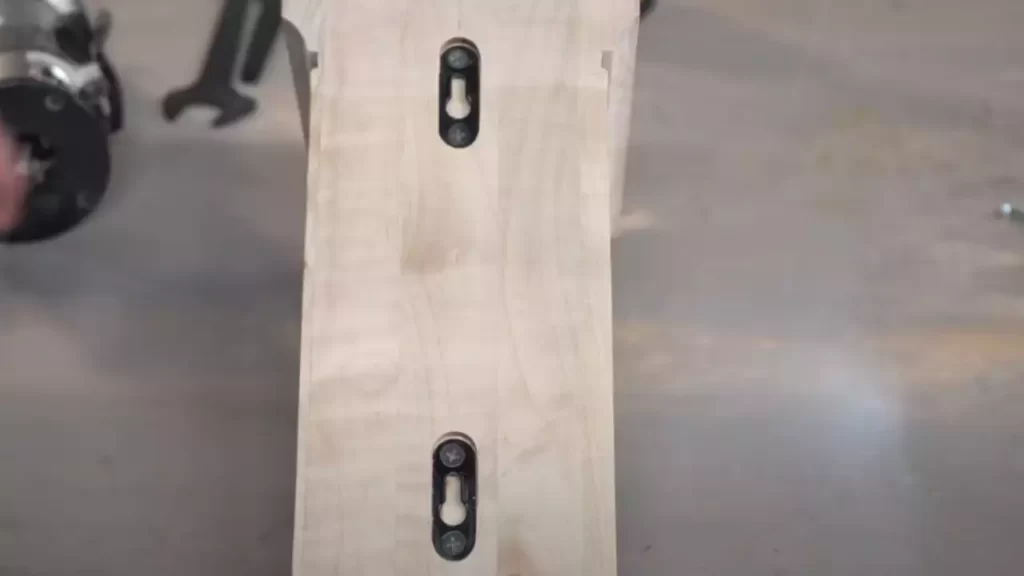
- With the help of a stud finder, locate the studs behind the wall or use appropriate anchors for non-load-bearing applications. This step is essential for providing a strong base for the corbel.
- Using a drill and the appropriate size drill bit, create pilot holes at the marked spots. Ensure that these holes are deep enough to accommodate the fasteners securely.
- Position the corbel against the wall, aligning it with the pilot holes you have created. Insert the fasteners (screws or bolts) through the corbel’s pre-drilled holes and into the pilot holes. Start by loosely securing the fasteners to allow for adjustments.
- Gradually and evenly tighten the fasteners using a screwdriver or hex key (depending on whether you are using screws or bolts). Avoid overtightening, as this can damage the corbel or strip the threads.
Using appropriate fasteners and anchors
The choice of fasteners and anchors plays a significant role in the overall strength and durability of your corbel installation. Using the right ones will ensure a secure attachment to the wall or support structure. Here’s what you need to know:
- For wood corbels: Opt for wood screws that are long enough to penetrate through the corbel and into the wall or support structure. Make sure the diameter of the screws is appropriate for the weight and size of the corbel.
- For heavier corbels or non-wood surfaces: Consider using toggle bolts, masonry screws, or wall anchors. These provide secure anchoring and are specifically designed for non-wood materials or heavier load-bearing applications.
- Consult a professional: If you are unsure about the appropriate fasteners and anchors for your specific corbel and installation needs, it’s always best to consult a professional to ensure the safety and stability of your project.
Aligning the corbel to ensure level installation
Proper alignment is crucial for a visually appealing corbel installation. Follow these steps to ensure the corbel is aligned correctly:
- Use a level to determine the horizontal and vertical position of the corbel. It’s essential to ensure that the corbel is perfectly level and plumb.
- Make adjustments as necessary by slightly loosening the fasteners. Gently tap or nudge the corbel to achieve the desired alignment.
- Recheck the alignment with the level and make any additional adjustments until the corbel is perfectly level and aligned.
Properly tightening and securing the corbel
To guarantee the strength and stability of your corbel installation, it’s essential to properly tighten and secure the fasteners. Follow these steps:
- Once you are satisfied with the alignment, proceed to tighten the fasteners gradually and evenly.
- Use an appropriate tool, such as a screwdriver or hex key, to ensure a tight, secure fit.
- Avoid overtightening, as this can potentially damage the corbel or the wall surface.
- Ensure that all fasteners are tightened and secure before considering the installation complete.
- Once the corbel is securely fastened, give it a gentle wiggle or pull to confirm its stability. If there is any movement, revisit the previous steps to make the necessary adjustments.
- By following these steps, your corbel will be securely installed, ready to add a touch of elegance and functionality to your space.
Finishing Touches
Installing a corbel is a fantastic way to add both elegance and structural support to your home decor. However, no installation is complete without the perfect finishing touches. In this section, we will discuss two crucial steps: sanding and smoothing the corbel surface, and priming and painting it to match the surrounding area. Additionally, we will cover applying a protective coating to ensure the longevity of your corbel. Let’s dive in!
Sanding and Smoothing the Corbel Surface
Before you begin painting, it’s essential to prepare the corbel’s surface by sanding and smoothing it. This step ensures proper adherence of the paint and creates a flawless finish. Here’s a step-by-step guide on how to accomplish this:
- Start by gently wiping off any dust or debris from the corbel’s surface using a clean cloth.
- Next, using a sandpaper block or sanding sponge, carefully sand the entire surface of the corbel in circular motions. This helps to smooth out any imperfections or rough spots.
- Once you have finished sanding, use a damp cloth to remove any sanding dust from the corbel.
- Finally, inspect the surface to ensure it is smooth and free from any visible flaws before proceeding to the next step.
Priming and Painting the Corbel to Match the Surrounding Area
The next step in the finishing process is to prime and paint the corbel, ensuring it blends seamlessly with its surroundings. Let’s go through the necessary steps:
- Begin by applying a coat of primer to the corbel. This will help the paint adhere better and ensure a uniform finish.
- Allow the primer to dry completely according to the manufacturer’s instructions. This typically takes around 24 hours.
- Once the primer is dry, it’s time to apply the paint. Choose a color that matches the surrounding area or opt for a contrasting hue for a unique touch.
- Use a high-quality brush or roller to evenly apply thin coats of paint to the corbel’s surface. Allow each coat to dry before applying the next, ensuring a smooth and professional finish.
- Once you have achieved the desired color and coverage, let the final coat of paint dry completely before moving on to the next step.
Applying a Protective Coating if Necessary
To enhance the longevity of your corbel and protect it from wear and tear, it may be necessary to apply a protective coating. This additional layer safeguards the paint and wood from damage caused by moisture, sunlight, or other environmental factors. Follow these simple steps to apply a protective coating:
- Select a suitable wood sealer or clear coat designed for exterior use.
- Using a high-quality brush or sprayer, apply a thin, even coat of the protective coating to the corbel’s surface.
- Allow the first coat to dry completely, and then repeat the process for an additional coat if recommended by the manufacturer.
- Ensure each coat is dry before considering the installation of your beautifully finished corbel.
By following these steps, you can achieve a stunning and long-lasting result when installing a corbel. With proper sanding, priming, painting, and protective coating, your corbel will seamlessly blend into its surroundings, enhancing the beauty of your home. Now it’s time to admire your craftsmanship and enjoy the finished look!
Maintenance And Care
Regular cleaning and upkeep of the corbel
Maintaining the cleanliness and overall condition of your corbels is essential to ensure their longevity and functionality. By regularly cleaning and performing upkeep on the corbel, you can prevent the buildup of dirt, grime, and other debris that may compromise their structural integrity. Here are some steps to follow:
- Start by removing any loose dirt or dust from the surface of the corbel using a soft cloth or a brush.
- Mix a mild detergent with water in a bucket or sink. Use a soft sponge or cloth dipped in the soapy water to gently scrub the corbel’s surface.
- Rinse the corbel thoroughly with clean water to remove any soap residue.
- Dry the corbel using a clean, dry cloth or allow it to air dry completely.
- Inspect the corbel for any stubborn stains or marks that may require additional cleaning. Use a mild stain remover or a mixture of baking soda and water to spot treat the affected areas.
- Once the corbel is clean, apply a protective sealer or finish to help maintain its appearance and protect it from moisture and other external factors. Follow the instructions provided by the manufacturer for the best results.
Inspecting for any signs of damage or wear
Regularly inspecting your corbels for any signs of damage or wear is crucial to address potential issues before they worsen. Here’s what you should look out for:
- Check for any cracks, chips, or splintering in the corbel’s surface. These can indicate structural damage or weakening.
- Examine the corbel for any signs of rot or decay, especially if it is made of wood. Pay close attention to areas exposed to moisture or extreme weather conditions.
- Inspect the corbel’s mounting brackets or supports for any signs of rust or corrosion. These can jeopardize the stability of the corbel and pose a safety risk.
- Ensure that any decorative or intricate details on the corbel, such as carved designs or moldings, are intact and undamaged.
Repairing or replacing the corbel if needed
If you notice any significant damage or wear during your inspection, it’s essential to take prompt action to repair or replace the corbel. Here’s what you can do:
- For minor cracks or chips, use wood filler or epoxy resin to repair the damaged areas. Follow the manufacturer’s instructions for the proper application and drying time.
- If the corbel is severely damaged or structurally unsound, it may be necessary to replace it entirely. Remove the old corbel carefully and select a new one that matches the style and dimensions of your existing installation.
- Ensure the new corbel is securely attached to the surface using appropriate mounting brackets or supports.
- If you are uncertain about the repair or replacement process, it’s advisable to consult a professional contractor or handyman to ensure the job is done correctly and safely.
By regularly cleaning, inspecting, and addressing any necessary repairs or replacements, you can ensure that your corbels remain in optimal condition and maintain their aesthetic appeal for years to come. Proactively caring for your corbels will not only enhance their longevity but also preserve the overall structural integrity of your installations.
Troubleshooting Common Issues
As you embark on the journey of installing a corbel, it’s essential to be prepared for any issues that might arise along the way. Troubleshooting common issues related to loose corbels, cracks or damage to the corbel surface, and stability or structural concerns will help ensure a successful installation. In this section, we will discuss practical solutions for each of these problems. Let’s dive in!
Dealing with Loose Corbels
A loose corbel can be a frustrating problem, but fear not! There are simple steps you can take to address this issue. Follow these tips to properly secure your corbel:
- First, check if the corbel is properly aligned with the mounting surface. Ensure that the corbel sits flush against the wall or supporting structure.
- Tighten the screws or bolts that hold the corbel in place. If the corbel seems loose, gently tighten the fasteners using a screwdriver or wrench. Be careful not to overtighten, as this may cause damage to the corbel or mounting surface.
- If the corbel continues to feel unstable, consider using adhesive to provide additional support. Apply a high-quality construction adhesive, such as epoxy or polyurethane, to the back of the corbel and press it firmly against the mounting surface. Allow the adhesive to cure according to the manufacturer’s instructions.
By following these steps, you can ensure that your corbel stays securely in place, adding both beauty and functionality to your space.
Fixing Cracks or Damage to the Corbel Surface
Cracks or damage to the corbel surface can detract from its overall appearance. However, with a few simple techniques, you can effectively repair and restore your corbel’s surface:
- Start by cleaning the damaged area with a mild detergent and warm water. Remove any dirt, debris, or loose particles to ensure a clean surface for repair.
- If the surface has minor cracks or small chips, apply a wood filler that matches the corbel’s material. Use a putty knife to spread the filler evenly over the damaged area and smooth it out. Allow the filler to dry completely.
- For more significant damage, consider using a two-part epoxy or wood glue specifically designed for repairs. Mix the epoxy according to the manufacturer’s instructions and apply it to the damaged area. Use clamps or tape to hold the pieces together until the epoxy cures.
- Once the repair has dried or cured, sand the surface gently to ensure a smooth finish. Start with a coarse-grit sandpaper and gradually work your way to finer grits for a polished look.
- Finally, apply a wood stain or paint that matches the corbel’s color to blend the repaired area seamlessly with the rest of the surface. Allow the stain or paint to dry thoroughly.
By following these steps, you can effectively repair cracks or damage to your corbel, restoring it to its original beauty.
Addressing Stability or Structural Concerns
Ensuring the stability and structural integrity of your corbel is crucial to the safety and longevity of its installation. Follow these steps to assess and address any stability or structural concerns:
- Start by examining the mounting surface. Ensure that it is sturdy and capable of bearing the weight of the corbel.
- If the mounting surface is inadequate, consider reinforcing it by adding a wooden block or bracket behind the corbel. This additional support will distribute the weight more evenly and provide greater stability.
- If the corbel is part of a larger shelving system or decorative structure, ensure that all the components are securely connected. Tighten any screws, bolts, or connectors, and make sure there are no loose or damaged parts.
- Perform regular maintenance checks to identify any signs of wear or deterioration. Promptly address any issues to prevent further damage or instability.
By following these steps, you can address stability or structural concerns, ensuring that your corbel installation remains strong and reliable for years to come.
Remember, troubleshooting common issues is an integral part of the installation process. By being prepared and equipped with these practical solutions, you can overcome any challenges and enjoy the beauty and functionality that corbels bring to your space.
Frequently Asked Questions
How Do You Attach Corbels To The Wall?
To attach corbels to the wall, follow these steps: 1. Determine the placement of the corbels on the wall. 2. Mark the locations and pre-drill holes into the wall. 3. Apply construction adhesive to the back of the corbel. 4.
Align the corbel with the holes and press firmly onto the wall. 5. Insert screws through the pre-drilled holes and tighten them to secure the corbel in place.
How Do You Install Exterior Corbels?
To install exterior corbels, follow these steps: 1. Prepare the surface by removing any debris or old brackets. 2. Determine the placement of the corbels and mark the spots. 3. Apply an adhesive recommended for the material of the corbels. 4.
Position the corbels on the marked spots and press firmly. 5. Allow the adhesive to dry completely before applying any load to the corbels.
Where Should Corbels Be Placed?
Corbels should be placed under countertops, shelves, or mantels for added support and decorative purposes. They should be positioned at the corners or midpoint of the structure, ensuring proper weight distribution.
What Is The Rule Of Thumb For Corbels?
Corbels should be chosen based on their size and weight-bearing capacity. A general rule of thumb is to have a corbel that is one-half to two-thirds the depth of the overhang it supports. It should also be made of a material that can adequately support the weight.
Conclusion
To sum it up, installing a corbel can add both functionality and aesthetics to your space. With the easy-to-follow steps outlined in this guide, you’ll be able to successfully install a corbel without any hassle. Remember to choose the right materials, measure accurately, and use proper tools for a seamless installation.
By following these guidelines, you’ll be able to enhance the beauty and support of your shelves, countertops, or any other structural element with a corbel. Happy DIY-ing!