To install a coolant temperature sensor, start by locating the sensor on the engine block. Then, disconnect the electrical connector and remove the sensor using a suitable wrench.
Importance Of Coolant Temperature Sensors
Coolant temperature sensors play a crucial role in maintaining the optimal performance of your vehicle’s engine. They are responsible for monitoring the temperature of the coolant, which is essential for the overall health and efficiency of the engine. In this section, we will explore the importance of coolant temperature sensors in three key areas: ensuring optimal engine performance, preventing engine overheating and damage, and monitoring coolant temperature for efficient fuel consumption.
Ensuring Optimal Engine Performance
One of the primary functions of a coolant temperature sensor is to ensure that the engine is running at its optimal temperature. The sensor continuously measures the temperature of the coolant and relays this information to the engine control unit (ECU). The ECU then adjusts various engine parameters, such as air/fuel mixture and ignition timing, based on the coolant temperature data.
By maintaining the engine within the ideal temperature range, the coolant temperature sensor helps to optimize fuel combustion, reduce emissions, and improve overall engine performance. When the engine operates at an excessive temperature, it can lead to decreased power output and increased wear and tear on engine components.
Preventing Engine Overheating and Damage
Engine overheating is a serious issue that can cause extensive damage to the engine if not addressed promptly. Cooling system failures, coolant leaks, or other issues can result in the engine temperature rising above safe limits. This is where the coolant temperature sensor comes into play.
The sensor constantly monitors the coolant temperature, and if it detects an abnormal increase, it alerts the driver or triggers a warning light on the dashboard. This early warning system allows you to take immediate action, such as pulling over and shutting off the engine, to prevent further overheating and potential engine damage.
Monitoring Coolant Temperature for Efficient Fuel Consumption
Optimal fuel consumption is a priority for any vehicle owner, and coolant temperature plays a significant role in achieving this goal. The coolant temperature sensor helps the ECU determine the appropriate fuel-to-air ratio for combustion.
When the engine is cold, more fuel is required to achieve efficient combustion. As the engine warms up, less fuel is needed. The coolant temperature sensor ensures that the engine receives the right amount of fuel for the current temperature, allowing for efficient fuel consumption and reducing unnecessary fuel consumption during warm-up.
In conclusion, the importance of coolant temperature sensors cannot be overstated. By ensuring optimal engine performance, preventing engine overheating and damage, and monitoring coolant temperature for efficient fuel consumption, these sensors play a crucial role in keeping your vehicle running smoothly. Regular maintenance, including sensor checks and replacement, will help safeguard your engine and enhance its longevity.

Benefits Of Installing A Coolant Temperature Sensor
Improved engine efficiency and performance
Installing a coolant temperature sensor in your vehicle can significantly enhance its engine efficiency and performance. This sensor constantly monitors the temperature of the engine coolant and provides vital data to the vehicle’s engine control unit (ECU). With this information, the ECU can adjust various engine parameters to optimize the combustion process and ensure the engine operates at its peak performance.
By accurately measuring the coolant temperature, the sensor enables the ECU to make precise adjustments to the air-fuel mixture, ignition timing, and other critical engine functions. This ensures that the engine is always operating within the ideal temperature range, resulting in improved combustion efficiency and power output. As a result, you can experience smoother acceleration, better throttle response, and overall improved engine performance.
Enhanced fuel economy
A coolant temperature sensor plays a crucial role in improving fuel economy. When the engine is too cold, it operates less efficiently, causing increased fuel consumption. On the other hand, when the engine is too hot, it may lead to excessive fuel vaporization or even engine damage. The coolant temperature sensor helps maintain the engine at an optimal temperature, striking the perfect balance to achieve improved fuel economy.
By continuously monitoring the coolant temperature and relaying this information to the ECU, the sensor allows the engine to stay in its optimal temperature range. This allows the fuel system to deliver the right amount of fuel for combustion, resulting in better fuel mileage. Additionally, by preventing the engine from overheating, the coolant temperature sensor helps avoid potential damage that could lead to costly repairs, further contributing to long-term fuel efficiency.
Increased engine lifespan
Installing a coolant temperature sensor can significantly extend the lifespan of your engine. A well-maintained and properly functioning cooling system is essential for preventing engine overheating, which can cause severe damage to various engine components.
By accurately monitoring the coolant temperature, the sensor ensures that the cooling system operates efficiently, providing sufficient cooling to the engine. This helps prevent overheating and associated issues such as warped cylinder heads, blown gaskets, and damaged pistons.
In addition, the sensor plays a crucial role in detecting any coolant leaks or other cooling system malfunctions. This early detection allows for timely repairs, reducing the risk of extensive engine damage. By ensuring the engine operates within its recommended temperature range, a coolant temperature sensor helps prolong the lifespan of your engine, saving you from expensive repairs or even engine replacement.

Tools And Materials Needed For Installation
When it comes to installing a coolant temperature sensor in your vehicle, there are a few key tools and materials you will need to have on hand. These tools will ensure that the installation process goes smoothly and that your sensor is properly installed for accurate readings.
Coolant temperature sensor
The first item you will need is the coolant temperature sensor itself. This sensor is responsible for measuring the temperature of the coolant in your vehicle’s engine. It is an essential component of the engine management system and helps regulate fuel delivery and ignition timing based on the coolant temperature.
Socket wrench set
To remove and install the coolant temperature sensor, you will need a socket wrench set. This set usually includes a variety of socket sizes to fit different bolt heads. The correct size socket will depend on the specific sensor and engine model, so it’s important to have a set with a range of sizes on hand to ensure a proper fit.
Coolant drain pan
Before removing the coolant temperature sensor, it’s essential to drain the coolant from the engine to prevent any spills or leaks. To catch the coolant, you will need a coolant drain pan. This pan is designed to hold the coolant safely and can be easily emptied into a proper container for disposal or reuse.
Pliers
In addition to the socket wrench set, you may also need a pair of pliers. Pliers can be useful for removing electrical connectors or hoses that may be in the way of accessing the coolant temperature sensor. Having a sturdy pair of pliers on hand will help make the installation process easier.
Safety gloves
Lastly, it’s important to ensure your safety during the installation process. Wearing safety gloves will protect your hands from any sharp edges or hot surfaces. It’s essential to prioritize safety and always wear gloves when working with your vehicle’s engine.
In conclusion, when installing a coolant temperature sensor, it’s crucial to have the right tools and materials on hand. The coolant temperature sensor, socket wrench set, coolant drain pan, pliers, and safety gloves are all essential for a successful installation. By gathering these items beforehand, you can ensure a smooth and efficient installation process.
Choosing The Right Coolant Temperature Sensor
When it comes to installing a coolant temperature sensor, choosing the right one is essential for optimal performance and accuracy. Your vehicle’s cooling system relies on this sensor to monitor and regulate the engine’s temperature, so it’s crucial to select a sensor that is compatible, reliable, and suits your specific needs. In this section, we will discuss the key factors to consider when choosing a coolant temperature sensor: compatibility with your vehicle’s make and model, the difference between OEM and aftermarket options, and the specifications and features to look for in a sensor.
Compatibility with Vehicle Make and Model
The first step in choosing the right coolant temperature sensor is to ensure compatibility with your vehicle’s make and model. Different vehicles require different sensors due to variations in their engine designs and electrical systems. Before making a purchase, refer to your vehicle’s owner’s manual or consult a trusted mechanic for information on the specific sensor that is compatible with your vehicle. Installing an incompatible sensor can result in inaccurate readings and potential damage to your vehicle’s engine.
OEM vs Aftermarket Options
When shopping for a coolant temperature sensor, you will come across two types of options: OEM (Original Equipment Manufacturer) and aftermarket sensors. OEM sensors are manufactured by the same company that produced the sensor originally installed in your vehicle. They are typically more expensive but offer the advantage of being an exact replacement for your existing sensor, ensuring compatibility and reliability. Aftermarket sensors, on the other hand, are produced by third-party manufacturers. They may offer a more affordable alternative, but it’s crucial to ensure they meet the necessary quality standards and are compatible with your vehicle’s requirements.
Sensor Specifications and Features
When comparing coolant temperature sensors, it’s important to consider their specifications and features. Here are some key factors to look for:
- Temperature Range: Ensure that the sensor can accurately measure the temperature range required for your vehicle.
- Resistance Values: Check the appropriate resistance values for your vehicle’s specific temperature-to-resistance conversion.
- Material and Durability: Look for sensors made of high-quality materials that can withstand the demanding conditions of the engine compartment.
- Connector Type: Ensure the sensor has the correct connector type to fit your vehicle’s wiring harness.
- Sealing and Water Resistance: Choose a sensor that is sealed and water-resistant to prevent damage from coolant leaks or exposure to moisture.
By considering these sensor specifications and features, you can select a coolant temperature sensor that is not only compatible with your vehicle but also meets the necessary performance and durability requirements.
In conclusion, choosing the right coolant temperature sensor is crucial for the efficient and reliable operation of your vehicle’s cooling system. Ensure compatibility with your vehicle’s make and model, consider the options of OEM versus aftermarket sensors, and pay attention to the sensor’s specifications and features. Taking these factors into account will help you make an informed decision and install a coolant temperature sensor that will accurately monitor your engine’s temperature and contribute to the longevity and performance of your vehicle.
Gathering The Necessary Tools
When it comes to installing a coolant temperature sensor, gathering the necessary tools is crucial for a smooth and efficient process. In this section, we will discuss the essential tools you will need to have on hand before beginning the installation. Ensuring you have the correct socket wrench size, acquiring a coolant drain pan to catch any spilled coolant, and keeping pliers handy for removing electrical connectors are key steps to prepare yourself for a successful coolant temperature sensor installation.
Ensuring you have the correct socket wrench size
One of the first things you will need to do is to ensure that you have the correct socket wrench size. The coolant temperature sensor is typically attached with a bolt or nut, and having the right socket wrench will make it much easier to remove and install the sensor. Before starting the installation, check the specifications of your vehicle to determine the appropriate socket wrench size needed. This will save you time and help prevent any frustration during the process.
Acquiring a coolant drain pan to catch any spilled coolant
Another crucial tool to have on hand is a coolant drain pan. As you remove the old coolant temperature sensor, there may be residual coolant that can spill out. Having a drain pan positioned underneath the sensor will help catch any spilled coolant and prevent it from contaminating your workspace or causing a mess. Make sure the drain pan is large enough to hold an adequate amount of coolant to avoid any overflow or splashing.
Keeping pliers handy for removing electrical connectors
When removing the electrical connectors from the old coolant temperature sensor, pliers can be a handy tool. Electrical connectors can sometimes be tight or difficult to remove by hand, and pliers provide the extra leverage needed to disconnect them without causing damage. Keep a pair of pliers nearby to facilitate the smooth removal of the connectors and make the overall installation process more efficient.
Step-By-Step Guide To Installing A Coolant Temperature Sensor
Installing a coolant temperature sensor is an essential step in maintaining your vehicle’s engine performance. The coolant temperature sensor monitors the temperature of the engine coolant, allowing the engine control unit (ECU) to adjust various parameters for optimal operation. If you’re looking to install a new coolant temperature sensor, follow this step-by-step guide to ensure a smooth and successful installation.
Step 1: Preparing the Vehicle
- Park the vehicle on a level surface to ensure stability during the installation process.
- Allow the engine to cool down completely before starting the installation process to avoid the risk of burns.
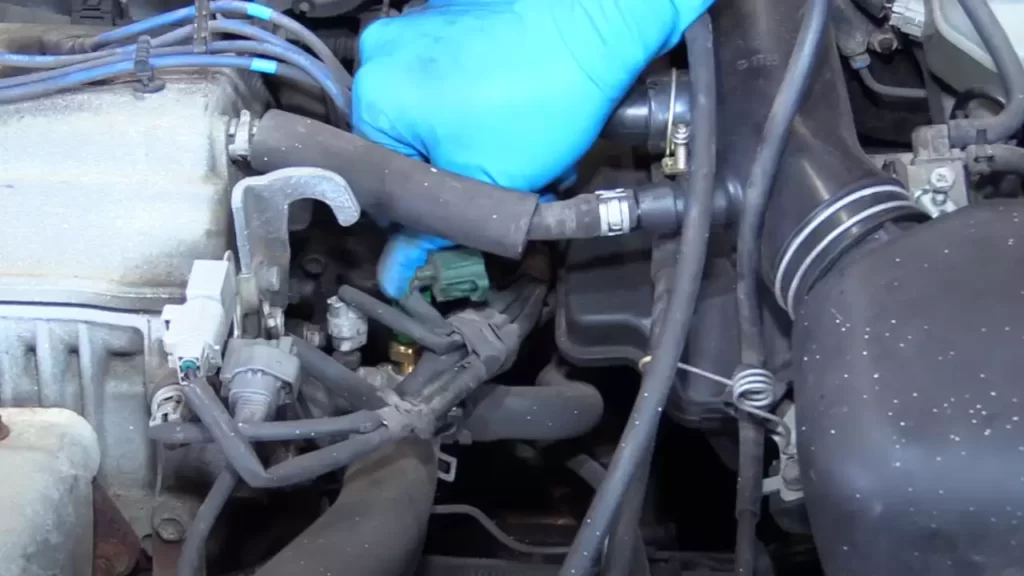
Step 2: Locating the Coolant Temperature Sensor
Consult the vehicle’s repair manual or explore online resources to find the specific location of the coolant temperature sensor in your vehicle. However, common locations include the cylinder head or intake manifold.
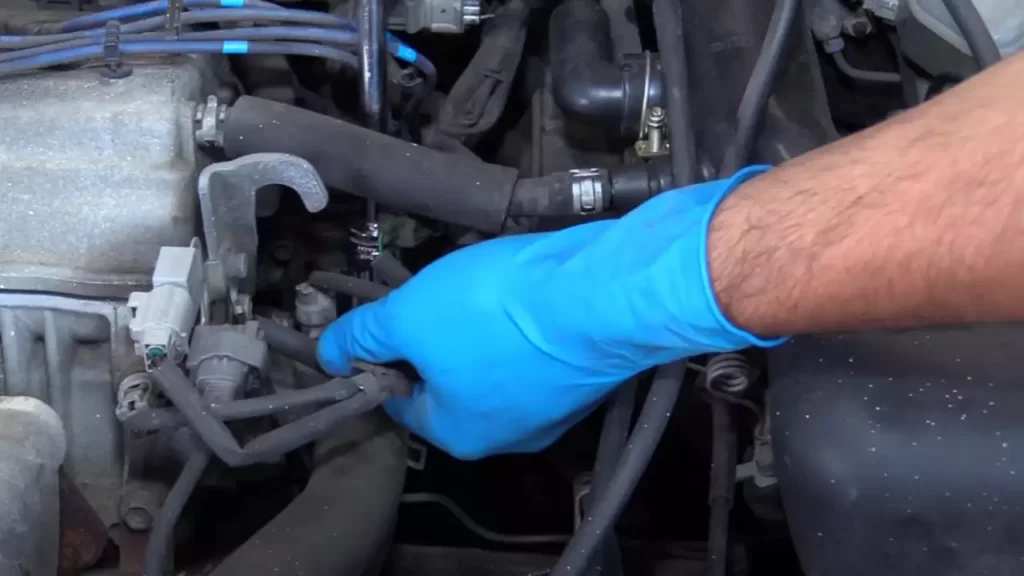
Step 3: Removing the Old Sensor
- Disconnect the electrical connector by carefully using pliers to avoid damaging the wires.
- Use a socket wrench to loosen and remove the old sensor. Pay attention to the sensor’s position and note any gaskets or washers that need to be transferred to the new sensor.
Step 4: Installing the New Sensor
- Apply a thin layer of thread sealant to the sensor threads to prevent coolant leaks.
- Screw the new sensor into place using a socket wrench, ensuring it is securely tightened.
Step 5: Reconnecting the Electrical Connector
- Align the electrical connector with the sensor and push it until it clicks into place, ensuring a secure and stable connection.
Step 6: Refilling the Coolant
- Open the coolant reservoir cap carefully, releasing any built-up pressure.
- Slowly pour the appropriate coolant into the reservoir, ensuring it reaches the recommended level indicated on the reservoir.
By following these step-by-step instructions, you’ll be able to install a new coolant temperature sensor in your vehicle effectively. Remember, it’s crucial to refer to your vehicle’s specific repair manual or seek advice from reputable online resources for any additional details or considerations.
Testing And Verifying The Sensor Installation
After successfully installing a new coolant temperature sensor, it is crucial to test and verify its proper functionality. This step is essential to ensure that your engine’s temperature is accurately monitored, preventing issues such as overheating or engine damage. In this section, we will discuss the necessary steps to test and verify the sensor installation.
Starting the engine and allowing it to warm up
Once the coolant temperature sensor is installed, start the engine and let it idle for a few minutes. This allows the sensor to detect the engine’s starting temperature and begin transmitting accurate temperature readings. During this time, pay close attention to any irregularities or warning signs.
Checking for any warning lights or error codes
While the engine is warming up, carefully observe the dashboard for any warning lights or error codes related to the coolant system. These indicators might suggest a faulty sensor installation or other issues that need immediate attention. If you notice any abnormal warning lights or error codes, consult your vehicle’s user manual or seek professional assistance.
Verifying that the coolant temperature gauge is functioning correctly
An important aspect of testing the coolant temperature sensor installation is verifying the proper functionality of the coolant temperature gauge. This gauge provides a visual representation of your engine’s temperature and ensures that it remains within safe operating limits. To verify its accuracy, follow these steps:
- Observe the coolant temperature gauge and compare it to the temperature readings provided by the vehicle’s onboard diagnostics system.
- If the readings on the gauge align with those from the diagnostics system, it indicates that the sensor installation was successful.
- On the other hand, if there is a significant discrepancy between the coolant temperature gauge and the diagnostics system, it may indicate an issue with the sensor installation or a faulty gauge.
- In such cases, it is advisable to consult a professional mechanic to diagnose and rectify the problem.
By carefully following these steps and ensuring the proper functionality of the coolant temperature sensor and gauge, you can have confidence that your engine’s temperature is accurately monitored. This helps to prevent potential issues, allowing your vehicle to operate smoothly and efficiently for years to come.
Maintenance Tips For Coolant Temperature Sensors
The proper functioning of a coolant temperature sensor is essential for the smooth operation of your vehicle’s engine. Regular maintenance and inspection of the sensor can help prevent potential issues and ensure optimal performance. In this section, we will discuss some crucial maintenance tips for coolant temperature sensors that every vehicle owner should be aware of.
Regularly checking and cleaning the sensor connections
To ensure accurate readings, it is important to regularly inspect and clean the connections of the coolant temperature sensor. Over time, these connections can become dirty or corroded, leading to faulty readings or even sensor failure. Follow these steps to clean the sensor connections:
- Start by locating the coolant temperature sensor, which is typically located near the engine’s thermostat housing or in the intake manifold.
- Disconnect the electrical connector from the sensor by carefully removing the locking tab and gently pulling it apart.
- Inspect the connector and sensor for any visible signs of dirt, corrosion, or damage.
- If you notice any debris or corrosion, use a soft brush or compressed air to clean the connector and sensor. Be careful not to damage the delicate sensor component.
- Reconnect the electrical connector, ensuring it is securely fastened.
By regularly checking and cleaning the sensor connections, you can maintain reliable and accurate readings from your coolant temperature sensor.
Inspecting for any signs of wear or damage
Another important maintenance tip is to inspect the coolant temperature sensor for any signs of wear or damage. Over time, the sensor may become worn or develop cracks, which can negatively impact its performance. Here are the steps to follow when inspecting the sensor:
- Visually inspect the sensor for any visible signs of wear, such as cracks, leaks, or physical damage.
- If you notice any issues, it is recommended to replace the sensor with a new one. Consult your vehicle’s service manual or a professional mechanic for guidance.
- Ensure that the new sensor matches the specifications of your vehicle’s make and model.
By regularly inspecting the coolant temperature sensor for wear or damage, you can address potential problems before they escalate and ensure optimal engine performance.
Following the vehicle’s maintenance schedule for coolant system maintenance
Lastly, it is crucial to follow your vehicle’s maintenance schedule for coolant system maintenance. This includes regularly changing the coolant, flushing the system, and replacing any worn or damaged components. By adhering to the manufacturer’s recommended maintenance intervals, you can extend the lifespan of your coolant temperature sensor and prevent costly repairs down the line.
In conclusion, maintaining your vehicle’s coolant temperature sensor is essential for the proper functioning of your engine. By regularly checking and cleaning the sensor connections, inspecting for wear or damage, and following the vehicle’s maintenance schedule, you can ensure reliable and accurate readings from your sensor, prolong its lifespan, and prevent potential issues. Remember that it is always recommended to consult your vehicle’s service manual or seek professional assistance if you are unsure about any maintenance procedures.
Frequently Asked Questions
Where Do You Put The Coolant Temp Sensor?
The coolant temp sensor is typically located near the engine’s thermostat housing or on the cylinder head. It measures the temperature of the coolant and relays the information to the engine control unit.
Is Coolant Temperature Sensor Easy To Replace?
Yes, replacing a coolant temperature sensor is typically easy. It requires simple tools and can be done by following basic instructions.
How Do I Replace My Coolant Temp Sensor?
To replace your coolant temp sensor, follow these steps: 1. First, locate the sensor on your vehicle’s engine. 2. Use a wrench or socket to disconnect the electrical connector from the sensor. 3. Carefully remove the old sensor from its housing.
4. Install the new sensor and make sure it is securely tightened. 5. Finally, reconnect the electrical connector and test the sensor to ensure proper functioning.
How Do You Install A Temperature Sensor?
To install a temperature sensor, follow these steps: Locate a suitable spot for installation. Ensure the sensor is compatible with your device. Connect the sensor to the designated port using the provided instructions. Calibrate the sensor if necessary. Test the sensor’s functionality by checking the temperature readings.
Conclusion
To sum up, installing a coolant temperature sensor is a crucial task for maintaining the performance and longevity of your vehicle’s cooling system. With the right tools and steps outlined in this guide, you can complete the installation process efficiently and effectively.
Remember to follow safety precautions and consult a professional if needed. By properly installing a coolant temperature sensor, you can ensure the optimal functioning of your vehicle’s engine and prevent any potential issues. Take care of your vehicle, and it will take care of you.