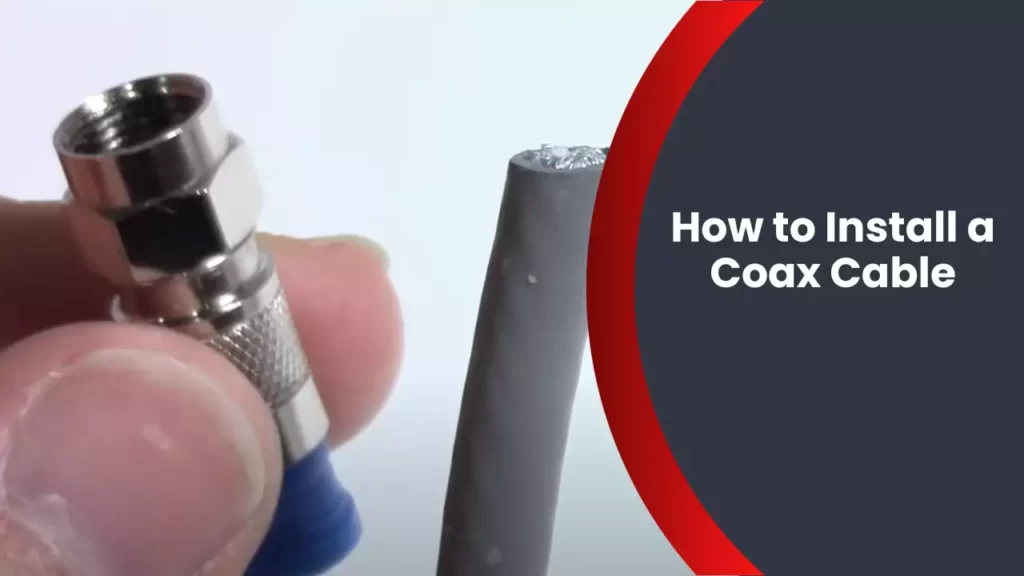
To install a coax cable, first, find a suitable location for the cable connection and ensure the power source is turned off. Next, attach one end of the coax cable to the device requiring the connection, such as a TV or modem, and the other end to the corresponding coaxial port on the wall or outlet.
Tools And Materials Needed
Before you can start installing a coax cable, it is important to have the necessary tools and materials ready. Having these items on hand will ensure a smooth installation process. Here is a list of the essential tools and materials:
Coax Cable
The coax cable is the main component of your installation. It is a thick, insulated cable that carries both the video and audio signals. You will need to choose a coax cable with the appropriate length and thickness depending on your needs.
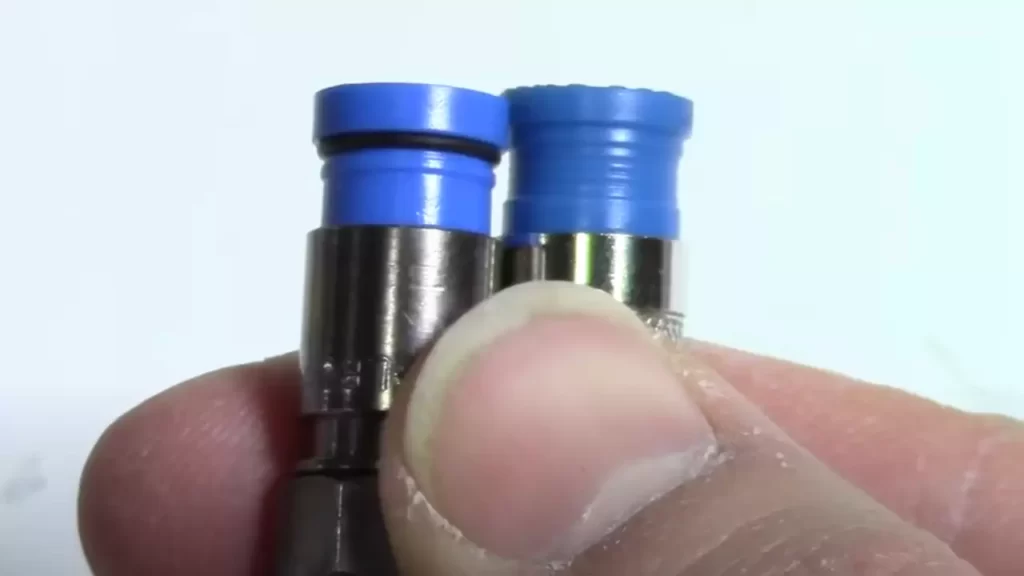
Coaxial Connectors
Coaxial connectors are used to connect the coax cable to other devices, such as TVs or routers. These connectors ensure a secure and reliable connection. There are various types of coaxial connectors, including F connectors and BNC connectors, so make sure to choose the right one for your specific needs.
Coax Stripper
A coax stripper is a tool used to remove the outer insulation from the coax cable. This allows you to expose the inner conductor and the shield, which are necessary for a proper connection. The coax stripper ensures clean and precise cuts without damaging the cable.
Coax Compression Tool
A coax compression tool is used to securely attach the coaxial connectors to the cable. This tool applies pressure to compress the connector around the cable, creating a tight and reliable connection. Using a compression tool ensures a professional-grade installation.
Cable Cutter
A cable cutter is a necessary tool for trimming the coax cable to the desired length. It is crucial to have a clean and precise cut to ensure optimal signal quality. A cable cutter with sharp blades will make the cutting process quick and easy.
Screwdriver
A screwdriver is needed to tighten any screws or fasteners involved in the installation. It is a versatile tool that may be required for attaching coaxial wall plates or connectors. Make sure to have both Phillips and flathead screwdrivers on hand to accommodate different types of screws.
Coaxial Wall Plate
A coaxial wall plate is used to provide a clean and professional-looking installation. It allows you to connect your coax cable to the wall for a more organized setup. The wall plate typically has a female coaxial connector that can easily be connected to your devices.
Coaxial Crimp Connectors
Coaxial crimp connectors are an alternative to compression connectors. They are used in a similar manner, but instead of compression, crimp connectors rely on a crimping tool to secure the connection. Make sure to choose a crimp connector that matches the type of coaxial cable you are using.
Coaxial Cable Tester
A coaxial cable tester is a handy tool for verifying the quality and continuity of your coaxial cable installation. It helps identify any potential issues, such as signal loss or faulty connections. Using a cable tester ensures a reliable connection and optimal performance for your devices.
With these tools and materials at your disposal, you are well-equipped to install a coax cable. Make sure to follow the appropriate installation steps for your specific setup, and enjoy an enhanced audio and video experience.
Preparing For Installation
Before you begin installing a coax cable, it’s important to properly prepare for the task. This involves selecting the right coax cable for your specific application, measuring the required length, and identifying the best path for the cable installation. Taking these steps will help ensure a smooth and successful installation process.
Choosing the right coax cable for your application
When it comes to coaxial cables, not all are created equal. To ensure optimal performance and compatibility, it’s essential to choose the right coax cable for your application. Here are a few factors to consider:
- Frequency range: Different coax cables have varying frequency ranges. Make sure to select a cable that supports the frequency range required for your specific use, whether it’s for television, internet, or another application.
- Impedance: Coax cables typically come in two different impedance options: 50-ohm and 75-ohm. Ensure that the cable you choose matches the impedance required by your devices or network.
- Shielding: Look for coax cables with proper shielding, such as braided or foil shielding, to minimize signal interference and ensure reliable transmission.
Measuring the required length of the coax cable
Before purchasing the coax cable, it’s crucial to accurately measure the required length. This will help you avoid purchasing an excessive amount of cable or ending up with a shortage. To measure the length needed:
- Identify the start and end points: Determine where you plan to connect the coax cable. Identify the starting point, such as the antenna or cable outlet, and the end point, such as the television or modem.
- Measure the distance: Using a measuring tape or ruler, measure the distance between the start and end points. Remember to account for any corners or obstacles that may affect the cable’s path.
- Add extra length: It’s always a good idea to add a few extra feet to the measured length to provide flexibility and account for any changes in the cable’s routing or future adjustments.
Identifying the best path for the cable installation
Once you have the right coax cable and know the required length, the next step is to identify the best path for the cable installation. Here are a few tips to help you:
- Survey the area: Take a close look at the area where the cable will be installed. Identify any existing cables, electrical lines, or other potential obstacles that could interfere with the installation process.
- Choose the shortest and most direct path: Whenever possible, opt for the shortest and most direct path between the start and end points. This will help minimize signal loss and make the installation process easier.
- Consider hiding the cable: If aesthetics are a concern, explore options for hiding the cable, such as running it along baseboards, behind furniture, or inside wall conduits.
By following these guidelines for preparing for the installation of a coax cable, you’ll be well equipped to handle the next steps of the process with confidence. Remember to always refer to the manufacturer’s instructions for specific installation procedures and consult a professional if you’re unsure or encounter any difficulties.
Installing Coaxial Wall Plate
When it comes to installing a coaxial cable, one crucial step is to install a coaxial wall plate. This wall plate acts as the connection point between the coax cable and your television or other devices. In this guide, we will walk you through the process of installing a coaxial wall plate and ensure a secure and proper connection.
Choosing the appropriate location for the wall plate
Before you start the installation process, you need to select the perfect location for your coaxial wall plate. Here are a few factors to consider when determining the location:
- The distance from the cable source: Ensure that the wall plate is placed within a reasonable distance from where your coaxial cable is routed, to avoid any signal loss or interference.
- Accessibility: Look for a location that is easily accessible and does not require any complicated cable routing.
- Avoid obstructions: Make sure there are no obstructions such as electrical outlets, light switches, or other objects that could interfere with the installation.
Drilling necessary holes for the wall plate installation
Once you have determined the ideal location, the next step is to drill the necessary holes for the wall plate installation. Follow these steps:
- Select the appropriate drill bit: Use a drill bit that matches the size of the wall plate. Typically, a 1/2-inch or 3/4-inch drill bit should work.
- Mark the hole locations: Hold the wall plate against the wall and mark the center of the screw holes with a pencil.
- Drill the holes: Carefully drill the marked holes using a power drill. Make sure to maintain a steady hand and apply gentle pressure to avoid any damage to the wall or cable.
Mounting the wall plate securely on the wall
Now that the holes are drilled, it’s time to mount the wall plate securely on the wall. Follow these steps to ensure a sturdy installation:
- Prepare the wall plate: Attach any necessary connectors or plates to the coaxial wall plate before mounting it on the wall.
- Align the holes: Line up the holes on the wall plate with the drilled holes on the wall.
- Secure the screws: Use screws provided with the wall plate or suitable screws to fasten the plate securely to the wall. Tighten the screws firmly, but be careful not to overtighten and damage the plate or wall.
- Check the stability: After mounting the wall plate, give it a gentle tug to ensure it is securely attached to the wall. If there is any wobbling or movement, recheck the screws and tighten them if necessary.
By following these steps, you can successfully install a coaxial wall plate for your coax cable. Remember to test your connection once the wall plate is installed to ensure a strong and clear signal.
Stripping And Preparing Coaxial Cable
When it comes to installing a coax cable, one of the most important steps is to properly strip and prepare the cable. This ensures that you have a clean and secure connection, which is essential for reliable signal transmission. In this article, we will guide you through the process of stripping and preparing coaxial cable, step by step.
Marking the length of the cable to be stripped
Before you start stripping the cable, it’s important to determine the length of the outer jacket that needs to be removed. This will depend on the specific requirements of your setup. To mark the length, use a marker or a piece of tape to indicate the desired stripping point. Make sure to measure carefully and double-check the measurement to ensure accuracy.
Stripping the outer jacket of the coaxial cable
Once you have marked the length to be stripped, it’s time to remove the outer jacket of the coaxial cable. To do this, you will need a coaxial cable stripper, which is a specialized tool designed for this purpose. Place the cable into the stripper, aligning it with the marked stripping point. Squeeze the stripper, and rotate it gently around the cable. The stripper will remove the outer jacket, exposing the underlying layers of the cable.
Trimming the dielectric and exposing the inner conductor
With the outer jacket removed, you can now focus on trimming the dielectric and exposing the inner conductor of the coaxial cable. Ensure that you only trim a small portion of the dielectric, as you want to maintain its proper length for optimal signal transmission. Use a coaxial cable stripper with a trimming blade to carefully trim the dielectric layer. Be cautious not to cut into the inner conductor, as this can compromise the cable’s performance.
Once the dielectric is trimmed, you will see the inner conductor exposed. It should be clean and free from any damage. If needed, use a wire cutter to trim any excess length of the inner conductor, ensuring that it is flush with the trimmed dielectric. This will help maintain a secure connection when connecting the cable to other devices or connectors.
In conclusion, stripping and preparing coaxial cable is a crucial step in the installation process. By following the steps outlined above, you can ensure a clean and secure connection, resulting in reliable signal transmission. Taking the time to properly strip and prepare the cable will ultimately contribute to a successful installation.

Attaching Coaxial Connectors
Properly attaching coaxial connectors is a crucial step when it comes to installing a coax cable. The quality of the connection directly affects the signal strength and can impact your viewing experience. In this section, we will discuss the steps to selecting the correct type of coaxial connector, preparing it for installation, and attaching it to the cable.
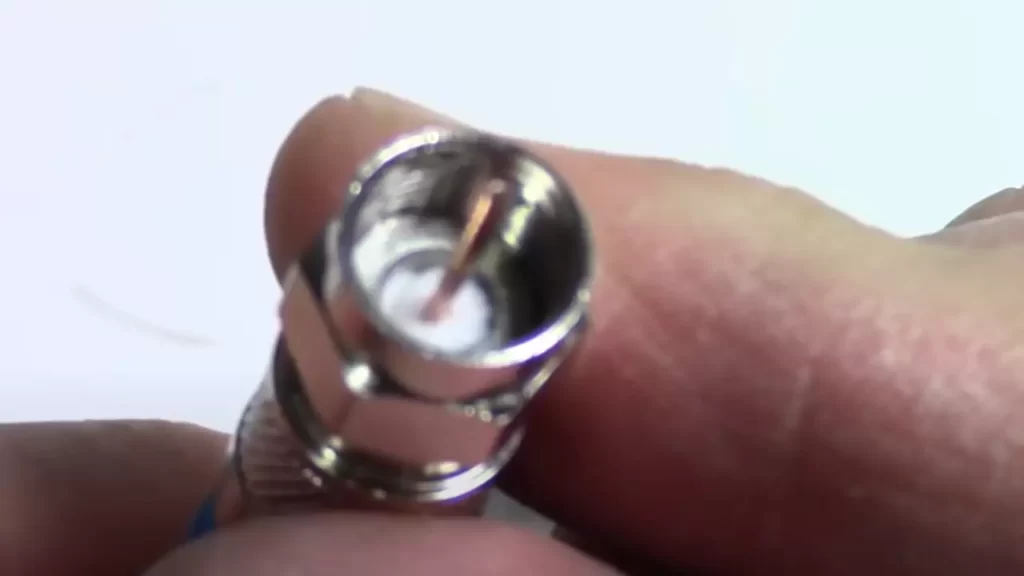
Selecting the correct type of coaxial connector
It is important to choose the right type of coaxial connector for your cable. There are several varieties available, including F-type, BNC, and RCA connectors. F-type connectors are the most commonly used for residential applications. Consider the type of equipment you will be connecting, such as TVs or modems, to determine the appropriate connector.
Preparing the coaxial connector for installation
Before attaching the coaxial connector, proper preparation is essential. Start by stripping the outer jacket of the cable using a coaxial cable stripper. Carefully follow the manufacturer’s instructions or use a wire stripper with the correct blade size. Once the outer jacket is removed, assess the shielding and insulation. Make sure the shielding is intact and free from any cuts or damage.
Next, expose the inner conductor by stripping the insulation around it. This can be done using a coaxial cable stripper or a sharp utility knife. Be cautious to remove just enough insulation, exposing the conductor without damaging it.
Properly attaching the coaxial connector to the cable
Now that the connector and cable are prepared, it’s time to attach them together. Follow these steps for a secure and reliable connection:
- Slide the crimp sleeve onto the cable, making sure it rests against the exposed shielding.
- Insert the center conductor into the pin or center hole of the connector.
- While holding the connector and cable firmly in place, slide the crimp sleeve over the connector body until it reaches the base of the connector.
- Using a crimping tool, apply even pressure around the crimp sleeve to secure it to the connector. This will create a tight, durable connection.
After crimping, give the connector a gentle tug to ensure it is securely attached to the cable. If it feels loose or easily comes off, repeat the process to ensure a proper connection.
Attaching coaxial connectors may seem like a simple task, but attention to detail is essential for optimal performance. By selecting the correct connector, preparing it properly, and attaching it securely to the cable, you can ensure a strong and reliable signal for your coax cable installation.
Installing Coaxial Cable
Running the coaxial cable along the chosen path
When it comes to installing coaxial cable, properly running the cable along the chosen path is crucial for optimal performance and signal quality. Follow these steps to ensure a seamless installation:
- Identify the desired path: Before running the cable, determine the path it needs to follow. Consider factors such as the proximity to power lines, interference from other electronic devices, and the shortest distance to the destination.
- Clear the path: Make sure the path is clear of obstacles such as furniture, wall hangings, or other objects that may impede the cable’s installation. This will help avoid any unnecessary strain or damage to the cable.
- Measure and cut the cable: Take precise measurements of the cable needed to cover the distance along the chosen path. Use a sharp pair of cable cutters to make clean cuts, ensuring that the ends are smooth and free from any frayed wires.
- Secure the cable using cable clips or staples: Use cable clips or staples to fasten the coaxial cable to walls, baseboards, or other surfaces along the path. These clips or staples will provide support and prevent the cable from sagging or getting in the way.
- Avoid tight bends and kinks: It’s crucial to avoid sharp bends or kinks in the cable, as these can cause signal loss and degrade the overall performance of your coaxial system. Instead, gently curve the cable when changes in direction are necessary.
- Use fish tape if needed: If you need to navigate the cable through tight spaces or behind walls, using a fish tape can be helpful. Attach the coaxial cable to the end of the fish tape and carefully pull it through the desired path.
Securing the cable using cable clips or staples
Once you have determined the path for your coaxial cable, securing it using cable clips or staples is an essential step to ensure stability and longevity. Follow these guidelines to securely fasten the coaxial cable along the chosen path:
- Use cable clips or staples designed for coaxial cables: Make sure to choose clips or staples specifically made for coaxial cables. These clips or staples will have the necessary size and shape to fit the cable securely.
- Place the clips or staples at regular intervals: Space the clips or staples at regular intervals along the cable’s path to provide adequate support. The typical recommendation is placing them every two to three feet.
- Secure the cable firmly without causing damage: Carefully fasten the clips or staples to the surface, ensuring that they grip the cable tightly without causing any damage or compression. The cable should be held securely without being overly squeezed.
Avoiding sharp bends and kinks in the cable
Sharp bends and kinks in the coaxial cable can lead to signal loss and degrade the overall performance of your cable installation. Keep the following tips in mind to avoid unnecessary strain and ensure optimal cable functionality:
- Gradual curves instead of sharp bends: Instead of sharply bending the coaxial cable, opt for gradual curves whenever changes in direction are required. Allow the cable to follow a smooth path to minimize signal loss.
- Ensure proper cable length: Before running the coaxial cable, ensure that you have enough cable length to comfortably reach the desired destination without the need for tight turns.
- Avoid twisting or coiling excess cable: If you have excess cable, avoid twisting or coiling it tightly, as this can introduce interference and signal degradation. Instead, consider neatly organizing the excess cable in loose loops.
By adhering to these guidelines, you can confidently install coaxial cable while minimizing the risk of signal loss and ensuring optimal performance for your audiovisual systems.
Testing The Coaxial Cable
Using a Coaxial Cable Tester to Check for Signal Continuity
One essential step in installing a coaxial cable is testing it for signal continuity. This ensures that the cable is correctly connected and will deliver a strong and uninterrupted signal. To perform this test, you will need a coaxial cable tester. These handy devices are designed specifically for checking the quality and performance of coaxial cables. Here’s how to use a coaxial cable tester:
- Start by disconnecting any devices or equipment that are connected to the coaxial cable.
- Connect one end of the tester to the coaxial cable’s output connector, often referred to as the “source” or “transmitter.”
- Ensure the other end of the cable is disconnected and not touching any other objects.
- Activate the coaxial cable tester and wait for the results.
- If the tester indicates that the cable has a signal continuity, it means the cable is correctly installed and ready for use. However, if the tester shows no signal or a weak signal, it indicates a problem with the cable.
Checking for Any Signal Loss or Interference
In addition to testing for signal continuity, it is crucial to check for any signal loss or interference. This step ensures that the quality of the signal transmitted through the coaxial cable remains uncompromised. Here’s how to check for signal loss or interference:
- Connect one end of the coaxial cable to the source or transmitter.
- Attach the other end of the cable to a device or equipment that receives the signal, such as a TV or modem.
- Ensure both ends of the cable are securely connected.
- Observe the signal strength on the receiving device.
- If the signal strength is consistently strong and clear, it indicates that the coaxial cable is transmitting the signal effectively. However, if you notice any signal loss, pixelation, or interference, it may signify a problem with the cable or its connections.
Troubleshooting and Fixing Any Connectivity Issues
If you encounter any connectivity issues during the testing process or while using the coaxial cable, troubleshooting is necessary to identify and resolve the problem. Here are some common troubleshooting steps:
- Inspect the coaxial cable for any physical damage, such as cuts or frayed ends. If you find any, replace the cable.
- Check the connectors on both ends of the cable. Ensure they are clean, securely attached, and not damaged.
- Make sure the cable is properly connected to the source and receiving device.
- Consider using a cable signal booster or an amplifier if the signal strength is consistently weak.
- If troubleshooting steps do not resolve the issue, it may be necessary to seek professional help or consult the manufacturer’s guidelines.
By following these steps to test your coaxial cable, you can ensure a reliable and high-quality signal for your television, internet, or other devices. Remember, regular maintenance and periodic checks can go a long way in ensuring optimal performance and minimizing connectivity issues.
Tips For A Successful Installation
When it comes to installing a coax cable, following a few tips can help ensure a successful installation. Double-checking the cable connections for a secure fit, using cable management techniques to keep cables organized, and labeling the coaxial cables for easy identification in the future are all essential steps to consider. By paying attention to these details, you can achieve a smooth and efficient installation process. In this article, we will explore each of these tips in more detail to help you complete your coax cable installation with ease.
Double-checking the cable connections for a secure fit
Before proceeding with the installation, it is crucial to double-check the cable connections to ensure they are securely fitted. Loose connections can lead to signal loss or interference, resulting in poor performance. To avoid such issues, follow these steps:
- Inspect the cable connectors to ensure they are clean and undamaged.
- Make sure the connectors are properly threaded and tightened.
- Use a cable tester to verify the continuity and signal strength.
By carefully checking and securing the cable connections, you can minimize the risk of any future problems and optimize the performance of your coaxial cable.
Using cable management techniques to keep cables organized
Keeping your cables organized is not only visually appealing but also helps in easy troubleshooting and maintenance. Here are a few cable management techniques to consider during your coax cable installation:
- Use cable clips or adhesive cable mounts to secure the coaxial cables along walls or baseboards.
- Utilize cable ties or Velcro straps to bind multiple cables together, preventing tangles or clutter.
- Arrange the cables neatly and avoid sharp bends or kinks that could potentially damage the signal flow.
By implementing these cable management techniques, you can create a clean and efficient setup, making it easier to work with your coaxial cables in the long run.
Labeling the coaxial cables for easy identification in the future
Labeling your coaxial cables is a small yet significant step that can save you a lot of time and effort in the future. When you need to troubleshoot or make changes to your setup, having clearly labeled cables will help you identify and differentiate them easily. Here’s how you can label your coaxial cables:
- Use adhesive labels or cable tags to mark each cable with relevant information like the destination, device, or function it is connected to.
- Place the labels near the connectors for quick and convenient identification.
- Consider using different colors or patterns for each cable to enhance clarity and visual distinction.
By labeling your coaxial cables properly, you can eliminate guesswork, streamline your troubleshooting process, and save valuable time.
Overall, paying attention to the cable connections, implementing cable management techniques, and labeling your coaxial cables are crucial steps for a successful installation. Taking the time to complete these tasks diligently will result in a well-organized and efficient coax cable setup that delivers optimal performance.
Frequently Asked Questions
Can You Install A Coax Cable Yourself?
Yes, you can install a coax cable yourself. It is a straightforward process and doesn’t require much technical expertise. Just connect the cable to the appropriate ports on your devices and run it along the desired route. However, if you’re unsure, it’s best to consult a professional for assistance.
Is Coaxial Cable Difficult To Install?
Coaxial cable installation is not difficult. It can be completed easily, even by beginners. Just follow the proper steps and guidelines, and you’ll have it up and running in no time.
How Do I Connect My Coaxial Cable To My Tv?
To connect your coaxial cable to your TV, start by locating the coaxial input port on the back of your TV. Screw the coaxial cable into this port until it is securely connected. Ensure that the cable is tightly fastened to prevent any signal loss.
Once connected, you can access your cable or satellite channels on your TV.
Does Coaxial Cable Need To Be In A Box?
Coaxial cable does not need to be in a box. It can be installed without a box, but it is recommended to use a box for protection and to maintain a neat appearance. The box provides a secure enclosure for the cable and helps prevent damage and interference.
Conclusion
Installing a coax cable may seem daunting, but with the right steps, it can be a manageable task. By following our guide, you can easily connect your devices and enjoy high-quality signal transmission. Remember, accuracy and attention to detail are crucial to ensure a successful installation.
So, go ahead, put your skills to the test and get ready to enjoy seamless television and internet connections!