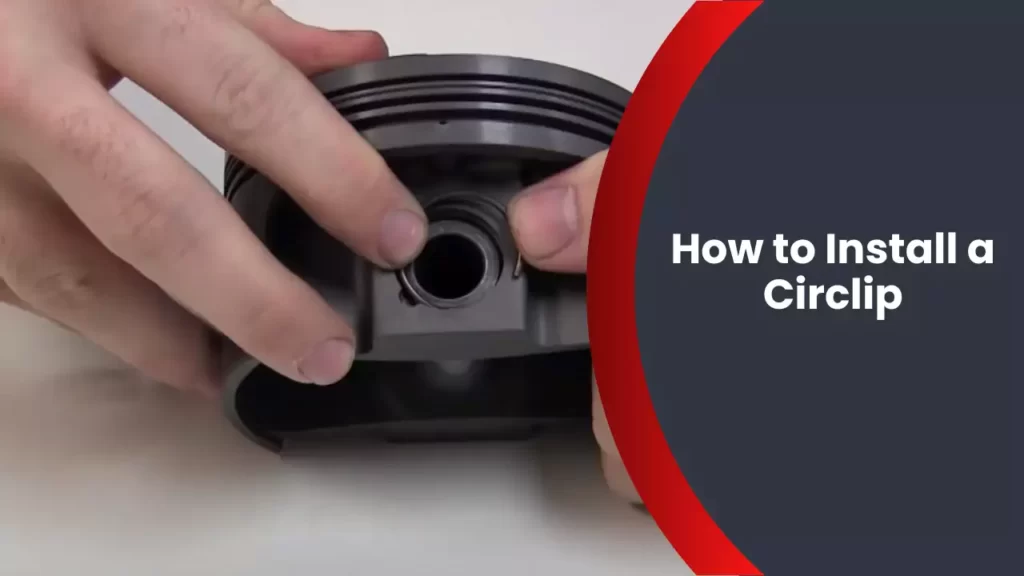
To install a circlip, start by compressing the circlip and aligning it with the groove. Then release the circlip to secure it in place.
Understanding Circlips
A circlip, also known as a snap ring or C-clip, is a small, circular metal fastener. It is designed to be inserted into a groove on a shaft or inside a bore to hold components in place.
What are circlips and their purpose?
Circlips are widely used in various industries and applications due to their versatile nature. They serve the important purpose of retaining components on a shaft or within a bore, preventing them from moving or sliding out of position. The circular shape of the circlip exerts a radial force against the groove, creating a secure hold.
With their simple design and effective functionality, circlips offer several advantages:
- Space-saving: Circlips are compact and require minimal space, which makes them ideal for applications where clearance is limited.
- Cost-effective: Compared to other types of fasteners, circlips are relatively inexpensive, making them an affordable option for various projects.
- Easy installation and removal: Installing and removing circlips is straightforward, requiring basic tools such as circlip pliers. This ease of use ensures efficient assembly and disassembly processes.
Different types and sizes of circlips
Circlips come in different types and sizes to cater to the varying requirements of different applications. The two main types of circlips are:
- External circlip: Also known as an E-clip, the external circlip fits into a groove on the outside of a shaft or component. It provides outward radial force to secure the component in place.
- Internal circlip: The internal circlip, also called an I-clip, is inserted into a groove inside a bore or housing. It exerts inward radial force to prevent the component from moving out of position.
Additionally, circlips are available in various sizes, ranging from small to large diameters. The selection of an appropriate circlip size depends on factors such as the shaft or bore dimensions and the desired retention force.
Here are some common sizes of circlips:
| Diameter (mm) | Size Designation |
|---|---|
| 5-10 | 3 |
| 11-16 | 4 |
| 17-24 | 5 |
It is essential to select the appropriate circlip size and type to ensure secure and reliable retention of components in an assembly or application.
In conclusion, understanding circlips is crucial when it comes to proper installation and selection of the right type and size. The versatility, cost-effectiveness, and ease of use make circlips a popular choice in various industries. Whether it is an external or internal circlip, these small yet powerful fasteners play a significant role in keeping components in place, providing stability and reliability to countless applications.
Tools And Materials You’Ll Need
When it comes to installing a circlip, having the right tools and materials is essential for a seamless and successful installation. Below is a list of tools and materials you’ll need for installing a circlip.
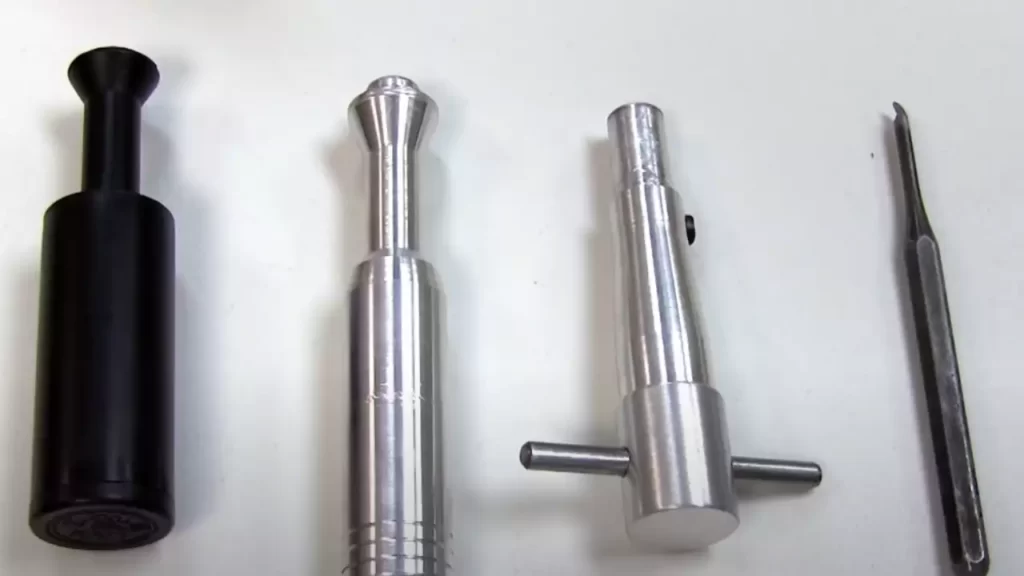
List of tools required for circlip installation
| Tool | Description |
|---|---|
| Circlip Pliers | Circlip pliers are specifically designed for installing and removing circlips. They come in various sizes and types, such as external and internal circlip pliers, to accommodate different circlip sizes. |
| Flathead Screwdriver | A flathead screwdriver can be useful for prying open or closing circlips. Make sure to choose a screwdriver with a sturdy and durable tip. |
| Needle-Nose Pliers | Needle-nose pliers can be handy for holding or maneuvering circlips during installation. Their long, slim jaws allow for precise control. |
| Retaining Ring Tool | A retaining ring tool facilitates the installation of internal circlips. It helps in expanding the circlip for easy insertion into the groove. |
| Work Gloves | Wearing work gloves can provide protection for your hands and improve grip while handling the tools or circlips. |
Recommended materials for circlip installation
- Circlips: Make sure you have the appropriate circlip for your specific application. Consider the size, type (external or internal), and material (such as carbon steel, stainless steel, or brass) of the circlip.
- Lubricant: Applying a small amount of lubricant to the circlip can ease the installation process and prevent damage.
- Clean Cloth: Keeping a clean cloth handy can help wipe off any debris, grease, or excess lubricant, ensuring a secure fit for the circlip.
- Magnifying Glass or Light: Using a magnifying glass or a light source can aid in examining and identifying the correct position and alignment of the circlip.
- Protective Eyewear: It is always recommended to wear protective eyewear to safeguard your eyes from any potential flying debris during the installation process.
By having these essential tools and materials at your disposal, you’ll be well-prepared to install a circlip effectively and efficiently.
Step 1: Preparing For Installation
When it comes to installing a circlip, it is crucial to start with the proper preparations. This will not only ensure a smooth installation process but also enhance the overall longevity and functionality of the circlip. In this step, we will discuss the safety precautions to follow and the importance of cleaning the area before installation. Let’s dive in!
Safety Precautions to Follow
Safety should always be a top priority when working with any mechanical components. Before you start the installation process, it is essential to adhere to these safety precautions:
- Ensure you are wearing proper protective gear, such as safety glasses and gloves, to protect yourself from any potential injuries.
- Verify that the work area is well-lit and free from any clutter or obstacles that could cause accidents.
- Use only the appropriate tools for the installation to prevent any damage to the circlip or surrounding components.
- If you are working on a larger project or in a professional setting, it is advisable to have a buddy system in place. Having a second set of eyes and hands can help mitigate potential risks.
Cleaning the Area Before Installation
Prior to installing a circlip, it is crucial to ensure the area where the circlip will be placed is thoroughly cleaned. This step may seem simple, but it plays a significant role in the effectiveness of the installation and the durability of the circlip.
To clean the area, follow these steps:
- Gently remove any dirt, rust, or debris from the surface where the circlip will be installed. You can use a clean, lint-free cloth or a soft-bristle brush for this purpose.
- If there are any stubborn particles or contaminants, you can use a solvent specifically designed for cleaning purposes. Apply a small amount of the solvent to a cloth and gently scrub the area, ensuring thorough removal.
- Once the area is clean, carefully inspect it for any signs of damage or wear. If you notice any defects, it is recommended to address them before proceeding with the installation.
- Dry the area completely using a separate, clean cloth or allow it to air dry. Make sure there is no moisture remaining, as this can lead to corrosion or poor adhesion.
By following these steps for cleaning the area, you are creating an optimal environment for the circlip to function effectively. It ensures that there are no impediments or contaminants that could hinder its performance or compromise its integrity.
Now that we have covered the safety precautions to follow and the importance of cleaning the installation area, we are ready to move on to the next step: selecting the right circlip for your application. Stay tuned!
Step 2: Choosing The Right Circlip
Measuring the Shaft and Bore Diameter
Before choosing the right circlip, it’s crucial to measure the shaft and bore diameter accurately. This step ensures that the circlip fits securely in place, preventing any potential issues down the line. To measure the shaft and bore diameter effectively, follow these straightforward steps:
- Start by measuring the shaft diameter using a caliper or any precise measuring tool. Place the caliper around the shaft’s widest point to obtain an accurate measurement. Make sure to take note of this measurement.
- Next, measure the bore diameter, which refers to the internal diameter of the cavity where the circlip will be installed. Again, use a caliper or a similar measuring tool and record the measurement.
By measuring the shaft and bore diameter correctly, you’ll have the necessary information to choose the appropriate circlip size for your application.
Ensuring the Appropriate Circlip Size
Now that you have the measurements, it’s time to find the circlip size that suits your requirements. It’s essential to select the correct circlip size to ensure a proper fit and reliable performance. Follow these steps to ensure you choose the appropriate circlip size:
- Refer to a circlip size chart specific to the style or design you are working with. These charts typically provide a range of sizes based on shaft and bore diameter measurements.
- Identify the circlip size that matches your measured shaft and bore diameter. The chart will list various circlip sizes with corresponding measurements for easy reference.
- Once you have identified the appropriate circlip size, ensure that it is readily available for purchase. Check with suppliers or manufacturers to confirm its availability.
Choosing the right circlip size is vital to ensure a secure and reliable installation. It prevents the circlip from dislodging during operation or causing any damage to the overall system.

Step 3: Installing An External Circlip
Now that you have successfully inserted the circlip into the groove, it’s time to move on to the next crucial step – installing the external circlip. This step requires proper positioning and alignment to ensure a secure and effective installation. Follow the instructions below to complete the process smoothly.
Inserting the circlip into the groove
The first thing you need to do is insert the external circlip into the groove, which you have carefully measured and selected based on the specifications. Keep in mind that the circlip should fit snugly into the groove without any gaps or excessive play. Ensure that the ends of the circlip overlap perfectly to prevent any potential for the component to slip out during operation.
To aid in the insertion process, you may find it helpful to use a circlip plier. These specialized tools are designed to hold the circlip securely and provide the necessary leverage for smooth insertion. Gently squeeze the pliers, align the circlip with the groove, and gradually release the pressure to allow the circlip to expand and settle into place.
Proper positioning and alignment of the circlip
Once the circlip is seated within the groove, the next crucial step is to ensure proper positioning and alignment. This is essential in guaranteeing the circlip’s effectiveness in securing the component it holds. To achieve this, pay close attention to the following details:
- Check that both ends of the circlip align parallel to the groove’s edges. Any deviations from a straight line could compromise its structural integrity.
- Verify that the circlip sits flush within the groove, with no part protruding. This will prevent interference with adjacent components and ensure a smooth operation.
- Double-check that the circlip is evenly positioned around the circumference of the groove. It should not be skewed or favoring one side, as this could lead to uneven distribution of forces and potential failure.
By adhering to these positioning and alignment guidelines, you can rest assured that your external circlip is properly installed and ready to fulfill its intended purpose.
In conclusion, installing an external circlip involves inserting it into the groove and ensuring correct positioning and alignment. Following these steps diligently will help you achieve a secure and effective installation that contributes to the longevity and functionality of your assembly.
Step 4: Installing An Internal Circlip
Placing the circlip into the groove
Before you start installing the internal circlip, it’s important to ensure that you have correctly identified the groove where it needs to be placed. The groove is typically located on the inside of the bore or shaft, and it is essential to align the circlip correctly for proper installation. Make sure the groove is free from any dirt, debris, or rust that could prevent the circlip from fitting smoothly.
Here are the steps to place the circlip into the groove:
- Position the circlip: Hold the internal circlip with your thumb and index finger, positioning it at an angle so that it aligns with the groove. Ensure that the circlip is facing in the correct direction, with the open end facing outward.
- Begin insertion: Start inserting the circlip into the groove by placing one of the open ends into the groove. Use your fingers or a circlip plier to control the circlip’s position, ensuring it remains aligned with the groove.
- Gently apply pressure: Slowly push the circlip into the groove, applying gentle and even pressure to ensure it slides smoothly along the groove. Be careful not to apply excessive force that could damage the circlip or the groove.
- Complete insertion: Continue sliding the circlip around the entire circumference of the groove until it is fully inserted. Double-check that the circlip is securely seated in the groove and does not protrude or hang out.
Proper technique for expanding and fitting
Now that you have successfully placed the internal circlip into the groove, it’s time to expand and fit it securely. The expansion and fitting process is crucial to ensure that the circlip remains in place and performs its intended function effectively. Follow these steps to properly expand and fit the internal circlip:
- Identify expansion points: Take a moment to locate the expansion points on the circlip. These points are usually at the opposite ends, where the circlip can be expanded or contracted.
- Expand the circlip: Carefully insert the tip of a circlip plier into one of the expansion points. Gradually and evenly apply pressure to expand the circlip, making it slightly larger in diameter.
- Fit the circlip: With the circlip expanded, guide it into the bore or shaft. Use your fingers or appropriate tools to ensure that the circlip fits snugly and securely into position.
- Check the fit: Once the circlip is fitted, inspect the area to ensure that it is properly seated and provides the desired retention. Gently test the circlip to verify that it stays in place and offers the necessary resistance against movement.
Following these steps will enable you to properly install an internal circlip, ensuring secure retention and reliable functionality. Remember, always refer to the manufacturer’s instructions for specific installation guidelines and precautions applicable to your particular circlip and application.
Step 5: Securing The Circlip
Before ensuring the circlip is properly secured, it is essential to check for proper seating and retention. This step ensures that the circlip is placed securely within the groove it is intended for, preventing any unwanted movement or dislodging. Additionally, testing the circlip for proper function is crucial to guarantee its effectiveness in holding components together. Let’s dive deeper into each aspect:
Checking for proper seating and retention
1. Visually inspect the circlip: Take a close look at the circlip to ensure it is seated correctly within the groove. It should be positioned flat against the shoulder of the housing or shaft, with all ends securely inserted into their respective grooves.
2. Perform a manual check: Gently try to move the circlip with your fingers. It should not budge or come loose. If there is any play or movement, it indicates improper seating. In such cases, remove the circlip and reinsert it, ensuring a snug fit.
3. Audible confirmation: While holding the circlip in place, tap it lightly with a small hammer or a nylon mallet. A distinct ringing sound indicates that the circlip has been properly seated and is securely retained within the groove.
Testing the circlip for proper function
1. Verify ease of rotation: For circlips that are meant to allow rotational movement, ensure that the assembled components can rotate freely. There should be no resistance caused by the circlip’s positioning.
2. Check axial retention: For circlips designed to prevent axial movement, apply a gentle pulling force on the components in the direction of their intended movement. The circlip should hold the components firmly in place without slipping or allowing any axial movement that is not desired.
3. Ensure overall stability: Confirm that the installed circlip maintains the necessary stability and holds the components securely together. This can be done by applying slight pressure or tension to the assembled parts to assess the circlip’s ability to resist unwanted separation.
4. Functionality across the intended range: If the application allows for variable conditions, ensure that the circlip meets the necessary retention requirements throughout the desired range of operation. This may involve testing the circlip’s function under different loads, speeds, or temperatures as applicable.
Once you have performed these checks, you can be confident that the circlip has been properly installed and secured, ready to fulfill its purpose effectively.
Troubleshooting Common Issues
Circlip Misalignment and How to Fix It
If you’ve ever installed a circlip, you might be familiar with the frustrating issue of misalignment. This occurs when the circlip isn’t properly seated in its groove, leading to potential reliability and safety problems. However, fear not! Here are a few simple steps you can follow to fix this misalignment issue and ensure a successful installation:
- Inspect the circlip groove: Start by examining the groove where the circlip sits. Look for any obstructions, debris, or damage that could prevent the circlip from aligning properly. Clean the groove with a lint-free cloth or brush if necessary.
- Position the circlip correctly: Place the circlip on the inner shaft or pin and use circlip pliers to compress it, enabling easy insertion into the groove. Make sure the circlip is positioned evenly and fully seated within the groove.
- Rotate the circlip: If you encounter resistance while inserting the circlip, try rotating it slightly within the groove. This rotation can help align the circlip’s ends with the groove, facilitating a smoother installation.
- Verify proper alignment: Once the circlip is installed, double-check that it sits evenly within the groove. Gently rotate the shaft or pin to ensure the circlip stays in place without wobbling or shifting. If you notice any misalignment, carefully remove the circlip and repeat the installation steps.
Circlip Installation Mistakes to Avoid
While knowing how to troubleshoot misalignment is crucial, it’s equally important to prevent installation mistakes in the first place. By avoiding these common errors, you can save time, effort, and potential headaches:
- Using incorrect tools: Always use circlip pliers designed for the specific size and type of circlip you are installing. Using improper tools can lead to poor alignment and damage to the circlip or the component being secured.
- Forceful installation: Avoid applying excessive force when inserting the circlip. If it doesn’t fit easily, don’t push harder. Forceful installation can cause misalignment, distortion, or even breakage of the circlip or the component.
- Inadequate groove preparation: Neglecting to clean and inspect the circlip groove before installation can result in misalignment. Take the time to ensure the groove is free from debris, corrosion, or any irregularities that could hinder proper circlip seating.
- Skipping circlip orientation: Some circlips have specific orientation requirements, indicated by markings or grooves. Failing to align the circlip correctly as per the manufacturer’s instructions can lead to misalignment and compromised functionality.
By being aware of these common circlip installation mistakes and following the correct procedure outlined in this guide, you can minimize misalignment issues and ensure a successful installation every time. Remember, attention to detail and proper tools are key to avoiding troubleshooting mishaps and achieving secure and reliable circlip installations.
Tips And Best Practices
When it comes to installing a circlip, following the right tips and best practices can make all the difference. From lubrication techniques to maintaining circlip integrity, these practices will ensure a smoother installation process and enhance the longevity of your circlip. Let’s delve into each of these areas in detail:
Lubrication techniques for smoother installation
Lubrication plays a crucial role in ensuring a smooth installation of the circlip. By reducing friction, it not only makes the installation process easier but also prevents damage to the circlip or the shaft. Here are some effective lubrication techniques:
- Choose the right lubricant: Select a lubricant that is compatible with your circlip material and suitable for the application. Different lubricants work best for specific situations, so make sure to consult the manufacturer’s recommendations.
- Apply the lubricant: Before installation, apply a thin layer of lubricant on both the inner and outer surfaces of the circlip. This will ensure even distribution and provide lubrication throughout the installation process.
- Avoid excessive lubrication: While lubrication is essential, it’s important to avoid excessive application. Too much lubricant can attract dirt and debris, which can hinder the circlip’s performance. Apply a sufficient amount for smooth installation without overdoing it.
Maintaining circlip integrity for longevity
Proper maintenance of the circlip is essential to ensure its longevity and reliable performance. Here are some best practices to keep in mind:
- Inspect the circlip: Before installation, carefully inspect the circlip for any signs of damage or wear. Look for bends, cracks, or deformation that could affect its functionality. If you notice any issues, replace the circlip to avoid potential failures.
- Choose the correct circlip size: Using the correct size of circlip is crucial for its effectiveness. Make sure to measure the shaft diameter accurately and select the appropriate circlip size accordingly. Using an undersized or oversized circlip can lead to instability and compromised performance.
- Ensure proper installation: Follow the manufacturer’s guidelines for installing the circlip correctly. Improper installation, such as applying too much force or not aligning it properly, can lead to premature failure. Take your time and ensure a secure and symmetrical fit.
- Avoid harsh environments: Circlips should ideally be installed in environments free from harsh chemicals, extreme temperatures, or excessive vibrations. These factors can accelerate wear and reduce the lifespan of the circlip. If possible, take precautions to protect the circlip from these conditions.
By adhering to these tips and best practices, you can install a circlip with ease and ensure its longevity. Remember to select the right lubricant, apply it properly, inspect the circlip, choose the correct size, install it correctly, and protect it from harsh environments. Following these guidelines will not only enhance the performance of the circlip, but also save you from potential issues down the line.
Frequently Asked Questions
How Do I Install An External C-Clip?
To install an external C-clip, follow these steps: First, position the clip in the groove on the shaft or pin. Then, use a pair of pliers to compress the clip, allowing it to fit into the groove. Ensure it is fully seated by checking for evenness on both sides.
Finally, release the pliers and verify that the clip is securely in place.
What Is The Correct Circlip Orientation?
The correct circlip orientation depends on the application. It is typically placed with the open end facing the direction of rotation or movement to prevent it from dislodging. Proper installation instructions should be followed to ensure proper functionality and safety.
What Is The Difference Between A Circlip And A Snap Ring?
A circlip and a snap ring are essentially the same thing. Both are types of retaining rings used to hold components in place. The terms are used interchangeably, with “circlip” being more common in Europe and “snap ring” being more common in the United States.
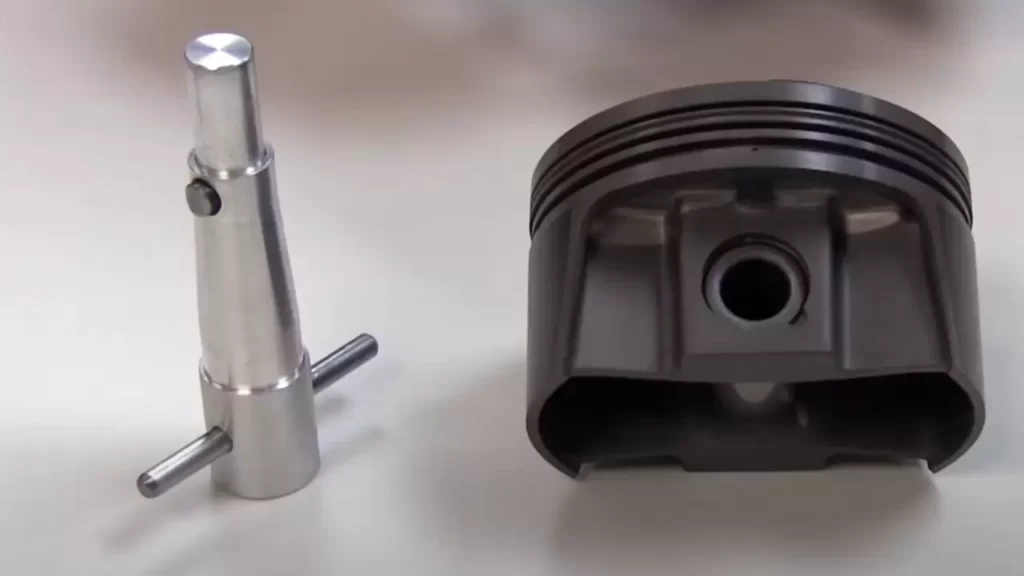
How Do You Install Cp Piston Circlips?
To install CP piston circlips, follow these steps: 1. Position the circlip in the groove of the piston, ensuring it is fully seated. 2. Use a circlip plier to compress the circlip evenly until it snaps into place. 3. Double-check the circlip to ensure it is securely installed.
4. Repeat the process for any additional circlips. 5. Finally, verify the circlips are properly seated before continuing with assembly.
Conclusion
Installing a circlip may seem daunting at first, but with the right knowledge and tools, it can be a straightforward process. By following the steps outlined in this guide, you can confidently install a circlip and ensure the proper functioning of your machinery or equipment.
Remember to choose the appropriate circlip for your application and exercise caution during installation to avoid any mishaps. With practice and patience, you’ll become adept at installing circlips in no time. So go ahead and give it a try!