To install a chimney cleanout door, follow these steps: Position the door at the base of the chimney, mark the outline, and cut the opening. Then, attach the door using screws or hinges.
Understanding The Importance Of A Chimney Cleanout Door
Why a Chimney Cleanout Door is Necessary for Maintaining a Clean and Functional Chimney
When it comes to maintaining a clean and functional chimney, one essential component that often goes unnoticed is the chimney cleanout door. This small and often overlooked feature plays a crucial role in keeping your chimney in optimal condition, ensuring it operates efficiently and safely.
A chimney cleanout door serves as an access point to the chimney flue or the space where the smoke and gases from your fireplace or stove pass through. Over time, creosote buildup, debris, and other obstructions can accumulate inside the flue, obstructing the proper flow of smoke and increasing the risk of chimney fires. Having a chimney cleanout door installed allows for easy and direct access to remove these obstructions, preventing potential hazards and ensuring your chimney functions effectively.
Without a chimney cleanout door, the process of cleaning and inspecting your chimney becomes time-consuming and challenging. Imagine having to disassemble parts of your chimney every time you need to clean it or check for any issues. Installing a cleanout door simplifies this process by providing a convenient and efficient way to access the flue, allowing you to clean and maintain your chimney with ease.
The Benefits of Installing a Chimney Cleanout Door for Regular Maintenance and Inspections
Regular maintenance and inspections of your chimney are vital for its longevity and performance. Installing a chimney cleanout door offers several benefits when it comes to these routine tasks:
- Simplified cleaning process: With a chimney cleanout door in place, cleaning your chimney becomes a breeze. It eliminates the need for disassembling parts of the chimney, making the process faster and more efficient.
- Efficient debris removal: The accumulation of creosote, debris, and animal nesting materials can obstruct the proper functioning of your chimney. A cleanout door allows you to remove these obstructions easily, ensuring optimal airflow and preventing potential hazards.
- Easier inspections: Regular inspections are crucial for identifying any issues or damages to your chimney. By installing a cleanout door, inspectors can easily access the flue, allowing them to thoroughly examine the interior and assess its condition without any hassle.
- Cost-effective maintenance: Swift access to the flue through a chimney cleanout door not only saves time but also money. Regular maintenance and cleaning help prevent major issues that could be costly to repair, ensuring your chimney operates efficiently in the long run.
Installing a chimney cleanout door is a wise investment that provides peace of mind and convenience when it comes to maintaining a clean and functional chimney. Whether it’s for cleaning, inspections, or addressing chimney issues, having easy access to the flue through a cleanout door ensures a smooth and efficient process, keeping your chimney in top-notch condition for years to come.
Tools And Materials Required
A comprehensive list of all the tools and materials needed for the installation process
Before you embark on the installation of a chimney cleanout door, it is crucial to ensure that you have all the necessary tools and materials at hand. This will not only make the installation process smoother but also save you time and frustration. To help you prepare, here is a comprehensive list of everything you’ll need:
Tools
1. Screwdriver – A flathead or Phillips screwdriver will be needed to remove the screws from the existing cleanout door, if applicable, as well as to install the new door.
2. Measuring tape – Accurate measurements are essential for ensuring that the cleanout door fits properly. Use a measuring tape to measure the dimensions of your existing cleanout or the opening where the new door will be installed.
3. Hammer – A hammer may be necessary for removing any debris or obstructions around the cleanout area.
4. Power drill – If you need to create new screw holes for the cleanout door, a power drill will come in handy.
5. Level – To ensure the cleanout door is installed evenly and straight, a level is essential. This will help prevent any water leakage or improper sealing.
Materials
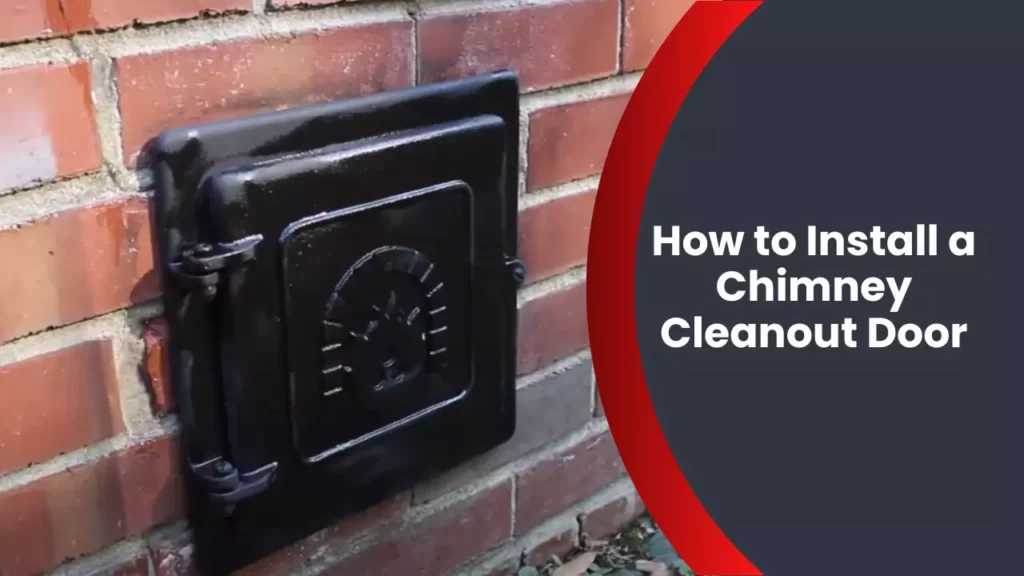
1. Chimney cleanout door – The most important material you’ll need is the cleanout door itself. Choose a door that is suitable for your chimney size and made from durable materials such as stainless steel or cast iron for long-lasting performance.
2. Anchors and screws – If you need to install new screw holes for the cleanout door, make sure you have the appropriate anchors and screws. These will ensure that the cleanout door is securely attached to the chimney.
3. Sealant – A high-temperature sealant is necessary to provide a watertight seal around the cleanout door. Choose a sealant that is specifically designed for chimney use to ensure maximum effectiveness.
4. Safety gloves and goggles – It is important to protect yourself during the installation process. Wear safety gloves to avoid injury and goggles to protect your eyes from any debris or dust.
5. Rags or towels – Have some rags or towels on hand to clean up any spills or excess sealant during the installation process.
Now that you have a complete list of all the required tools and materials, you’ll be well-prepared for the installation of a chimney cleanout door. With these essentials in hand, you can proceed confidently and efficiently, knowing that you have everything you need to get the job done right.

Preparing For The Installation
Before you begin the installation of a chimney cleanout door, it is essential to properly prepare. This will ensure a smooth and successful installation process. Preparing for the installation involves assessing the current condition of the chimney, identifying the ideal location for the cleanout door, measuring the dimensions of the chimney, and taking safety precautions.
Assessing the current condition of the chimney and identifying the ideal location for the cleanout door
In order to install a cleanout door, it is important to assess the current condition of your chimney. Check for any signs of damage or deterioration, such as cracks, loose bricks, or mortar. Addressing these issues before installing a cleanout door can prevent further damage to your chimney in the future.
Once you have assessed the condition of the chimney, you need to identify the ideal location for the cleanout door. The cleanout door should be easily accessible and located in an area that allows for convenient cleaning and maintenance. Take into consideration factors such as proximity to the stove or fireplace and accessibility for sweeping the chimney.
Measuring the dimensions of the chimney for selecting the right size cleanout door
After determining the ideal location for the cleanout door, it is important to measure the dimensions of your chimney. This will help you select the right size cleanout door. Measure the width and height of your chimney using a tape measure. Make sure to take accurate measurements to ensure a proper fit for your cleanout door.
Keep in mind that the size of the cleanout door should allow for easy access when cleaning or inspecting the chimney. It should also be large enough to accommodate the tools you will use to clean the chimney.
Taking safety precautions and gathering the necessary protective equipment
Prior to starting the installation process, it is crucial to take safety precautions and gather the necessary protective equipment. Working with chimneys can involve dust, so wearing a dust mask is advisable. Additionally, wearing gloves will protect your hands from sharp edges or debris during the installation process.
It is also important to ensure that you have the necessary tools and materials ready. This may include a drill, screws, a level, a tape measure, and a cleanout door kit. Having all these items readily available will help make the installation process smoother and more efficient.
By properly preparing for the installation of a chimney cleanout door, you can ensure a successful and hassle-free process. Assessing the current condition of the chimney, identifying the ideal location, measuring the dimensions, and taking safety precautions are crucial components of the preparation process. Taking the time to prepare will not only make the installation easier, but it will also help to prolong the life and functionality of your chimney.
Step 1: Removing The Existing Bricks
Properly dismantling the bricks surrounding the area where the cleanout door will be installed
When it comes to installing a chimney cleanout door, the first and most crucial step is to remove the existing bricks that surround the area where the door will be placed. This process requires careful attention to detail to ensure the overall structural integrity of the chimney remains intact. By following the proper technique and approach, you can safely dismantle the bricks and pave the way for the installation of the cleanout door.
Here’s how you can properly dismantle the bricks:
- Begin by assessing the condition of the bricks. Inspect them for any signs of damage, such as cracks or loose mortar. If you notice any significant issues, it may be wise to consult a professional before proceeding with the removal process.
- Next, gather the necessary tools for the job. You will need a masonry chisel, a mallet, and safety equipment, including gloves and goggles, to protect yourself during the process.
- Start by carefully chiseling away the mortar surrounding the bricks. Work your way around the perimeter of the cleanout door area, gradually removing the mortar using firm but controlled strikes with the mallet.
- Once the mortar has been sufficiently loosened, gently pry out the bricks one by one using the masonry chisel. Take your time and be mindful not to damage the surrounding bricks or the chimney structure.
- As you remove each brick, inspect it for any potential issues. If the bricks are still in good condition, you can set them aside for later use. However, if they are damaged or unsuitable for reuse, it’s best to discard them and plan for replacement bricks.
- Continue this process until you have completely removed all the bricks surrounding the designated cleanout door area.
By adhering to this step-by-step approach, you can ensure a smooth removal process for the existing bricks, setting the groundwork for the installation of your new chimney cleanout door. Remember to proceed with caution and seek professional guidance if needed to guarantee the safety and structural integrity of your chimney throughout the removal process.

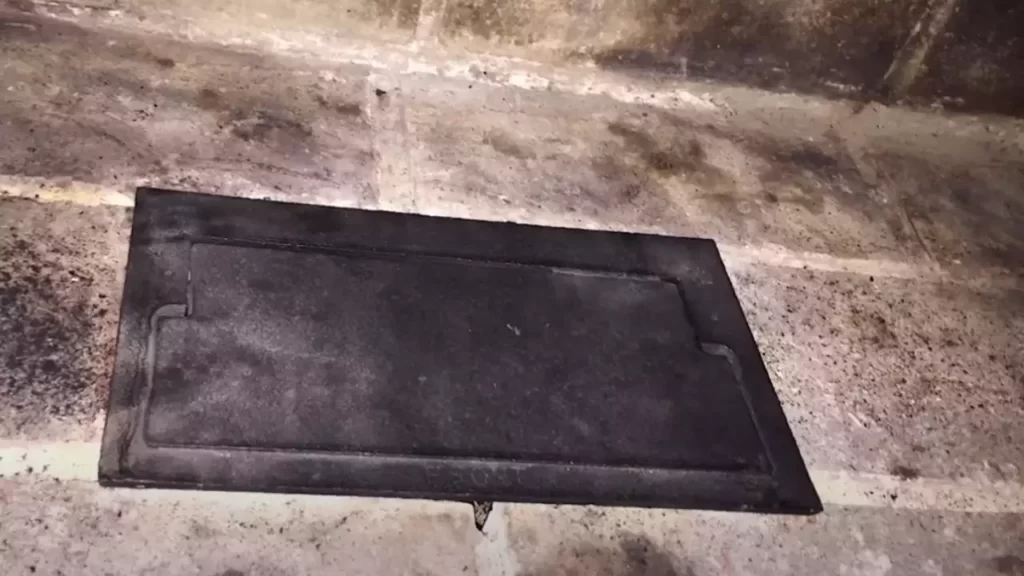
Step 2: Installing The Cleanout Door Frame
Now that you have successfully removed the necessary bricks to create an opening for the cleanout door, it’s time to move on to the next step: installing the cleanout door frame. This step is crucial in ensuring that the cleanout door fits securely and functions properly. Follow these instructions to align and install the frame securely into the opening you created:
Installing the frame securely into the opening created after removing the bricks
- Clean any debris or loose mortar from the opening to ensure a clean surface for installation.
- Measure the dimensions of the opening to determine the appropriate size of the frame.
- Choose a cleanout door frame that matches the measurements of the opening. Consider materials such as stainless steel or cast iron for durability.
- Position the frame at the opening, ensuring that it is level and centered.
- Secure the frame into place using masonry screws or anchors appropriate for your chimney structure.
- Double-check that the frame is securely attached and there are no gaps or loose areas.
Aligning the frame correctly to ensure a snug fit for the cleanout door
Once the frame is securely installed, it’s essential to align it correctly to guarantee a snug fit for the cleanout door. Follow these steps to ensure proper alignment:
- Check the alignment of the cleanout door within the frame. Make sure it sits perfectly flush and there are no gaps or misalignments.
- Adjust the frame if necessary to achieve a properly aligned fit.
- Confirm that the cleanout door opens and closes smoothly within the frame. Test its functionality before proceeding to the next step.
By taking the time to install the cleanout door frame securely and align it correctly, you are setting the stage for a successful chimney cleaning experience. This step ensures that the cleanout door functions efficiently and maintains a tight seal, preventing any unwanted air leaks or chimney issues. With the frame properly installed, you can now move on to the next step in the process.
Step 3: Mounting The Cleanout Door
Attaching the Cleanout Door to the Frame Using the Provided Screws or Bolts
To mount the cleanout door securely, start by positioning it on the frame. Ensure that it aligns properly with the opening of the chimney cleanout. The cleanout door should fit snugly in the frame, with no gaps or misalignment.
Next, using the screws or bolts provided with the cleanout door kit, attach the door to the frame. Place the screws or bolts through the pre-drilled holes in the door and align them with the corresponding holes in the frame. Tighten the screws or bolts using a screwdriver or wrench, ensuring they are secure but not overly tightened, as this may warp the door or damage the frame.
Testing the Door to Ensure Smooth Operation and Adequate Sealing
After mounting the cleanout door, it’s important to test it to ensure that it operates smoothly and provides adequate sealing.
To test the door, open and close it several times to check for any sticking, resistance, or misalignment. The door should move freely and effortlessly within the frame. If you encounter any issues, adjust the screws or bolts slightly until the door operates smoothly.
Additionally, check for proper sealing when the cleanout door is closed. Run your hand along the edges of the door and frame to feel for any air leakage. A well-sealed cleanout door will prevent drafts and keep your chimney system functioning efficiently. If you notice any gaps or air leakage, adjust the screws or bolts as needed until the door provides a tight seal.
Remember, proper installation of the cleanout door is crucial for effective chimney maintenance and safety. By attaching the door securely to the frame and testing it for smooth operation and adequate sealing, you can ensure that your chimney cleanout door functions optimally.
Step 4: Sealing And Insulating The Cleanout Door
Properly sealing and insulating the cleanout door of your chimney is essential to prevent air leaks and protect against heat transfer. By following these steps, you can ensure that your chimney cleanout door is effectively sealed and insulated, increasing energy efficiency and reducing heat loss.
Applying high-quality sealant around the edges of the cleanout door to prevent air leaks
One of the most crucial steps in sealing your chimney cleanout door is applying a high-quality sealant around its edges. This sealant acts as a barrier against air leaks, preventing drafts from entering your home and retaining the warmth inside.
To apply the sealant:
- Begin by cleaning the surface of the cleanout door and its surrounding area. Remove any debris, dust, or old sealants using a damp cloth.
- Once the surface is clean and dry, apply a bead of high-quality sealant along the edges of the cleanout door. Make sure to cover any gaps or cracks.
- Use a putty knife or your finger to smooth out the sealant, ensuring an even and tight seal.
- Allow the sealant to dry completely according to the manufacturer’s instructions before moving on to the next step.
Insulating the cleanout door to protect against heat transfer and increase energy efficiency
In addition to sealing, insulating the cleanout door is important to protect against heat transfer and increase overall energy efficiency.
Here’s how you can insulate the cleanout door:
- Measure the dimensions of the cleanout door to determine the appropriate size of insulation material.
- Choose an insulation material suitable for your needs, such as fiberglass or ceramic insulation.
- Cut the insulation material to fit the dimensions of the cleanout door.
- Attach the insulation material to the inner side of the cleanout door, ensuring it covers the entire surface.
- Secure the insulation material in place using adhesive or insulation tape.
Insulating the cleanout door not only helps in conserving energy but also prevents any heat transfer from the chimney to the surrounding area. This can help maintain a comfortable temperature in your home and reduce energy costs.
By following these steps to properly seal and insulate your chimney cleanout door, you can ensure its effectiveness in preventing air leaks and heat transfer. This simple yet important maintenance task can significantly improve the energy efficiency of your chimney system, providing you with a more comfortable and cost-effective heating experience.
Step 5: Cleaning Up And Final Considerations
Removing debris and cleaning the surrounding area after completing the installation
Once you have successfully installed the chimney cleanout door, it is important to take the necessary steps to clean up any debris and ensure the surrounding area is neat and tidy. This will not only enhance the aesthetic appeal of your chimney but also prevent any potential hazards that may arise due to accumulated debris.
Here are some tips to help you effectively clean up after installing the chimney cleanout door:
- Begin by removing any debris that may have accumulated during the installation process. This can include dust, wood shavings, or any other materials that were generated while cutting through the chimney wall.
- Use a broom or vacuum cleaner to thoroughly clean the area around the chimney cleanout door. Make sure to reach into all corners and crevices to remove any loose particles.
- Inspect the door and its surroundings for any sharp edges or protruding nails that may pose a safety risk. Smooth out any rough edges or hammer in any nails that are sticking out.
- Wipe down the chimney cleanout door with a damp cloth to remove any dirt or fingerprints that may have accumulated during the installation process.
- Dispose of all the debris in a proper manner, ensuring it is not left lying around where it could potentially cause a fire hazard.
Tips for regular maintenance and inspection of the chimney cleanout door
Now that you have successfully installed and cleaned up after the chimney cleanout door installation, it is important to implement regular maintenance and inspection practices to ensure the door functions optimally. Regular maintenance and inspection not only prolong the lifespan of the door but also help identify any issues that may require immediate attention.
Here are a few tips to help you maintain and inspect your chimney cleanout door:
- Keep the area around the door clean: Regularly clean the surrounding area to prevent the accumulation of debris or obstructions that may hinder the functionality of the door.
- Check for any signs of damage: Inspect the door for any signs of wear, such as cracks, rust, or loose hinges. Replace or repair any damaged components promptly to ensure the door functions properly.
- Perform periodic lubrication: Apply a lubricant to the hinges and moving parts of the door to prevent friction and ensure smooth operation.
- Consider professional chimney inspections: Schedule regular chimney inspections with a professional to ensure the entire chimney system, including the cleanout door, is in good condition and free from any potential hazards.
By adhering to these maintenance and inspection practices, you can ensure the longevity and efficiency of your chimney cleanout door, providing you with peace of mind and safe operation.
Frequently Asked Questions
How Do I Choose The Right Size Chimney Cleanout Door?
Choosing the right size chimney cleanout door is crucial for proper installation. Measure the opening of your chimney cleanout carefully and make sure to match it with the size of the door. A properly sized door will ensure a tight, secure fit and efficient cleaning and maintenance of your chimney.
What Tools And Materials Do I Need For Installing A Chimney Cleanout Door?
To install a chimney cleanout door, you will need a few essential tools and materials. These include a measuring tape, drill, screwdriver, cement or mortar, door frame, and screws. It’s also recommended to wear safety goggles, gloves, and a dust mask during the installation process.
Can I Install A Chimney Cleanout Door Myself, Or Do I Need Professional Help?
Installing a chimney cleanout door is a relatively simple task that can be done by most homeowners. However, if you don’t have prior DIY experience or lack the necessary tools, it may be best to hire a professional. They can ensure proper installation, saving you time and potential mistakes.
How Often Should A Chimney Cleanout Door Be Cleaned?
Regular maintenance of your chimney cleanout door is essential for optimal performance. Aim to clean the door at least once a year, or more frequently if you frequently use your fireplace or notice excessive soot or debris. Cleaning helps prevent blockages and ensures the door functions properly during chimney inspections and cleanings.
Conclusion
Installing a chimney cleanout door is an important step in maintaining the health and safety of your chimney. By following the steps outlined in this guide, you can ensure that your chimney is properly cleaned and maintained, reducing the risk of fire and improving the overall efficiency and functionality of your fireplace.
Don’t neglect this essential part of chimney maintenance, as it can make a significant difference in the lifespan and performance of your chimney. Keep your home safe and cozy by taking care of your chimney with a cleanout door installation.