To install a chainsaw chain, first, loosen the tension on the chain by turning the tensioning screw counterclockwise. Then, place the chain around the guide bar, ensuring the cutting teeth are facing forward.
Finally, adjust the tension by turning the tensioning screw clockwise until the chain fits snugly on the bar but still allows for smooth movement. Now, you can start using your chainsaw with its newly installed chain! Are you planning to use your chainsaw for some much-needed yard work?
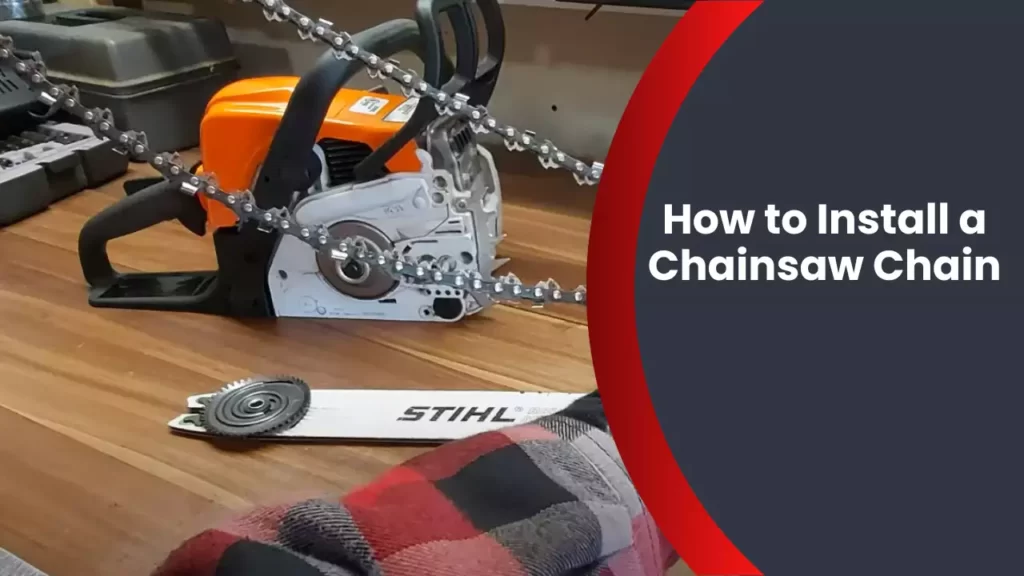
Before you can begin, it’s important to know how to properly install a chainsaw chain. We will guide you through the step-by-step process of installing a chainsaw chain, ensuring that you can complete the task safely and efficiently. So, let’s dive in and learn how to get your chainsaw ready for action.
Understanding The Chainsaw Chain Components
Understanding the Chainsaw Chain Components
Chainsaws are powerful tools that require regular maintenance to ensure optimal performance and safety. One crucial aspect of chainsaw maintenance is replacing the chainsaw chain when it becomes worn or damaged. In this section, we will take a closer look at the different components of a chainsaw chain, helping you understand how each part contributes to the overall operation of your chainsaw.
Chainsaw chain anatomy: a closer look at the different parts
1. Cutter Teeth: The cutter teeth are the sharp blades located on the chainsaw chain. These teeth are responsible for cutting through wood and other materials. They come in different shapes and sizes, such as full chisel, semi-chisel, or low-profile. Choosing the right type of cutter teeth depends on the nature of your work.
2. Drive Links: The drive links are the part of the chainsaw chain that fits into the chainsaw’s guide bar. These links feature the precise measurements required to connect the chain to the guide bar, ensuring a secure fit. Determining the chain type and size for your specific chainsaw model will help you identify the correct drive link count.
3. Rivets: Rivets are the small metal pins that hold the chainsaw chain together. These pins are positioned in the outer side plates and play a crucial role in keeping the chain intact during operation. It is essential to ensure that the rivets are securely in place to prevent any accidents while using the chainsaw.
4. Depth Gauges: The depth gauges, also known as rakers, are small metal projections located in front of each cutter tooth. These gauges determine the depth to which the teeth penetrate the wood during cutting. Maintaining the correct depth gauge height is crucial for the chainsaw’s performance and safe operation.
Identifying the chain type and size for your specific chainsaw model
When it comes to replacing the chainsaw chain, one of the initial steps is identifying the correct chain type and size for your specific chainsaw model. Using the wrong chain can result in poor performance and potential safety hazards. To determine the appropriate chain type and size, follow these steps:
1. Consult the User Manual: The first step is to refer to the user manual provided by the chainsaw manufacturer. The manual will often include detailed information about the chain type and size recommended for your specific model.
2. Check the Old Chain: If you still have the old chainsaw chain, examine it closely. Look for any markings or numbers engraved on the drive links or other chain components. These markings can provide valuable information about the type and size of the chain.
3. Measure the Chain Length: If you don’t have access to the old chain or it’s worn beyond recognition, you can manually measure the chain length. Start by removing the chain from the chainsaw and using a measuring tape to measure the entire length of the chain, including the drive links. Ensure you measure accurately to avoid any inaccuracies.
By understanding the different components of a chainsaw chain and identifying the correct chain type and size for your specific chainsaw model, you can ensure a smooth process when it comes to installing a new chain. Regularly inspect and maintain your chainsaw chain to extend its lifespan and maintain optimal performance during your cutting tasks.
Preparing Your Chainsaw For Chain Installation
Before you embark on installing a chainsaw chain, it is crucial to properly prepare your chainsaw. This will ensure a safe and seamless chain installation process. In this section, we will discuss two key aspects of preparing your chainsaw: placing it on a stable surface and taking safety precautions by wearing protective gear and disconnecting the spark plug.
Ensuring the chainsaw is placed on a stable surface
Placing your chainsaw on a stable surface is the first step towards creating a secure working environment. When the chainsaw is securely positioned, it reduces the risk of accidents and ensures precision during the chain installation process. Here are some simple steps to follow:
- Find a flat and level surface: Look for a solid and sturdy surface where you can comfortably place your chainsaw. Avoid working on uneven ground or precarious surfaces that may jeopardize your balance or the stability of the chainsaw.
- Use a workbench or sawhorses: If possible, place your chainsaw on a designated workbench or sawhorses. These provide a stable platform and elevate the chainsaw to a comfortable working height, reducing strain on your back and neck.
- Secure the chainsaw: Once you have chosen a stable surface, ensure that the chainsaw is firmly secured. You can use clamps or vices to keep the chainsaw in place while you work on it. This will prevent any undesired movement or shifting during the installation process.
Taking safety precautions: wearing protective gear and disconnecting the spark plug
Safety should always be a top priority whenever you are working with power tools like chainsaws. To minimize the risk of injury, it is essential to take the necessary safety precautions. Here’s what you need to do:
- Wear protective gear: Before beginning any work on your chainsaw, put on the appropriate protective gear. This includes wearing safety goggles to protect your eyes from debris, hearing protection to safeguard against the noise, gloves to protect your hands, and sturdy boots with non-slip soles.
- Disconnect the spark plug: As an additional safety measure, always disconnect the spark plug before installing or adjusting the chainsaw chain. This prevents accidental starts or unwanted movement of the chain. Simply locate the spark plug wire, typically situated on the side of the chainsaw, then gently detach it from the spark plug.
By following these steps, you are effectively preparing your chainsaw for chain installation, ensuring a secure and safe working environment. Now that the chainsaw is ready, it’s time to move on to the next step of installing the new chain!
Step-By-Step Guide To Installing A Chainsaw Chain
Installing a new chainsaw chain may seem like a daunting task, but with the right tools and a clear set of instructions, it can be done easily. In this step-by-step guide, we will walk you through the process of removing the old chain, cleaning the bar and sprocket, properly tensioning the new chain, adjusting the chain tensioning mechanism, aligning the chain on the guide bar, and engaging the drive links with the sprocket.
Removing the old chain and cleaning the bar and sprocket
The first step in installing a new chainsaw chain is to remove the old chain and clean the bar and sprocket. Follow these steps:
- Ensure the chainsaw is turned off and the spark plug is disconnected for safety.
- Use a wrench to loosen the nuts holding the guide bar in place.
- Remove the guide bar and the old chain from the chainsaw.
- Inspect the guide bar and remove any debris or sawdust using a brush or compressed air.
- Check the sprocket for any damage and clean it using a brush.
Properly tensioning the new chain and adjusting the chain tensioning mechanism
Tensioning the new chainsaw chain is crucial to ensure optimal performance and prevent accidents. Here’s how to do it:
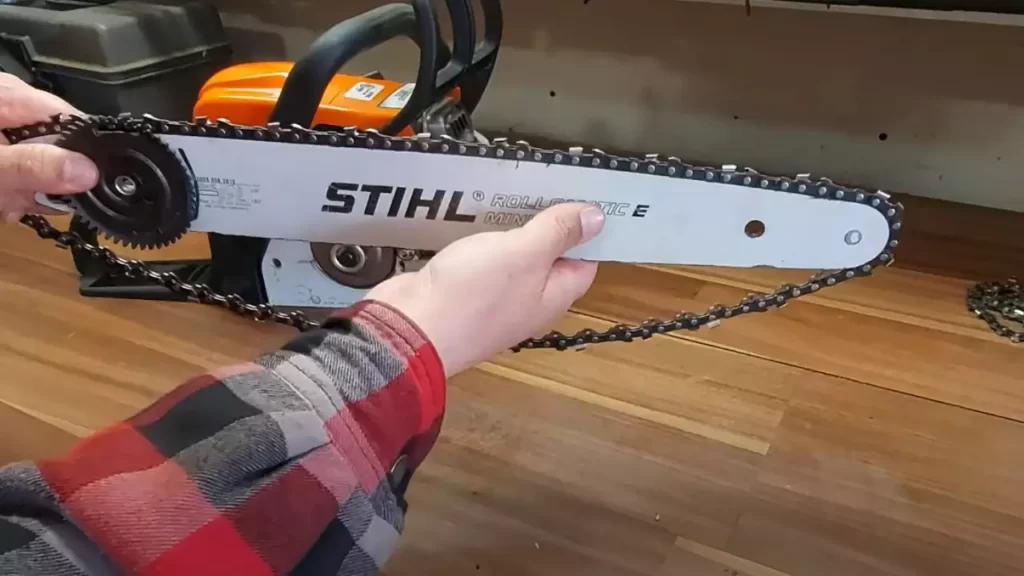
- Place the new chain on the guide bar, ensuring the drive links face towards the chainsaw’s engine.
- Insert the guide bar into the chainsaw, making sure it is properly aligned.
- Use the tensioning mechanism to adjust the tension of the chain.
- Check the chain tension by pulling it away from the guide bar. It should have a slight amount of slack without sagging.
- If the chain is too tight or too loose, adjust the tensioning mechanism accordingly.
Aligning the chain properly on the guide bar and engaging the drive links with the sprocket
Proper alignment of the chain on the guide bar and engaging the drive links with the sprocket is essential for smooth operation. Follow these steps:
- Make sure the chain is properly aligned on the guide bar, with the cutters facing away from you.
- Engage the drive links with the sprocket by placing the chain over the sprocket.
- Ensure the chain is properly seated on the guide bar by pulling it around the bar.
- Check that the chain moves freely along the guide bar without binding.
Once you have completed these steps, double-check that everything is properly tightened and secured before starting the chainsaw. By following this step-by-step guide, you can easily install a new chainsaw chain and get back to cutting with ease.

Troubleshooting And Tips For Successful Chain Installation
Common Mistakes to Avoid When Installing a Chainsaw Chain
Installing a chainsaw chain may seem like a straightforward task, but there are several common mistakes that can hinder your success. By avoiding these mistakes, you can ensure a smooth and effective installation process. Here are some key mistakes to steer clear of:
- Inadequate Cleaning: Failing to clean the guide bar thoroughly before installing a new chain can lead to debris and buildup. This can negatively impact the chain’s performance and lifespan. Make sure to clean the guide bar, drive sprocket, and chain tensioning mechanism before proceeding.
- Incorrect Chain Size: Using the wrong-sized chain is another common mistake. Chainsaw chains come in various sizes, including pitch, gauge, and drive link count. Consult your chainsaw’s user manual or refer to the old chain markings to ensure you select the correct chain for your saw.
- Improper Chain Tension: Incorrect chain tension is a prevalent issue, affecting both cutting performance and safety. Avoid overtightening, as it can damage the guide bar and chain, while also stressing the chainsaw’s motor. On the other hand, an excessively loose chain can lead to reduced cutting efficiency and potential kickbacks. Follow your chainsaw’s instructions for proper tensioning, usually involving a slight sag at the bottom of the guide bar.
- Inaccurate Chain Alignment: Misalignment occurs when the chain does not track properly along the guide bar. This can result in poor cutting performance and uneven wear. Ensure the chain’s drive links are seated correctly in the bar groove and adjust the chain tension accordingly.
- Skipping Bar Maintenance: Neglecting regular maintenance of the guide bar can lead to premature chain wear and poor performance. Keep the bar grooves clean, flip the bar periodically to maximize its lifespan, and regularly lubricate the sprocket nose to ensure smooth operation.
Troubleshooting Issues with Chain Tension, Alignment, and Engagement
Even with a cautious installation, issues may still arise with chain tension, alignment, and engagement. Proper troubleshooting techniques can help resolve these problems quickly. Here are some common troubleshooting tips:
- Chain Tension: If the chain becomes loose during operation, readjust the tension to the optimal position. Check for any damage or worn parts that may contribute to tension loss.
- Chain Alignment: If you notice the chain veering to one side of the guide bar, assess the alignment. Misalignment can occur if the bar groove is obstructed by debris or if the drive sprocket is worn. Clean the groove and replace any damaged components as necessary.
- Chain Engagement: Inadequate chain engagement can result in the chain slipping or popping off during use. Ensure the drive links properly engage with the sprocket and that the tension is correctly set. Replace any worn-out parts that may hinder engagement.
Tips for Maintaining and Prolonging the Lifespan of Your Chainsaw Chain
Proper maintenance of your chainsaw chain is essential for both its longevity and optimal performance. By following these tips, you can extend the lifespan of your chain and ensure it consistently performs at its best:
- Frequent Lubrication: Regularly lubricate the chain with appropriate chainsaw oil to reduce friction, prevent overheating, and minimize wear. Check the oil levels before each use to ensure proper lubrication.
- Proper Chain Sharpening: Sharpening your chain regularly maintains its cutting efficiency. Invest in a high-quality chainsaw file or file guide and follow the manufacturer’s instructions to maintain the correct sharpening angle.
- Avoiding Contact with Hard Surfaces: Prevent the chain from contacting the ground or other hard surfaces as much as possible during operation. This reduces the risk of damaging the chain’s cutting edges and keeps it in better condition.
- Regular Bar Cleaning: Clean the guide bar and its groove after each use to remove debris and buildup. This ensures smooth movement of the chain along the bar and prevents premature wear.
- Proper Storage: When your chainsaw is not in use, store it in a dry location, ideally in a protective case or cover. This safeguards the chain from rust, corrosion, and other moisture-related damage.
By avoiding common installation mistakes, troubleshooting any issues, and providing regular maintenance, you can optimize the lifespan and performance of your chainsaw chain. Follow these tips to ensure a successful chain installation and enjoy efficient cutting for years to come.
Frequently Asked Questions
Are you a chainsaw owner looking to install a new chainsaw chain? Or perhaps you’re unsure if it’s time to replace your current chain? In this section, we’ll answer some frequently asked questions about chainsaw chain installation to help you navigate this process with ease.
How often should I replace my chainsaw chain?
Knowing when to replace your chainsaw chain is crucial for maintaining optimal performance. Typically, chainsaw chains should be replaced after every 5 to 10 hours of use. However, this can vary depending on several factors such as the type of wood being cut, the condition of the chain, and the frequency of maintenance. It’s important to regularly inspect your chain for signs of wear and decide whether replacement is necessary.
What are the signs of a dull chainsaw chain?
A dull chainsaw chain can significantly affect the cutting performance and efficiency of your chainsaw. Recognizing the signs of a dull chain will help you determine when it’s time for sharpening or replacement. Here are a few indications that your chainsaw chain may be dull:
- Difficulty making precise cuts
- Increased effort required to cut through wood
- Excessive vibration while cutting
- Smaller wood chips or sawdust instead of larger, uniform chips
- Chain frequently getting stuck in the wood
If you encounter any of these signs, it’s highly recommended to sharpen or replace your chainsaw chain to ensure safe and efficient cutting.
Can I sharpen a chainsaw chain instead of replacing it?
Yes, you can sharpen a dull chainsaw chain to restore its cutting performance. It’s a cost-effective option that prolongs the life of your chain. However, sharpening a chainsaw chain requires specialized tools and proper technique. If you don’t have experience in chain sharpening, it’s recommended to seek assistance from a professional or consider replacing the chain altogether.
Remember, maintaining a sharp and properly installed chainsaw chain is essential for safe and efficient cutting. By understanding when to replace your chain, recognizing signs of a dull chain, and knowing the option to sharpen, you can ensure that your chainsaw is always ready to tackle any cutting task.
Frequently Asked Questions On How To Install A Chainsaw Chain
How Does A Stihl Chainsaw Chain Go On?
To install a Stihl chainsaw chain, follow these steps: 1. Make sure the chain brake is engaged and the saw is off. 2. Line up the chain with the sprocket and bar. 3. Place the chain over the bar and onto the sprocket.
4. Adjust the tension until there is a slight sag in the chain. 5. Finally, release the chain brake and test the saw.
How Tight Do You Want A Chainsaw Chain?
Keep the chainsaw chain tight enough to prevent slippage and ensure efficient cutting. A properly tensioned chain should have just a little slack, about 1/4 inch between the guide bar and the chain’s bottom.
What Angle Do You File A Chainsaw Chain?
You file a chainsaw chain at a specific angle to maintain its sharpness and efficiency. The angle depends on the type of chain you have. It’s important to follow the manufacturer’s instructions for the correct filing angle to ensure optimal performance.
Do All Chainsaw Chains Fit All Chainsaws?
No, not all chainsaw chains fit all chainsaws. Chainsaw chains come in different sizes and designs, so it’s essential to choose the right chain that is compatible with your specific chainsaw model. Be sure to consult the manufacturer’s recommendations for the correct chain size and type for your chainsaw.
Conclusion
To sum up, installing a chainsaw chain is a straightforward process that any DIY enthusiast can tackle. By following the steps outlined in this guide, you can ensure the effective and safe operation of your chainsaw. Remember to prioritize safety and maintenance throughout the process to extend the lifespan of your chainsaw and optimize its performance.
Keep your chainsaw in good condition, and you’ll be ready to tackle any cutting task with ease.