To install a ceiling fan without existing wiring and no attic, you will need to use a wireless remote control system specifically designed for fan installations. These systems allow you to control both the fan’s speed and lights without the need for any wiring or access to an attic space.
With the wireless remote control system, you can easily install a ceiling fan in any room without the hassle of extensive electrical work. Simply follow the manufacturer’s instructions for installation and enjoy the comfort and convenience of a ceiling fan without the need for existing wiring or attic access.
Assessing The Feasibility Of Installing A Ceiling Fan Without Existing Wiring And No Attic
Surveying the Room for Ceiling Fan Installation
Before embarking on the project of installing a ceiling fan without existing wiring and no attic, it’s essential to assess the feasibility of such an installation. One of the first steps in this process is surveying the room where you want to place the ceiling fan.
Start by examining the ceiling itself. Is there enough clearance to accommodate the fan without any obstructions? Measure the height from the floor to the ceiling to ensure that the fan will hang at an appropriate distance. Additionally, check for any structural elements, such as beams or joists, which may impede the installation process.
Next, take into account the size of the room. Ceiling fans come in various sizes, and choosing the right one is crucial to ensure effective airflow. Consider the square footage of the room and the height of the ceiling to determine the appropriate fan size.
If the room is relatively small, a compact fan with shorter blades might be the ideal choice. Conversely, for larger or higher-ceilinged rooms, a fan with longer blades and a more powerful motor may be necessary to adequately circulate air.
Evaluating the Available Power Sources
The availability of power sources is another critical factor to consider when assessing the feasibility of installing a ceiling fan without existing wiring and no attic. Without proper wiring in place, alternative power sources must be identified and evaluated.
Start by examining the existing electrical outlets in the room. Determine if there is an outlet conveniently located near the desired fan location. The outlet’s proximity will play a significant role in determining how feasible it is to install a ceiling fan without having to lay new wiring.
If there is an outlet nearby, assess its capacity to handle the additional load of a ceiling fan. Ceiling fans typically require a dedicated circuit due to their power consumption. An overloaded circuit could lead to electrical issues or even potential hazards. Check the circuit’s rating and ensure it can accommodate the fan’s wattage.
If there is no outlet near the intended fan location or the existing outlets cannot support the additional load, alternative power sources can be explored. One option is to use an extension cord to connect the fan to a nearby outlet. However, this may not be the most aesthetically pleasing solution and could pose tripping hazards.
Another option is to install a new electrical outlet specifically for the ceiling fan. This will involve running wiring from an existing outlet or the circuit breaker panel to the desired location. It is crucial to engage the services of a qualified electrician for this task to ensure compliance with electrical codes and safety standards.
In some cases, a battery-powered ceiling fan may be a viable alternative. These fans are typically smaller in size and have limited run time, but they can provide temporary relief in spaces where wiring installation is challenging.
Remember, while assessing the feasibility of installing a ceiling fan without existing wiring and no attic, it is essential to prioritize safety and adhere to local electrical regulations. Consulting with a professional electrician is highly recommended to ensure a proper and secure installation.
Choosing The Appropriate Type Of Ceiling Fan
When it comes to installing a ceiling fan without existing wiring and no attic, it’s crucial to choose the appropriate type of ceiling fan. Understanding the different types of ceiling fans and selecting one suitable for your room size are important factors to consider. So, let’s dive in and explore these aspects!
Understanding the different types of ceiling fans
Before selecting a ceiling fan, it’s essential to understand the different types available. Each type is designed to fit specific installation needs and preferences. Here are the three common types:
- Standard Ceiling Fans: These are the most common type of ceiling fans. They usually have a downrod that connects the fan to the ceiling mount, allowing it to hang at an appropriate distance from the ceiling. Standard ceiling fans require existing wiring for installation.
- Hugger Ceiling Fans: Also known as low-profile or flush-mount ceiling fans, these are perfect for rooms with low ceilings. Hugger fans are mounted directly on the ceiling, eliminating the need for a downrod. They are ideal for rooms with limited vertical height.
- Remote Control Ceiling Fans: These ceiling fans come with a remote control for easy operation. With a remote control, you can adjust the fan speed, turn the fan on/off, and even control the fan’s light (if it has one). Remote control ceiling fans are convenient, especially in rooms where the switch location is not easily accessible.
Selecting a ceiling fan suitable for the room size
Choosing the right ceiling fan size is crucial for the fan’s effectiveness and the comfort of the room occupants. Here’s a general guideline to help you select the right size:
| Room Size (Square Footage) | Ideal Fan Blade Span (Diameter) |
|---|---|
| Up to 75 sqft | Less than 42 inches |
| 76 to 144 sqft | 42 to 50 inches |
| 145 to 225 sqft | 50 to 58 inches |
| Above 225 sqft | 58 inches or more |
By selecting a ceiling fan with an appropriate blade span for your room size, you ensure that the air circulation is effective and the fan operates optimally.
Now that you have a better understanding of the different types of ceiling fans and how to select the right size, you can confidently proceed with the installation process. Stay tuned for the next section of this blog post, where we’ll guide you on installing a ceiling fan without existing wiring and no attic!
Gathering The Necessary Tools And Materials
Before you dive into installing a ceiling fan without existing wiring and no attic, it’s essential to gather all the necessary tools and materials. Having everything ready and within reach will make the installation process smoother and more efficient. In this section, we’ll discuss the tools you’ll need and the materials required to complete the wiring.
Essential tools for the installation process
Here’s a list of tools you’ll need to have on hand:
| Tool | Usage |
|---|---|
| Screwdriver | To secure the fan’s mounting bracket and blades. |
| Wire strippers | To remove insulation from wires for proper connections. |
| Wire connectors | To join wires securely and ensure reliable electrical connections. |
| Plastic wire caps | To protect exposed wire ends. |
| Voltage tester | To check if power is being supplied to the wires. |
| Measuring tape | For precise measurements during installation. |
| Stud finder | To locate ceiling joists for proper mounting. |
| Drill | Required if you need to create holes for wiring or mounting. |
| Wire fish tape | If you need to run wires through walls or ceilings. |
| Ladder | To access the ceiling safely during installation. |
| Personal protective equipment (PPE) | For your safety, wear gloves and safety glasses. |
Required materials for wiring a ceiling fan without existing wiring and no attic
Now let’s take a look at the materials you’ll need to ensure a successful installation:
- Ceiling fan: Choose a fan that suits your needs and complements your room’s décor.
- Mounting bracket: Typically supplied with the fan, it secures the fan to the ceiling.
- Canopy: Covers the electrical box and provides a finished look.
- Junction box: Required if no electrical box exists or if the existing box doesn’t meet safety standards.
- Wire: Make sure it’s the correct gauge and type for the electrical load of the fan.
- Fan blades: Attach these to the fan motor for air circulation.
- Bulb(s): Choose the appropriate wattage and style of bulb for the fan’s light kit (if applicable).
- Ceiling medallion: Optional decorative feature that enhances the visual appeal of the fan.
Gathering the necessary tools and materials ensures a hassle-free installation process. With everything at your fingertips, you’ll be ready to tackle the next steps of wiring a ceiling fan without existing wiring and no attic.
Preparing The Room For Ceiling Fan Installation
Before you can start installing a ceiling fan without existing wiring and no attic, you need to properly prepare the room. This includes clearing the space and ensuring safety precautions, as well as determining the ideal location for installing the fan.
Clearing the Space and Ensuring Safety Precautions
Before you begin any installation project, it is important to clear the space and remove any potential obstacles. This will ensure that you have enough room to work comfortably and safely. Start by removing furniture, decor, and any other items that may be in the way. This will not only make the installation process easier but also help prevent damage to your belongings.
Additionally, it is crucial to follow safety precautions during the installation. Make sure to turn off the power to the room at the circuit breaker before beginning any electrical work. This will help protect you from any potential electrical hazards. It is also recommended to wear gloves and safety goggles to protect yourself from any injuries.
Determining the Ideal Location for Installing the Ceiling Fan
Next, you need to determine the ideal location for installing your ceiling fan. This will ensure optimal air circulation and comfort in the room. Look for a spot in the ceiling where there is enough support to hold the weight of the fan. Avoid installing the fan near any obstructions such as light fixtures or air vents.
Consider the layout of the room and the direction of air movement you desire. Ideally, the fan blades should be at least 7 feet above the floor and around 18 inches away from the nearest wall. This will help provide efficient airflow throughout the space.
To accurately determine the location, you can use a stud finder to locate the ceiling joists. These are sturdy beams that provide ample support for the fan. Mark the spots where the joists are located to guide you during the installation process.
By properly preparing the room for ceiling fan installation, you can ensure a smooth and successful project. Clearing the space, following safety precautions, and determining the ideal location will help you achieve optimal results. Now that you have prepared the room, it’s time to move on to the next steps of the installation process.
Installing The Mounting Bracket And Junction Box
When installing a ceiling fan without existing wiring and no attic, it is crucial to ensure proper installation of the mounting bracket and junction box. These two components serve as the foundation for a secure and safe ceiling fan installation. In this section, we’ll guide you through the process of mounting the bracket securely to the ceiling and installing a junction box for proper electrical connections.
Mounting the Bracket Securely to the Ceiling
The first step in installing your ceiling fan is to mount the bracket securely to the ceiling. The bracket acts as the anchor for your fan, providing the necessary support. Here’s how you can do it:
- Start by identifying the appropriate location for your ceiling fan. Consider factors such as the room’s layout, the desired airflow, and any obstructions.
- Using a stud finder, locate the ceiling joists. These sturdy wooden beams in your ceiling will provide the best support for your fan.
- Mark the positions of the joists on the ceiling using a pencil or masking tape.
- Hold the mounting bracket against the ceiling, aligning it with the marked joist locations.
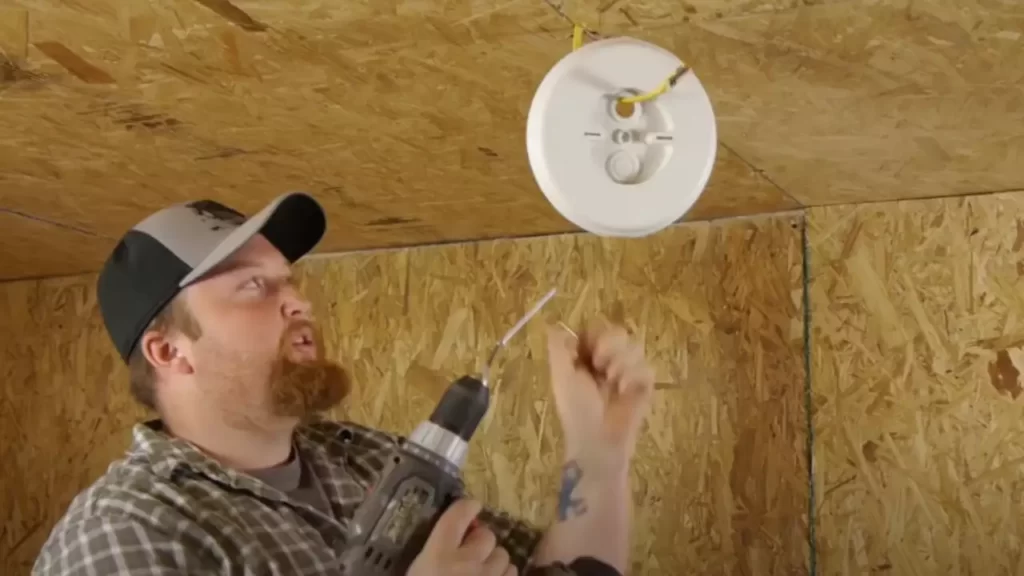
- Secure the bracket to the ceiling by drilling screws through the pre-drilled holes in the bracket and into the ceiling joists. Make sure the bracket is level and tight against the ceiling.
- Double-check the stability of the mounting bracket by giving it a light tug. It should be firmly fixed to the ceiling, ready to support your fan.
Installing a Junction Box for Proper Electrical Connections
Now that the mounting bracket is securely in place, it’s time to install a junction box for proper electrical connections. The junction box will house the necessary wiring and ensure a safe and reliable electrical connection. Follow these steps:
- Choose a junction box suitable for ceiling fan installation, ensuring it is UL-listed and designed to support the weight and movement of a fan.
- Position the junction box on top of the mounting bracket, aligning it with the pre-drilled screw holes on the bracket.
- Secure the junction box to the mounting bracket by inserting screws through the holes in the box and tightening them into the bracket.
- Remove the knockout tabs on the side of the junction box to create openings for wiring. This can be done using pliers or a screwdriver.
- Feed the electrical wiring through the opening of the junction box and connect it to the corresponding wires on your ceiling fan. Ensure proper insulation and secure connections.
- Carefully tuck the excess wiring into the junction box, avoiding any sharp edges or pinching that could damage the wires.
- Reattach the junction box cover, making sure it is properly secured and flush with the box.
By following these steps and installing the mounting bracket and junction box correctly, you’ll ensure a secure and functional foundation for your ceiling fan. With the groundwork in place, you’re now ready to proceed with the next steps of your ceiling fan installation.
Running The Electrical Wiring
Running the electrical wiring for your new ceiling fan can seem like a daunting task, especially if you don’t have existing wiring or access to the attic. However, with a little planning and the right tools, you can successfully install a ceiling fan without any major complications. In this section, we will cover how to plan the wiring route and run the electrical wire through the walls and ceiling.
Planning the Wiring Route for the Ceiling Fan
Before you start running the electrical wire, it’s essential to plan the wiring route to ensure a smooth and efficient installation. Here are some steps to guide you:
- Identify the location for your ceiling fan: Determine the ideal placement of your ceiling fan to ensure optimal airflow and functionality.
- Locate nearby power sources: Identify the nearest power source, such as an existing wall outlet or light switch, that you can tap into for the electrical connection.
- Consider the wall and ceiling structure: Take into account the placement of studs, joists, and any obstructions that may impact the wiring route. It’s important to avoid cutting through load-bearing structures.
- Measure the distance: Measure the distance between the power source and the ceiling fan’s location to determine the length of wire you will need.
- Choose the wire type: Select the appropriate wire type for your installation. Consult local electrical codes and consider factors such as insulation, wire gauge, and capacity.
- Plan for switch control: Decide whether you want to install a separate wall switch for the fan or utilize a remote control.
Running the Electrical Wire through the Walls and Ceiling
Once you have planned the wiring route, it’s time to run the electrical wire through the walls and ceiling. Follow these steps:
- Turn off the power: Before working with any electrical wires, turn off the power at the breaker box to ensure your safety.
- Prepare the wire: Strip about 3/4 inch of insulation from the ends of the electrical wire.
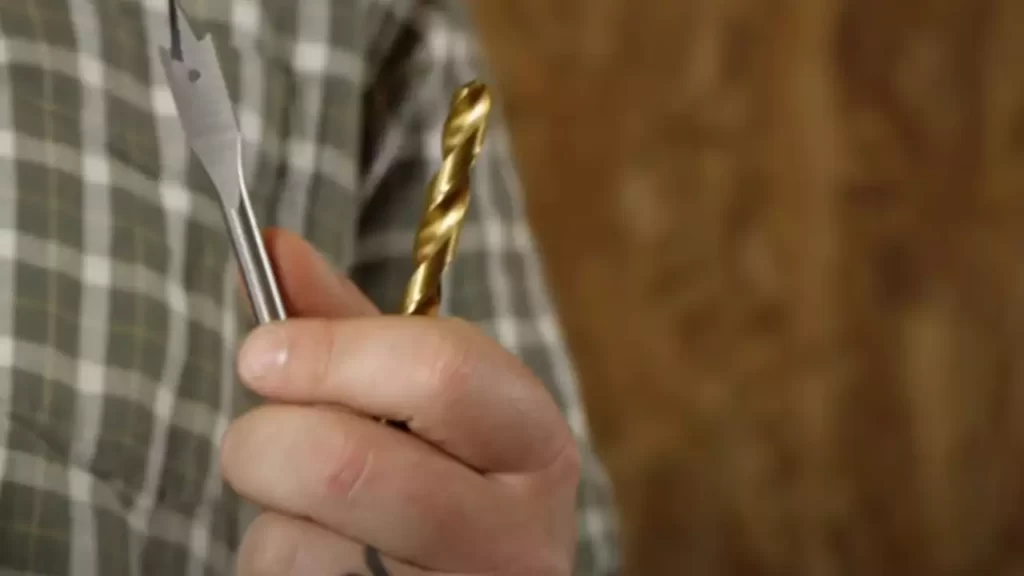
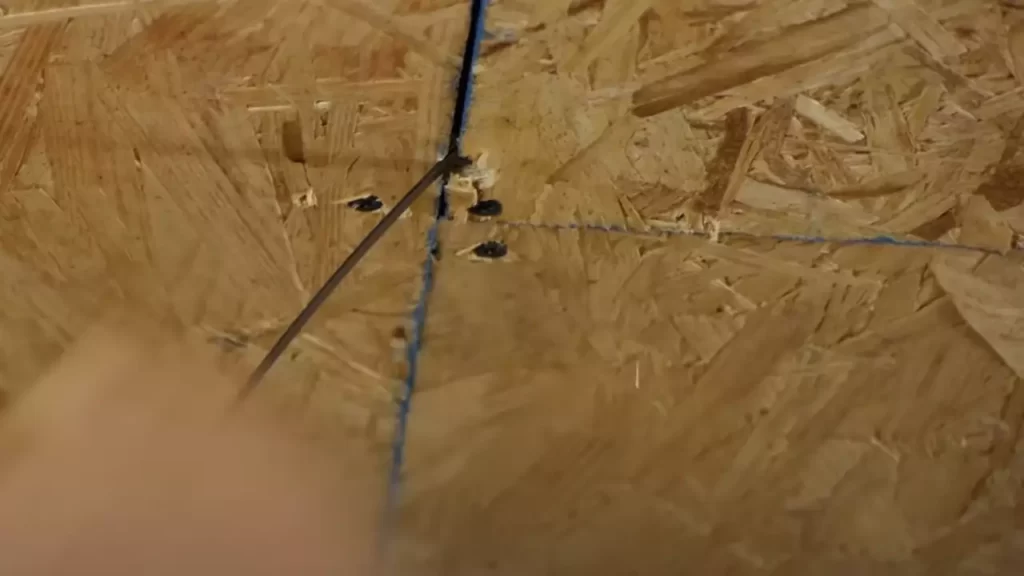
- Drill access holes: Use a drill with a hole saw attached to create access holes for running the wire. Be careful to avoid damaging any existing wires, pipes, or other structures.
- Fish the wire: Attach the wire to a fish tape or a similar tool and guide it through the access holes. Use gentle and careful movements to navigate the wire through the walls and ceiling.
- Secure the wire: Once the wire reaches its destination, secure it to the studs or joists using staples or cable clips. Ensure that the wire is not pressed tightly against any sharp edges or objects that could potentially damage the insulation.
- Connect the wire: Make the necessary connections between the electrical wire and the ceiling fan according to the manufacturer’s instructions. Double-check the connections to ensure they are secure.
- Test the installation: Before covering up any access holes, restore power at the breaker box and test the ceiling fan to ensure it functions properly.
By following these steps, you can successfully run the electrical wiring for your ceiling fan without existing wiring and no access to the attic. Remember to prioritize safety, consult electrical codes, and seek professional assistance if needed. With a little patience and careful execution, you’ll be able to enjoy the comfort and convenience of your new ceiling fan in no time.
Connecting The Electrical Wires
When installing a ceiling fan without existing wiring or access to the attic, it’s essential to understand how to properly connect the electrical wires. This step is crucial to ensure the fan operates safely and efficiently. By following these guidelines, you can successfully connect the wires and enjoy the comfort of your new ceiling fan.
Stripping and connecting the wires
To begin, you’ll need to strip the insulation from the ends of the electrical wires to expose the copper conductor. Use a wire stripping tool to carefully remove about half an inch of insulation from both the fan’s wire harness and the electrical supply wires. Make sure not to cut into the copper conductor while stripping the wires.
Next, you’ll need to connect the corresponding wires from both the fan and the electrical supply. Match the colored wires together: black to black, white to white, and green or bare copper to the grounding wire. Do this by twisting the stripped ends of the wires together clockwise.
After twisting the wires together, cover each connection with a wire nut. A wire nut is a small, plastic cap that securely holds the wires together and protects them from damage or accidental contact. Ensure that all wire nuts are tight and secure to prevent any loose connections.
Properly grounding the ceiling fan
Grounding the ceiling fan is an essential safety measure that helps protect you from electrical shocks. To properly ground the fan, you’ll need to connect the green or bare copper wire to the grounding system in your home. Most modern homes have a green or green-yellow striped wire as the grounding wire.
Locate the grounding wire from the electrical supply and connect it to the green or bare copper wire from the ceiling fan. Use a wire nut to secure the connection, ensuring it’s tight and properly insulated. If your home doesn’t have a grounding wire, consult a licensed electrician to determine the best course of action.
Remember, proper grounding is crucial for your safety, so double-check all connections and ensure they are secure. Incorrect or faulty wiring can pose a significant risk, so if you’re unsure about any step, it’s always best to consult a professional electrician.
Securing And Assembling The Ceiling Fan Components
Once you have prepared the necessary tools and materials for installing a ceiling fan without existing wiring and no attic, it’s time to move on to securing and assembling the various components of the fan. This process involves attaching the fan canopy and blades, as well as installing any necessary accessories such as light kits or remote controls.
Attaching the fan canopy and blades
Attaching the fan canopy and blades is an important step in the installation process as it ensures that the fan is securely mounted to the ceiling. To attach the fan canopy, follow these simple steps:
- Remove the decorative cover plate from the ceiling and expose the electrical box.
- Position the fan canopy over the exposed electrical box and align the holes on the canopy with the screw holes on the electrical box.
- Insert the screws provided with the fan into the aligned holes and tighten them using a screwdriver.
- Make sure that the fan canopy is firmly secured to the ceiling and does not wobble or move.
Once the fan canopy is securely attached, it’s time to install the fan blades. Follow these steps to ensure proper installation:
- Unbox the fan blades and carefully inspect them for any damages or defects.
- Align the holes on the blades with the holes on the fan motor and insert the blade screws provided with the fan.
- Tighten the screws using a screwdriver, but be careful not to overtighten them as it can strip the screw holes.
- Repeat this process for each fan blade, ensuring that they are evenly spaced and aligned.
Installing the necessary accessories
Once the fan canopy and blades are securely attached, you can proceed to install any necessary accessories such as light kits or remote controls. Follow these steps to ensure proper installation:
- For installing a light kit, refer to the manufacturer’s instructions and locate the wiring connections on the fan motor.
- Connect the wiring of the light kit to the corresponding wiring on the fan motor, ensuring that the connections are secure.
- Attach the light kit to the fan motor using the provided screws or mounting bracket.
- If you are installing a remote control, refer to the manufacturer’s instructions and locate the wiring connections on the fan motor.
- Connect the wiring of the remote control receiver to the corresponding wiring on the fan motor and secure the connections.
- Install the batteries in the remote control and follow the pairing instructions provided by the manufacturer.
By following these steps, you can securely attach the fan canopy and blades, as well as install any necessary accessories such as light kits or remote controls. This will ensure that your ceiling fan is not only functional but also aesthetically pleasing. Now that the components are securely in place, you can move on to the next step of the installation process.
Testing And Troubleshooting
Once you have successfully installed your ceiling fan without existing wiring and no attic, it’s time to move on to the crucial step of testing and troubleshooting. This stage ensures that the fan is functioning properly and allows you to address any common issues that may arise. By following these steps, you can verify the functionality of the ceiling fan and troubleshoot any potential problems.
Verifying the functionality of the ceiling fan
It’s important to first verify the functionality of your newly installed ceiling fan to ensure that it operates smoothly and effectively. Follow these steps to complete the verification process:
- Turn on the main power switch to provide electricity to the fan.
- Check for any visible indicators, such as lights or sounds, to confirm that the fan is receiving power.
- Adjust the fan’s speed settings to test if it responds accordingly.
- Turn on any included lights to ensure they are working properly.
- Test the fan’s rotation by adjusting the direction switch. This allows you to check if the fan is rotating in the intended direction for both cooling and heating seasons.
By thoroughly verifying these functionalities, you can be confident that your ceiling fan is in good working order.
Troubleshooting common issues
If you encounter any issues during the verification process or while using your ceiling fan, don’t worry. Here are some common problems that may arise and troubleshooting steps to address them:
| Issue | Troubleshooting Steps |
|---|---|
| The fan is not spinning |
|
| The lights are not working |
|
| The fan is making unusual noises |
|
These troubleshooting steps will help you address common issues and ensure that your ceiling fan provides optimal performance and functionality.
With the proper testing and troubleshooting, you can enjoy the comfort and convenience of your newly installed ceiling fan without existing wiring and no attic. Remember to follow safety precautions and consult a professional if needed to tackle any electrical concerns during this process.
Safety Precautions For Electrical Work
When it comes to electrical work, safety should always be the top priority. Whether you’re installing a ceiling fan without existing wiring or any other electrical project, it’s crucial to follow proper safety precautions. By taking these precautions, you can protect yourself from potential hazards and ensure a successful installation. In this section, we will discuss two important safety precautions to keep in mind: turning off the power and using appropriate safety gear and tools.
Turning off the power before starting the installation
Before you begin any electrical work, it is essential to turn off the power to the area you will be working in. This step is crucial to prevent electrical shock or injury. Follow these simple steps to turn off the power:
- Identify the circuit breaker or fuse box in your home.
- Locate the breaker or fuse that controls the area where you will be installing the ceiling fan.
- Switch the breaker to the “off” position or remove the fuse to disconnect the power.
- Double-check that the power is off by using a non-contact voltage tester.
By turning off the power, you eliminate the risk of electric shock while working with electrical components.
Using appropriate safety gear and tools
Another crucial safety precaution when working with electricity is to use the appropriate safety gear and tools. Here are some essential items you should have:
- A pair of insulated gloves to protect your hands from electrical shock.
- Safety goggles or glasses to shield your eyes from potential debris or sparks.
- A non-contact voltage tester to ensure there is no electrical current present.
- Insulated tools specifically designed for electrical work.
- A sturdy ladder or scaffolding to provide a stable working surface.
Using the right safety gear and tools will greatly reduce the risk of accidents or injuries while working on an electrical project.
Remember, safety should always be your top priority when working with electricity. By turning off the power and using appropriate safety gear and tools, you can ensure a safe and successful ceiling fan installation without existing wiring or attic access.
Practical Tips For A Smooth Installation Process
Installing a ceiling fan without existing wiring and no attic may seem like a challenging task. But with the right approach and a few practical tips, you can ensure a smooth and successful installation. In this section, we will explore two important aspects to consider: enlisting the help of a friend or family member and taking accurate measurements for a balanced fan operation.
Enlisting the Help of a Friend or Family Member
Installing a ceiling fan can be a two-person job, especially when dealing with limited accessibility. Having an extra set of hands ensures safety, efficiency, and makes the overall process less daunting.
To make the installation process more manageable, consider the following suggestions:
- Choose a reliable and able-bodied individual to assist you. It’s essential to have someone who can understand instructions and work well in a team setting.
- Prioritize safety by discussing any potential risks with your helper. This includes identifying electrical sources and turning off the power to prevent accidents.
- Collaborate and plan the installation process together. Assign roles and responsibilities to ensure a smooth workflow.
- Ensure you have the necessary tools and equipment readily available for both you and your helper. This includes ladders, screwdrivers, wire cutters, and any other relevant items.
Taking Accurate Measurements for a Balanced Fan Operation
Proper measurements are crucial for a ceiling fan to operate smoothly and efficiently. As every room’s dimensions can vary, it’s important to measure accurately. Here’s how you can ensure balanced fan operation:
| Measurement | Instructions |
|---|---|
| Blade Clearance | Measure the distance between the tip of the fan blades and any surrounding obstacles such as walls, furniture, or ceiling beams. The recommended clearance is at least 18 inches. |
| Hanging Height | Measure the distance from the floor to the desired placement of the fan. Ensure the bottom of the fan is at least 7 feet above the floor to prevent any potential accidents. |
| Blade Span | Measure the length from the tip of one blade to the tip of the opposite blade for the fan’s size. It’s recommended to choose a blade span suitable for the room size to provide effective air circulation. |
By enlisting the help of a friend or family member and taking precise measurements for a balanced fan operation, you can simplify the installation process. These practical tips ensure a successful and hassle-free installation, allowing you to enjoy a cool and refreshing breeze in no time.
Troubleshooting And Maintenance Tips
Once you have successfully installed your ceiling fan without existing wiring and no attic, it is important to know how to troubleshoot and perform regular maintenance to ensure optimal performance. In this section, we will discuss some common ceiling fan problems you might encounter and how to identify and resolve them. We will also provide you with tips for regular maintenance that will help keep your ceiling fan running smoothly.
Identifying and resolving common ceiling fan problems
Even with the best installation, ceiling fans can sometimes develop issues. Knowing how to identify and resolve these problems will save you time and frustration. Below are some common problems:
- Uneven or wobbling fan: A wobbling ceiling fan can be caused by a variety of factors, such as an imbalance in the blades or loose screws. To fix this, make sure all the blades are securely fastened and tighten any loose screws. If the problem persists, consider using a balancing kit to ensure even weight distribution.
- Noisy fan: If your ceiling fan is making unusual noises like rattling or clicking, it could be due to loose parts, such as screws or motor mounts. Check all the components of the fan and tighten any loose screws. Lubricating the bearings and motor can also help reduce noise. If the noise persists, it might be a sign of a more serious issue, and it is recommended to seek professional assistance.
- Poor airflow: If you notice that your ceiling fan is not providing sufficient airflow, the issue could be with the fan’s settings or the direction of the blades. Start by checking that the fan is set to the correct speed and the blades are not obstructed. Additionally, ensure that the blades are set to rotate counterclockwise during the summer and clockwise during the winter, as this will optimize airflow in each season.
- Non-responsive remote control: If you are using a remote control to operate your ceiling fan and it is not responding, the problem might be with the battery or the remote itself. Check the battery and replace it if necessary. If the issue persists, try reprogramming the remote control according to the manufacturer’s instructions.
Regular maintenance to ensure optimal performance
Maintaining your ceiling fan on a regular basis will help prolong its lifespan and ensure optimal performance. Here are some maintenance tips to follow:
- Dust the blades and housing: Dust accumulation can affect the balance and performance of your ceiling fan. Regularly dust the blades and housing using a soft cloth or a duster. Avoid using abrasive cleaners or harsh chemicals as they can damage the fan’s finish.
- Check and tighten screws: Over time, the screws that hold the fan’s components together can become loose. Check all the screws, including those on the blades, motor housing, and mounting bracket, and tighten them if necessary.
- Lubricate moving parts: Lubricating the bearings and motor of your ceiling fan can help reduce noise and ensure smooth operation. Refer to the manufacturer’s guidelines for the appropriate lubricant to use and apply it as recommended.
- Inspect the wiring: Periodically inspect the wiring connections to ensure they are secure and free from damage. If you notice any frayed wires or loose connections, it is important to address them promptly to avoid electrical hazards.
- Perform regular cleaning: Apart from dusting the fan, consider giving it a more thorough cleaning periodically. Use a mild detergent mixed with water to clean the blades and housing, then wipe them dry with a clean cloth. Avoid applying excessive water directly onto the motor or other electrical components.
By following these troubleshooting steps and performing regular maintenance, you can keep your ceiling fan in good working condition and enjoy its cooling benefits for years to come. Remember to always refer to the manufacturer’s instructions for specific guidance on troubleshooting and maintenance tasks.
Frequently Asked Questions
Can You Add Ceiling Fan Where No Fixture Exists?
Yes, you can add a ceiling fan even if there is no existing fixture. An electrician can install a new electrical box and wiring to support the fan’s weight and movement. It’s important to consult a professional for a safe and proper installation.
Do I Need To Go Into Attic To Install Ceiling Fan?
No, you don’t need to go into the attic to install a ceiling fan. The installation can be done from below, as long as there is proper access and support. It is recommended to hire a professional for a safe and efficient installation.
Is There Such Thing As Wireless Ceiling Fans?
Wireless ceiling fans do exist, offering convenience and flexibility. These fans are equipped with wireless technology, allowing control via remote or smartphone app, eliminating the need for physical switches or cords. With wireless ceiling fans, you can adjust settings from anywhere in the room.
How To Install A Ceiling Fan Without Existing Wiring Cost?
To install a ceiling fan without existing wiring cost, you can use a wireless fan control kit or a remote control. These options allow you to operate the fan without the need for additional wiring. Simply follow the instructions provided with the kit or remote to install and set up your ceiling fan.
Conclusion
Installing a ceiling fan without existing wiring and no attic may initially seem challenging, but with the right tools and techniques, it can be effectively accomplished. By using wireless technology and carefully following the step-by-step instructions provided, you can enjoy the comfort and convenience of a ceiling fan in any room of your home.
Remember to prioritize safety, consult professionals if needed, and enjoy the benefits of improved air circulation and energy efficiency.