To install a ceiling fan with remote, follow the manufacturer’s instructions for mounting the fan and connecting the electrical wiring. Then, install the remote receiver inside the fan canopy and program the remote to control the fan and its light.
Installing a ceiling fan with a remote can be a great way to improve the comfort and functionality of any room. Whether you want to cool down in the summer or circulate warm air during the winter, a ceiling fan can help regulate the temperature in your space.
With the added convenience of a remote control, you can easily adjust the fan speed and turn the light on or off without getting up. We will guide you through the process of installing a ceiling fan with a remote, ensuring a quick and hassle-free installation. So, let’s get started!
Understanding The Components
Different parts of a ceiling fan
Before you begin the installation process of a ceiling fan with a remote control, it is important to have a clear understanding of the various components that make up this essential home appliance. Familiarizing yourself with these parts will not only help you install the fan more effectively but also enable you to troubleshoot any issues that may arise in the future.
Let’s take a closer look at the different parts of a ceiling fan:
- The Motor: The motor is the heart of the ceiling fan, responsible for powering the blades and generating the airflow. It is typically housed in the fan’s body or canopy and connects to the fan blades through a central rod.
- The Blades: Ceiling fans usually have anywhere from three to five blades, although the number may vary depending on the design. The blades are responsible for circulating the air and come in a variety of materials, such as wood, plastic, or metal.
- The Mounting Bracket: The mounting bracket is what connects the fan to the ceiling. It provides stability and ensures the fan is securely attached, preventing any wobbling or imbalance during operation.
- The Downrod: The downrod is a metal rod that extends from the mounting bracket to the fan itself. It allows for proper spacing between the fan blades and the ceiling, ensuring optimal airflow.
- The Canopy: The canopy is the cover that conceals the wiring and electrical components of the ceiling fan. It is typically attached to the mounting bracket and provides a finished look.
- The Light Kit: Some ceiling fans come with an integrated light kit, which includes light bulbs and shades. This feature adds functionality and allows the fan to serve as both a cooling appliance and a source of illumination.
Importance of the remote control feature
One of the key features that sets ceiling fans with remote controls apart from traditional ones is their convenience and ease of use. The remote control eliminates the need for manual adjustments, enabling you to control the fan’s speed, direction, and light settings from anywhere in the room.
Here are a few reasons why the remote control feature is essential:
- Convenience: With a remote control, you can effortlessly adjust the fan’s settings without having to get up or reach for a wall switch. This is especially useful when you want to change the fan speed or turn on/off the lights while staying comfortably seated.
- Accessibility: The remote control allows individuals with limited mobility or disabilities to operate the ceiling fan without any difficulty. It ensures accessibility for everyone, promoting a greater level of independence and comfort.
- Customization: Many ceiling fan remotes offer advanced features like programmable timers and dimmable lights, allowing you to personalize your cooling and lighting preferences according to your specific needs and preferences.
Now that you understand the different components of a ceiling fan and the benefits of the remote control feature, you’re ready to embark on the installation process. Make sure to follow the manufacturer’s instructions and prioritize safety to ensure a successful installation and enjoy the comfort and functionality that a ceiling fan with a remote control brings to your space.
Preparing For Installation
Preparing for installation is an essential step in ensuring a smooth and successful ceiling fan installation with a remote. By taking the time to check the room for proper wiring, gather the necessary tools and equipment, and measure the ceiling fan location, you can save yourself both time and frustration during the installation process.
Checking the room for proper wiring
Prior to installing a ceiling fan with a remote, it’s crucial to check if the room has the proper wiring. This step ensures that the remote operates efficiently and effectively. A remote-controlled ceiling fan requires a specific type of wiring that allows communication between the remote control receiver and the fan itself. Without the proper wiring, the remote control functionality may not work as intended.
Gathering the necessary tools and equipment
Gatherings the required tools and equipment in advance can significantly streamline the installation process. Having everything readily available can save you from unnecessary trips back and forth. Below is a list of tools and equipment you will need:
| Tools | Equipment |
|---|---|
| Drill | Ceiling fan with a remote |
| Screwdriver set | Wire nuts |
| Wire stripper | Hammer |
| Wire connectors | Step ladder |
Measuring the ceiling fan location
Properly measuring the ceiling fan location is vital for its optimal performance and your safety. Before installation, use a tape measure to determine the exact spot where the fan will be mounted. Ensure that the fan blades have ample clearance from any obstacles such as walls, lights, or furniture. Additionally, confirm that the fan is centered within the room for aesthetic appeal.
By following these steps and adequately preparing for installation, you can avoid common mishaps and make the process of installing a ceiling fan with a remote a breeze. Remember to double-check the room’s wiring, gather all the necessary tools and equipment, and measure the fan’s location for optimal performance. Stay tuned for the next section of our blog post, where we will dive into the actual installation process.
Step-By-Step Installation Process
Installing a ceiling fan with a remote can enhance the aesthetics and functionality of any room. Not only does it provide cool and comfortable airflow, but a ceiling fan with a remote can also offer convenient control from anywhere in the room. To ensure a successful installation, follow the step-by-step process outlined below.
Turning off the power supply
Before you start installing a ceiling fan with a remote, it is crucial to turn off the power supply to the room. This ensures your safety and prevents any electrical mishaps during the installation process. To do this, locate the circuit breaker or fuse box and switch off the power to the room or area where you will be working.
Installing the mounting bracket
The next step is to install the mounting bracket, which securely holds the ceiling fan in place. Begin by removing the existing cover plate from the electrical box on the ceiling. Then, attach the mounting bracket to the electrical box using the provided screws. Make sure the bracket is level and securely fastened.
Assembling the fan components
Now it’s time to assemble the fan components. Lay out all the parts and identify the blades, motor housing, and downrod. Attach the blades to the motor housing, following the manufacturer’s instructions. Once the blades are properly attached, connect the downrod to the motor housing. Ensure all the connections are tight and secure.
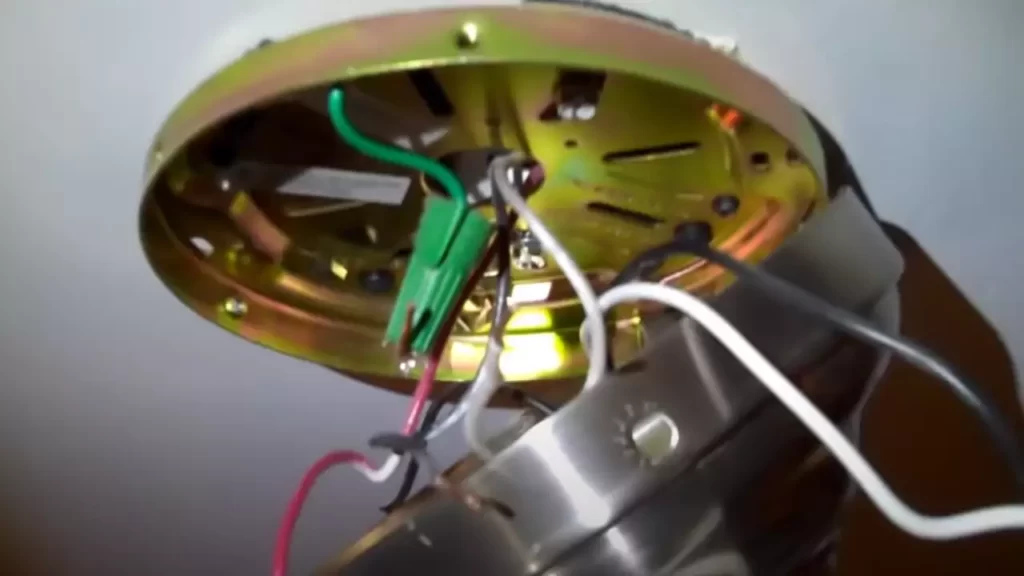
Wiring the fan to the electrical box
After assembling the fan components, the next step is to wire the fan to the electrical box. Begin by connecting the wires from the fan to the corresponding wires in the electrical box. Match the colors of the wires and twist them together, securing them with wire nuts. Ensure that the wire connections are tight and properly insulated to prevent any electrical hazards.
Testing the fan before final installation
Before completing the installation, it’s important to test the ceiling fan to ensure it is functioning correctly. Restore power to the room by switching on the breaker or fuse. Use the remote control to turn on the fan and adjust its speed. Listen for any unusual noises or vibrations. Also, check that the fan is rotating in the correct direction for cooling or heating purposes. Once you are satisfied with the fan’s performance, turn off the power again and proceed with the final installation.
Configuring The Ceiling Fan Remote
Once you have successfully installed your ceiling fan, the next step is to configure the remote control. This allows you to conveniently control the fan’s speed and direction from anywhere in the room. Follow these simple steps to configure your ceiling fan remote:
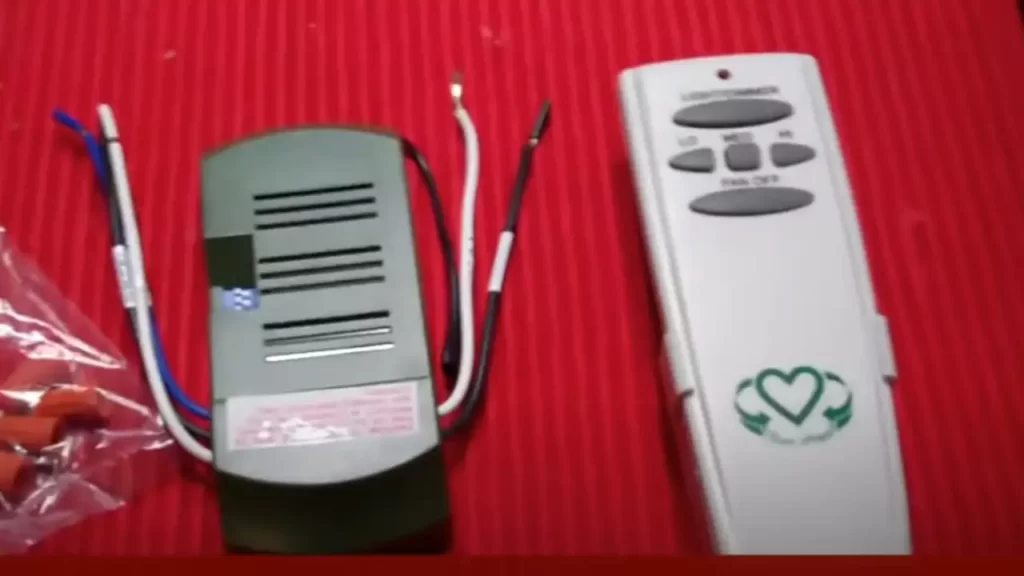
Identifying the remote control receiver
The first step in configuring your ceiling fan remote is to locate the remote control receiver. This is typically a small device that is attached to the fan’s canopy or installed inside the fan’s motor housing.
To identify the receiver, you may need to remove the fan canopy or use a ladder to access the motor housing. Look for a small box-like component with wires connected to it. This is the receiver that communicates with the remote control.
Important: Before proceeding with the configuration process, ensure that the fan is turned off and disconnected from the power source to avoid any electrical accidents.
Pairing the remote control with the receiver
Once you have found the remote control receiver, it’s time to pair it with the fan’s remote control. This process may vary depending on the fan manufacturer, so be sure to refer to the instructions provided with your specific model.
In most cases, you will need to follow a simple pairing procedure. This usually involves pressing a button on the receiver and then pressing a corresponding button on the remote control. Keep an eye out for any LED indicators on the receiver to confirm that the pairing was successful.
If you are unsure about the pairing process, consult the user manual or contact the manufacturer’s customer support for assistance. They will be able to guide you through the steps specific to your ceiling fan model.
Adjusting the fan speed and direction
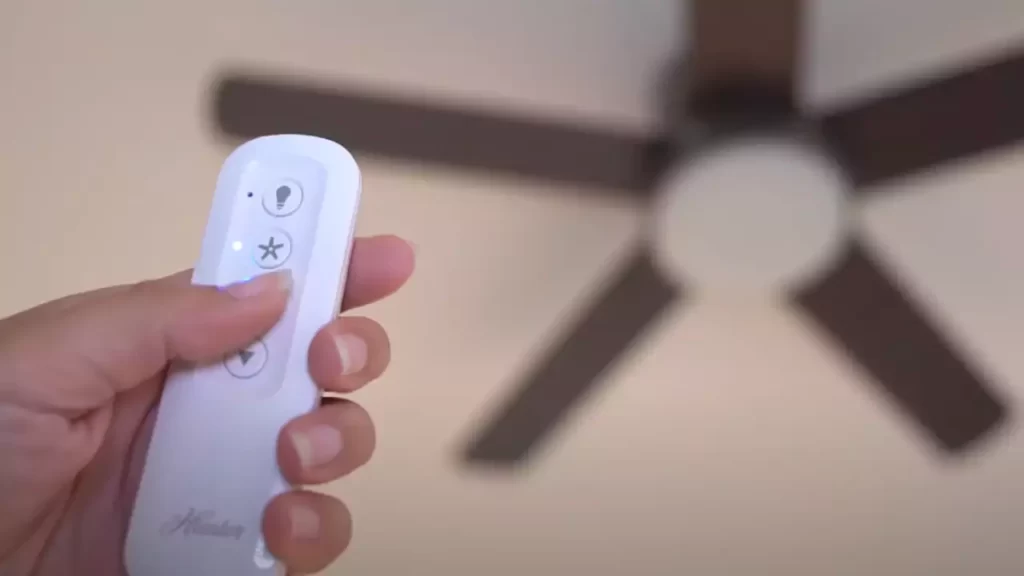
Once the remote control is paired with the receiver, you can start adjusting the fan speed and direction according to your preferences. Most ceiling fan remotes feature buttons or switches to control these settings.
To change the fan speed, look for buttons labeled with symbols representing different speed levels. Pressing these buttons will increase or decrease the fan’s speed accordingly.
To adjust the fan direction, locate the switch on the remote control that is dedicated to this function. In most cases, you will have the option to switch between forward and reverse modes, allowing you to cool or circulate air depending on the season.
Pro Tip: Experiment with different fan speeds and directions to find the optimal settings for your comfort and energy efficiency needs.
By following these steps to configure your ceiling fan remote, you can enhance your overall fan experience and enjoy the convenience of controlling your fan with a simple remote control. Say goodbye to reaching for pull chains or getting up from your seat – your ceiling fan is now at your fingertips!
Troubleshooting And Maintenance Tips
Installing a ceiling fan with a remote control can bring convenience and comfort to any room. However, like any electronic device, it can sometimes encounter issues that need to be resolved. In this section, we will discuss common issues with ceiling fan remote controls and provide troubleshooting steps for connection problems. We will also cover cleaning and maintaining the fan and remote control to ensure their optimal performance in the long run.
Common issues with ceiling fan remote controls
While ceiling fan remote controls are designed to make life easier, they can sometimes pose problems of their own. Below are some common issues you may encounter:
- Remote control not working: This can occur if the batteries are dead or if there is an issue with the remote itself.
- Interference from other devices: Sometimes, signals from other nearby devices can interfere with the signal from the remote control, causing it to malfunction.
- Signal range limitations: Remote controls have a limited signal range, and if you are too far from the fan, the commands may not be received.
- Signal reception problems: If the receiver in the fan is not properly connected or if it is faulty, the remote control may not be able to communicate with the fan.
Troubleshooting steps for connection problems
If you are experiencing connection problems between your ceiling fan remote control and the fan itself, try the following troubleshooting steps:
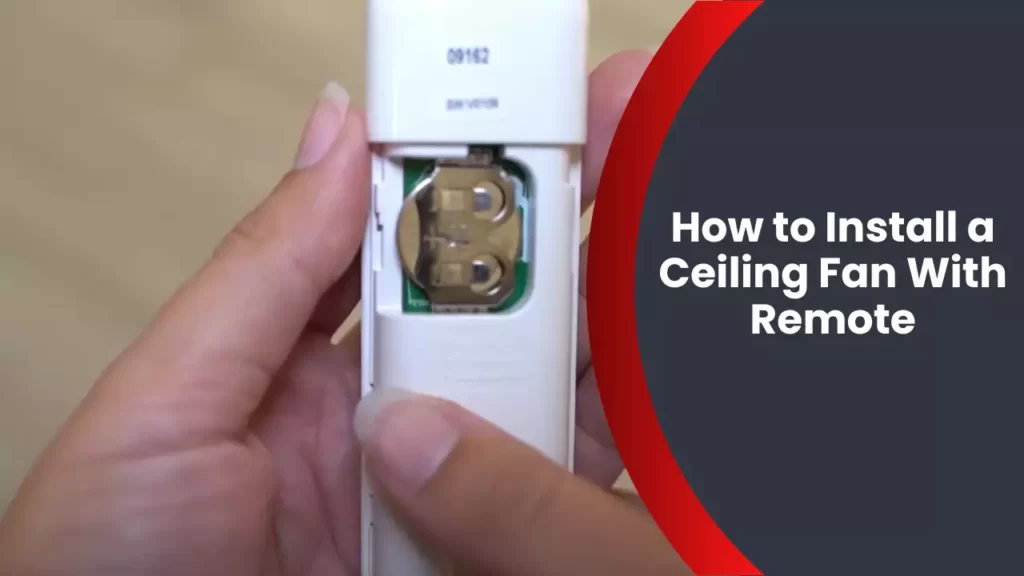
- Check the batteries: Make sure the batteries in the remote control are fresh and properly inserted.
- Reset the remote control: Sometimes, resetting the remote control can fix connection issues. Refer to the manufacturer’s instructions on how to perform a reset.
- Ensure line of sight: Make sure there are no obstacles blocking the line of sight between the remote control and the fan.
- Reposition the receiver: If the receiver in the fan is accessible, try repositioning it to improve the signal reception.
- Contact customer support: If the troubleshooting steps above do not solve the issue, it may be necessary to contact the manufacturer’s customer support for further assistance.
Cleaning and maintaining the fan and remote control
Regular cleaning and maintenance can help keep your ceiling fan and remote control in optimal condition. Here are some tips to ensure their long-lasting performance:
- Turn off the fan: Before cleaning the fan or the remote control, make sure to turn off the fan and unplug it from the power source.
- Use a soft cloth or brush: Gently wipe the fan blades and remote control with a soft cloth or use a soft brush to remove dust and dirt.
- Avoid wet cleaning: Do not use water or cleaning solutions directly on the fan or remote control. Instead, lightly dampen the cloth with water or a mild cleaning solution if necessary.
- Inspect and tighten connections: Periodically check the connections between the fan and the remote control to ensure they are secure. Loose connections can cause operational issues.
- Keep the remote control safe: When not in use, store the remote control in a safe place to prevent damage or accidental activation.
By following these troubleshooting and maintenance tips, you can troubleshoot common issues with your ceiling fan remote control and keep both the fan and remote control in optimal condition for years to come.
Safety Precautions
When it comes to installing a ceiling fan with a remote, safety should be your top priority. Following the necessary precautions is crucial to prevent any mishaps or accidents during the installation process. In this section, we will discuss the importance of following safety guidelines, electrical safety measures, and how to prevent accidents during the installation.
Importance of following safety guidelines
Before jumping into the installation process, it is vital to understand the significance of following safety guidelines. These guidelines are designed to protect you and ensure a smooth and secure installation. By adhering to them, you minimize the risk of electrical shocks, falling objects, or other accidents that may occur during the setup.
Electrical safety measures
When dealing with electricity, taking proper precautions is of utmost importance. Here are some electrical safety measures to keep in mind:
- Always turn off the power supply to the room or area where you plan to install the ceiling fan. This prevents accidental electrocution or short circuits.
- Use a voltage tester to double-check if the power is indeed turned off. It is a simple yet effective way to ensure personal safety.
- Wear insulated gloves to protect yourself from electrical shocks while handling the wiring or any exposed parts of the fan.
- Ensure the wiring connections are secure and properly insulated to avoid any risk of electrical fires or malfunctions.
- Never overload the circuit by connecting too many devices or appliances to the same electrical circuit. This can lead to overheating or even cause a fire hazard.
Preventing accidents during installation
Avoiding accidents during the installation process is essential to guarantee a safe environment. Here are a few steps you can take to prevent mishaps:
- Clear the area beneath the installation site to prevent tripping over tools or materials.
- Use a sturdy ladder or platform to ensure stability while working at heights.
- If possible, have a second person assist you during the installation. They can help with holding the fan or passing tools, minimizing the risk of accidents.
- Read and follow the manufacturer’s instructions carefully. Each fan may have specific installation steps and safety precautions that you need to be aware of.
By keeping these safety measures in mind, you can ensure a smooth and secure installation of your ceiling fan with remote. Safety should never be compromised, and taking the necessary precautions ensures not only a successful installation but also peace of mind.
Frequently Asked Questions
How Do You Wire A Ceiling Fan With A Remote?
To wire a ceiling fan with a remote, first turn off the power. Then, connect the black wire from the fan to the black (hot) wire from the ceiling. Next, connect the white (neutral) wires and ground wires together. Lastly, install the batteries in the remote and test the fan.
Does A Ceiling Fan With Remote Need A Wall Switch?
No, a ceiling fan with remote does not need a wall switch. The remote allows you to control the fan’s speed, direction, and other functions conveniently from anywhere in the room.
What Do I Do With The Red Wire When Installing A Ceiling Fan With Remote?
Connect the red wire from the ceiling to the blue wire from the fan’s receiver while installing a ceiling fan with a remote. This allows the remote to control both the fan and any connected light, ensuring proper functionality.
Can Ceiling Fans With Remote Be Hard Wired?
Yes, ceiling fans with remote control can be hard wired for operation.
Conclusion
Installing a ceiling fan with a remote control is a simple and convenient way to enhance your home’s comfort. By following the step-by-step instructions mentioned above, you can successfully install a ceiling fan with ease. Remember to switch off the power supply, gather the necessary tools, and carefully connect the wires.
Once installed, you’ll be able to control the fan’s speed and settings effortlessly. So, say goodbye to hot summer days and enjoy a cooler and more comfortable living space.