To install a ceiling fan where no fixture exists in a mobile home, follow these steps. First, choose a location for the fan and mark it.
Second, turn off the power to the room.
Assessing The Feasibility Of Installing A Ceiling Fan
Before embarking on the installation of a ceiling fan in a mobile home where no fixture exists, it is essential to assess the feasibility of the project. This involves evaluating the electrical infrastructure, identifying suitable mounting locations, and considering the structural integrity of the mobile home. By addressing these factors, you can ensure a successful installation that not only adds functionality to your space but enhances its aesthetics as well.
Evaluating the Electrical Infrastructure
The first step in assessing the feasibility of installing a ceiling fan is to evaluate the electrical infrastructure of your mobile home. Since you are working with a location that lacks an existing fixture, it is crucial to determine if the necessary electrical wiring is in place. Check if there is a nearby electrical circuit that can support the ceiling fan and if there is a switch that can control the fan’s operation. If the required wiring is absent, it may require professional assistance to install the necessary electrical connections.
Identifying Suitable Mounting Locations
Once you have confirmed the existence of the electrical infrastructure, the next step is to identify suitable mounting locations for your ceiling fan. Take into consideration the layout and design of your mobile home. Look for areas where the installation will not obstruct the functionality of other fixtures or impede the movement of the residents. Additionally, consider the height of the ceiling to ensure that the fan is installed at an optimal distance from the floor for effective air circulation.
Considering Structural Integrity
Another critical aspect to consider when assessing the feasibility of installing a ceiling fan in a mobile home is the structural integrity of the ceiling. Mobile homes may have different construction methods and materials compared to traditional homes. Assess the ceiling to determine if it is capable of supporting the weight of a ceiling fan. If you have any doubts, consulting with a professional or seeking advice from a structural engineer is recommended to ensure the installation is safe and secure.
Gathering The Necessary Tools And Materials
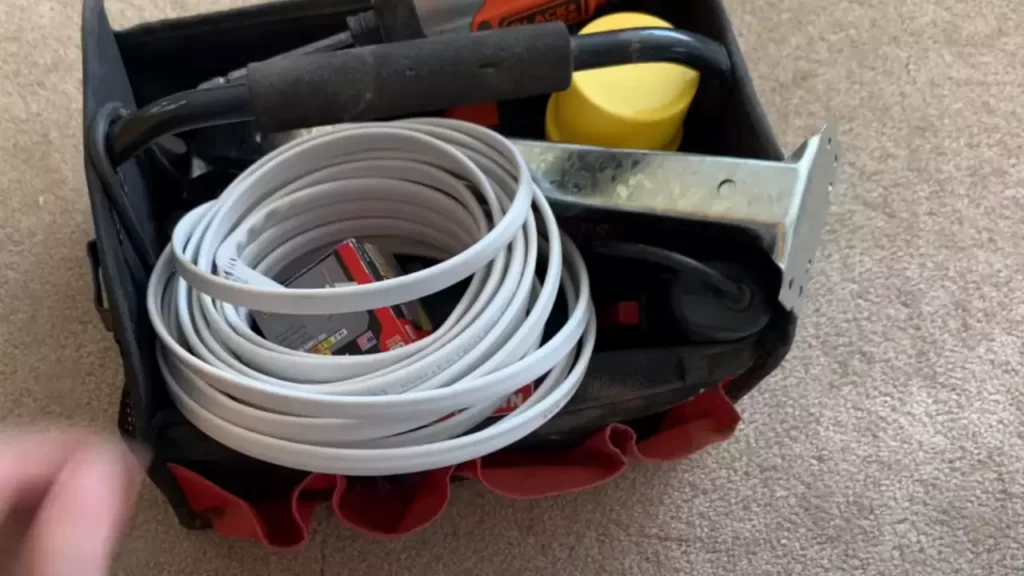
When it comes to installing a ceiling fan in a mobile home where no fixture exists, gathering the necessary tools and materials is the first step in ensuring a successful installation. By having all the essential tools, required electrical components, and additional accessories for enhanced efficiency, you’ll be well prepared to tackle the task at hand.
Essential Tools for the Installation
Before you begin the installation process, make sure you have the following essential tools:
- A ladder or step stool: You’ll need a stable and secure platform to reach the ceiling area where you’ll be installing the fan.
- A screwdriver set: Different screwdrivers, such as Phillips and flathead, will be necessary for loosening and tightening screws during the installation process.
- A drill: A drill will come in handy for making pilot holes, especially if you’re attaching the fan to a wooden beam or joist.
- A wire stripper: This tool is essential for removing the insulation from the electrical wires.
- A voltage tester: It’s crucial to have a voltage tester to ensure the power is turned off before working with any electrical components.
- A wire nut plier: Wire nut pliers are designed to securely connect and twist electrical wires together.
Required Electrical Components
In addition to the essential tools, you’ll also need the following required electrical components:
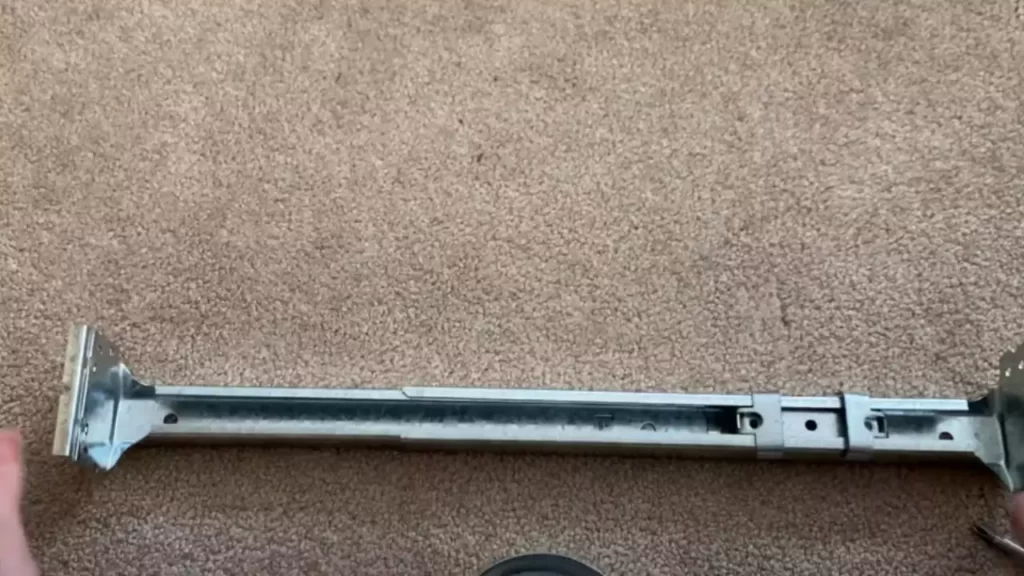
- A brace box: This is an essential component used to support the weight of the fan and keep it securely in place.
- An electrical box: The electrical box provides a safe enclosure for the electrical connections.
- A ceiling fan mounting bracket: This bracket is designed specifically for attaching the fan to the ceiling surface.
- Electrical wire: You’ll need electrical wire to connect the fan to the power source.
Additional Accessories for Enhanced Efficiency
To enhance the efficiency and functionality of your ceiling fan installation, consider having the following additional accessories:
- A remote control kit: A remote control kit allows you to conveniently operate the fan from anywhere in the room, eliminating the need for a separate wall switch.
- A downrod: If your ceiling has a higher height, a downrod is a useful accessory to lower the fan and optimize its airflow.
- An extension cord: If the fan’s electrical wire is not long enough to reach the power source, an extension cord can be used to bridge the gap.
- A ceiling medallion: A decorative ceiling medallion can add an elegant touch to your ceiling fan installation.
By gathering all the necessary tools and materials, including the essential tools, required electrical components, and additional accessories for enhanced efficiency, you’ll be well-equipped to install a ceiling fan where no fixture exists in a mobile home. Having everything prepared beforehand will ensure a smooth and successful installation process.
Preparing For The Installation Process
Preparing for the Installation Process
When it comes to installing a ceiling fan where no fixture exists in a mobile home, preparation is key to ensure a smooth and safe process. To get started, there are a few important steps you need to take before diving into the installation. Shutting off electric power in the area, clearing the workspace and securing the area, and assembling and organizing the ceiling fan components are crucial aspects to consider. Let’s break down each step in more detail.
Shutting Off Electric Power in the Area
Before you begin any electrical work, it is essential to shut off the electric power in the area where you will be installing the ceiling fan. This will help prevent any accidents or electrical shock. Locate the electrical panel in your mobile home and turn off the circuit breaker that supplies power to the room where the installation will take place. Remember to double-check that the power is off by using a non-contact voltage tester. This simple precaution ensures your safety throughout the installation process.
Clearing the Workspace and Securing the Area
Once the power is off, it’s time to clear the workspace and secure the area where you will be working. Remove any furniture, decorations, or personal items from the room to create a clutter-free space. It’s important to have enough room to move around comfortably and safely. Remove any obstructions that may hinder the installation process or pose a hazard. Moreover, consider placing a drop cloth or protective covering on the floor to prevent any damage from falling debris or accidental spills.
Assembling and Organizing the Ceiling Fan Components
With a cleared and secured workspace, now is the time to assemble and organize the ceiling fan components. Lay out all the parts and ensure that you have everything needed for the installation. Check the manufacturer’s instructions or assembly manual to familiarize yourself with the components included in the ceiling fan kit. This will help you understand the process and ensure that all the necessary parts are present. Moreover, organizing the components beforehand will save you time and frustration during the installation.
To make it easier to follow the instructions and keep track of the various parts, you can use a simple table to list and identify each component. Here’s an example:
| Component | Quantity |
|---|---|
| Motor | 1 |
| Blades | 3 or 4 |
| Mounting Bracket | 1 |
| Hardware (Screws, Nuts, etc.) | Varies |
| Light Kit (Optional) | 1 |
By organizing the components in a clear and concise manner, you can easily refer to your table and ensure nothing is missing or misplaced during the installation process.
With the preparation phase complete, you are now ready to move on to the next steps of installing a ceiling fan where no fixture exists in a mobile home. Taking these initial steps of shutting off electric power, clearing the workspace, securing the area, and organizing the ceiling fan components will set the foundation for a successful installation. Stay tuned for the next section where we dive into the installation process itself.
Wiring The Ceiling Fan For Installation
When it comes to installing a ceiling fan where no fixture exists in a mobile home, wiring is a crucial step in the process. In this section, we will discuss how to wire the ceiling fan for installation, ensuring a safe and efficient electrical connection. Follow these steps to successfully wire your ceiling fan and enjoy a cool and comfortable living space.
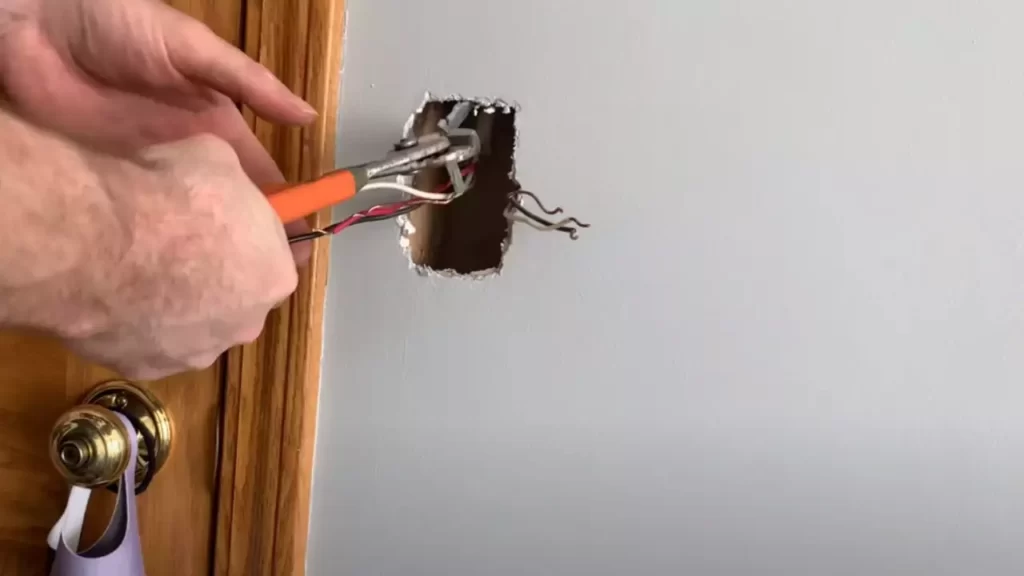
Locating the Nearest Power Source
The first step in wiring your ceiling fan is to locate the nearest power source. In a mobile home, the power sources are typically located in the walls or ceiling near existing fixtures or outlets. To identify the nearest power source, you can use a stud finder or carefully remove the ceiling panels to expose the electrical wiring. Once you have located the power source, ensure that it is appropriate for the wattage requirements of your ceiling fan.
Extending the Wiring to the Desired Location
After locating the nearest power source, it is essential to extend the wiring to the desired location where you wish to install the ceiling fan. This may involve running new electrical wires through the walls or ceiling to reach the intended spot. To ensure safety, it is recommended to consult a professional electrician for this step. They will have the expertise to extend the wiring correctly, avoiding any risks or damage to the electrical system.
Connecting the Fan’s Wiring to the Electrical System
Once the wiring has been extended to the desired location, the next step is to connect the fan’s wiring to the electrical system. This process involves matching the wires from the ceiling fan to the corresponding wires in the electrical system. Typically, this includes connecting the black wire (live wire) to the black wire, the white wire (neutral wire) to the white wire, and the green or copper wire (ground wire) to the grounding screw or copper wire in the electrical system.
To ensure a proper and secure connection, it is recommended to use wire connectors or wire nuts to join the wires together. Make sure to tighten the connectors firmly to prevent any loose connections that could result in electrical malfunction or electrical shock.
Additionally, before connecting the fan’s wiring to the electrical system, ensure that the power is turned off at the circuit breaker or fuse box to avoid any electrical accidents. Once the wiring is connected securely, you can turn the power back on and test the ceiling fan to ensure it is functioning correctly.
In conclusion, proper wiring is crucial for installing a ceiling fan where no fixture exists in a mobile home. By locating the nearest power source, extending the wiring to the desired location, and connecting the fan’s wiring to the electrical system, you can enjoy the benefits of a comfortable and well-ventilated living space. If you are uncertain or uncomfortable with any step of the installation process, it is always best to consult a professional electrician for assistance.
Mounting The Ceiling Fan Properly
HTML response:
Installing a ceiling fan in a mobile home where no fixture exists can be a bit of a challenge. However, by following the right steps and having the necessary tools, you can mount the ceiling fan securely and enjoy a cool breeze throughout your mobile home. In this section, we will guide you through the process of mounting the ceiling fan properly to ensure stability and functionality.
Finding a Secure Anchoring Point
The first step in mounting a ceiling fan is to find a secure anchoring point in your mobile home. This is crucial for stability and safety. It is recommended to mount the ceiling fan to a ceiling joist or a stable support beam.
To locate the ceiling joists, you can use a stud finder or tap lightly on the ceiling until you hear a solid sound. Once you have found a secure anchoring point, mark the spot using a pencil or a piece of tape for reference.
Installing the Ceiling Fan Mounting Bracket
With the anchoring point identified, it’s time to install the ceiling fan mounting bracket. The mounting bracket is the component that attaches the fan to the ceiling and provides stability. Here’s how to do it:
- Start by removing the canopy cover from the ceiling fan. This will expose the mounting bracket.
- Hold the mounting bracket against the ceiling, aligning it with the previously marked spot.
- Using a screwdriver or a drill, secure the mounting bracket into place by screwing it into the ceiling joist or stable support beam.
- Double-check the bracket’s tightness to ensure it is firmly attached and won’t wobble.
Attaching the Fan Motor to the Mounting Bracket
Once the mounting bracket is securely installed, it’s time to attach the fan motor. The fan motor is the component that holds the fan blades and provides the cooling breeze. Follow these steps:
- With the canopy cover still removed, position the fan motor onto the mounting bracket.
- Align the mounting holes on the fan motor with the corresponding holes on the mounting bracket.
- Insert the screws provided with the ceiling fan into the holes and tighten them using a screwdriver or a drill.
- Ensure that the fan motor is securely attached to the mounting bracket and does not wobble.
- Replace the canopy cover, covering the fan motor and hiding the wiring.
Congratulations! You have successfully mounted your ceiling fan in a mobile home where no fixture exists. Now, you can enjoy the comfort and functionality of a cooling breeze in your mobile home. Remember to follow the manufacturer’s instructions for wiring and additional precautions to ensure safe and effective operation of your ceiling fan.
Attaching The Fan Blades And Finishing Touches
Now that you have successfully mounted your ceiling fan in your mobile home, it’s time to move on to the next step – attaching the fan blades and adding those finishing touches that will complete the installation process. This is an important phase as it ensures that your fan not only functions properly but also looks aesthetically pleasing in your living space. Let’s dive right in!
Aligning and Attaching the Fan Blades
Aligning and attaching the fan blades is a crucial step to ensure smooth and efficient air circulation in your mobile home. Following the manufacturer’s instructions, identify the correct blade for each corresponding bracket. Use a screwdriver or the provided hardware to attach the blades securely to the brackets, making sure they are aligned properly. This will prevent any unnecessary wobbling or noise during operation. Take your time and double-check the alignment before moving on to the next blade.
Balancing the Ceiling Fan for Optimal Performance
Once all the fan blades are attached, it’s essential to balance the ceiling fan for optimal performance. An unbalanced fan can cause annoying vibrations and reduce its overall efficiency. To balance the fan, you can use a balancing kit generally provided by the manufacturer. Follow the kit instructions carefully, which usually involve attaching the provided weights to the blades until the fan runs smoothly without any noticeable wobble. This simple step will significantly improve the comfort and functionality of your fan.
Installing the Light Fixture (if applicable)
If your ceiling fan comes with a light fixture or if you have purchased a separate one, it’s time to install it. Begin by ensuring the power to the fan is turned off before proceeding with any electrical work. Follow the manufacturer’s instructions for connecting the wires of the light fixture to the corresponding wires in the fan. Secure the light fixture in place using the provided hardware. Once everything is securely connected, restore power to the fan and test the light to ensure it functions correctly.
With the fan blades attached, the ceiling fan balanced, and the light fixture (if applicable) installed, you have successfully completed the installation process. Step back and admire your handy work! Your mobile home is now equipped with a functional and stylish ceiling fan that not only enhances the airflow but also adds a touch of elegance to your living space.
Testing And Troubleshooting The Ceiling Fan Installation
After successfully installing a ceiling fan where no fixture exists in your mobile home, the next crucial step is to thoroughly test and troubleshoot the installation. This ensures that the fan is properly connected and functioning as intended, providing optimal performance and airflow throughout your space.
Verifying Proper Electrical Connections
Before performing any tests, it’s essential to verify that all electrical connections are secure and properly installed. This step ensures your safety and prevents any potential issues down the line. Here’s how to verify the electrical connections:
- Double-check that all wire connections are tight and secure, ensuring there are no loose or exposed wires.
- Ensure the fan’s wires are connected to the corresponding wires in the junction box, following the manufacturer’s instructions or an electrician’s guidance.
- Confirm that the connections between the fan’s motor and the fan blades are securely fastened.
Once you’ve gone through these steps, you can proceed to perform a test run and functionality check.
Performing a Test Run and Functionality Check
Conducting a test run and functionality check allows you to ensure that your newly installed ceiling fan is operating correctly. Follow these steps to perform the test and functionality check:
- Turn on the fan’s power at the circuit breaker or wall switch.
- Set the fan to its lowest speed and observe the rotation of the blades. Ensure they are turning smoothly and without any wobbling.
- Gradually increase the fan’s speed to higher settings, again checking for any irregularities or noises that may indicate a problem.
- Activate the fan’s light, if applicable, and confirm that it turns on and off properly.
If you find any issues during the test run or functionality check, it’s important to troubleshoot and address them promptly to ensure your fan functions optimally.
Troubleshooting Common Installation Issues
Even with careful installation, it’s possible to encounter common issues while installing a ceiling fan where no fixture exists in a mobile home. Here are a few common installation issues and troubleshooting steps:
| Issue | Troubleshooting Steps |
| The fan is not turning on. |
|
| The fan is wobbling or vibrating excessively. |
|
| The fan’s light is flickering. |
|
By troubleshooting these common installation issues, you can quickly resolve any problems and enjoy the benefits of a fully functional ceiling fan in your mobile home.
Enhancing Safety Measures And Maintenance Tips
Installing a ceiling fan where no fixture exists in a mobile home brings comfort and functionality to your living space. However, it is crucial to prioritize safety measures and proper maintenance to ensure the longevity and efficient performance of your newly installed ceiling fan. In this section, we will explore two essential aspects of maintaining your ceiling fan: securing loose wires and connections, as well as regular cleaning and dusting.
Securing Loose Wires and Connections
Securing loose wires and connections is a critical step in maintaining the safety of your ceiling fan installation. Loose wires not only pose electrical hazards but can also affect the performance and efficiency of your fan. To secure the wires and connections, follow these steps:
- Make sure the power to the fan is turned off before starting any work.
- Carefully inspect the wires for any signs of damage, such as fraying or exposed copper.
- Using twist-on wire connectors, tightly fasten any loose wire connections.
- Secure the cables with appropriate clips or clamps to prevent them from hanging loosely.
- Double-check that all connections are securely fastened before restoring power to the fan.
Regular Cleaning and Dusting of the Ceiling Fan
Regular cleaning and dusting play a vital role in maintaining the performance and overall condition of your ceiling fan. Dust buildup on the fan blades and motor can lead to decreased efficiency and even malfunction. Follow these maintenance tips to keep your ceiling fan clean:
- Before cleaning the fan, ensure the power is turned off to avoid accidents.
- Using a soft cloth or microfiber duster, gently wipe the fan blades to remove dust and dirt.
- For more stubborn dirt, dampen the cloth slightly with a mild cleaner, making sure not to saturate the blades.
- While cleaning, pay attention to the fan motor and housing, ensuring they are free from dust and debris.
- After cleaning, allow the fan to dry completely before turning the power back on.
Maintaining a clean and well-functioning ceiling fan helps improve the air circulation in your mobile home and keeps the fan operating efficiently. Remember to incorporate regular cleaning and dusting into your household maintenance routine to ensure a comfortable and healthy living environment.
Finalizing The Ceiling Fan Installation
Restoring Electricity to the Area
With the hard work of installing the ceiling fan complete, it’s time to restore electricity to the area. Follow these steps to ensure a safe and successful finalization of the installation:
- First, locate the breaker in your electrical panel that controls the power to the room where the ceiling fan is installed. Look for a switch that is in the “off” position; this indicates that the power to the area is currently turned off.
- Before proceeding, make sure you are wearing insulated gloves and taking all necessary safety precautions. Next, switch the breaker to the “on” position to restore power to the room.
- Once the power is restored, use a voltage tester to double-check that electricity is flowing to the ceiling fan. Test both the fan and light functions, if applicable.
- If the voltage tester confirms that electricity is reaching the fan, you can proceed to the next step with confidence.
Admiring the Newly Installed Ceiling Fan
Now that the ceiling fan is up and running, it’s time to step back and admire your handiwork. The satisfaction of a successful DIY project is something to be celebrated!
Take a moment to appreciate the benefits that your new ceiling fan brings to your mobile home. With its cooling breeze and energy-saving abilities, your fan will not only enhance the comfort of your living space, but it will also lower your energy bills.
Stand beneath the fan and feel the gentle airflow as it circulates air throughout the room. Notice how it fills the space with a refreshing sensation, making it perfect for those hot summer days or stuffy nights.
Even beyond its practical functionality, a well-chosen ceiling fan can also be a stylish addition to your home decor. With a wide variety of designs, finishes, and blade options available, you can select a ceiling fan that complements your mobile home’s interior aesthetic.
Celebrating the Successful DIY Project
As you wrap up the installation process and take a moment to revel in your accomplishment, it’s time to celebrate the successful completion of your DIY project.
Raise a glass or share a high-five with your partner or friends who may have assisted you along the way. Take pride in the fact that you tackled this task on your own and successfully installed a ceiling fan where no fixture existed in your mobile home.
To ensure lasting satisfaction with your newly installed ceiling fan, remember to clean and maintain it regularly. Dust the blades and gently wipe down the housing to keep it looking like new. This will not only prolong its lifespan but also preserve its optimal performance.
Enjoy the comfort and cost-saving benefits that your ceiling fan brings to your mobile home. Experience the joy of a job well done every time you switch it on and bask in the cool breeze it provides.
Frequently Asked Questions
Can You Install A Ceiling Fan Where There Is No Light Fixture?
Yes, you can install a ceiling fan even if there is no light fixture present. Hiring a professional electrician is recommended to handle the electrical wiring and ensure proper installation. They can install a ceiling fan in any room, regardless of the availability of a pre-existing light fixture.
How To Install A Ceiling Fan Without Existing Wiring Cost?
Installing a ceiling fan without existing wiring can be done by using a wireless fan control system. This eliminates the need for costly electrical work. Simply attach the fan and receiver, then use a remote to control the fan’s speed and light settings.
Is There Such Thing As Wireless Ceiling Fans?
Yes, wireless ceiling fans do exist.
What If My Ceiling Fan Doesn’T Have A Switch?
If your ceiling fan doesn’t have a switch, you may need to install one. This can be done by a professional electrician to ensure safety. The switch allows you to control the fan’s speed and turn it on/off without having to use the pull chains.
Conclusion
Installing a ceiling fan in a mobile home where no fixture exists is a simple and cost-effective way to improve air circulation. By following these step-by-step instructions, you can complete the installation process with ease. Remember to always prioritize safety and consult an electrician if needed.
With a little patience and guidance, you can enjoy the benefits of a cooler and more comfortable living space. So don’t hesitate, get started on your ceiling fan installation project today!